
Holiday Calendars
This feature is only available in Clockwork Pro.
You can manage days off using Holiday Calendars. If your team works in multiple locations you can create a calendar for each location and assign team members to the appropriate calendar. Automatic timers will not count time during these non-working days.

Holidays are displayed in the Timesheet and Calendar view as non-working days.

Create a Holiday Calendar
You may want to have multiple Holiday Calendars in Clockwork, especially if your teams are distributed across the globe or just one if you stay in the same location and have the same public holidays. Calendars can be created by manually setting up dates or by importing an ics. file.
-
Log in as a Jira administrator and navigate to Jira Settings > Apps > Clockwork Configuration and select the Holiday Calendars tab.
-
Click Add.
-
Fill in the details:
-
Name
-
Define if the calendar should be treated as the Default. (You must select one default calendar. Users who are not assigned to another calender will be automatically assigned to the default calendar.)
-
Click the Add date field to input the holiday days (non-working days).
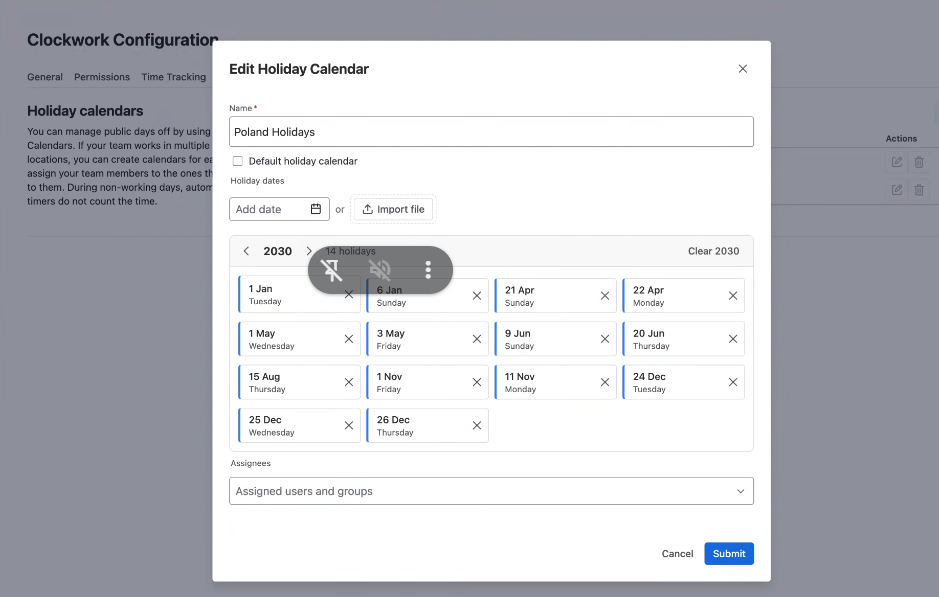
-
Add the appropriate users or Jira goups in the Assignees field.
-
Click Submit.
-
Importing an ics. Calendar
Instead of adding dates manually, select Import file.
-
Select the .ics calendar you want to upload.
-
Add the appropriate users or Jira goups in the Assignees field.
-
Click Submit.
Removing a User to a Calendar
To remove a user from one calendar:
-
Click on the Edit (pencil) icon for the calendar.
-
Click the X next to a user’s name to remove them from a calendar.
-
Click Submit.
Adding a User to an Existing Calendar
To add a user to an exisiting calendar:
-
Click on the Edit (pencil) icon for the calendar.
-
Type the user’s name in the Assignees field.
-
Click Submit.