Working Hours & Holiday Calendars
GLOBAL PROJECT USER
Working hours can be set at three different levels:
The Global setting (Jira settings > Apps > Clockwork configuration > Working Hours) allows you to enter the working hours for your organization.
You can also set work hours for a specific project (Project settings > Apps > Clockwork > Working Hours).
Individual users, if they have the Edit Own Working Hours permission, can configure their own Working Hours, by going to Apps > Clockwork in the main Jira menu and selecting Working Hours. Those can also be set up by the admin.
Clockwork timers will always use the most specific Working Hours available (assignee, then project, then global).
How Clockwork Uses Working Hours
Configuring Working Hours at the Project and User level is only available in Clockwork Pro.
Clockwork uses logged time (automatic or manual) and Working Hours to calculate the Time Spent on an issue. See this page for more information.
Set Global Working Hours
Use this setting to tell Clockwork your default working hours. When a Clockwork timer is running, Clockwork will use the Working Hours to calculate the actual amount of time that the issue was being worked on.
Working Hours can also be used with other Clockwork features such as Log Work and Timesheets to highlight users who are working outside of the intended hours.
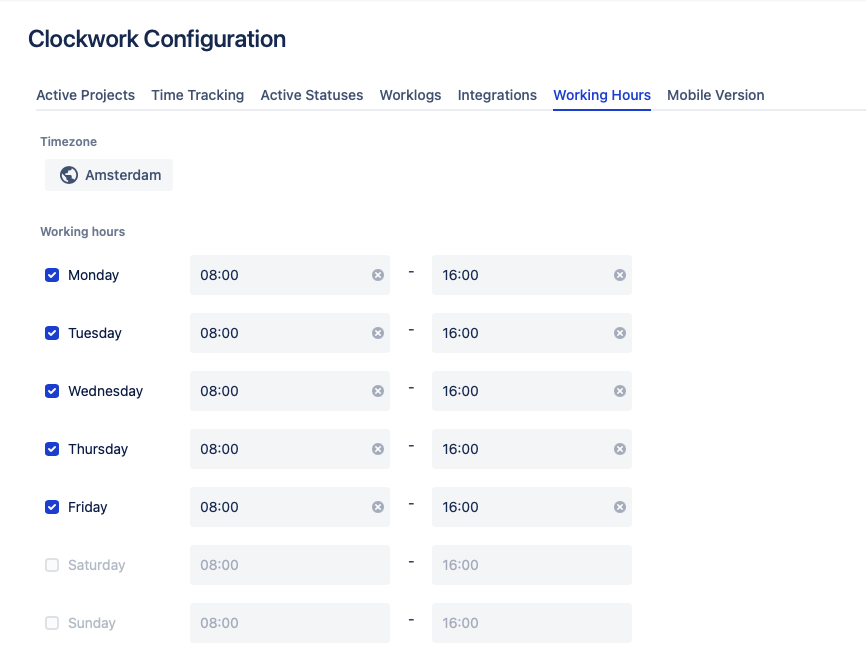
Set Working Hours for Individuals
To set a different Working schedule for specific users, navigate out of Clockwork Configuration and click on the Working Hours tab in the left side menu. Add working schedules for those individuals who have different working hours than the global ones.

Holiday Calendars
This feature is only available in Clockwork Pro.
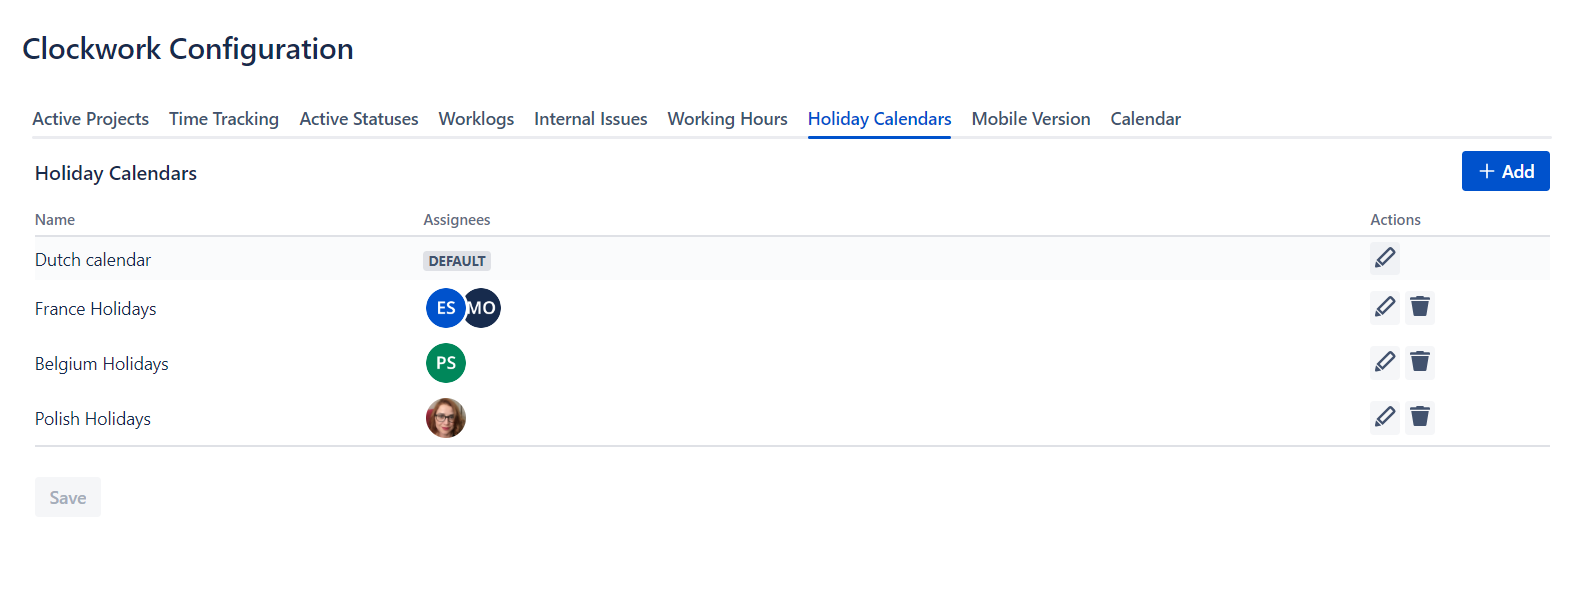
You can manage days off by using Holiday Calendars. If your team works in multiple locations you can create calendars for each of them and assign your team members to the ones that should apply to them. During non-working days automatic timers do not count the time.
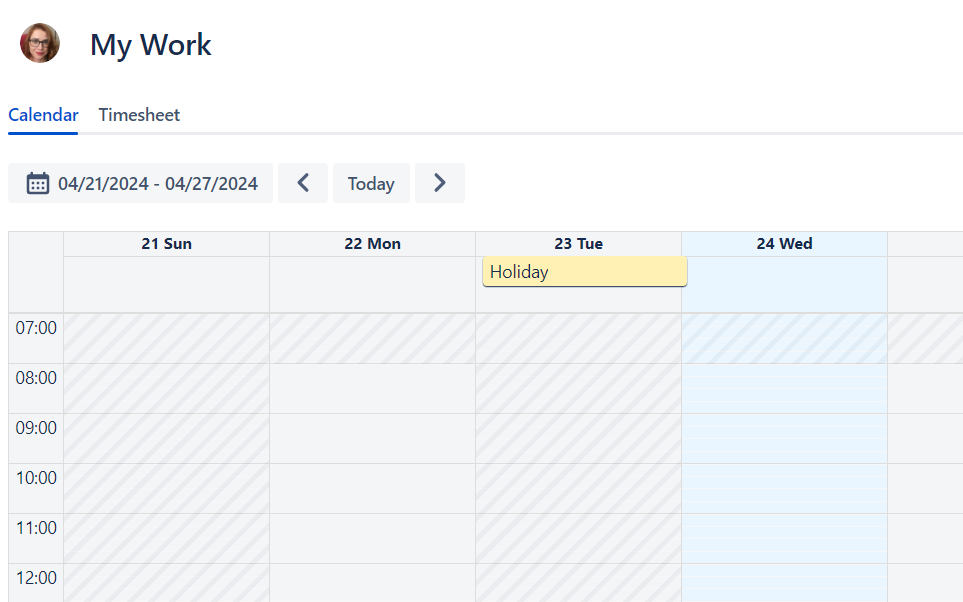
Holidays are displayed in the Timesheet and Calendar view as non-working days.
One of your calendars needs to be set up as a Default - existing users without assignments or new joiners will be assigned to it by default.
You can move users from one calendar to another just by assigning them to a new calendar - that will remove them from the previous calendar. A user can only be assigned to one calendar.
To create a Holiday Calendar:
Navigate to Settings → Holiday Calendars tab.
Click on Add
Fill in the details:
Name
Define if the calendar should be treated as a Default one
Choose if you want to add the dates manually or import from URL (importing a calendar from URL still allows you to add additional dates manually)
Assign Users to the calendar
Click Submit and then Save
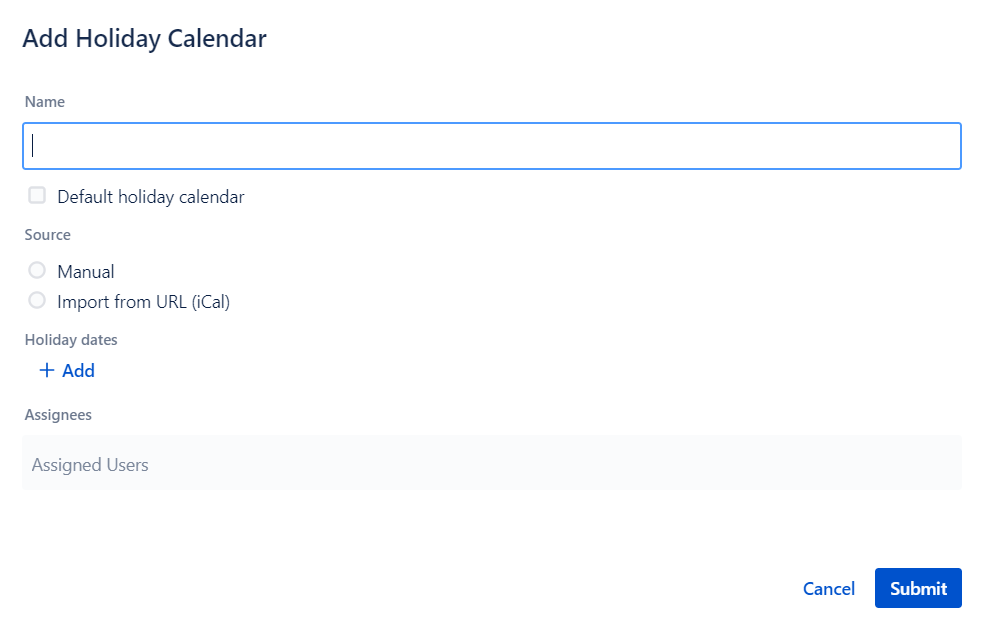
Importing a Calendar using a URL
Google Calendar
To sync with a Google Calendar:
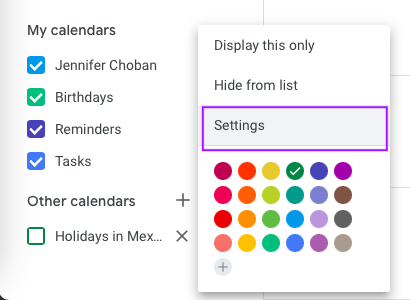
Click on the options menu (three vertical dots) to the right of the calendar name and select Settings.
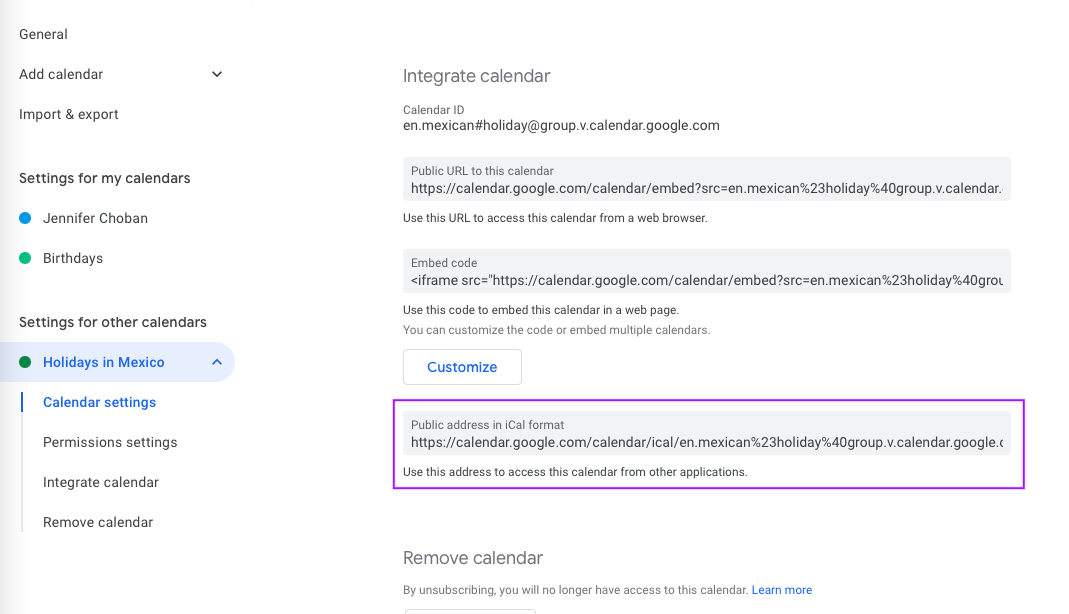
Copy the url for the Public address in iCal format.
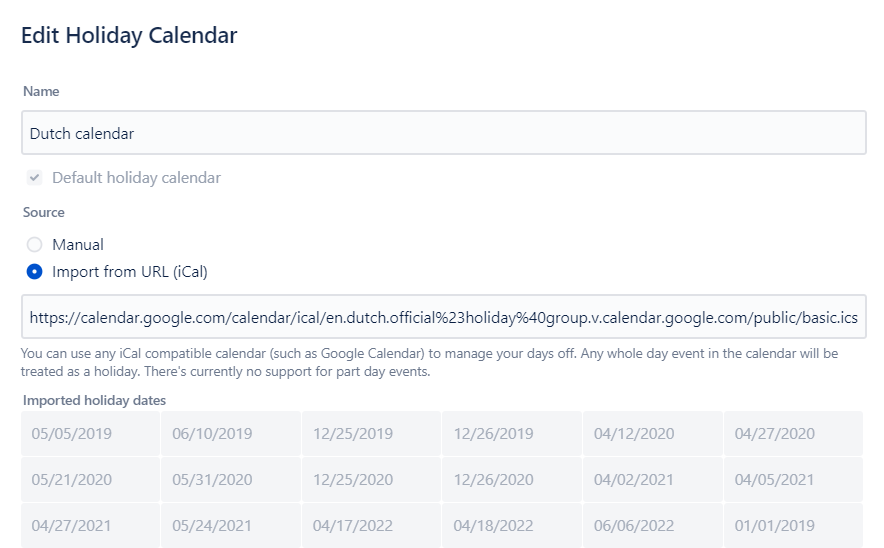
Paste the URL into the Import from URL field in the Holiday Calendar settings.
iCal Calendar
To sync with an iCal Calendar:
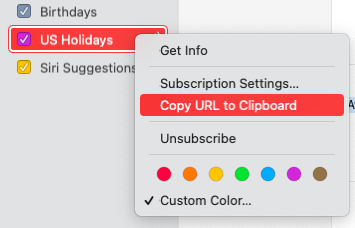
Right-click on a calendar and select Copy URL to Clipboard.
Paste the URL into the Import from URL field in the Holiday Calendar settings.
