
When you create a capacity planner in Portfolio, you get a timeline view that provides clear insights into the capacity of each member of your team. This allows you to optimize productivity, eliminate underutilization and protect team members from overload and burnout.
Create a New Capacity Planner
To create a capacity planner:
-
Navigate to Apps > Portfolio.
-
Select Capacity Planners from the left nav bar.
-
Click the New Capacity Planner button.
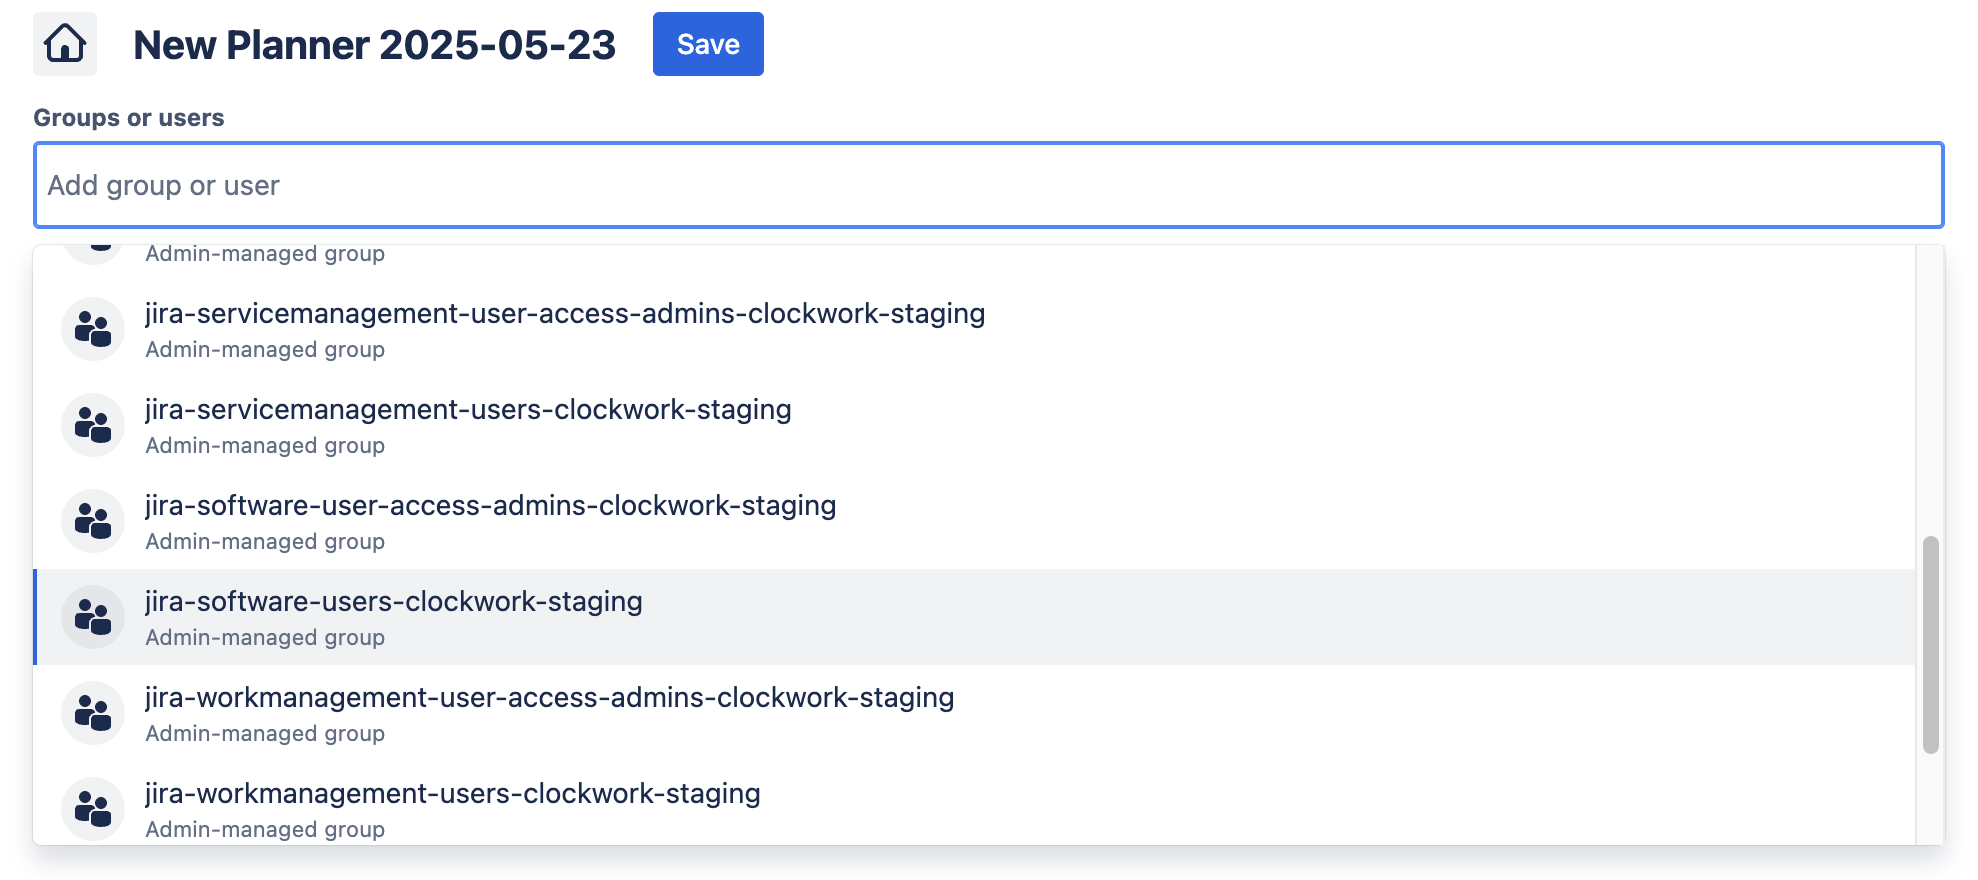
-
Select the appropriate combination of groups, users, teams, roles or skills depending on whose assignments you want to view and/or adjust.
-
Click into the date fields to select the Bookings time frame. (You can configure which Jira date fields are used in the Booking parameters.)
-
Click Save.
Adjust Working Days
You can adjust the working days in the App Settings to fit exactly how your teams work:
-
Navigate to Apps > Portfolio and select Settings in the left nav bar.
-
Use the checkboxes under Working Days to indicate your teams' schedule.
-
Click Save.
-
You can also assign working schedules per user in Settings > Users. Just add a user and provide his details.
Adjust Hours Per Day
The App Settings also allow you to change the number of work hours per day match those of your teams :
-
Navigate to Apps > Portfolio and select Settings in the left nav bar.
-
Enter the appropriate number in the Hours Per Day field.
-
Click Save.
-
You can also assign working schedules per user in Settings > Users. Just add a user and provide his details.
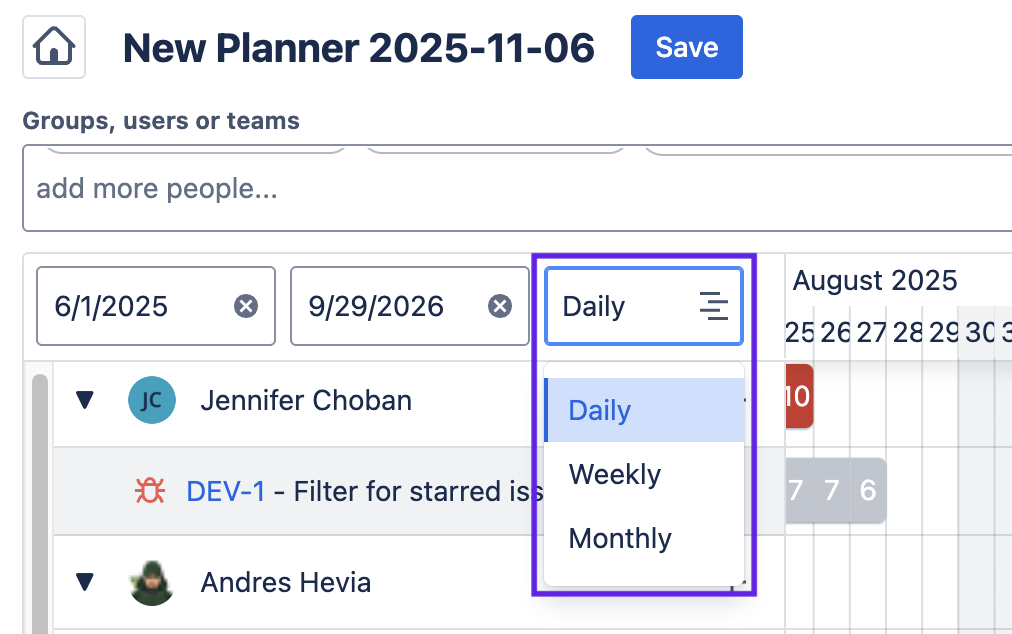
Change the Time Increment
Adjusting the time increment in the capacity planner lets you zoom in or out on your teams capacity. The monthly view is good for strategic planning and long term forecasting, while the daily increment lets you manage workloads on a day to day basis.
-
Click on the dropdown to the right of the Start and End dates.
-
Select the desired increment.
-
Click Save.
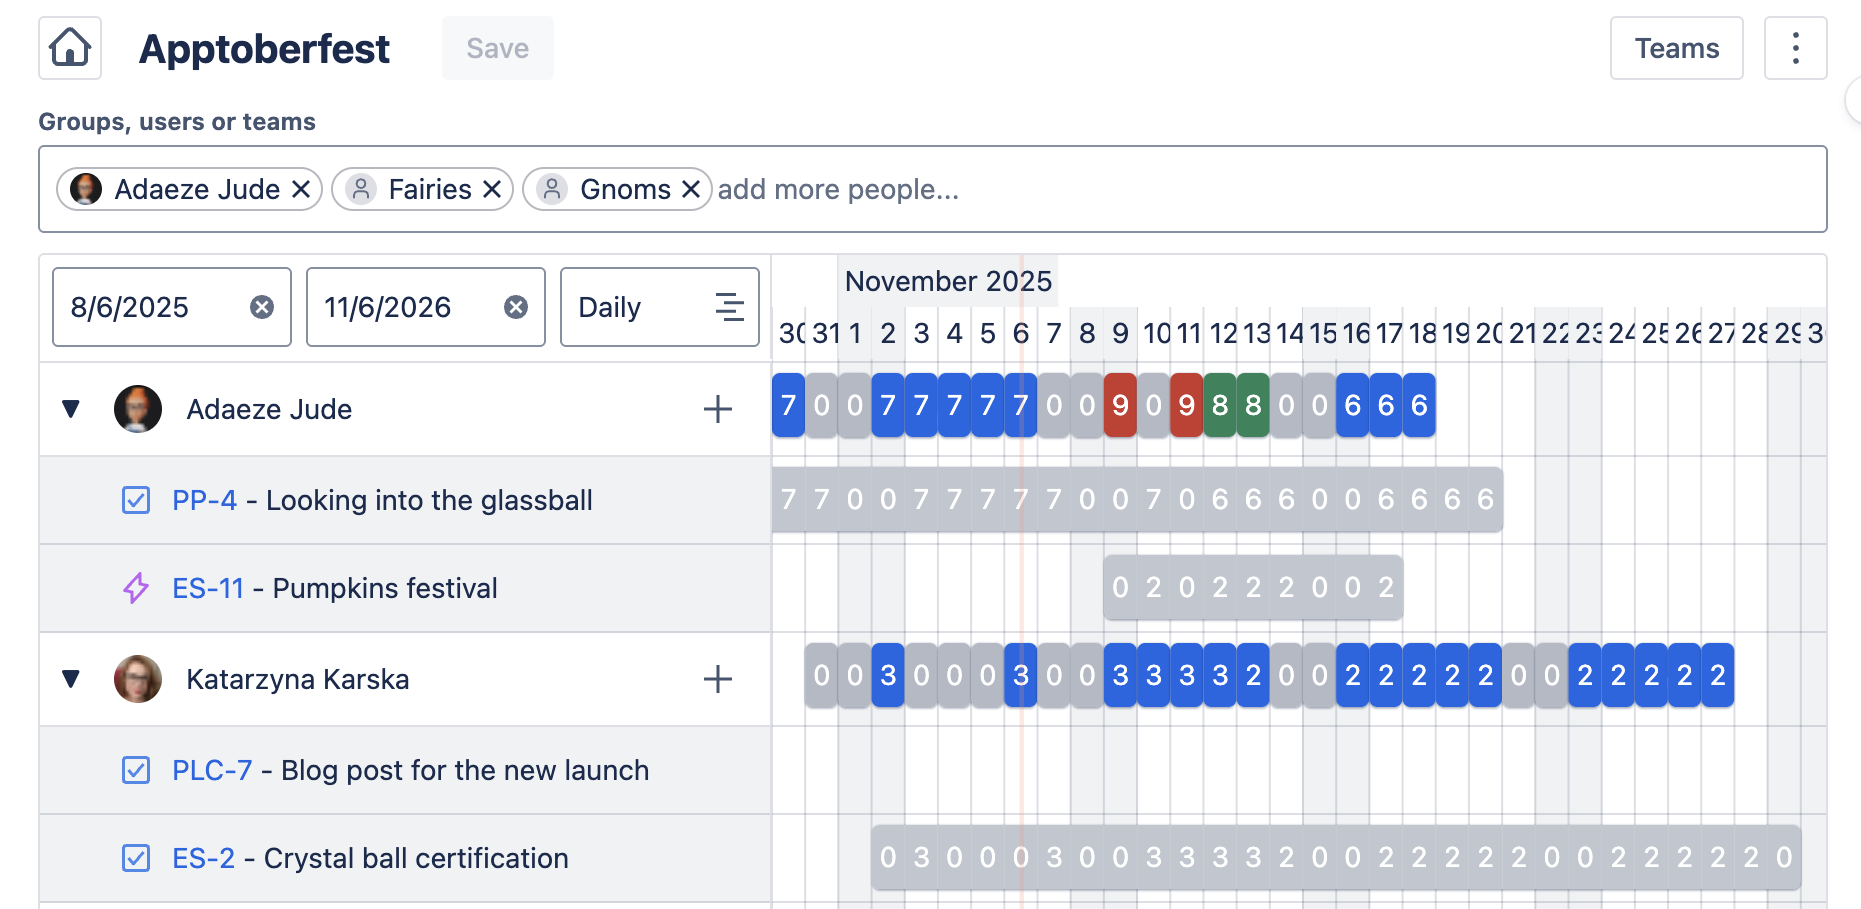
Identify Team Members Who Are Overbooked
Reduce risk by easily identifying when team members are overbooked. Instantly see who is available to take on new work. Portfolio’s Capacity Planner uses color-coding to represent team member capacity, so you can see at a glance what adjustments need to be made.
-
Red = Overbooked
-
Green = Fully booked
-
Gray = No work booked
-
Blue = Partially booked
-
Yellow = PTO or Public Holiday
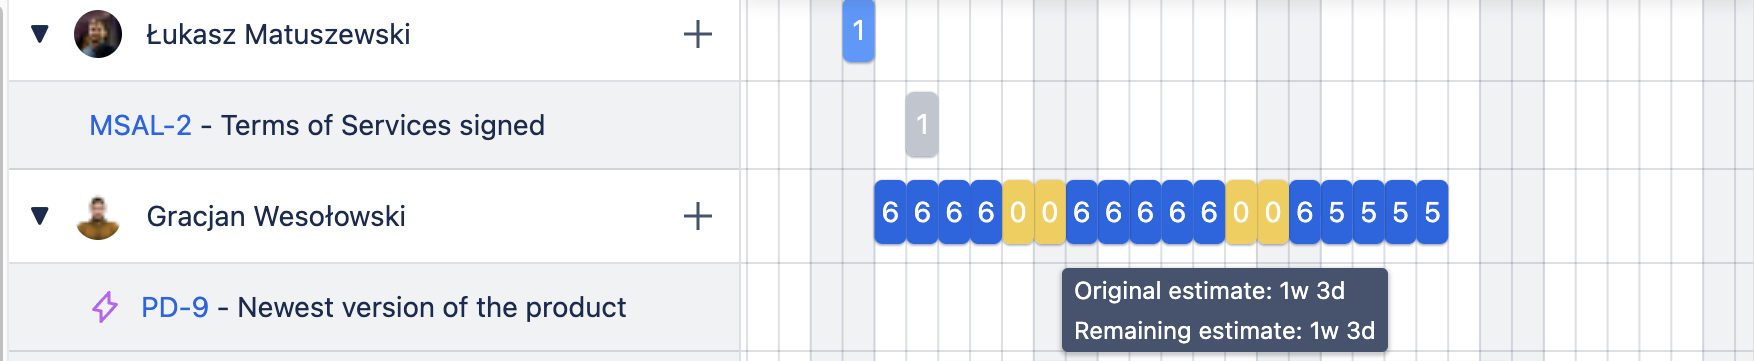
View Original and Remaining Estimate
Monitor progress and hone in on what remains to be done by hovering over a booking to view the Original and Remaining estimates.
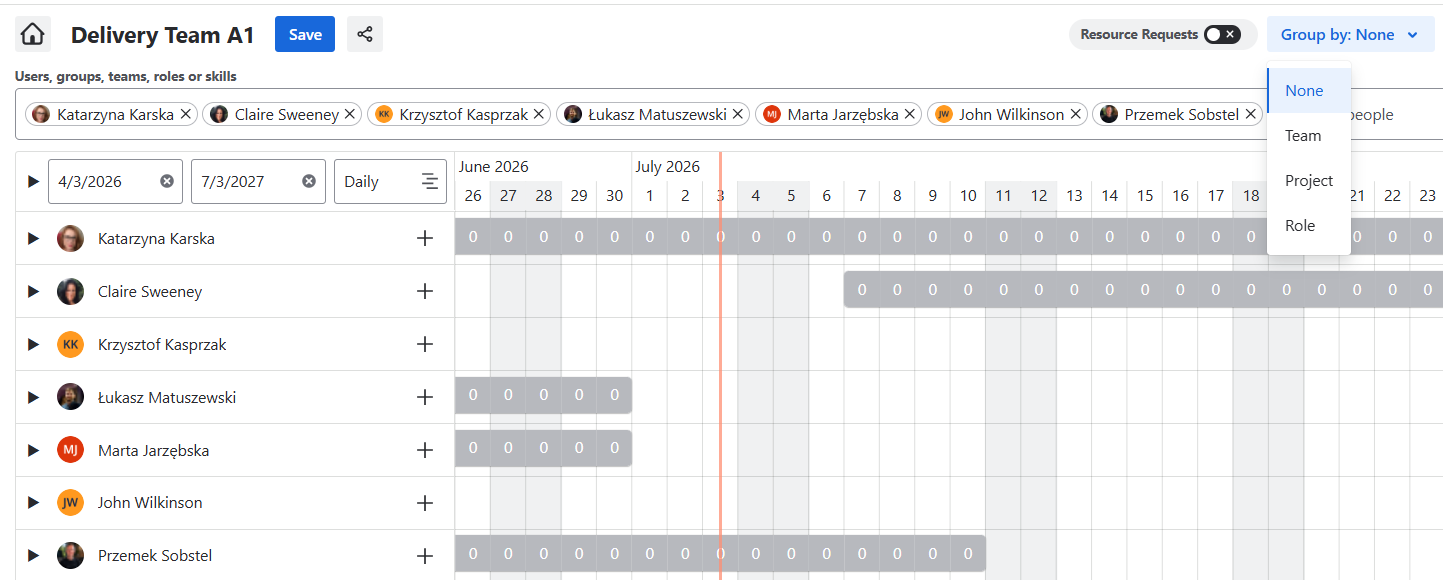
See Capacity per User, Team, Role or Project
Select the Group By button and select how you want to group the data. See capacity by User, Team, Role or Project. Spot bottlenecks, balance workloads, and make faster, smarter planning calls.
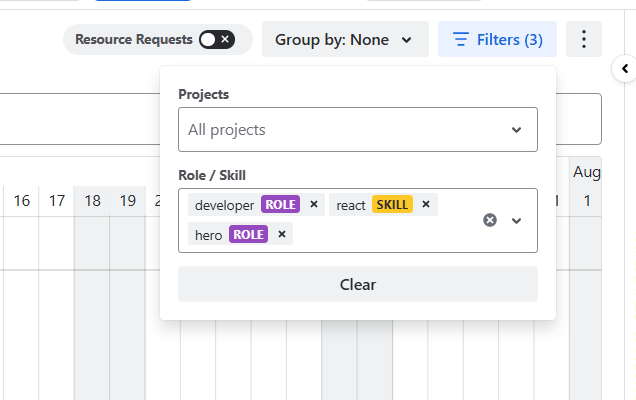
Filter the Capacity view for Projects or Roles and Skills
Cut through the noise and focus on the capacity that matters with new Project and Role filters.
Select Filters in the top right corner and choose which projects' bookings (work item rows) or which users based on roles and skills you want to see.
When selecting the Project filter, the Capacity Planner will filter out any work items that don’t belong to the selected Projects but you’ll still see the users' booked capacity across all of the projects in the user row.
When using the Role/Skill filter, only users with the specific roles and skills will appear in the Capacity Planner.
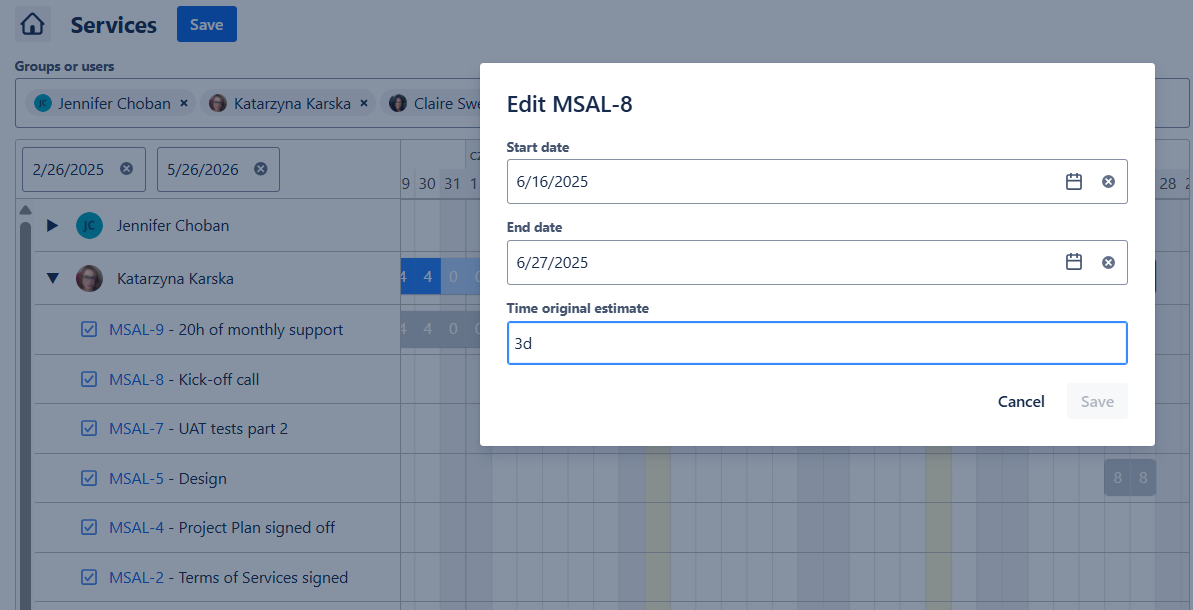
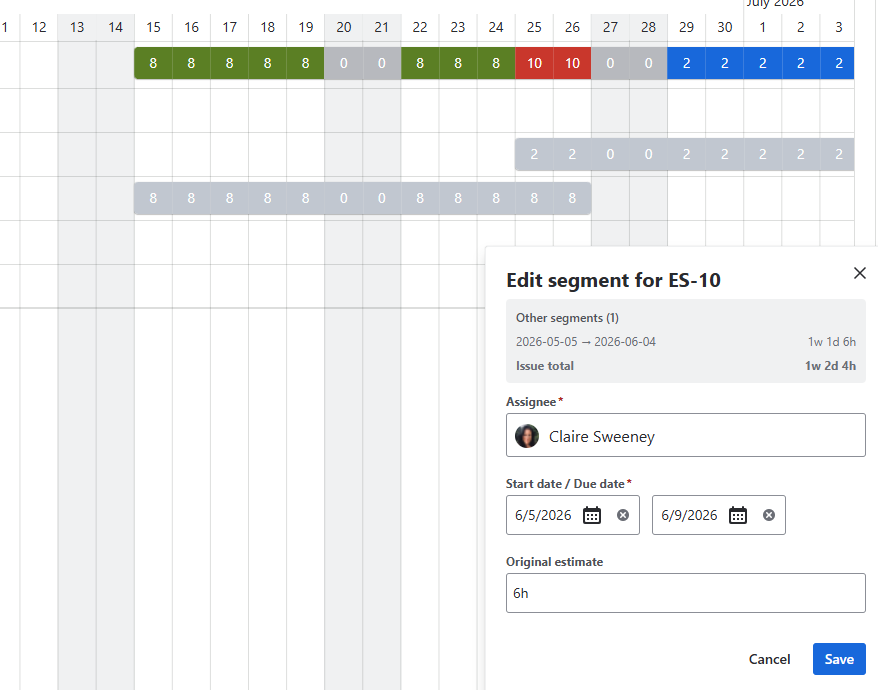
Update a Booking - Dates and Estimates
Adjust resources quickly and proactively respond to changing priorities so your portfolio stays aligned with your strategic goals. Make adjustments to booking dates and time estimates, with your changes immediately synced with Jira work item.
Each of the assignments in the Capacity view can be moved using drag and drop. You can also shorten or extend a booking by moving its corners.
To update the Estimate on a work item, double-click on the booking. A pop-up will appear where you can update the assignment.
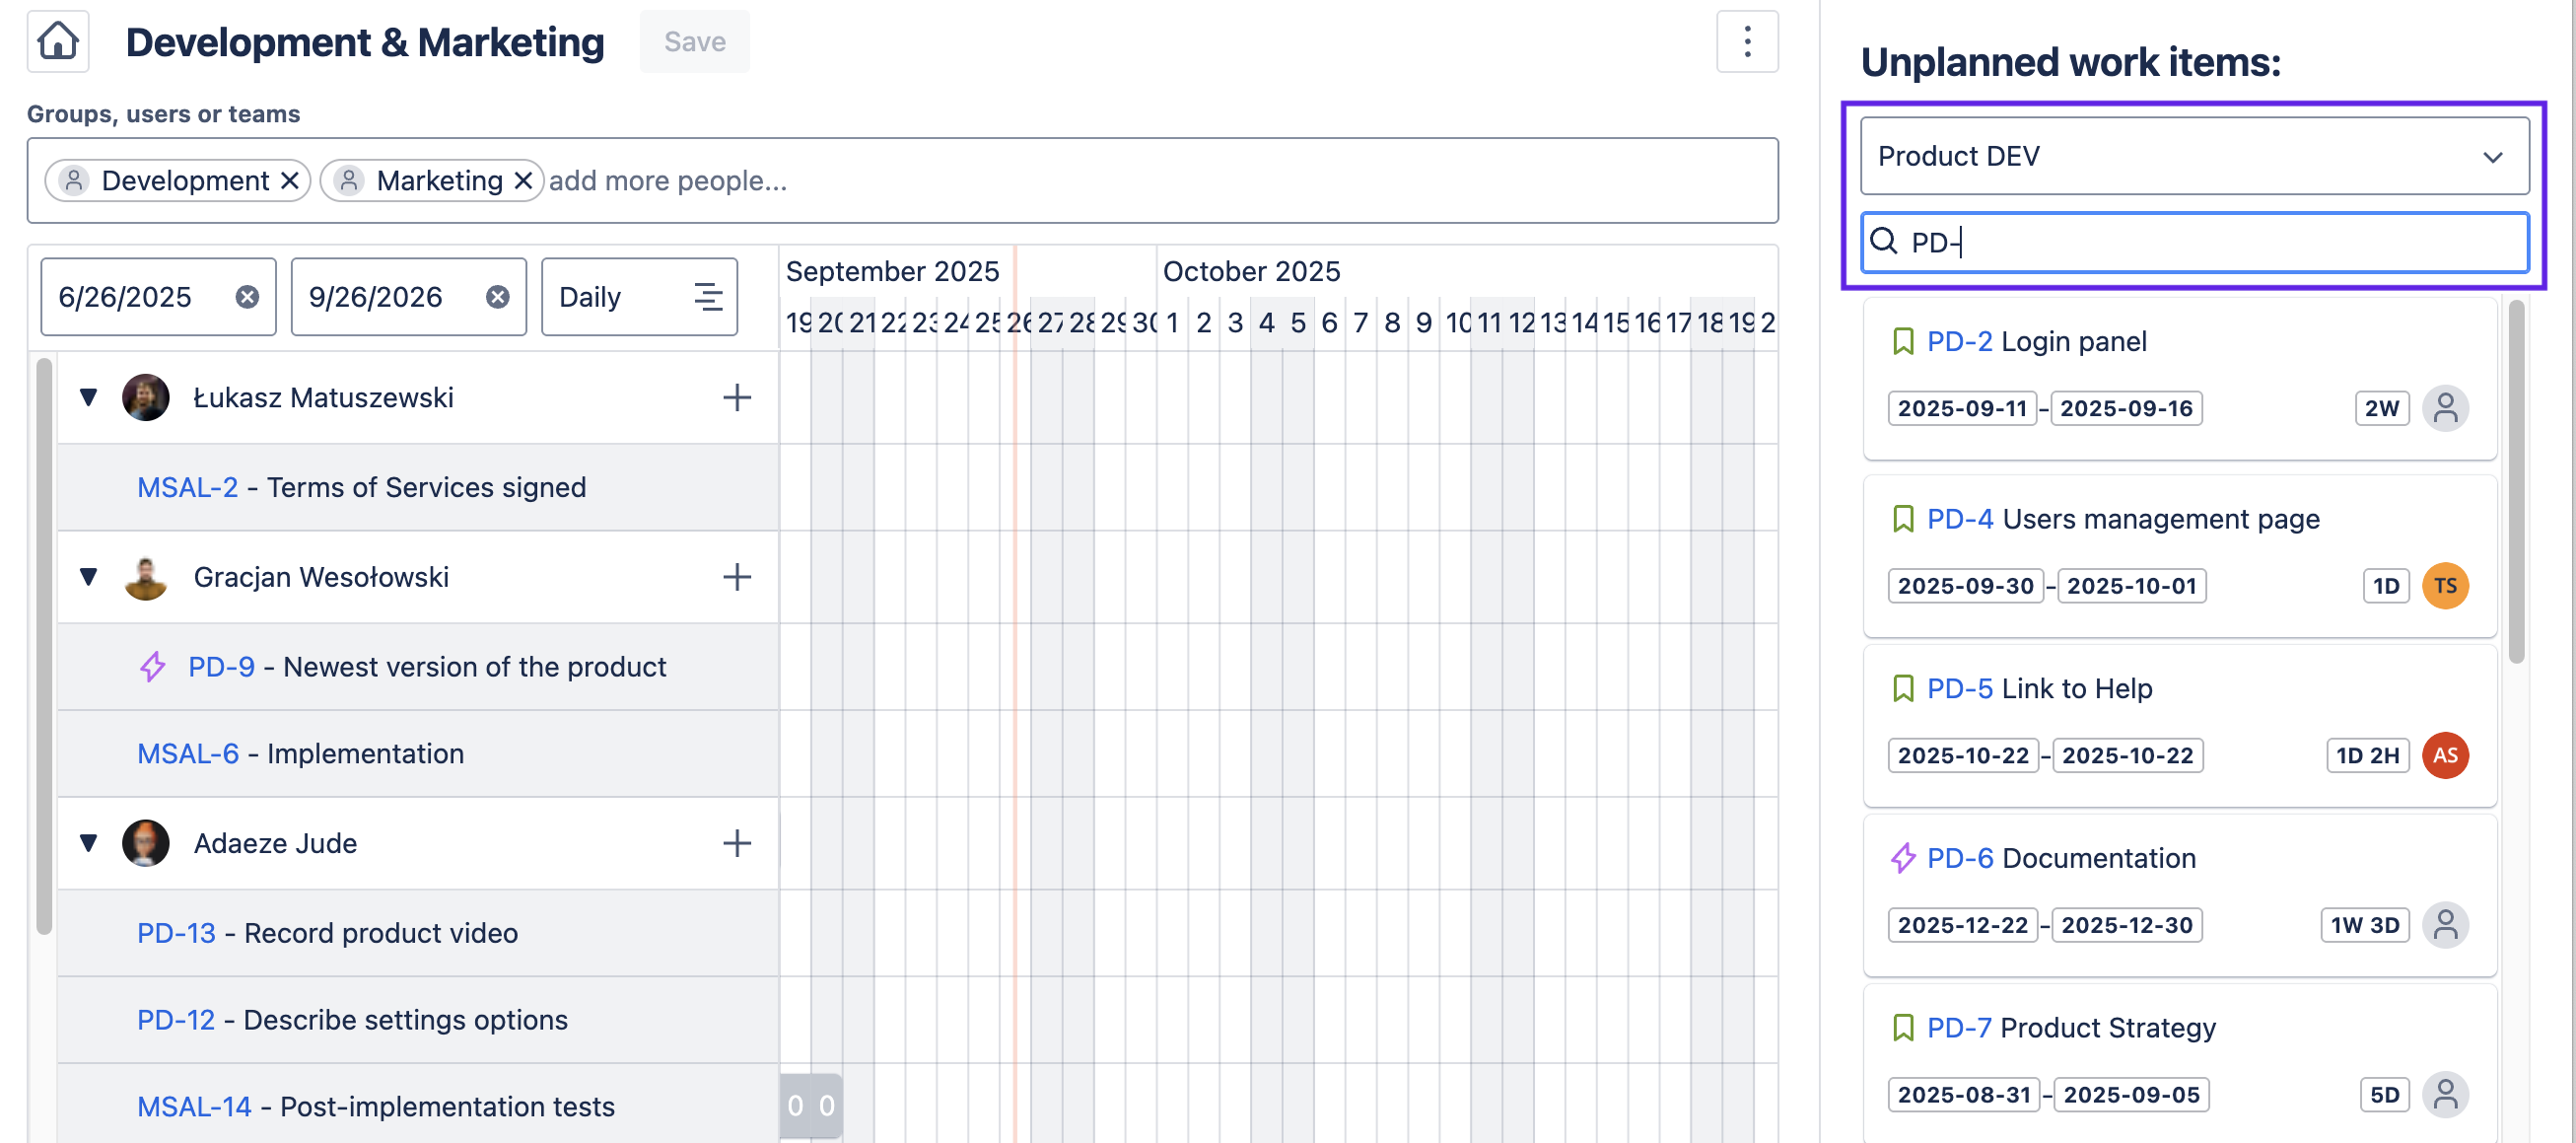
Add Unplanned Work Items
Keep everyone working at top productivity, The Unplanned work items panel lets you add items to a team member’s work load on the fly. Adding a work item in the capacity planner will automatically assign the item in Jira.
To add unplanned work items:
-
Find the Jira work item you want to add:
-
Select the appropriate portfolio from the dropbox . A list of unassigned work items will be displayed.
-
You can then use the search bar to filter for a specific work item.
-
-
Drag the work item to the capacity plan of the appropriate team member in the capacity plan. This will assign/reassign the work item.
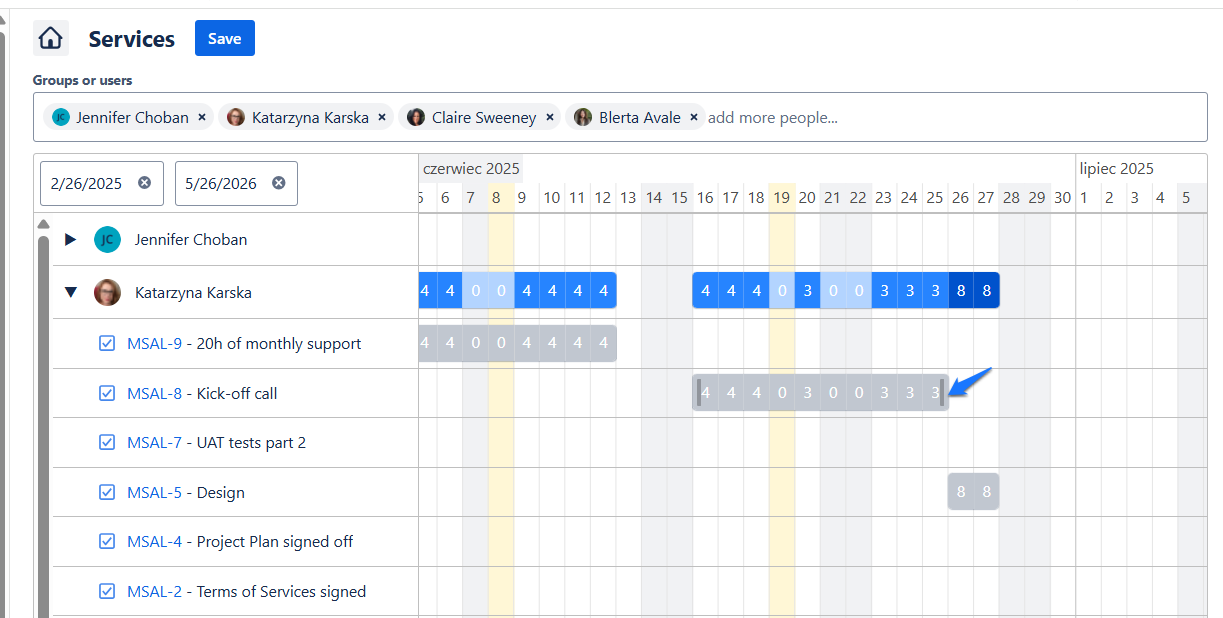
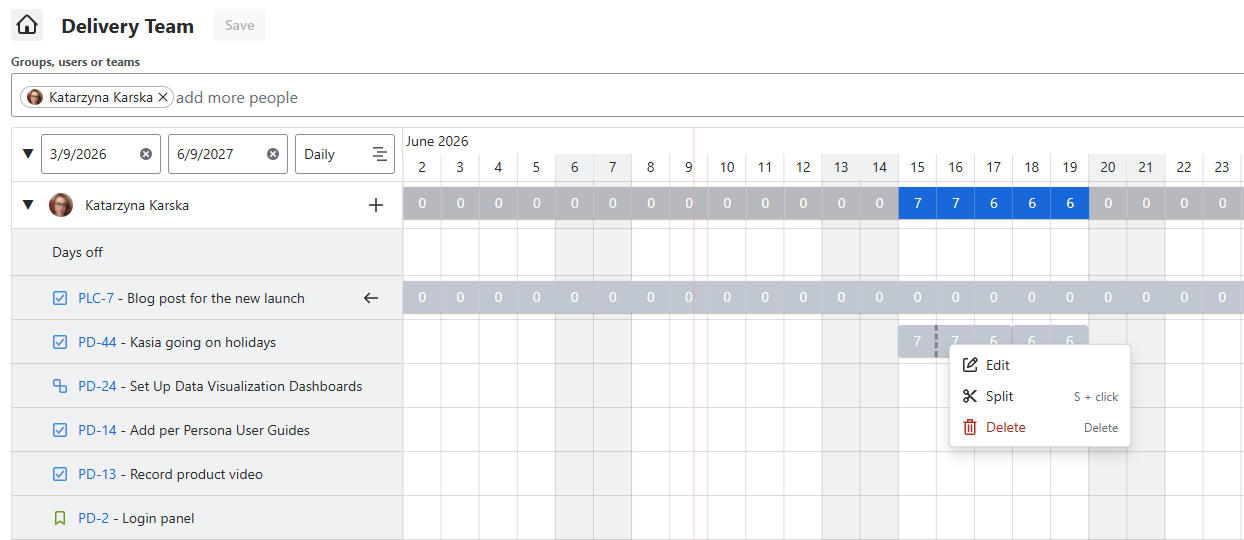
Split Bookings & Plan Time Differently for each day
If a booking is longer than 1 day, you can split it and assign a different amount of planned time to each of the ranges or even days.
To do it:
-
Right-click on the booking where you want to split and select Split from the drop-down.
-
Once it’s splitted, double-click on the booking to edit it or right click and select Edit to edit the splitted segment.
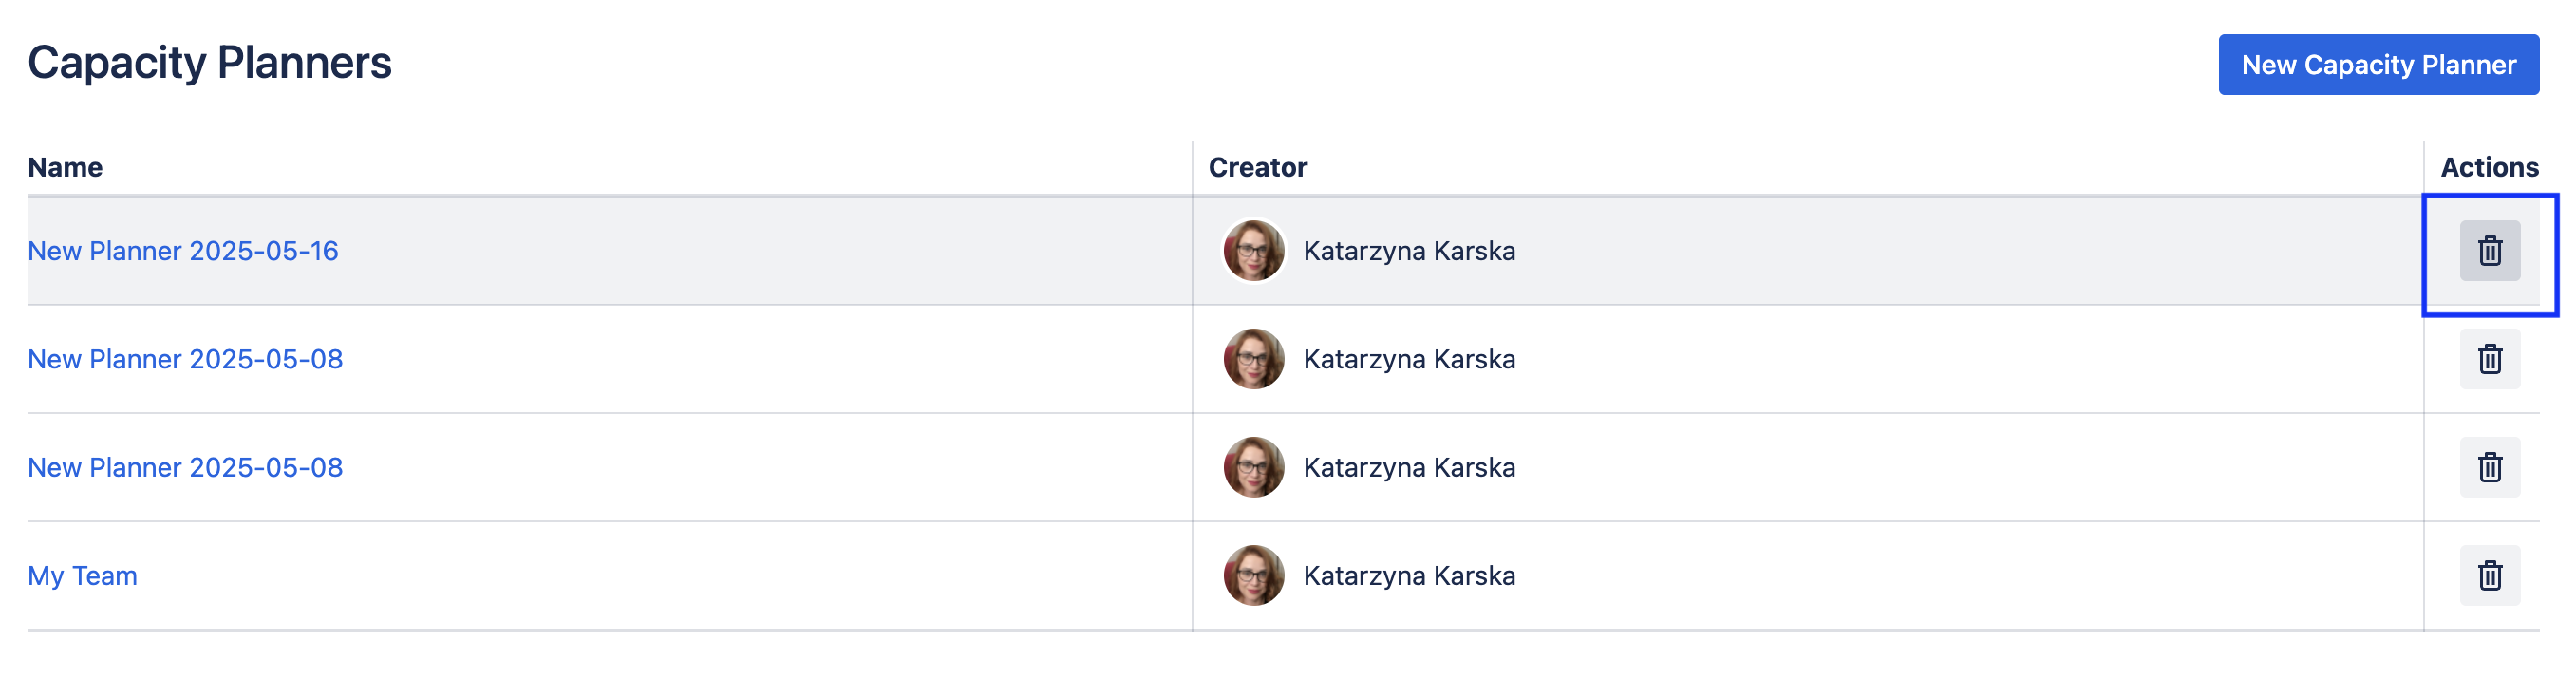
Delete a Capacity Planner
To delete a portfolio:
-
Navigate to Apps > Portfolio..
-
Select Capacity Planners from the left nav bar.
-
Select the appropriate capacity planner and click on the Trash icon to the right.
-
Click Delete.