
The Import global setting page is used for importing checklists from other apps. See this page for information about importing checklists from custom fields or other Jira instances.
Smart Checklist Import (Server and Cloud)
This import process reads all checklist items created by the Smart Checklist app (stored in your Jira Cloud) and copies them to Checklists for Jira (Enterprise) as local checklists. If you want to migrate from Smart Checklist Data Center, you must migrate your data to Jira Cloud first.
Note that currently we can only match to our default statuses - Open, In Progress, Done, and Skipped during the import. If custom statuses have been configured, the import will mark all of the not matched statuses as either Open (for unchecked items) or Done (for checked items).
-
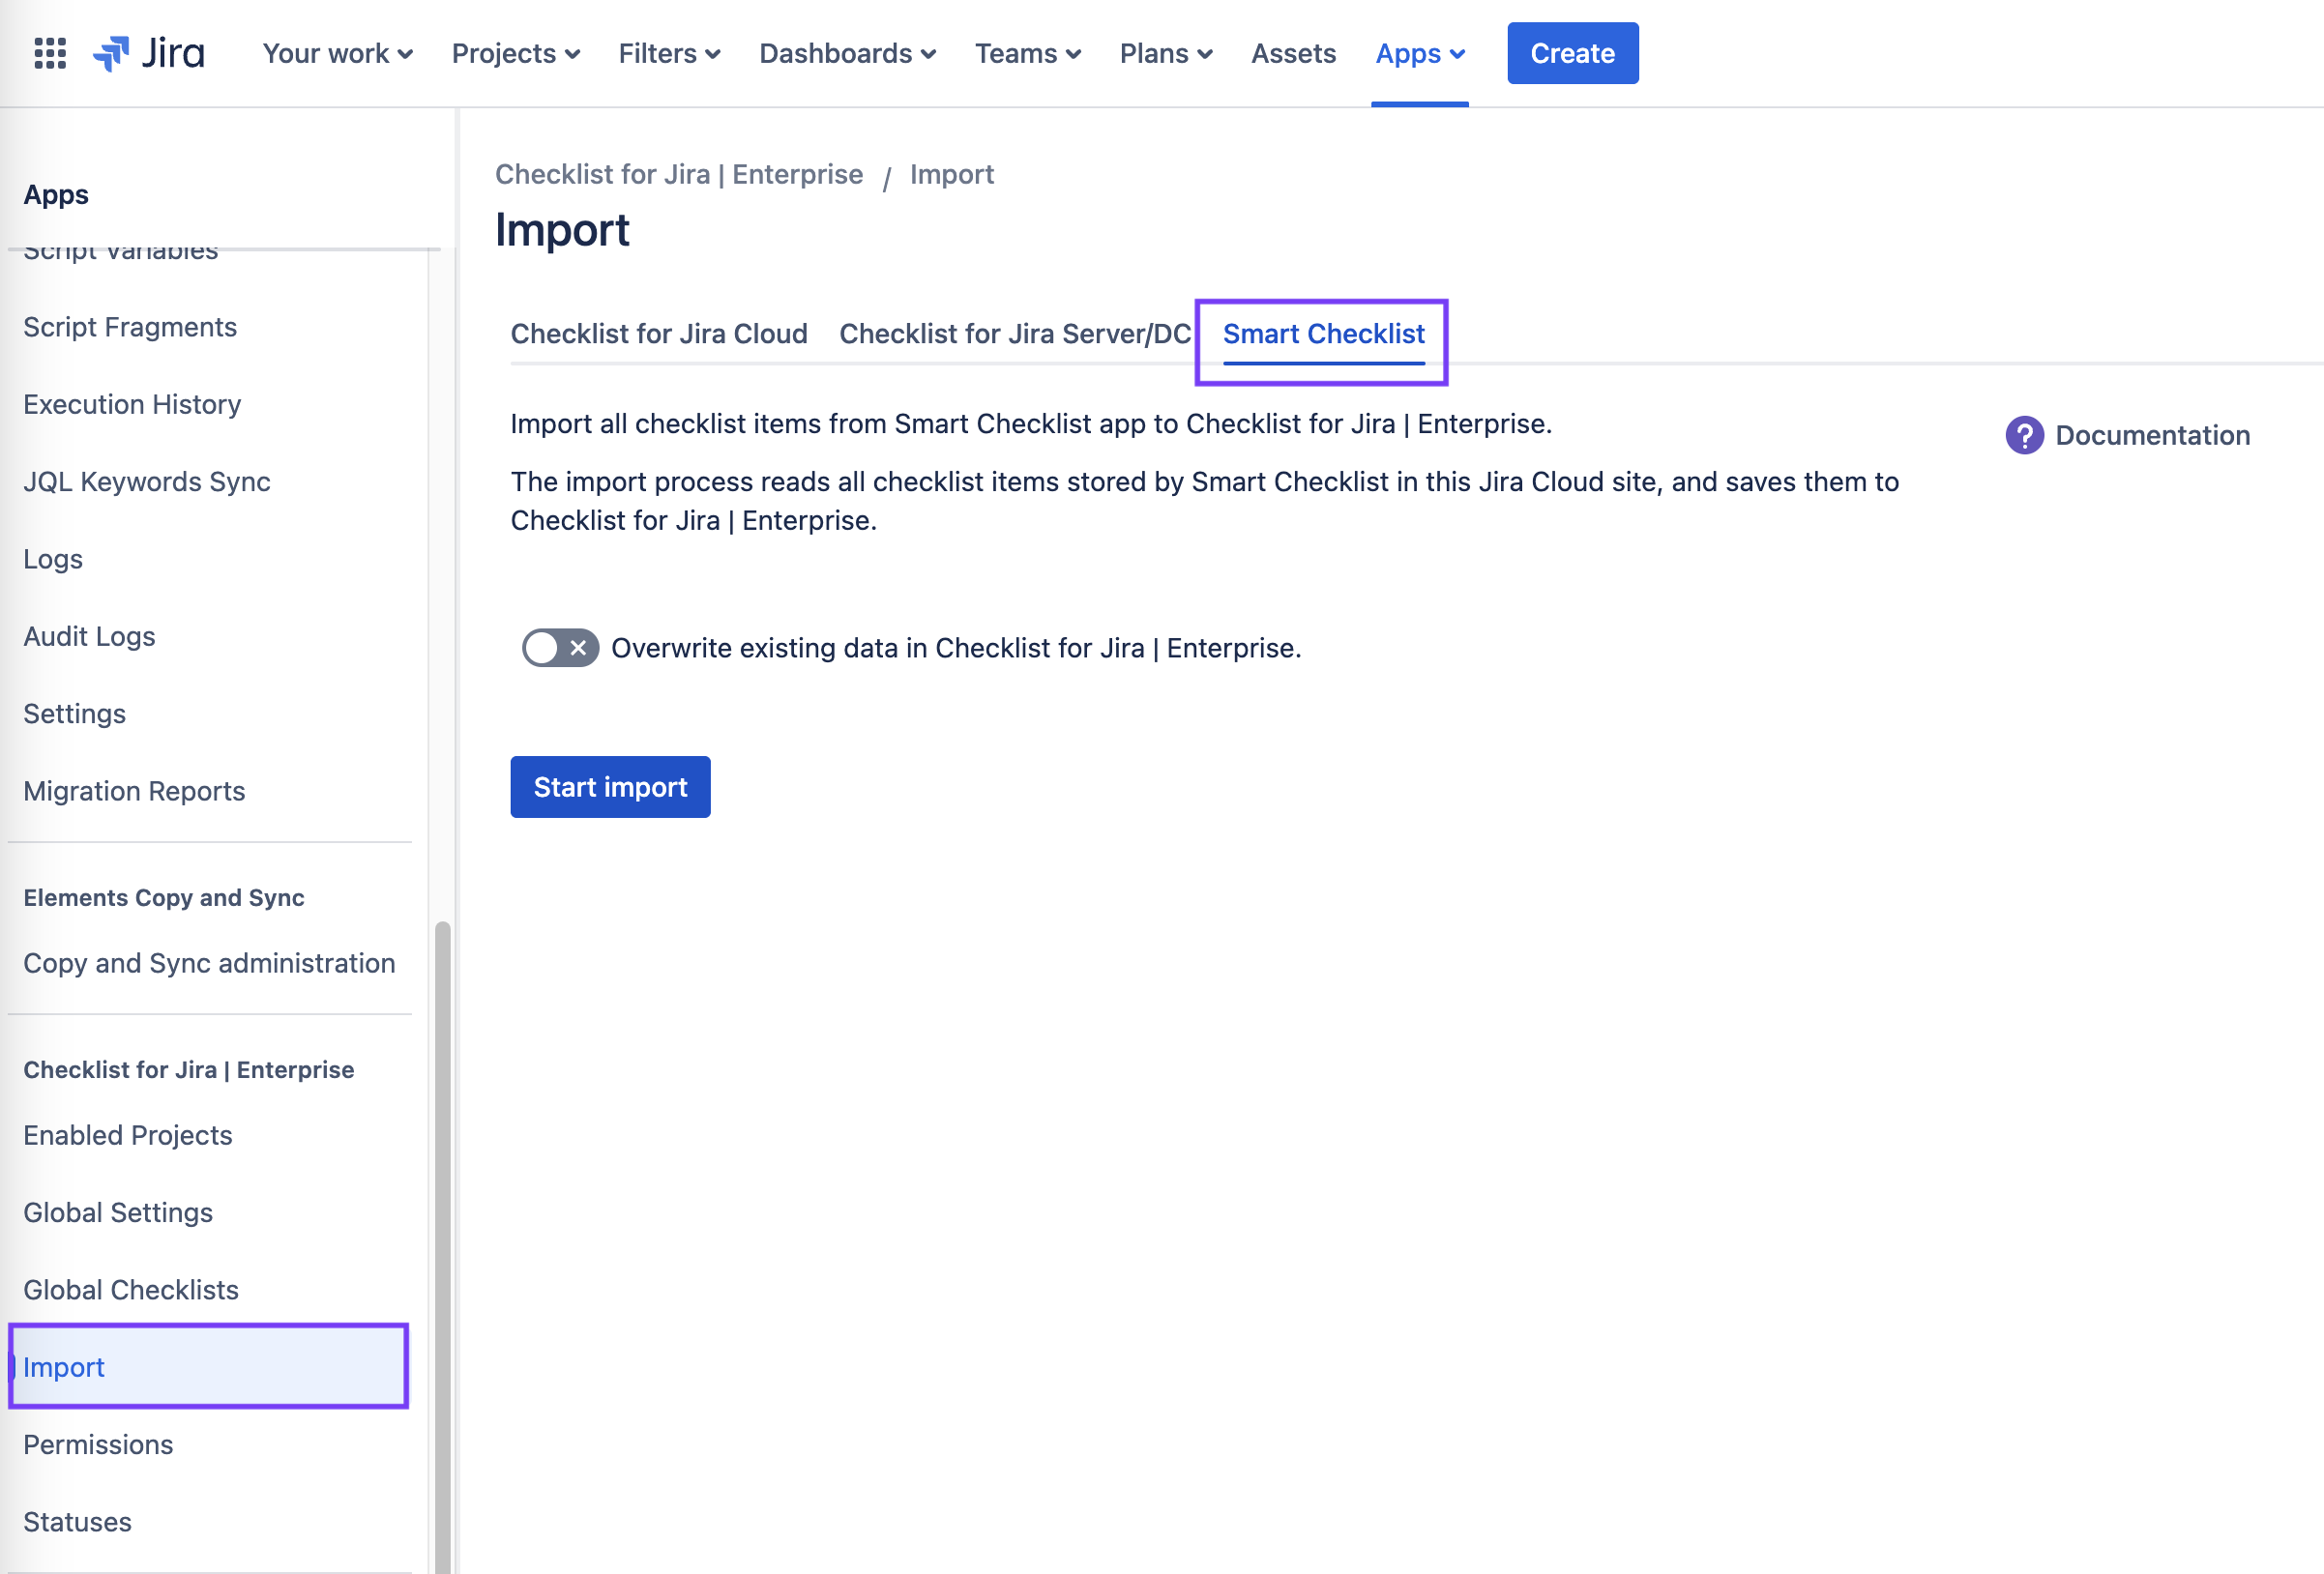
Navigate to Jira Settings > Apps and select Import under the Checklist for Jira heading.
-
Select the Smart Checklist tab.
-
Determine if you want to overwrite or append to existing checklists. The import process is designed to allow for incremental imports, and does not prevent duplicates. If you perform an import without enabling Overwrite existing items, any previously imported items may appear as duplicates in subsequent imports.
Use the Overwrite existing items in Checklists for Jira Enterprise toggle to indicate if you want to:
-
Overwrite existing data (Toggle enabled)
If the toggle is enabled, the import process will replace any existing checklists (in Checklists for Jira Enterprise) with the data being imported from Smart Checklist. In cases where there is an existing checklist in Checklists for Jira Enterprise, and the corresponding work item does not have a checklist in Smart Checklist for Jira, the existing checklist in Checklists for Jira Enterprise will be preserved. It is recommended that you enable the toggle if you attempt to perform an import more than once. -
Append imported checklist items to already existing checklists (Toggle disabled)
Imported checklist items will be appended to the existing checklists on the work item.
-
-
Click Start import. The import will be scheduled and a gray panel will show the import status.
Click on the Refresh icon to update the status.
-
The Import status will change when the background import process is launched. Once the process begins, the import cannot be canceled.

-
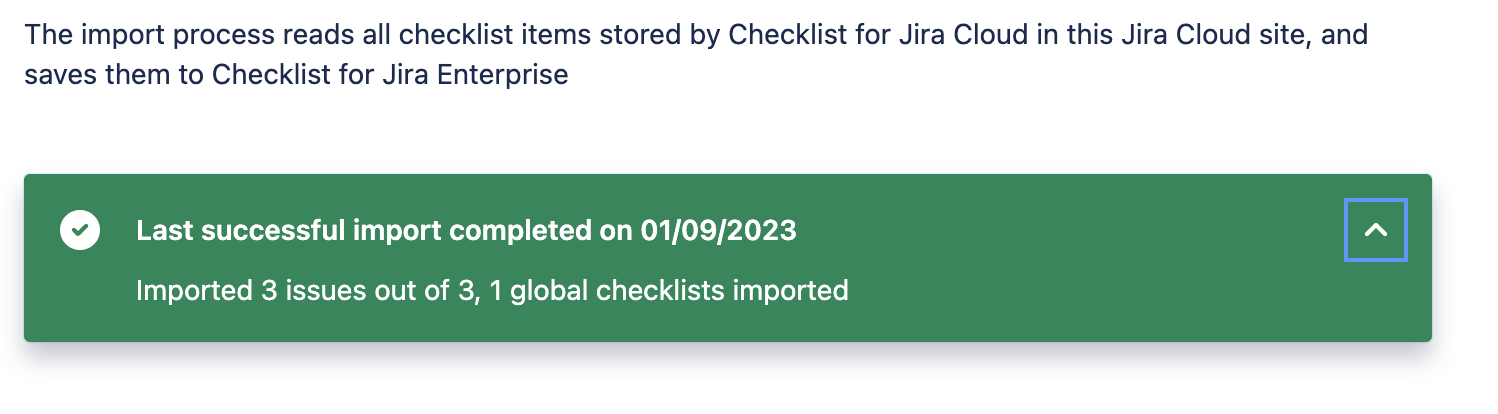
When the import is complete, the status panel will turn green and will display the number of checklist items and work items/work items impacted.

Checklist for Jira Import (Server)
-
Install Checklists for Jira Enterprise.
Before you start:
-
Jira will not be impacted by the migration. However, there will be some downtime during which you will not be able to access your checklist data.
-
The importer for Checklists for Jira Data Center is available in Checklists for Jira Enterprise and will load all checklist data files created by the Checklists for Jira Export feature and copy them to the Checklists for Jira Enterprise app.
-
Checklists for Jira Enterprise works differently than Checklists for Jira Data Center. Learn more here.
-
Use the Checklists for Jira Export feature to generate the files that will be loaded into work item Checklist.
-
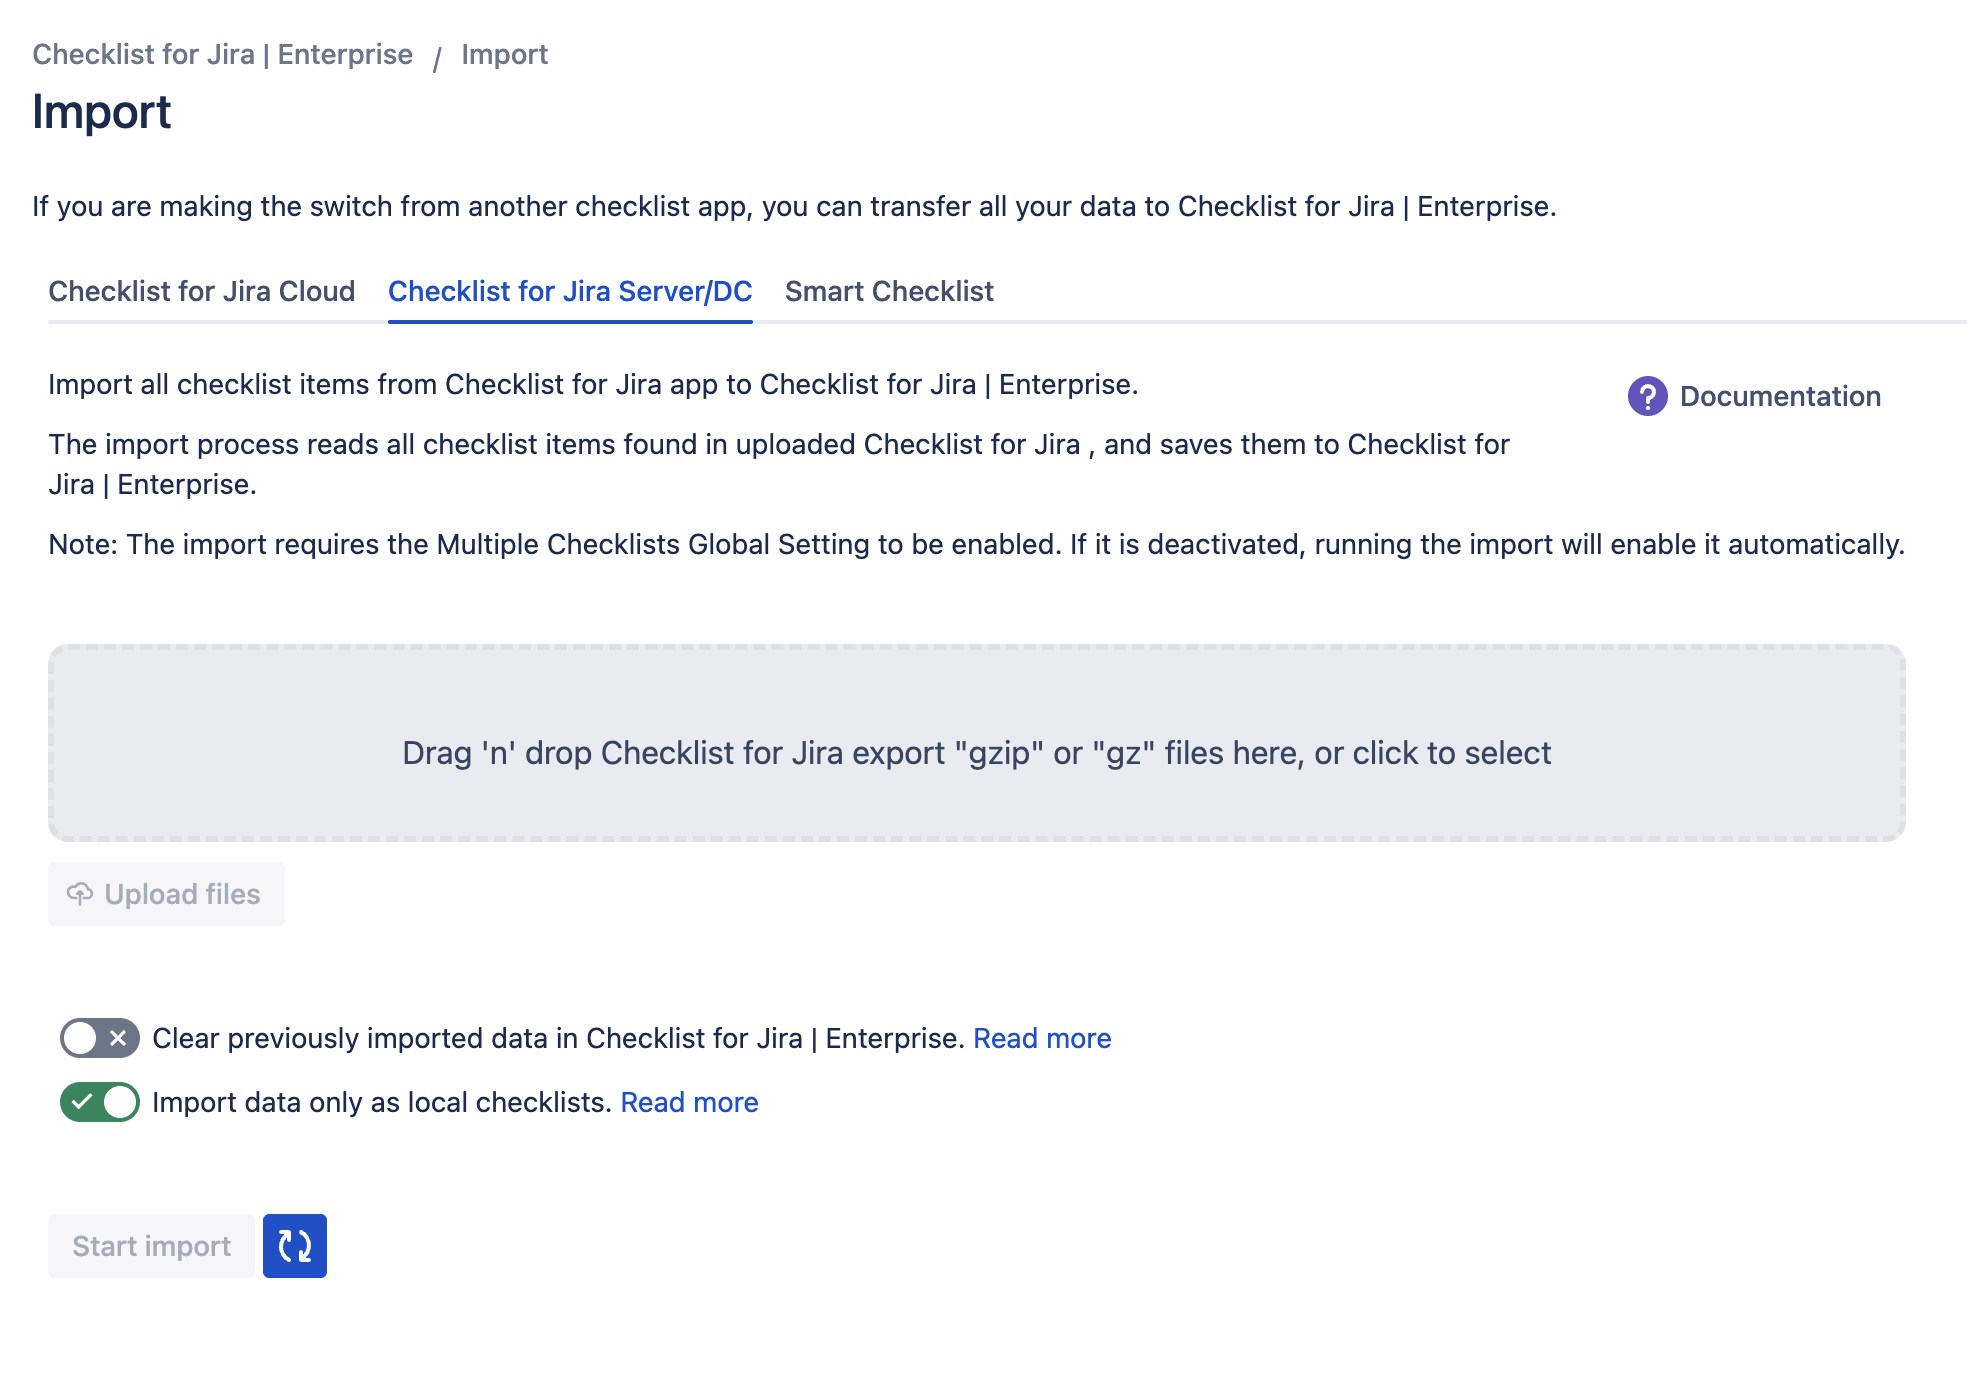
Navigate to Jira Settings > Marketplace apps and select Import under the Checklists for Jira Enterprise heading.
-
Select the Checklists for Jira Server/DC tab.
-
Locate the files generated during the Checklist for Jira Data Center export process and drag them to the upload area. Alternatively, you can click the area and select the files from your computer.
-
When all the files generated during the Export process are in the list, click Upload files.
-
By default, Global Checklist items on the on-prem instance will be imported as Global Checklists in the cloud instance. However, you can choose to import them as local (specific to the Jira work item). If you choose this option, no Global Checklists will be created by the import.
-
Determine if you want to overwrite or append to previously imported checklists. The import process is designed to allow for incremental imports, and does not prevent duplicates. If you perform an import without enabling Clear previously imported data, any previously imported items may appear as duplicates in subsequent imports. Use the Clear previously imported data toggle to indicate if you want to:
-
Clear previously imported data (Toggle enabled)
Replace any previously imported data from Checklist for Jira Data Centerwith the items being imported from the currently uploaded files. It is recommended that you enable the toggle if you attempt to perform an import more than once. Data to be replaced includes:-
Global Checklists
-
Checklist items in Jira work items (global and local)
-
Checklist item statuses
Please see the troubleshooting imports page for more information.
-
-
Append imported checklist items to already existing checklists (Toggle disabled)
Imported checklist items will be appended to the existing checklist(s) on the work item. If you will import the same checklist Checklist Field but for other space(s), duplicate Global Checklist will appear. It’s recommended to import a checklist Custom Field configuration for all spaces at once.
-
-
Once the files are uploaded, and you’ve confirmed that the Clear previously imported data toggle is in the correct position, click Start import. The import will be scheduled and a gray panel will show the import status. Click on the Refresh icon to update the status.
-
When the import is complete, the status panel will turn green and will display the number of checklist items and work items impacted.
The import is a gradual process. Checklist data will become available in the database and visible in the UI as it’s imported. However, we recommend waiting to work on checklists until the import is finalized.
If you need to cancel and restart the import, be sure to enable the Clear previously imported data in Checklist for Jira Enterprise toggle.
Please contact our support with any questions.
Note that in the Cloud App, global and local items are separated into two different checklists: an work item that had a checklist with both global and local items in the Data Centerversion will have two different checklists (global and local) in the Cloud version.
Checklist for Jira Import (Cloud)
-
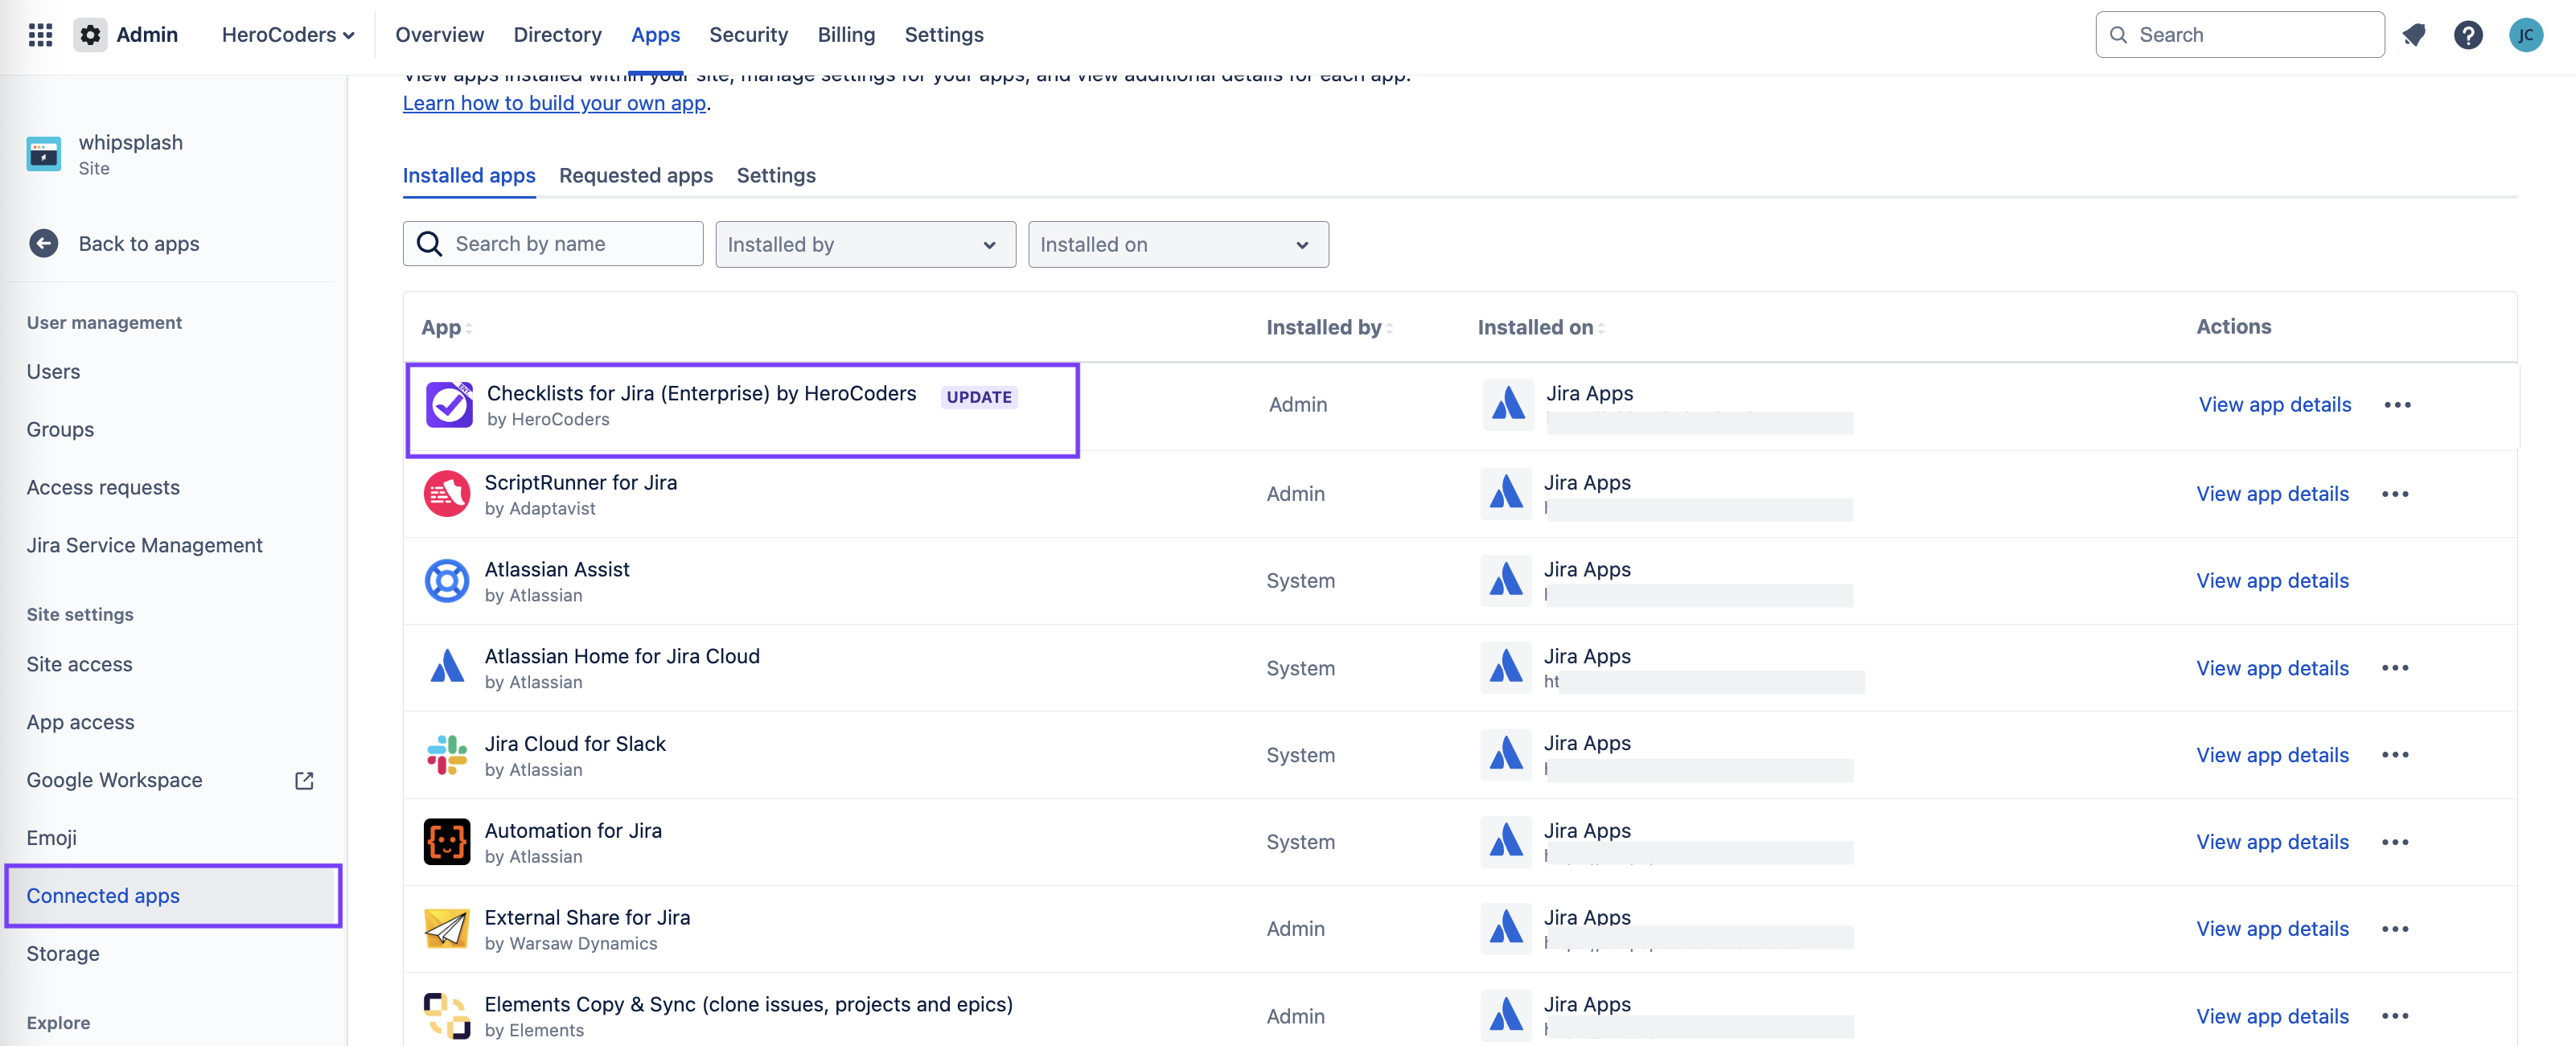
Navigate to admin.atlassian.com. Select the appropriate Organization. Click on the … menu to the right of the appropriate Product and select View product.
-
Click on Connected apps from the left nav bar. The Checklists for Jira (Enterprise) app will have an Update flag.
-
Click on View app details for Checklists for Jira Enterprise.
-
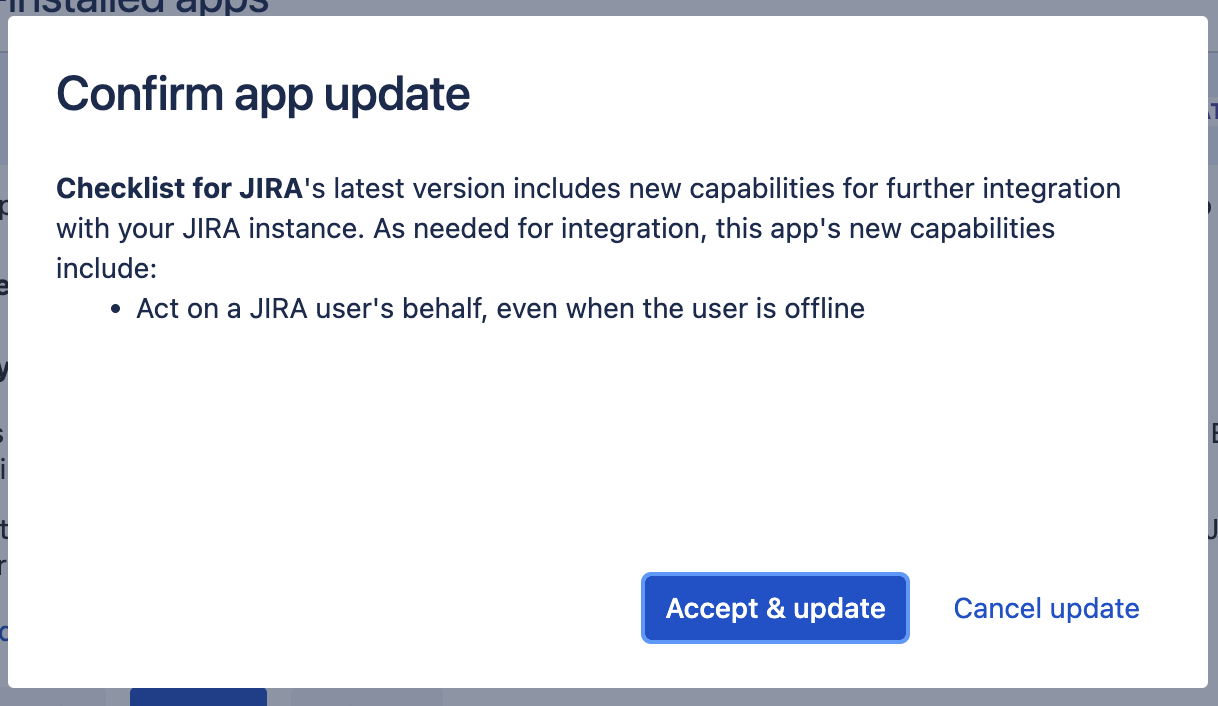
Click on the Update button to see a description of the update

-
Click Update.
-
Click Accept & update to confirm the update. (The Act on a Jira user’s behalf permission is only used for to avoid automatic upgrading.)
-
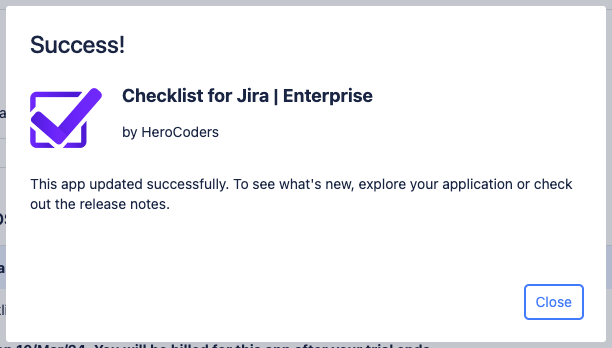
You will see a confirmation message.
-
Return to the Connected apps page and click on the …menu for Checklists for Jira (Enterprise). Select Get Started.

-
To migrate your checklist data to the new app, click Start import. If you are migrating for the first time, you can ignore the Clear previously imported data toggle.
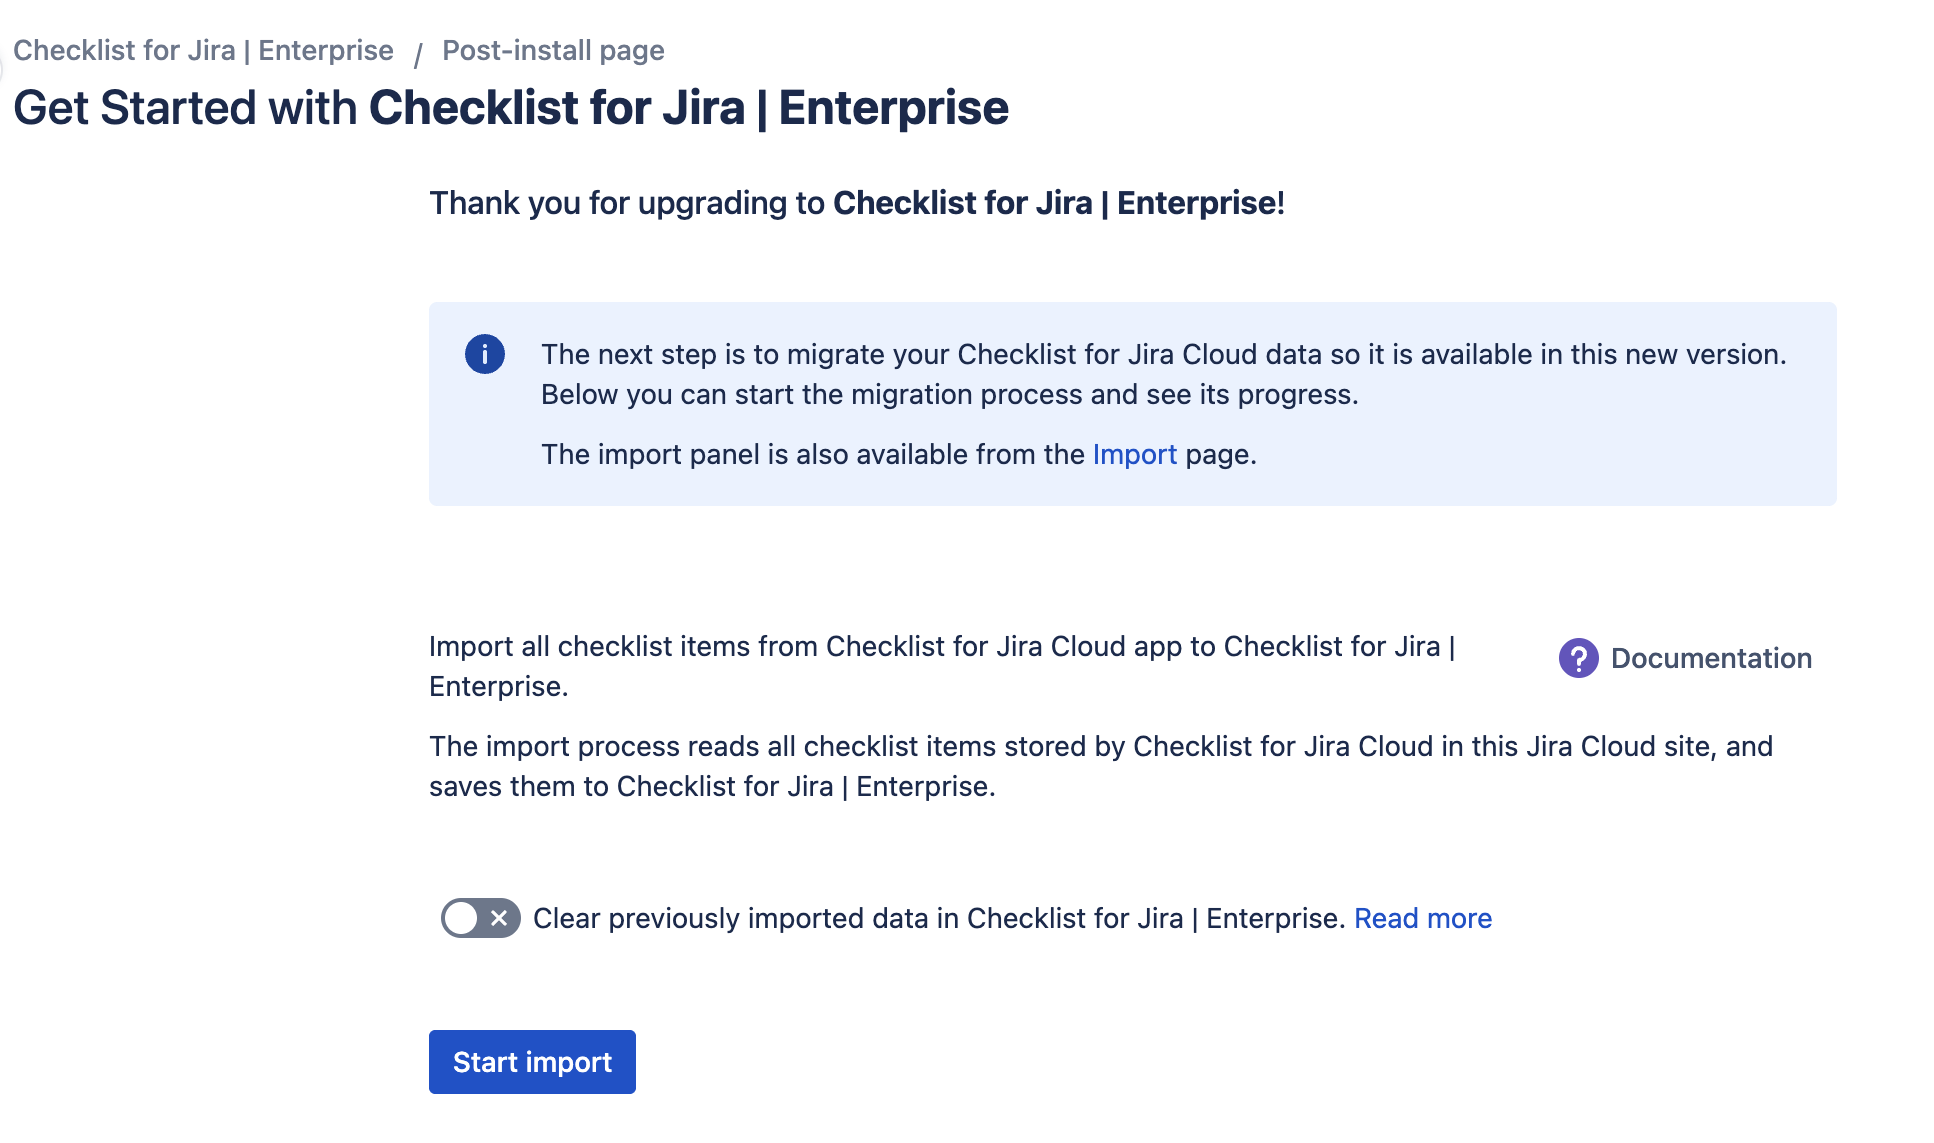
If you need to cancel, then restart the import at a later time, enable the Clear previously imported data in Checklist for Jira Enterprise toggle. This will delete in any previously imported data to prevent checklists/items.
-
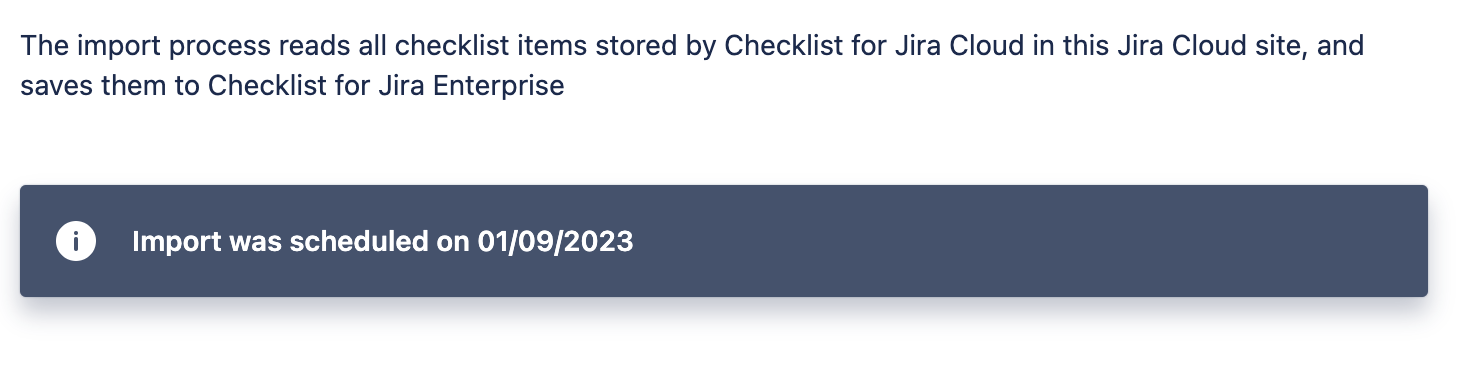
A message will indicate that the import is scheduled and allow you to cancel the import if needed.
-
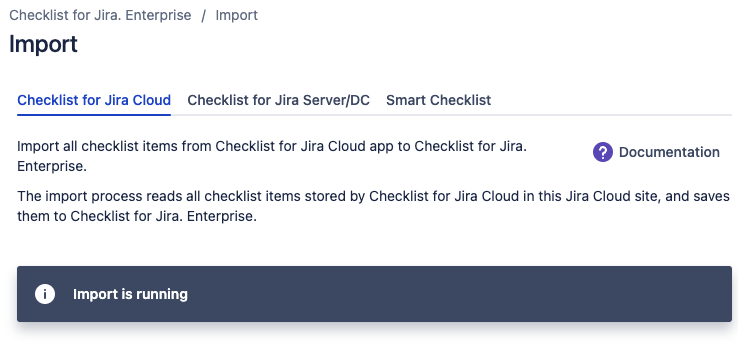
The import should start within a few minutes. You can check that the import is underway by clicking the Refresh button. Once the import is started, the Cancel import button becomes disabled.
The import is a gradual process. Checklist data will become available in the database and visible in the UI as it’s imported.
If you need to cancel and restart your import, be sure to enable the Clear previously imported data in Checklist for Jira Enterprise toggle.
-
A message will confirm that the import is complete.
-
Once the import is complete, it is recommended that you review/reconfigure the following:
-
Checklist permissions
-
Workflow validators
-