Upgrading from Acceptance Criteria to Issue Checklist Pro
Currently, there is no built-in importer for migrating from Acceptance Criteria to Checklist for Jira Pro. Migration is done via the Jira Automation and Checklist Text custom field as described below.
Preparing the Instance
Install the Checklist for Jira Pro App to your cloud instance.
Navigate to Jira settings > Issue > Custom fields. You now have double custom fields for each field associated with the Checklist.
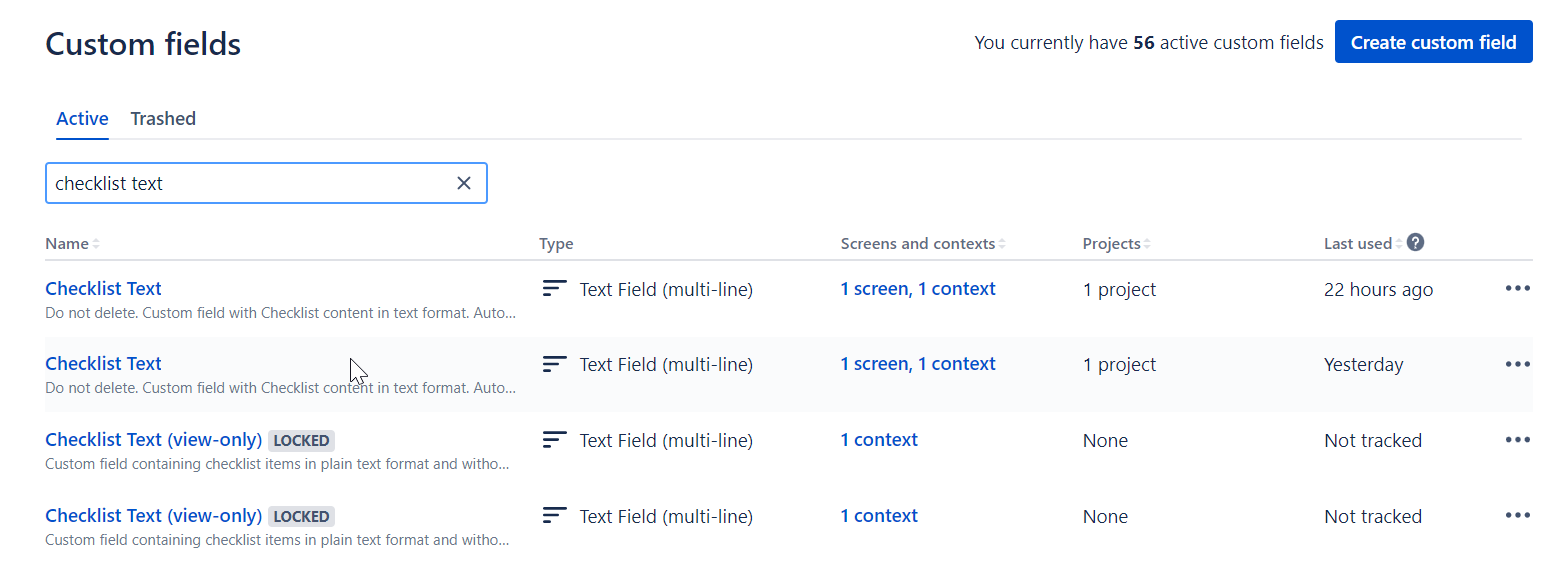
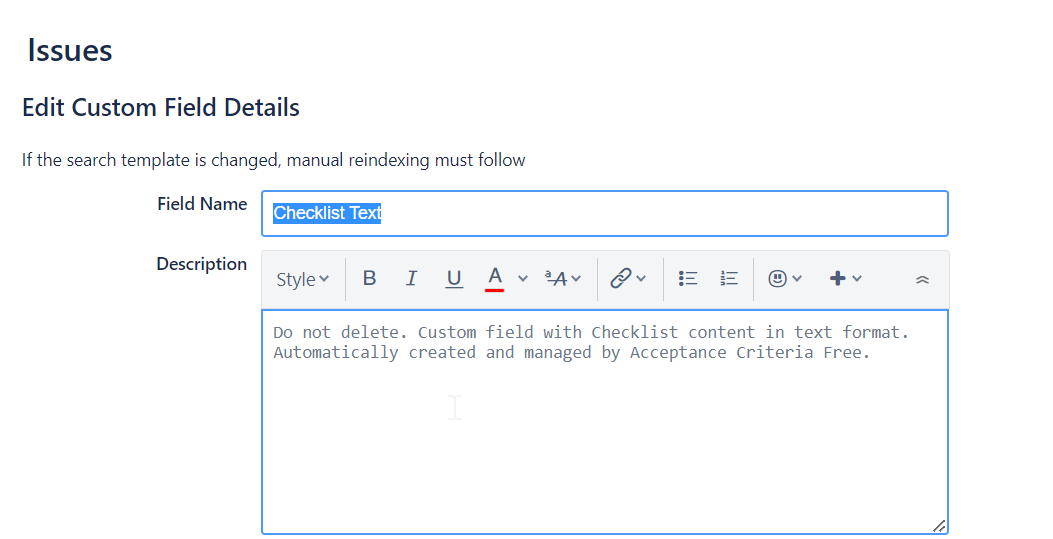
Note the custom filed ID for the Checklist Text field for Acceptance Criteria, and for the Checklist Text field for Issue Checklist Pro. To distinguish the two fields, click on Edit details in the … menu on the right. The description will tell you which app is associated with the field.
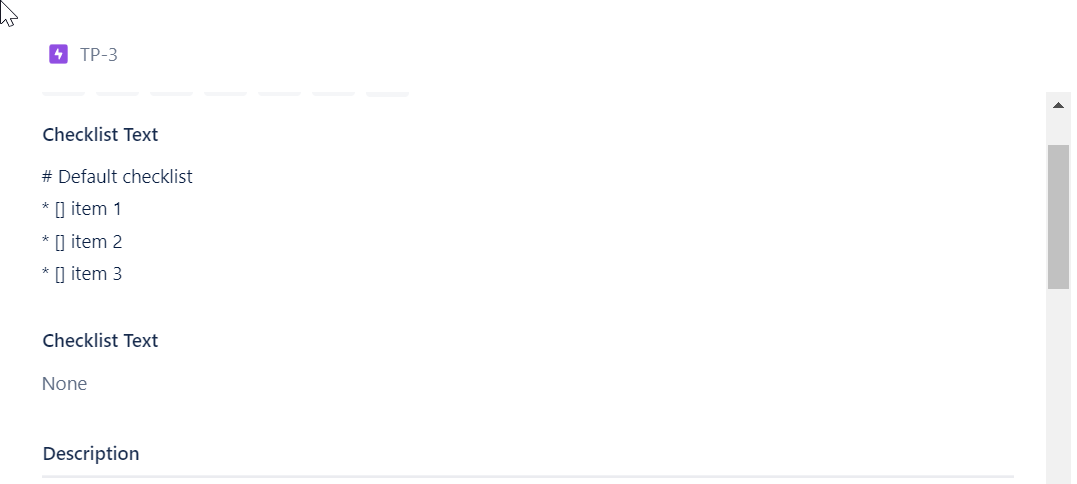
Add both Checklist Text custom fields (for Acceptance Criteria and Issue Checklist Pro) to theEdit issue screen.
Navigate to Jira Settings > Apps > Global Settings and ensure the Sync checklists to Custom Fields global setting is enabled for both Acceptance Criteria and Issue Checklist Pro. Once the data has synced, you will see the checklist items in the Checklist Text field.
Using Automation to Migrate the Data
Navigate to Project Settings > Automation (or Jira Settings > System > Automation rules).
Click Create rule.
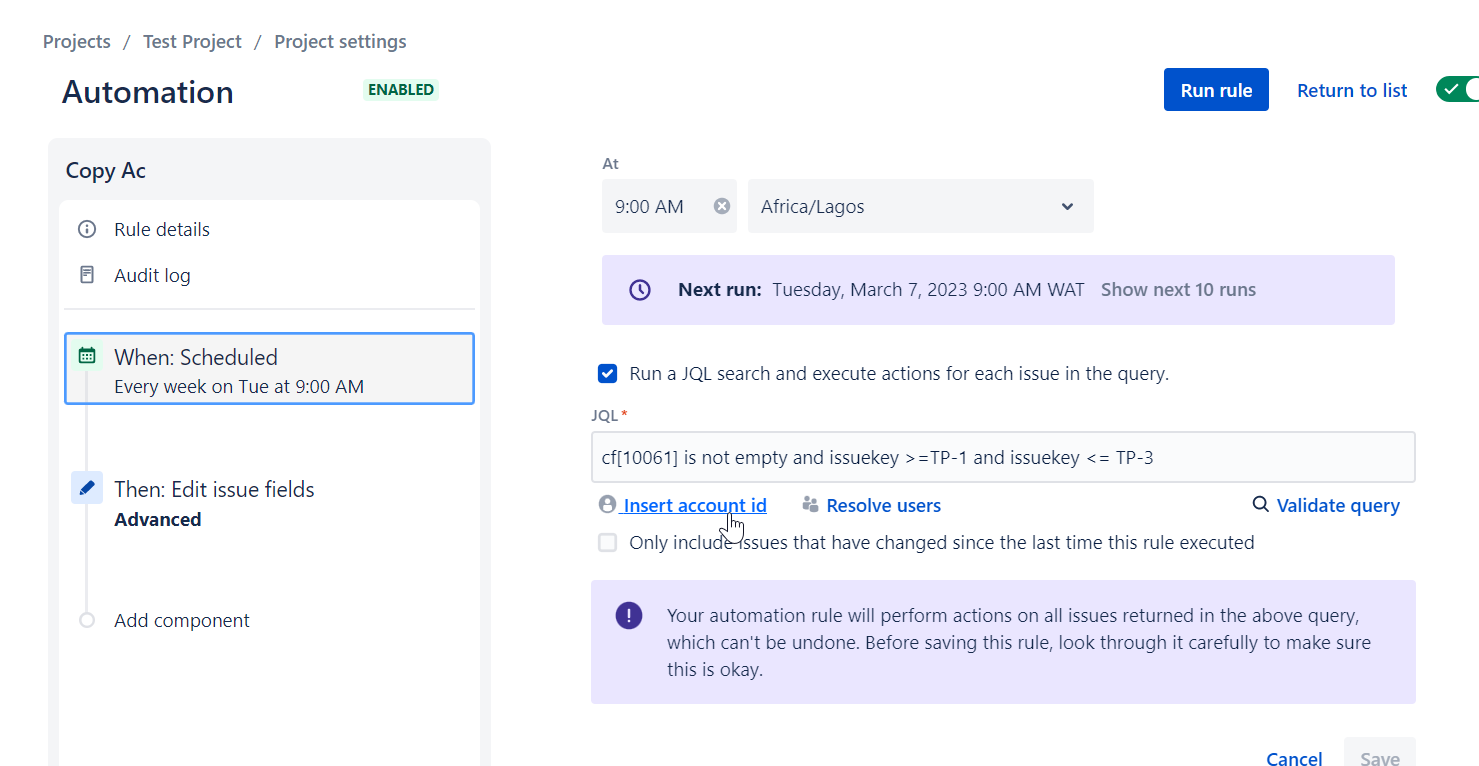
Select the Scheduled trigger and add JQL search (
cf[customfieldID for AC] is not empty and issuekey >=<<First IssueKey in range, like "KEY-1">> and issuekey <= <<Last issueKey in range, like "KEY-500">>)
Please note that the rule should not affect more than 500 issues at a time and that both the first and last IssueKey in the specified range must be valid, meaning their respective issues have to exist.
4. Click New action and select Edit issue.
5. Select the Advanced and type
{
  "fields": {
    "customfield_XXXXX": "{{issue.customfield_YYYYY}}"
  }}
where XXXXX is the ID of the Checklist Text field provided by Issue Checklist Pro and YYYYY is the ID of the Checklist Text field provided by Acceptance Criteria.
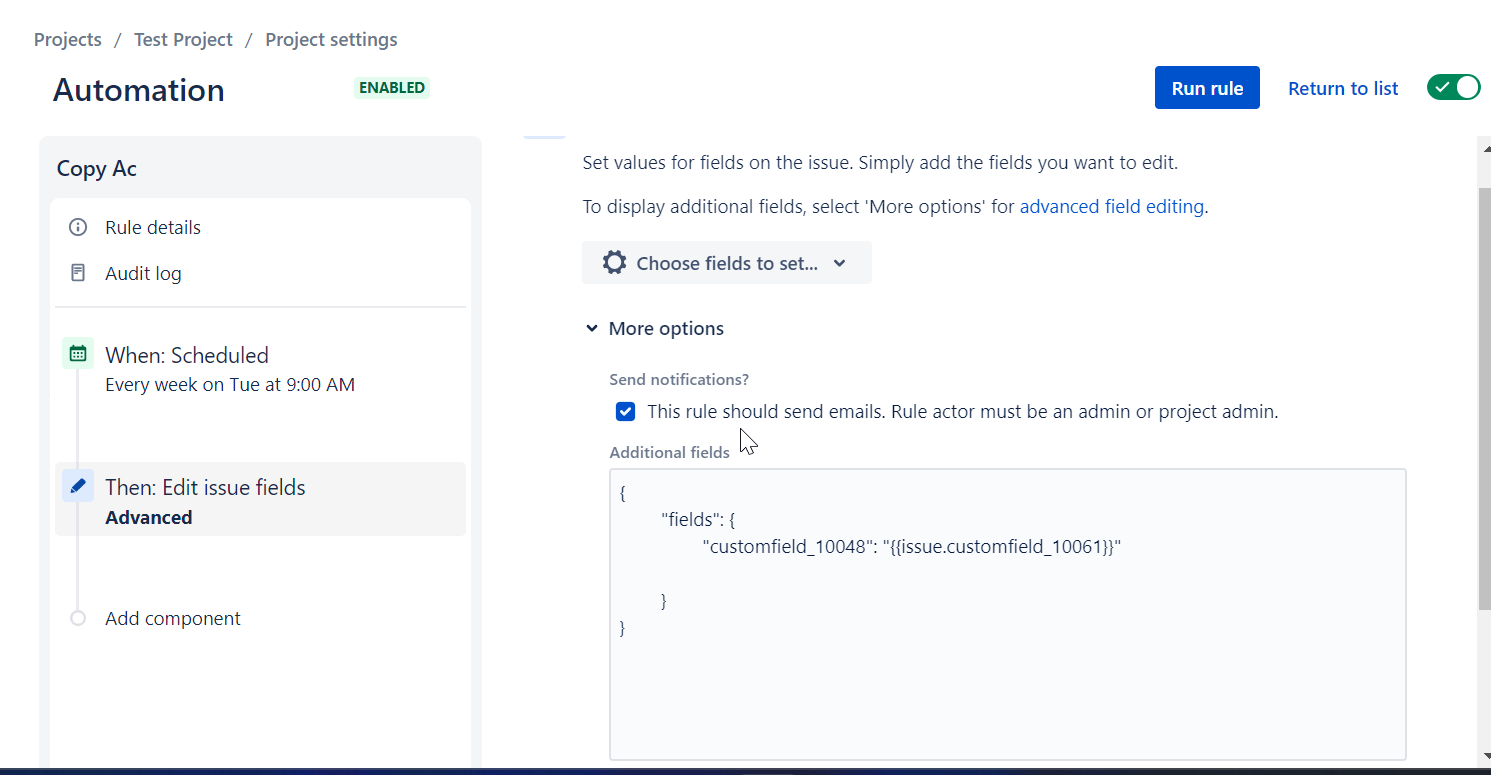
6. Click Save.
7. Name the rule and click Turn it on.
8. Run the Rule. The items will then be shown in the Checklist for Jira Pro Checklist Text field.

Uninstalling Acceptance Criteria & Removing Duplicate Custom Fields
After confirming that the checklist items have migrated on all issues, you can uninstall the Acceptance Criteria from your instance and delete the duplicated Checklist custom fields listed below. Be sure to onnly remove the custom fields associated with Acceptance Criteria:
Checklist completed
Checklist content YAML
Checklist Progress%
Checklist Progress
Checklist Template
Checklist Text.
Checklist Text (view only)
