Managing Employee Offboarding in Jira
Managing HR processes in Jira is a great option for small software companies who are already using Jira and who don’t have, or necessarily need, dedicated HR software. Employee onboarding and offboarding are key processes that can be easily managed in Jira.
Space Type: Jira Business Space
Apps: Checklists for Jira (Pro) or Checklists for Jira (Enterprise)
Workflow & Work Item Type: HR Onboarding Space Template
Set-up Tasks:
Workflow Modifications
Checklist Template
Automation Rules
Workflow
We can expand our Onboarding Workflow to accommodate the entire lifecycle of an employee by adding a few more statuses:
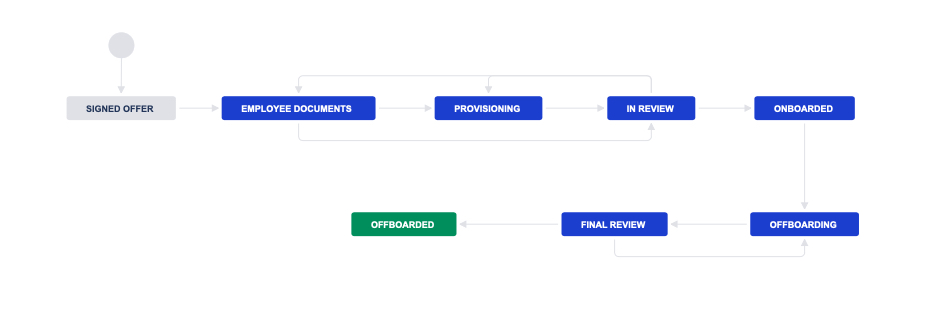
Since members of multiple teams (HR, IT and Facilities) will be working on the work item, it’s good practice to add Restrict who can move an issue rules (User is in group conditions) that only allow members of the HR team to transition the work item from IN REVIEW to ONBOARDED, and from FINAL REVIEW to OFFBOARDED .
Checklist Template
As with onboarding, HR, IT and Facilities will each have multiple tasks in order to offboard the employee. However, there is not the same dependency-based order of operations. All three teams will need to prepare their tasks to be executed at the last minute. Therefore, all of the tasks can be listed in the same checklist, with separators to keep the checklist organized.
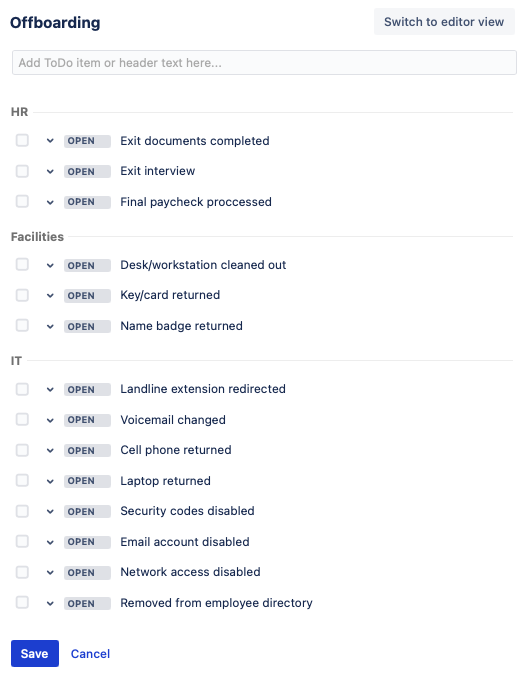
To create the Offboarding template, click on the More menu in the upper nav bar and select Checklist from the list to get to the Templates page. Click Create template. Name the template (without spaces), and add the checklist items.
Tip: You can also add checklists that track the on/offboarding tasks for specific teams. See the example here.
Automation Rules
Using checklists in combination with automation is a great way to streamline repeated tasks and ensure that nothing slips through the cracks. This is example will use automation to:
Check todays date against the employee’s last day to trigger the process at the appropriate time
Clear the current local checklists (from the IT and Facilities onboarding process) off of the work item
Add the Offboarding checklist template
Change the work item status
Notify the appropriate team members
A second automation rule will change the status again once the checklist is complete.
To create the first rule:
Ensure that the Apply checklist templates via labels global setting is enabled.
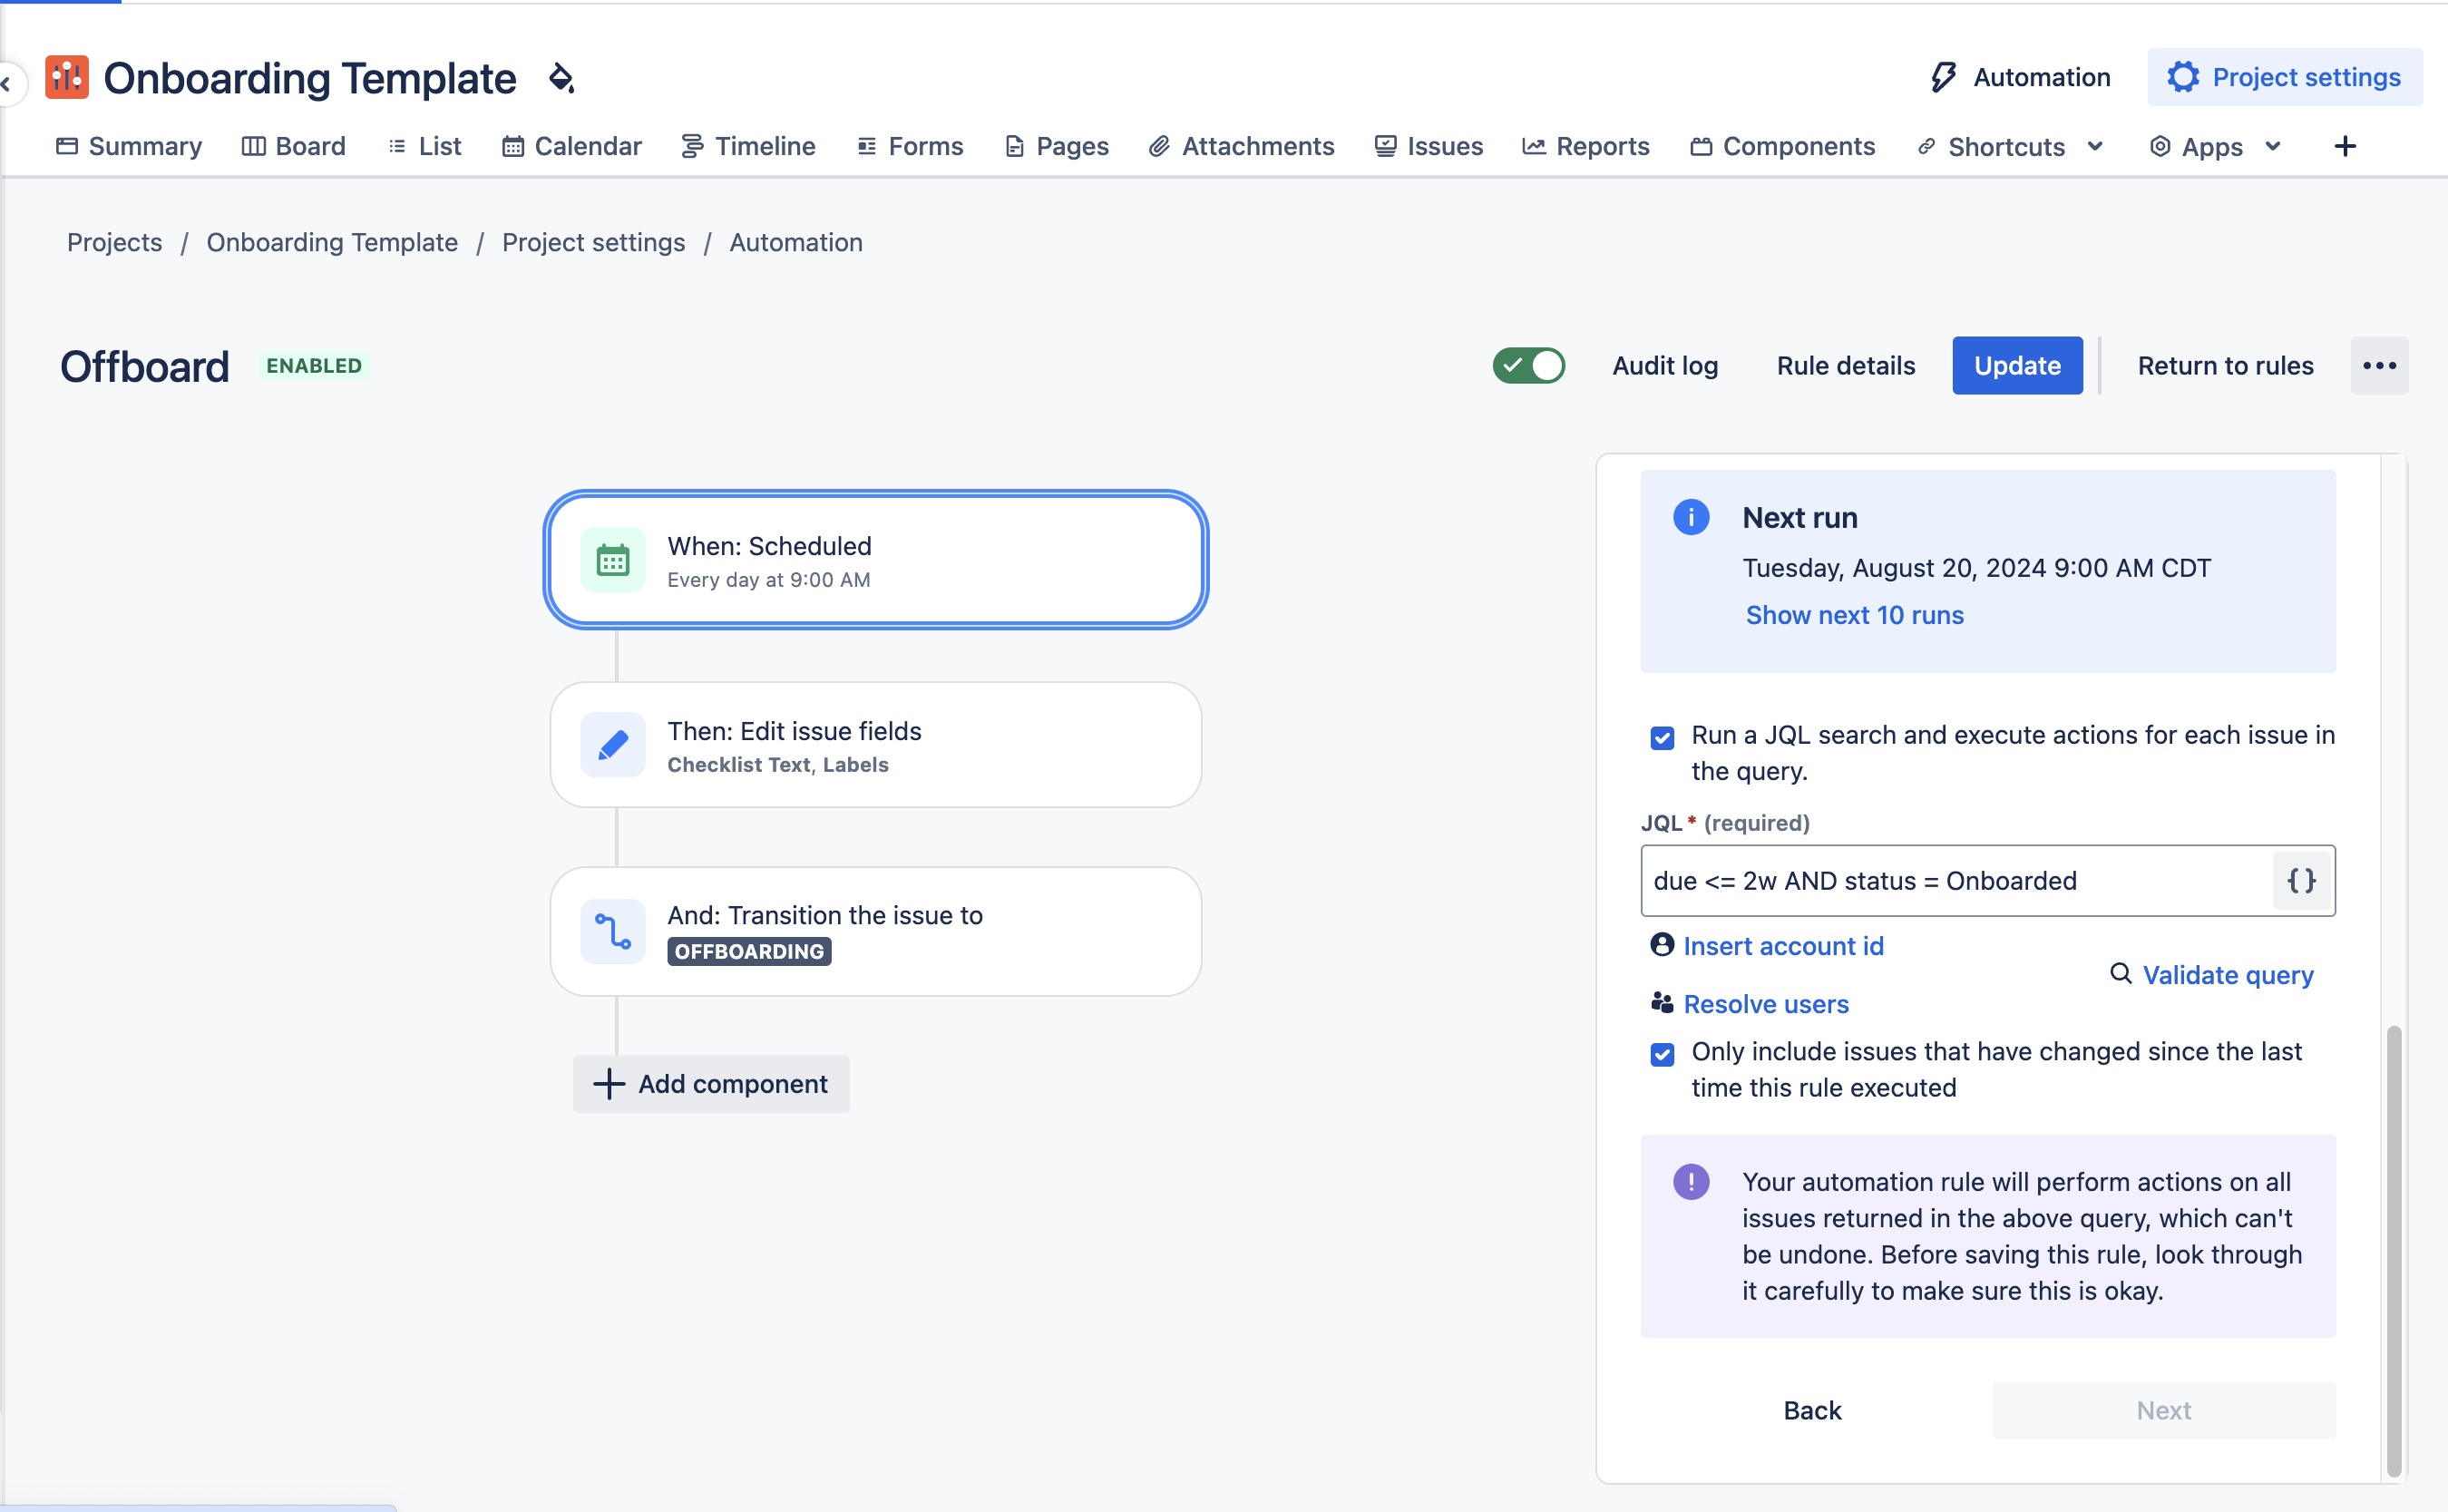
Select the Scheduled trigger.
Set the rule to run once per day at the desired hour.
Click the Run a JQL search and execute actions for each work item in the query checkbox
Insert a JQL query that returns all work items that are in the ONBOARDED status have a Due date within the next two weeks
due <= 2w AND status = OnboardedClick Save.
Click New action
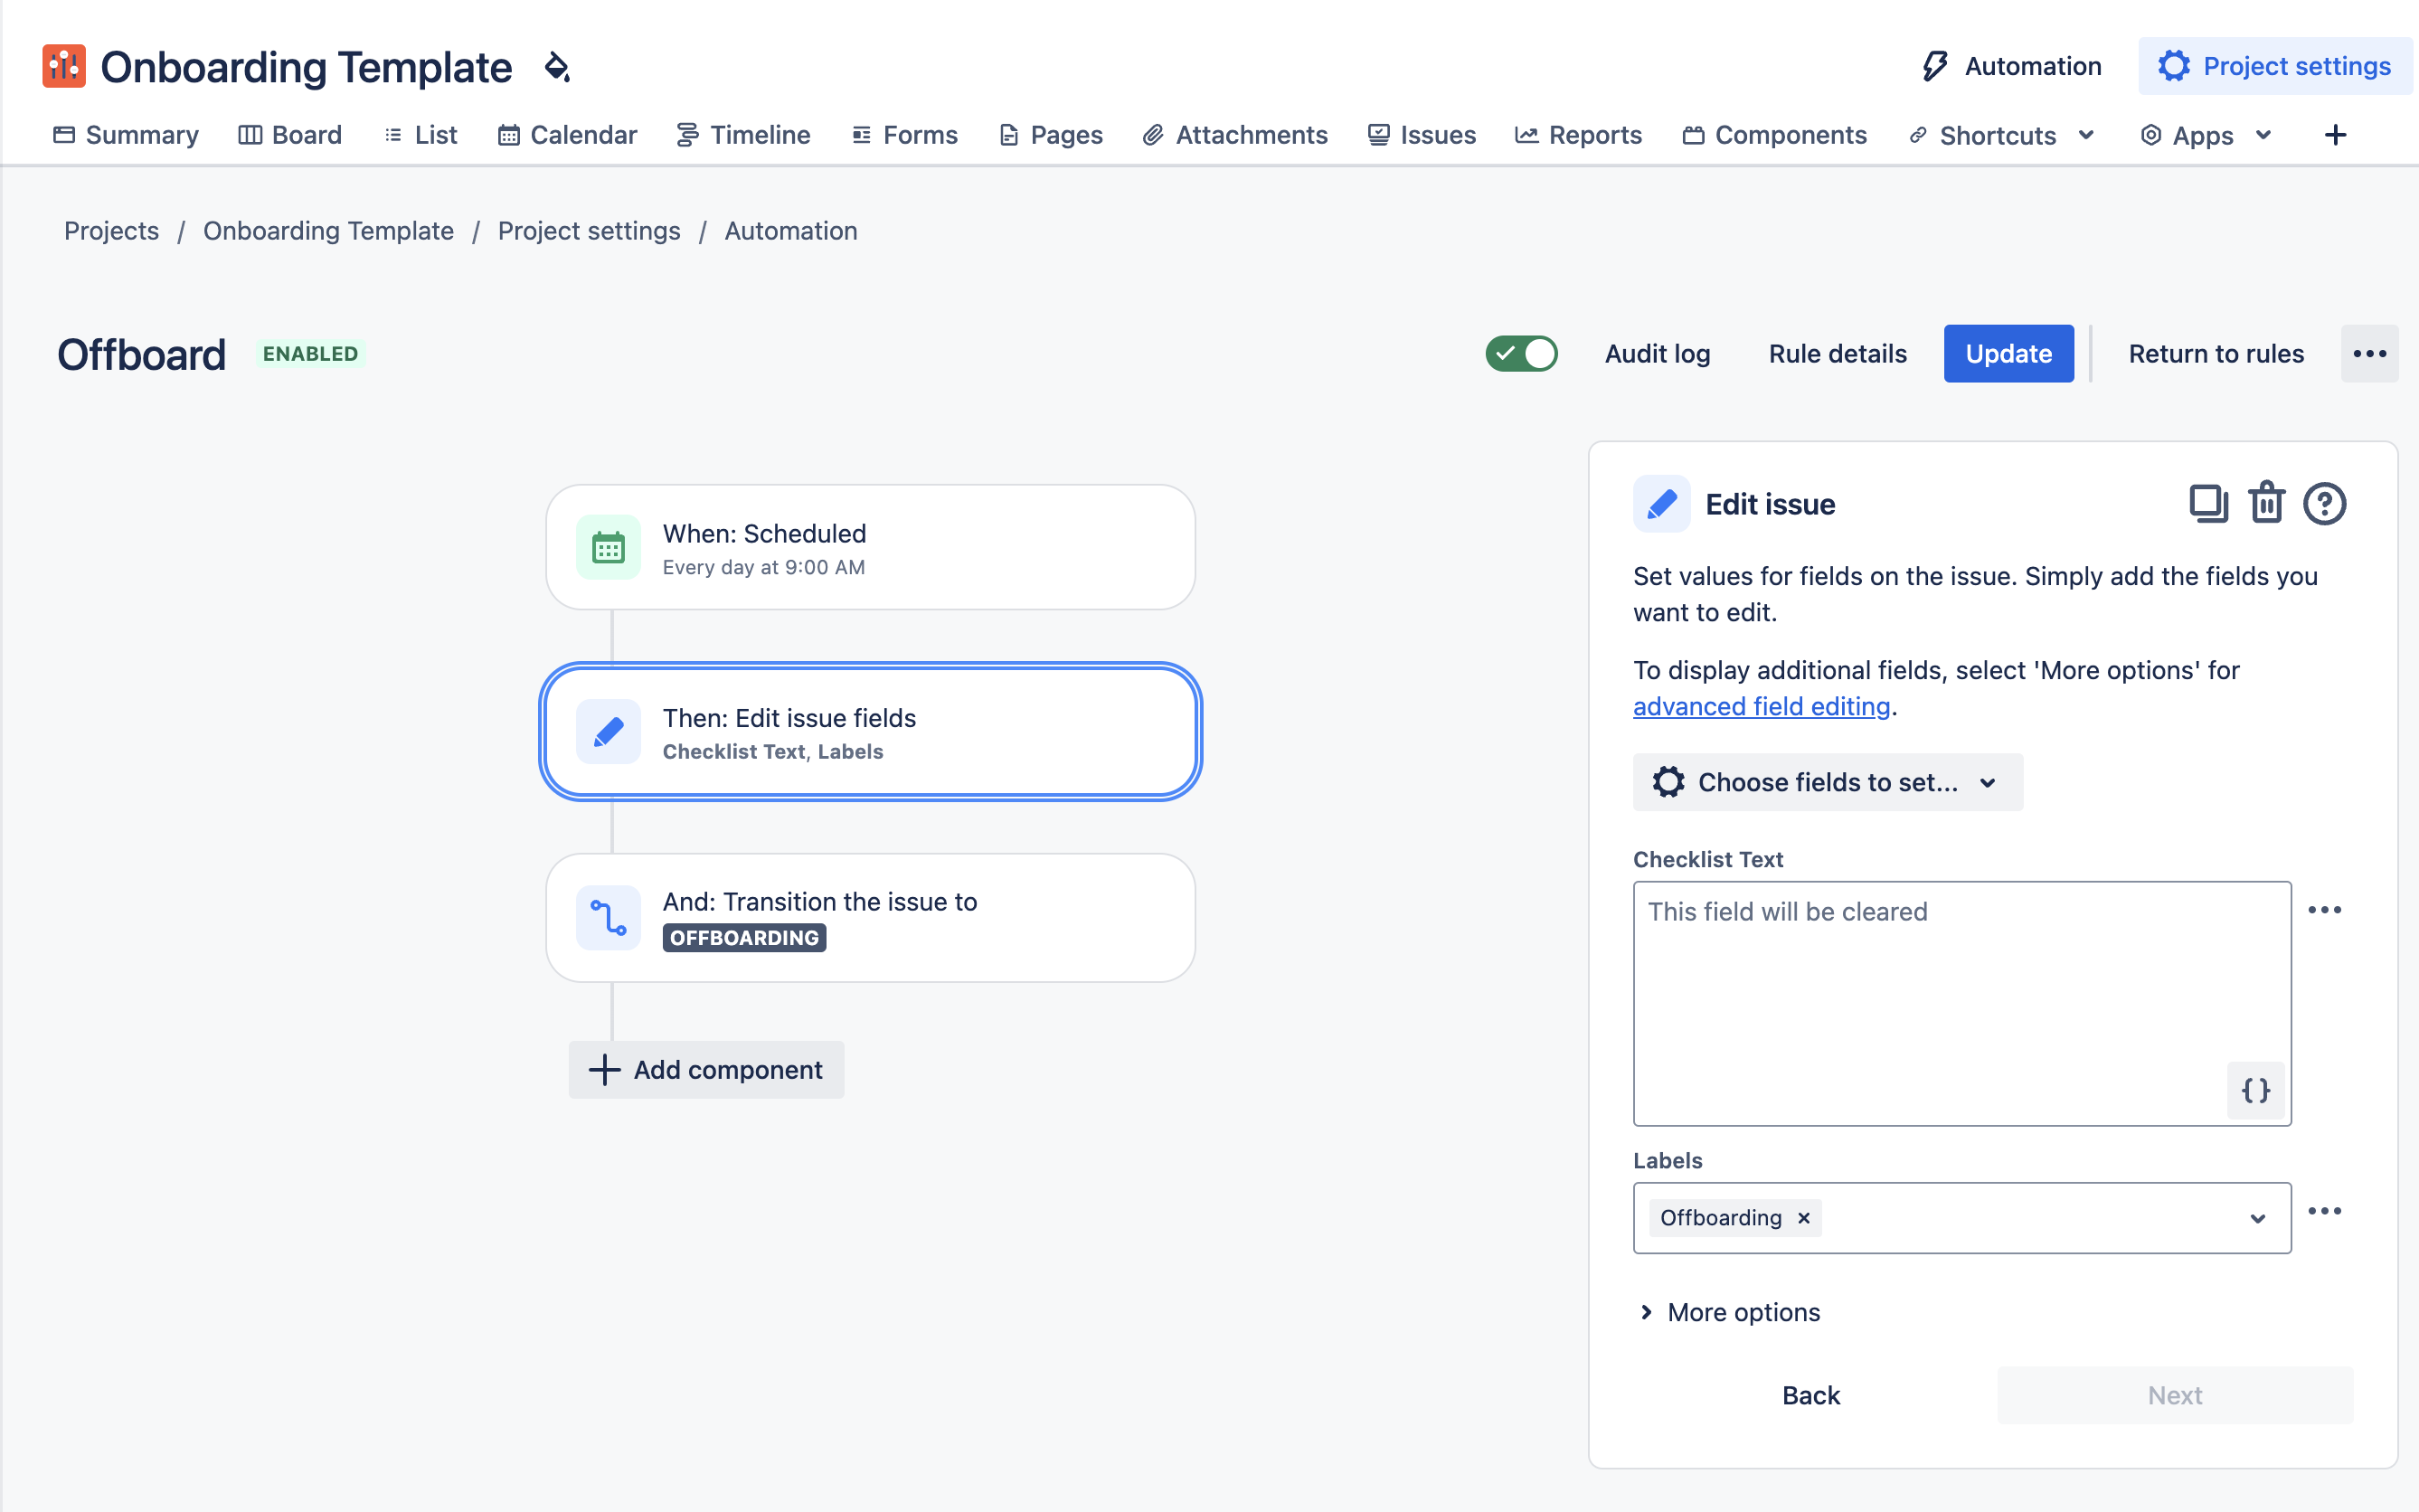
Click Edit work item and select the Checklist Text field.
Click Save. (This will clear the current local checklists from the work item.)
Click New action.
Click Edit work item and select Labels as the field to be edited.
Select or add the label that corresponds to the appropriate template (Offboarding).
Click Save.
Click New action.
Select Transition work item.
Select OFFBOARDING as the destination status.
Click Save.
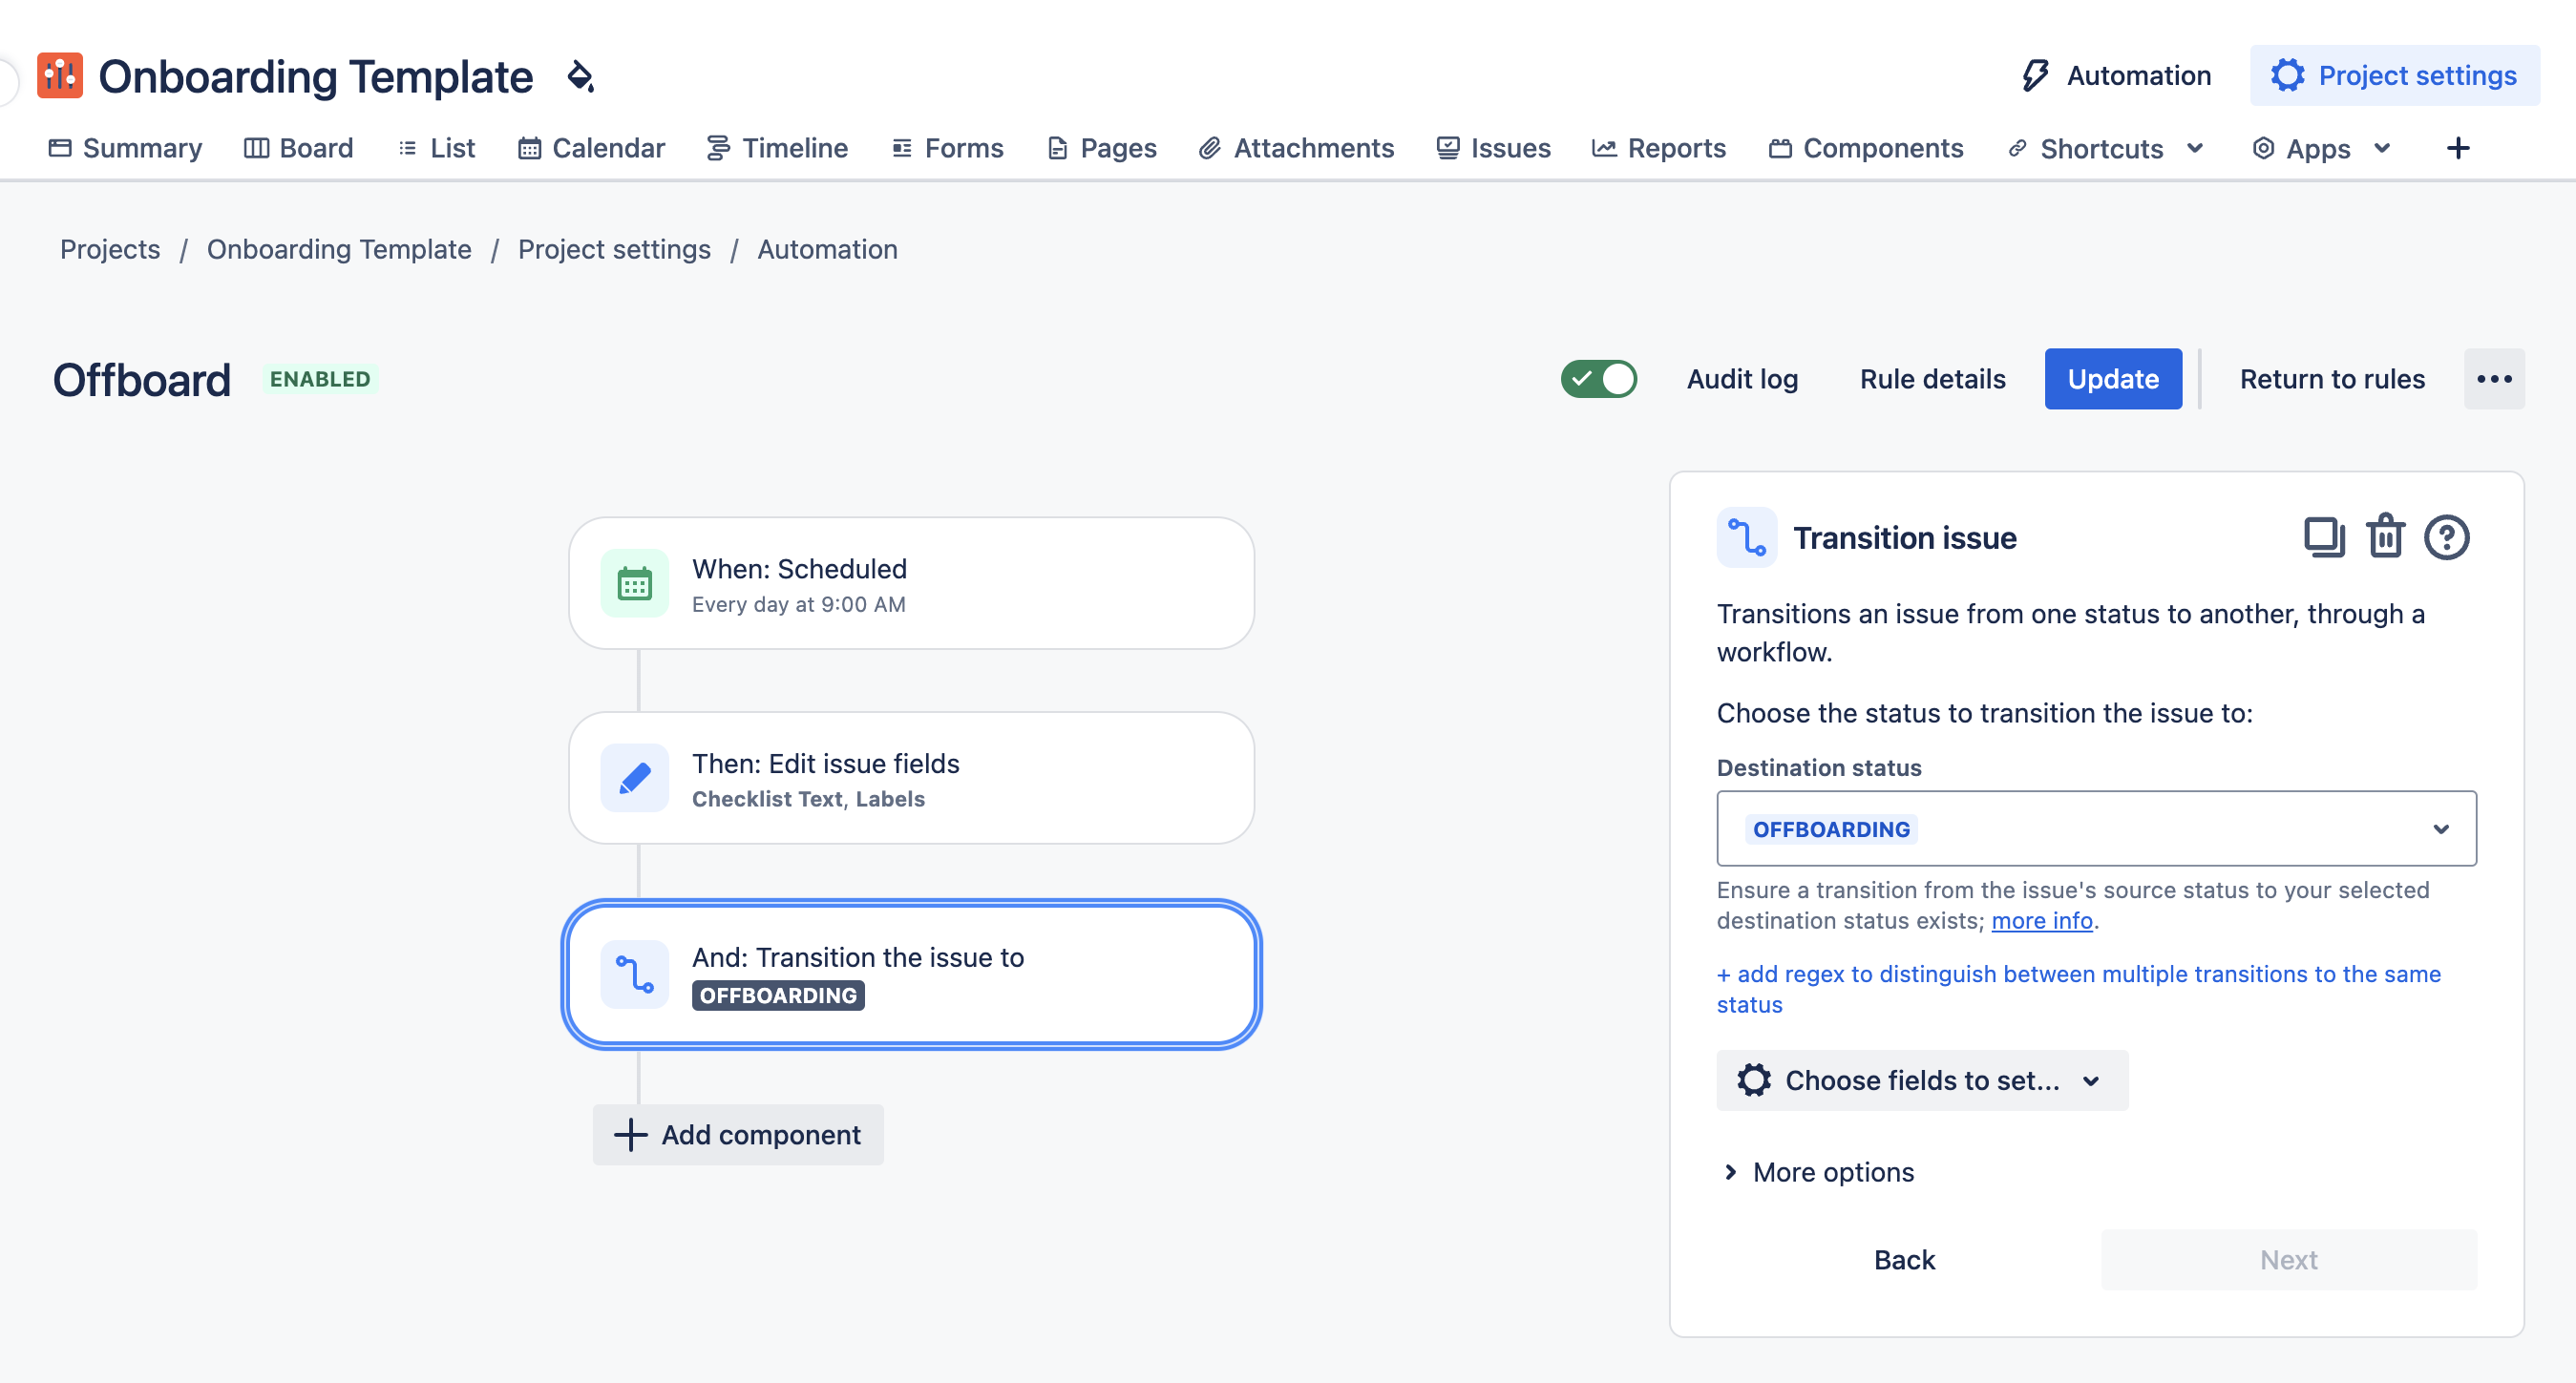
Optionally, you may want to add an additional action to set the Assignee or notify a member of the HR team.
Name the rule and click Turn it on.
To create the second rule:
Navigate to Space settings > Automation (or Jira Settings > System > Automation rules).
Click Create rule.
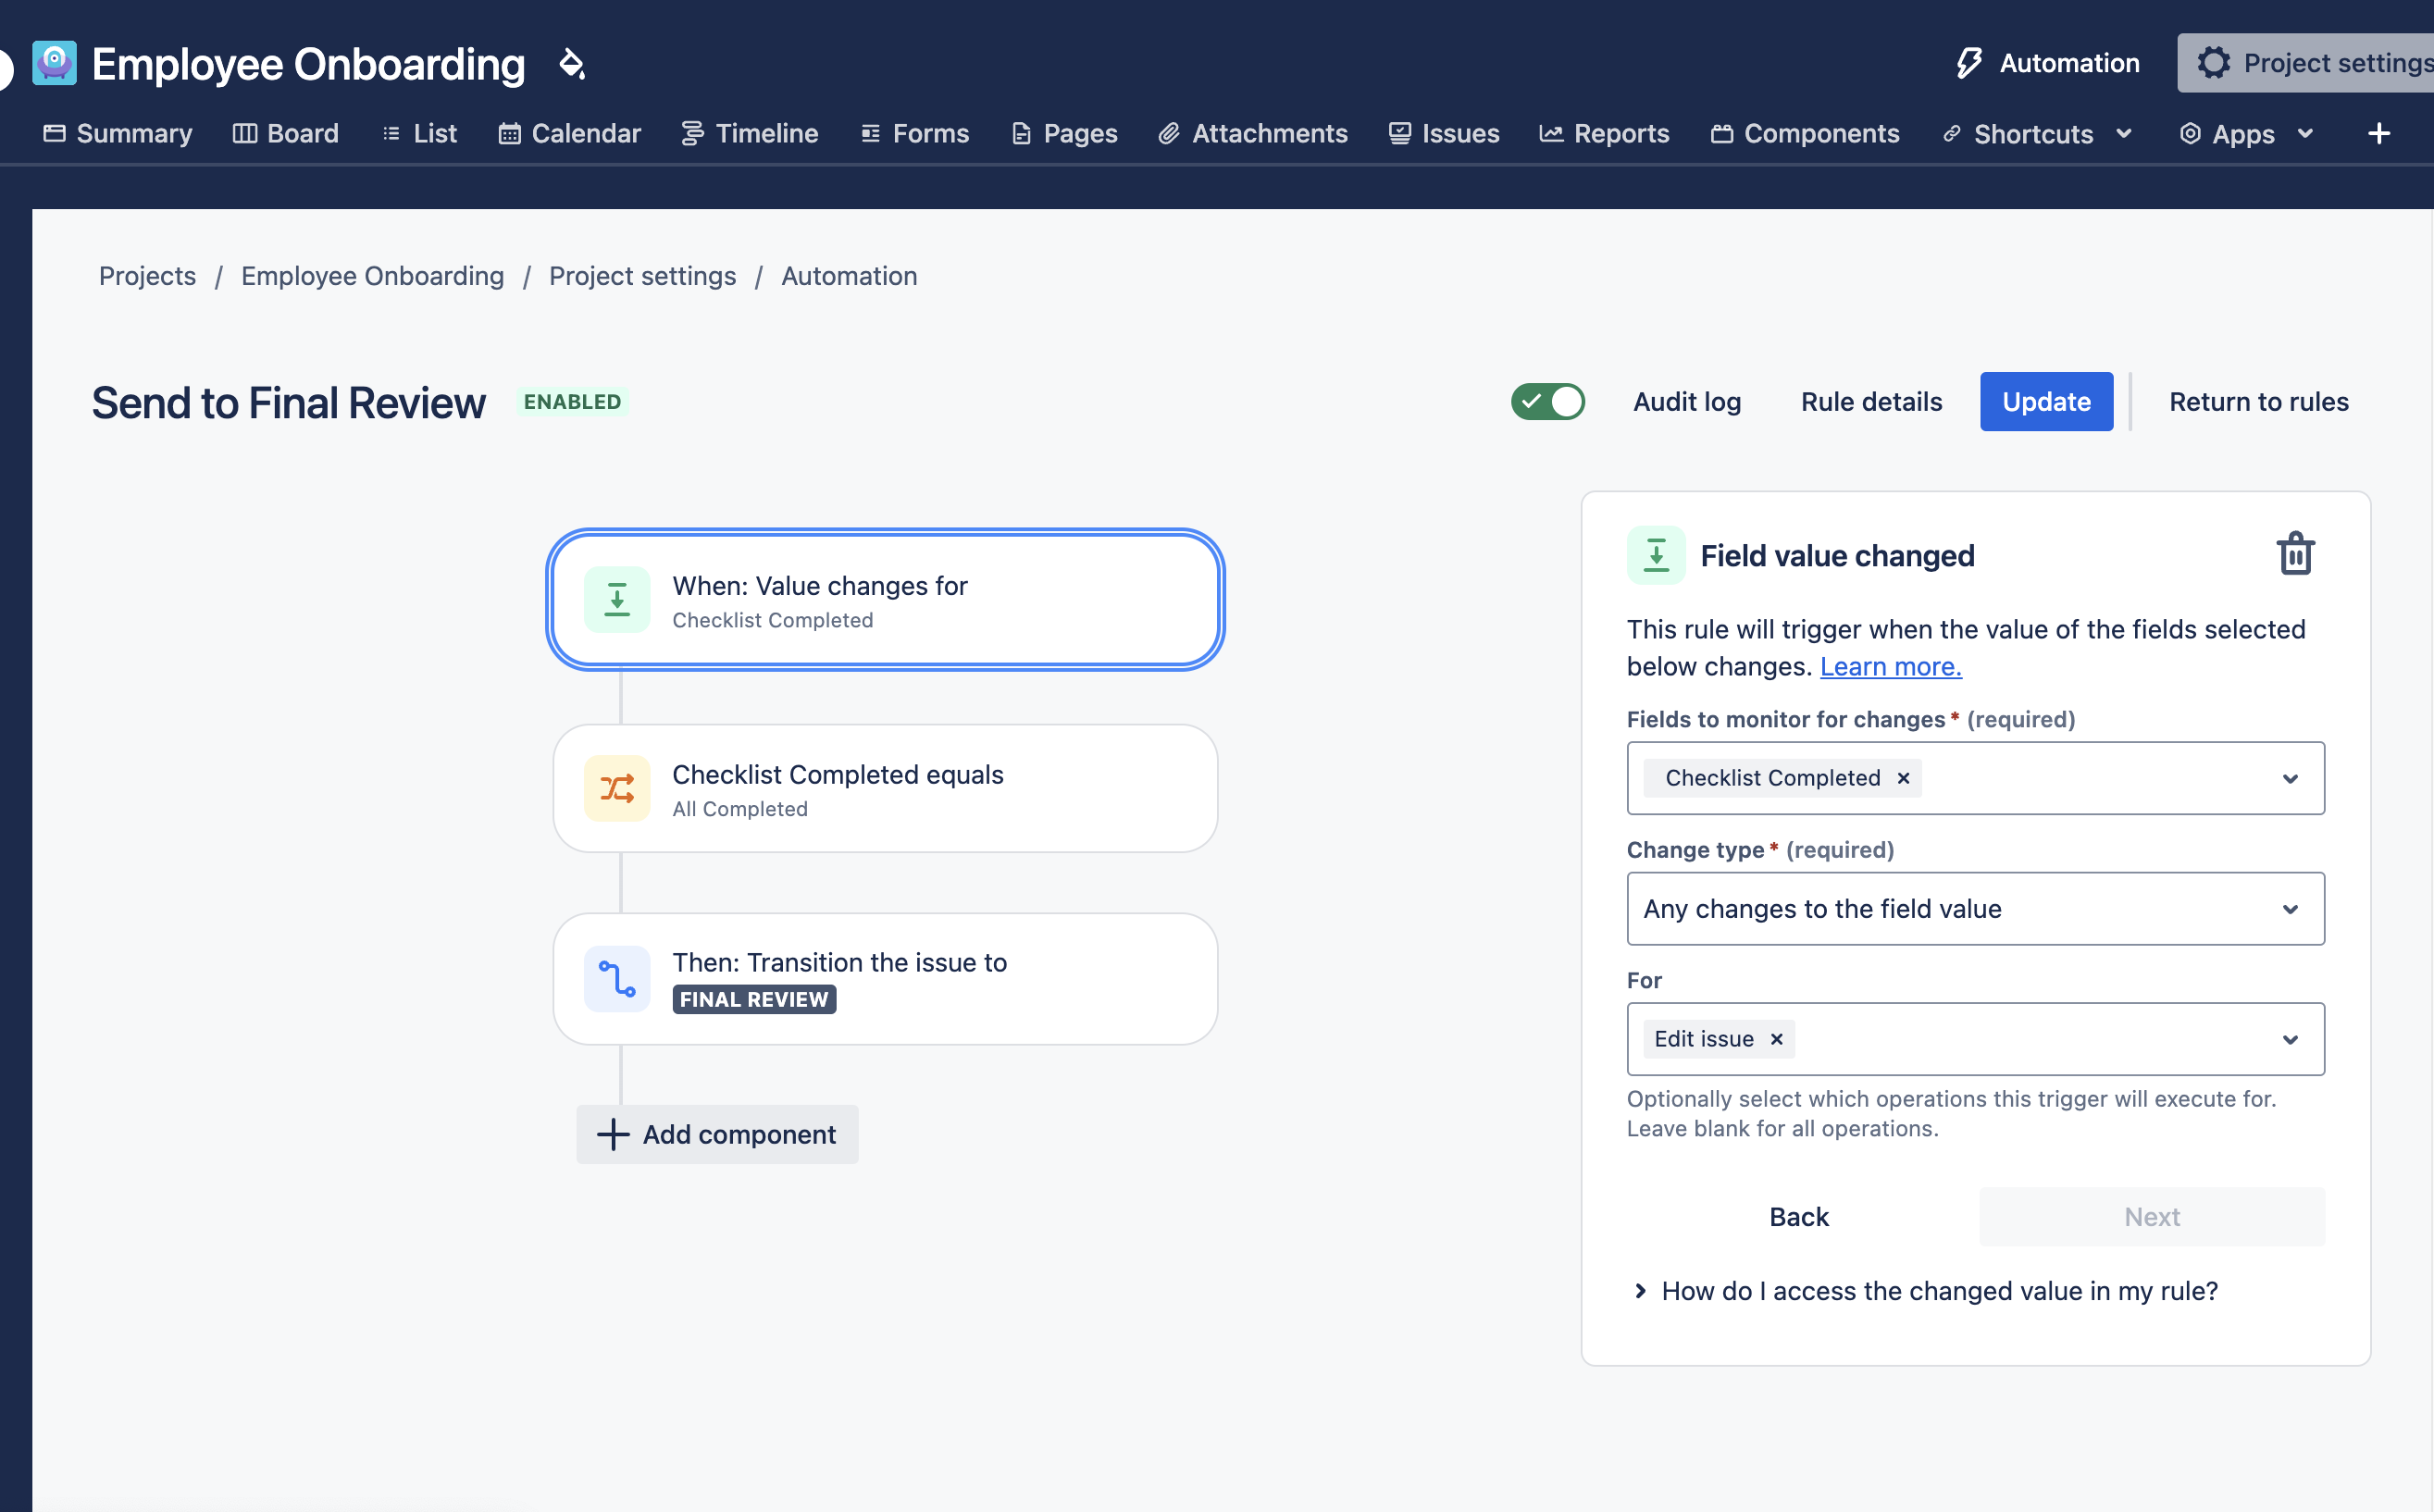
Select the Field value changed trigger.
Select
Checklist Completed in the Fields to monitor for changes dropdown
Any changes to the field value in the Change type dropdown
Edit work item in the For dropdown
Click Save.
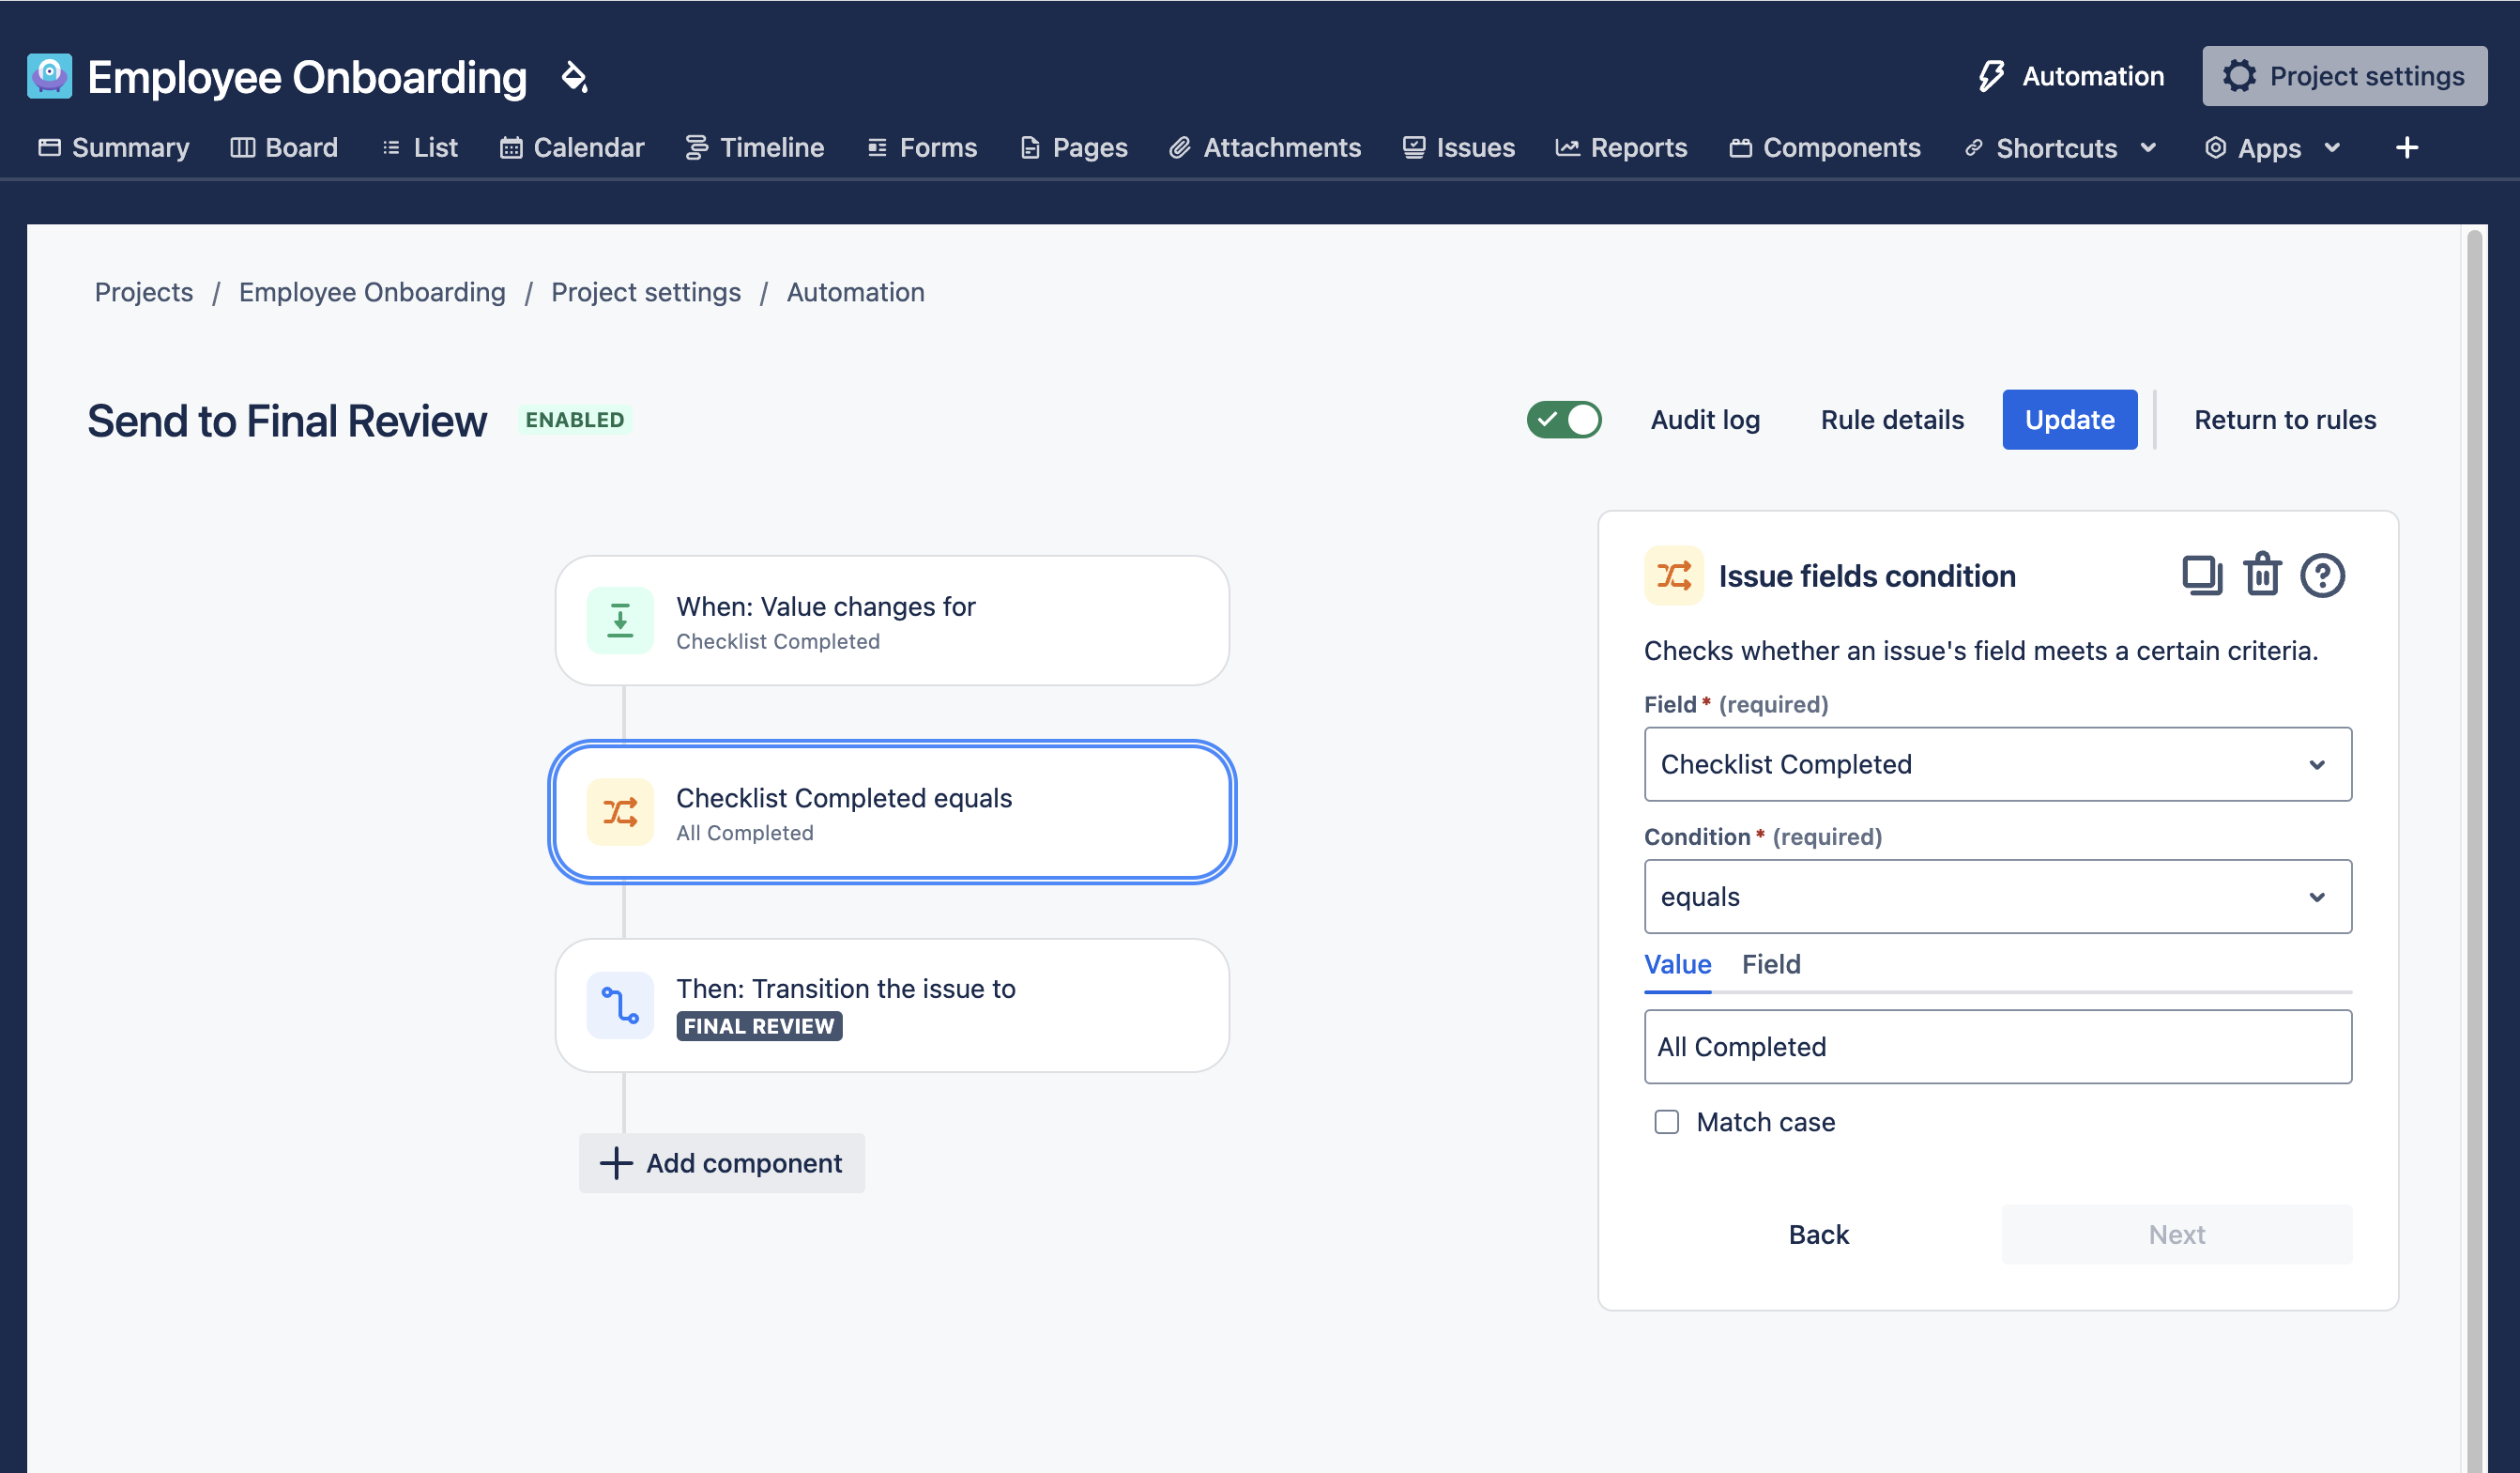
Click New condition and select work item fields condition.
Select Checklist Completed from the Fields dropdown
Select equals in the Condition dropdown
Type All Completed as the Value text box.
Click Save.
Click Add component and select New action.
Select Transition work item.
Select FINAL REVIEW as the destination status and click Save.
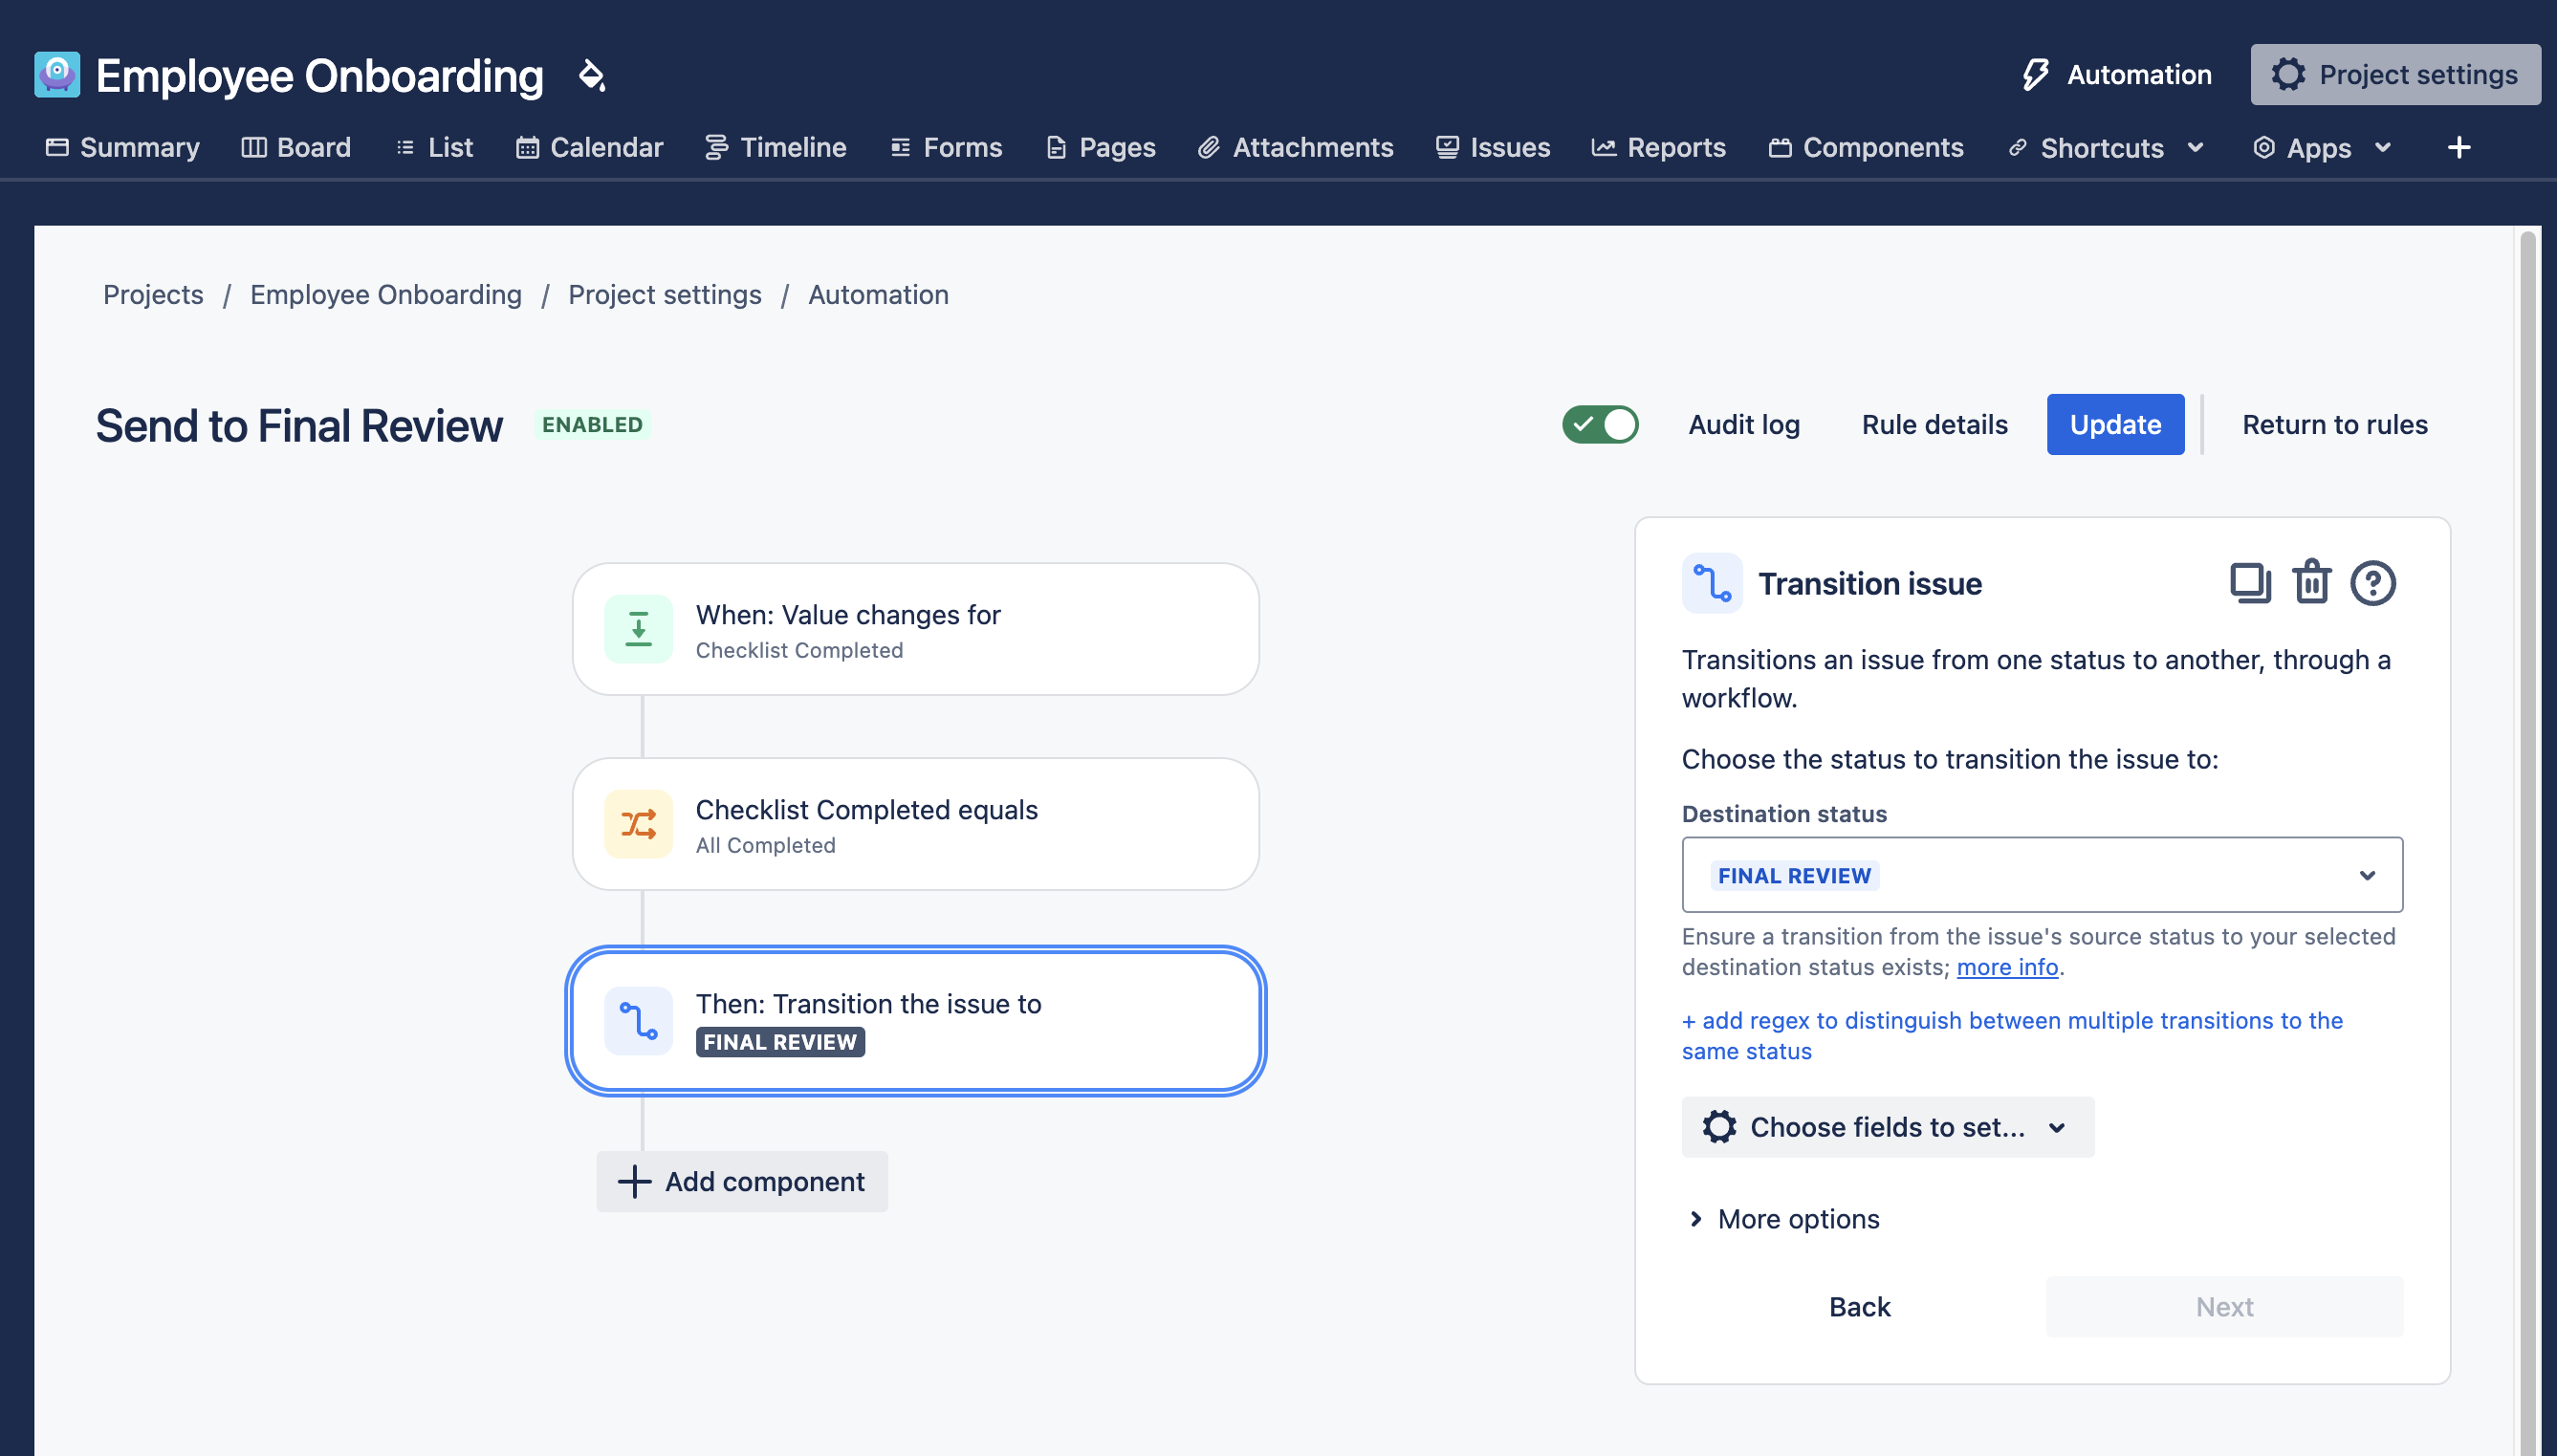
Optionally, you may want to add a second action to set the Assignee or notify a member of the HR team.
Name the rule and click Turn it on.
Work Item Life Cycle
The supervisor notifies HR that an employee is going to be leaving the organization.
HR sets the Due date field as the employee’s last day of employment.
The automation rule is triggered when the Due date is within two weeks of the current date.
The work item is transitioned to the OFFBOARDING status, the Offboarding checklist is automatically added to the work item (replacing the IT and Facilities Onboarding checklists) and appropriate team members are notified.
When the teams have completed the checklist items, the work item is automatically transitioned to FINAL REVIEW .
A member of the HR team reviews the work item, sees that all onboarding tasks have been completed and transitions the work item to OFFBOARDED .
