In addition to using timers, Clockwork allows users to create worklogs manually.
Creating Worklogs from a Work Item
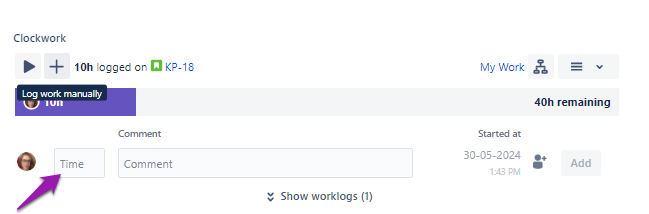
As an alternative to using timers, users can create worklogs manually by typing in the time, and optional comment in the Clockwork panel.
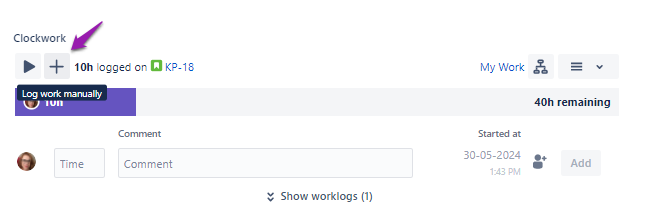
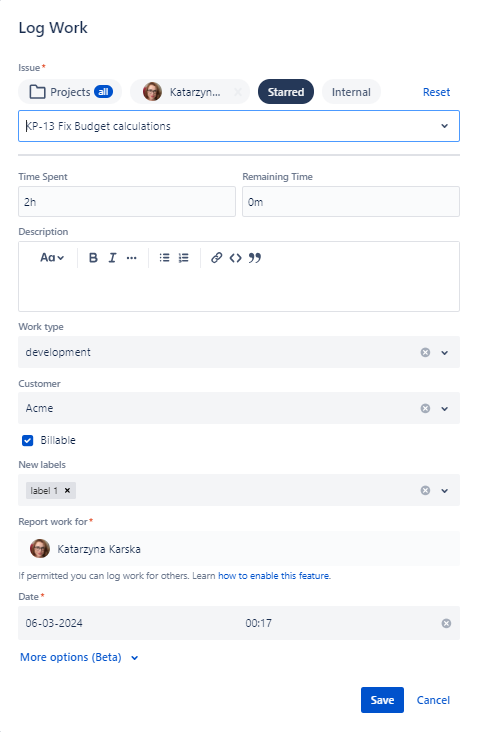
You can also click on the + button on the Clockwork UI, which opens a form with additional fields (description, worklog attributes, etc.) for recording the worklog.
Creating Worklogs from the Timesheet
From your Timesheet, you can add a new worklogs for existing work items, edit existing worklogs, or add worklogs for Jira work items that are not yet listed on the timesheet.
To Add a Worklog from an Existing Timesheet Entry
-
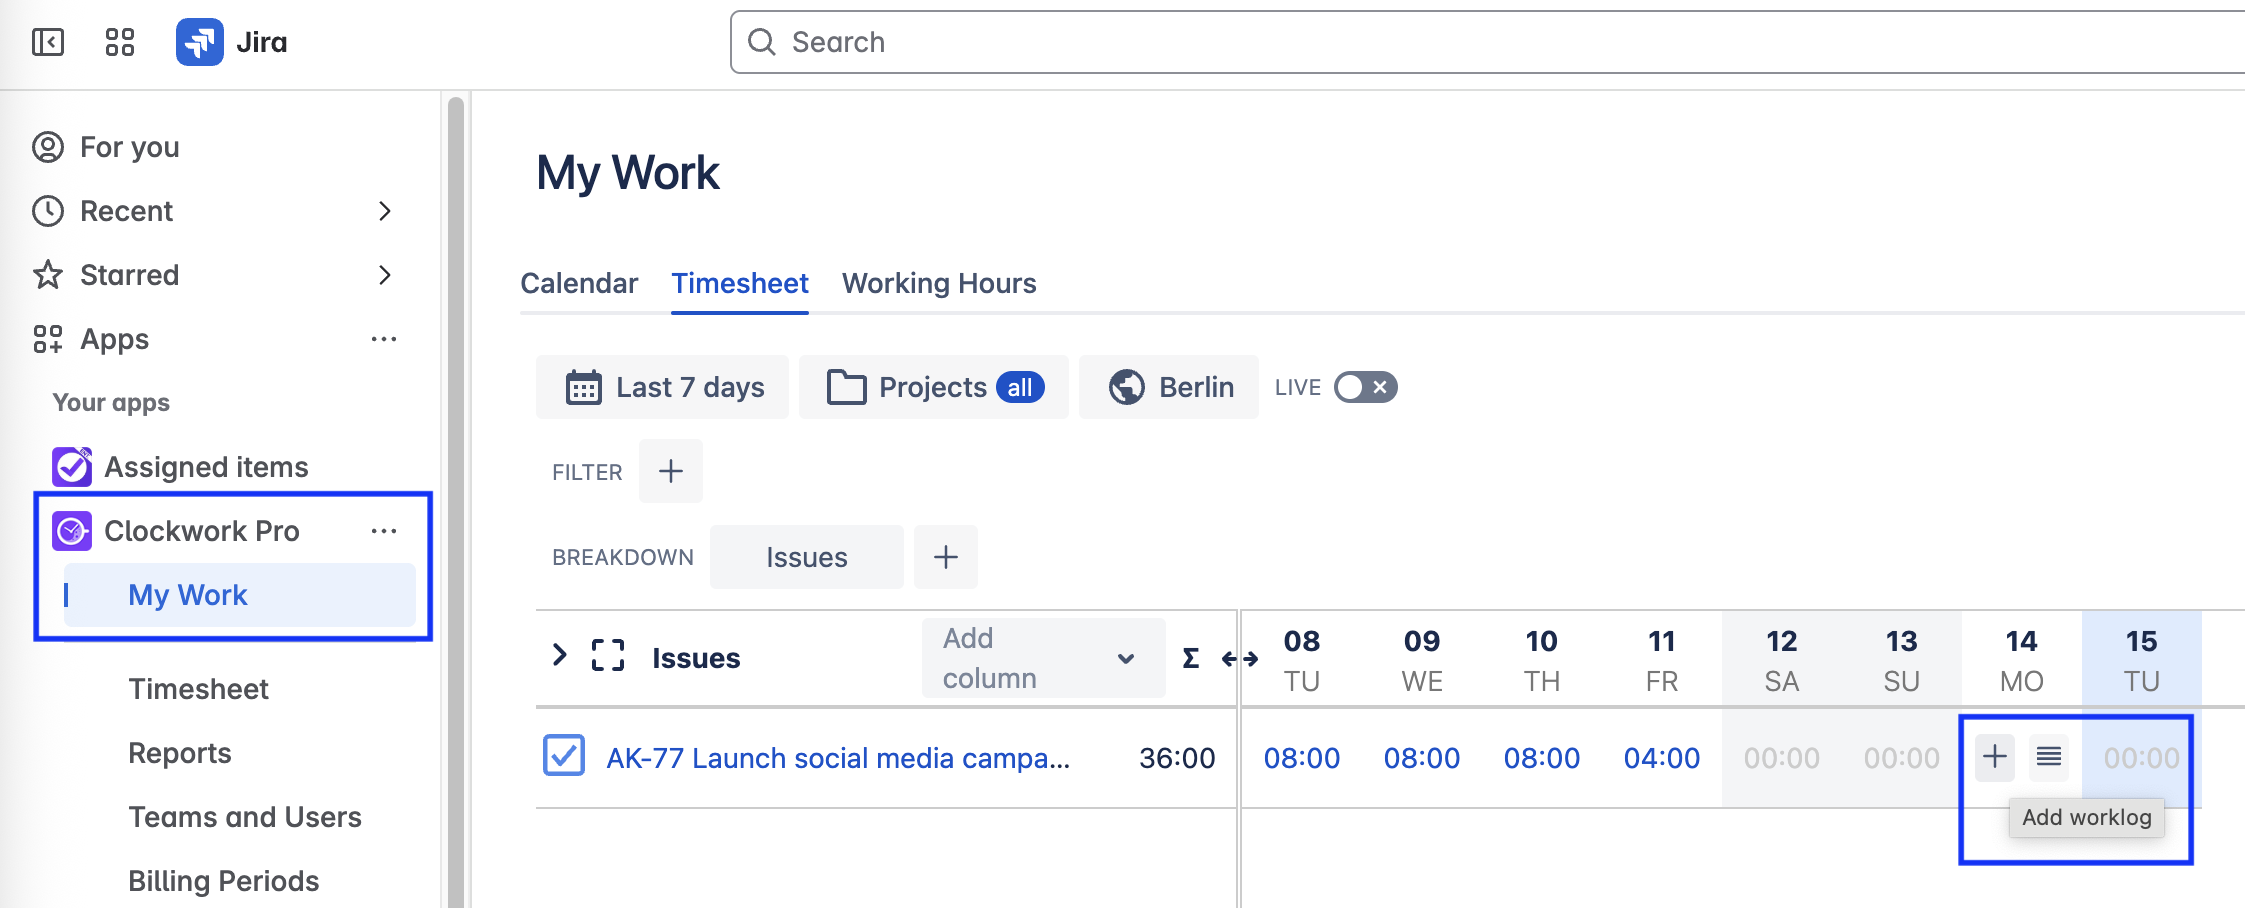
Navigate to Apps > Clockwork > My Work > Timesheet.
-
Navigate to the date you want to add the worklog to for the appropriate Jira work item.
-
Click on the + button.
-
The worklog dialog will pop up with the Jira work item will be already selected.
-
Enter the time worked and the other details (description, worklog attributes, etc.), if required.
-
Click Save.
To Edit an Existing Timesheet Entry
-
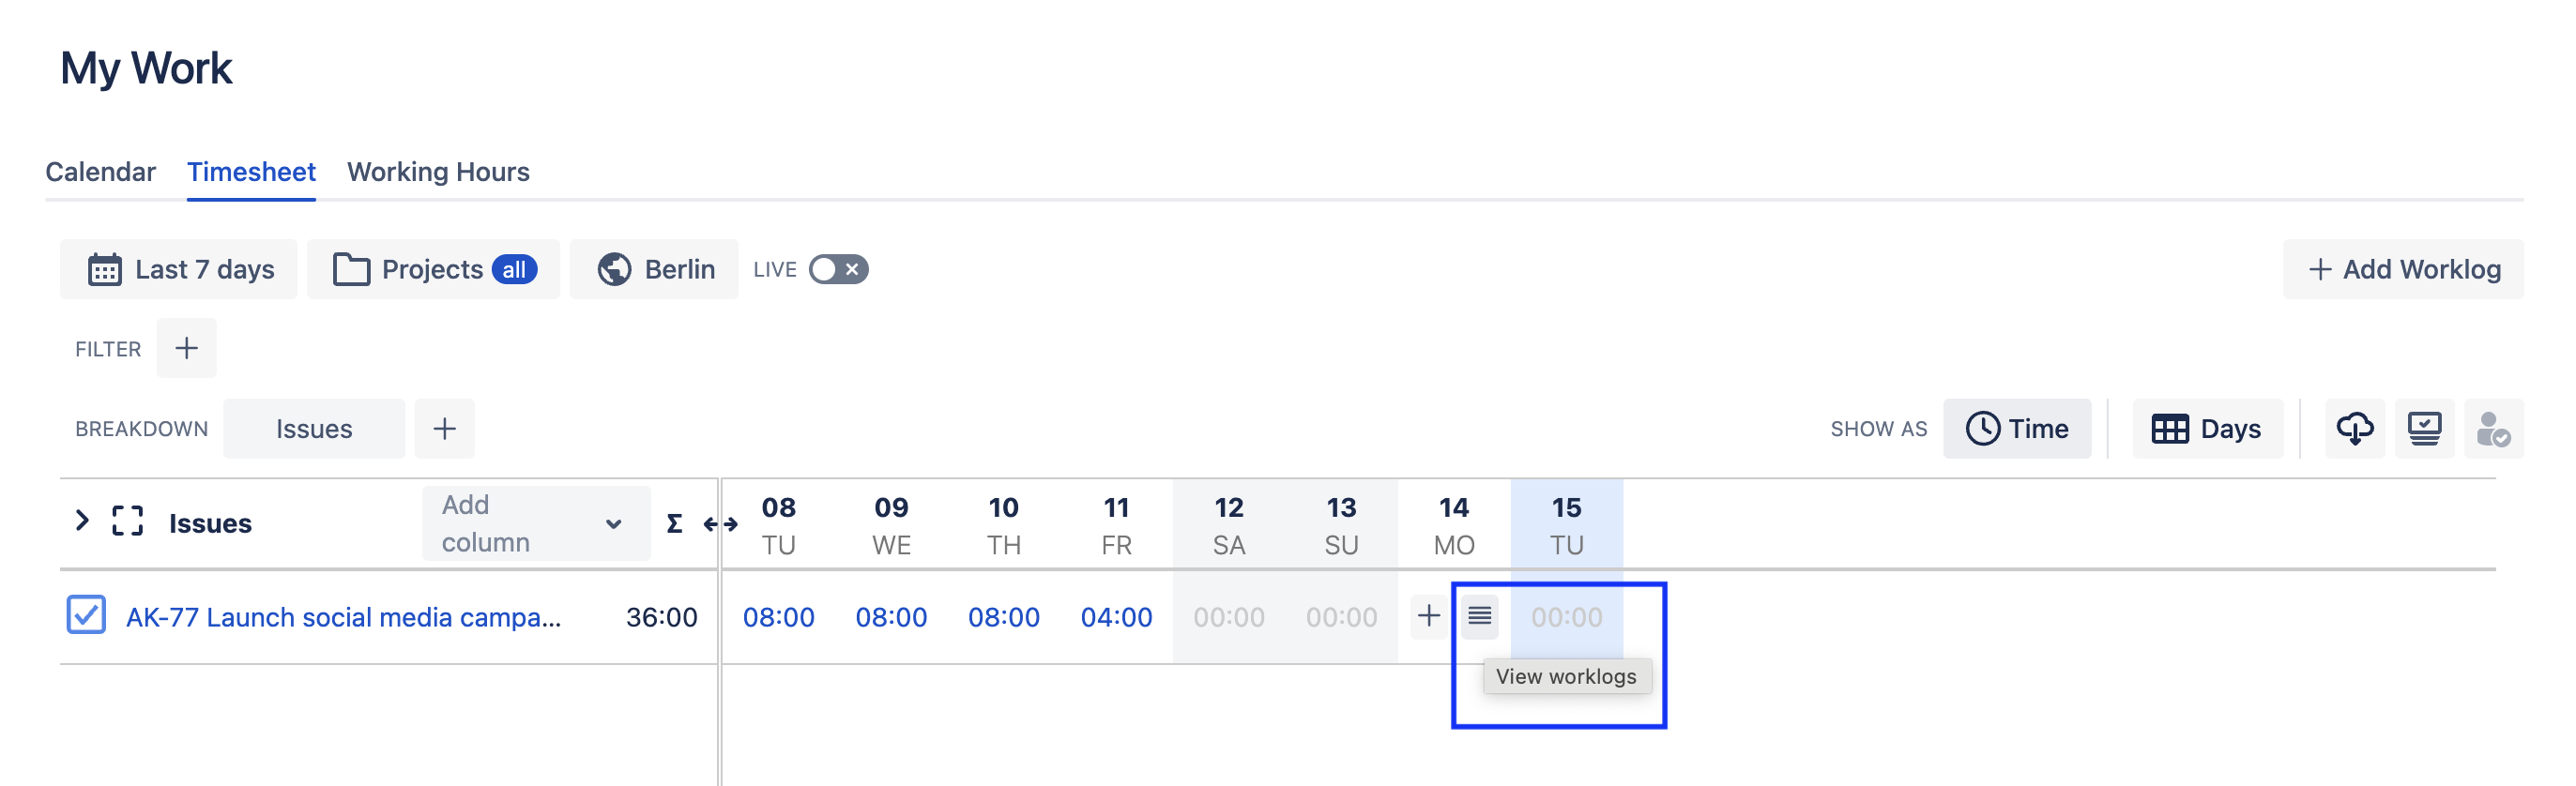
Navigate to Apps > Clockwork > My Work > Timesheet.
-
Navigate to the date you want to add the worklog you want to edit.
-
Click on button with horizontal lines to open a list of the work item’s worklogs for that day.
-
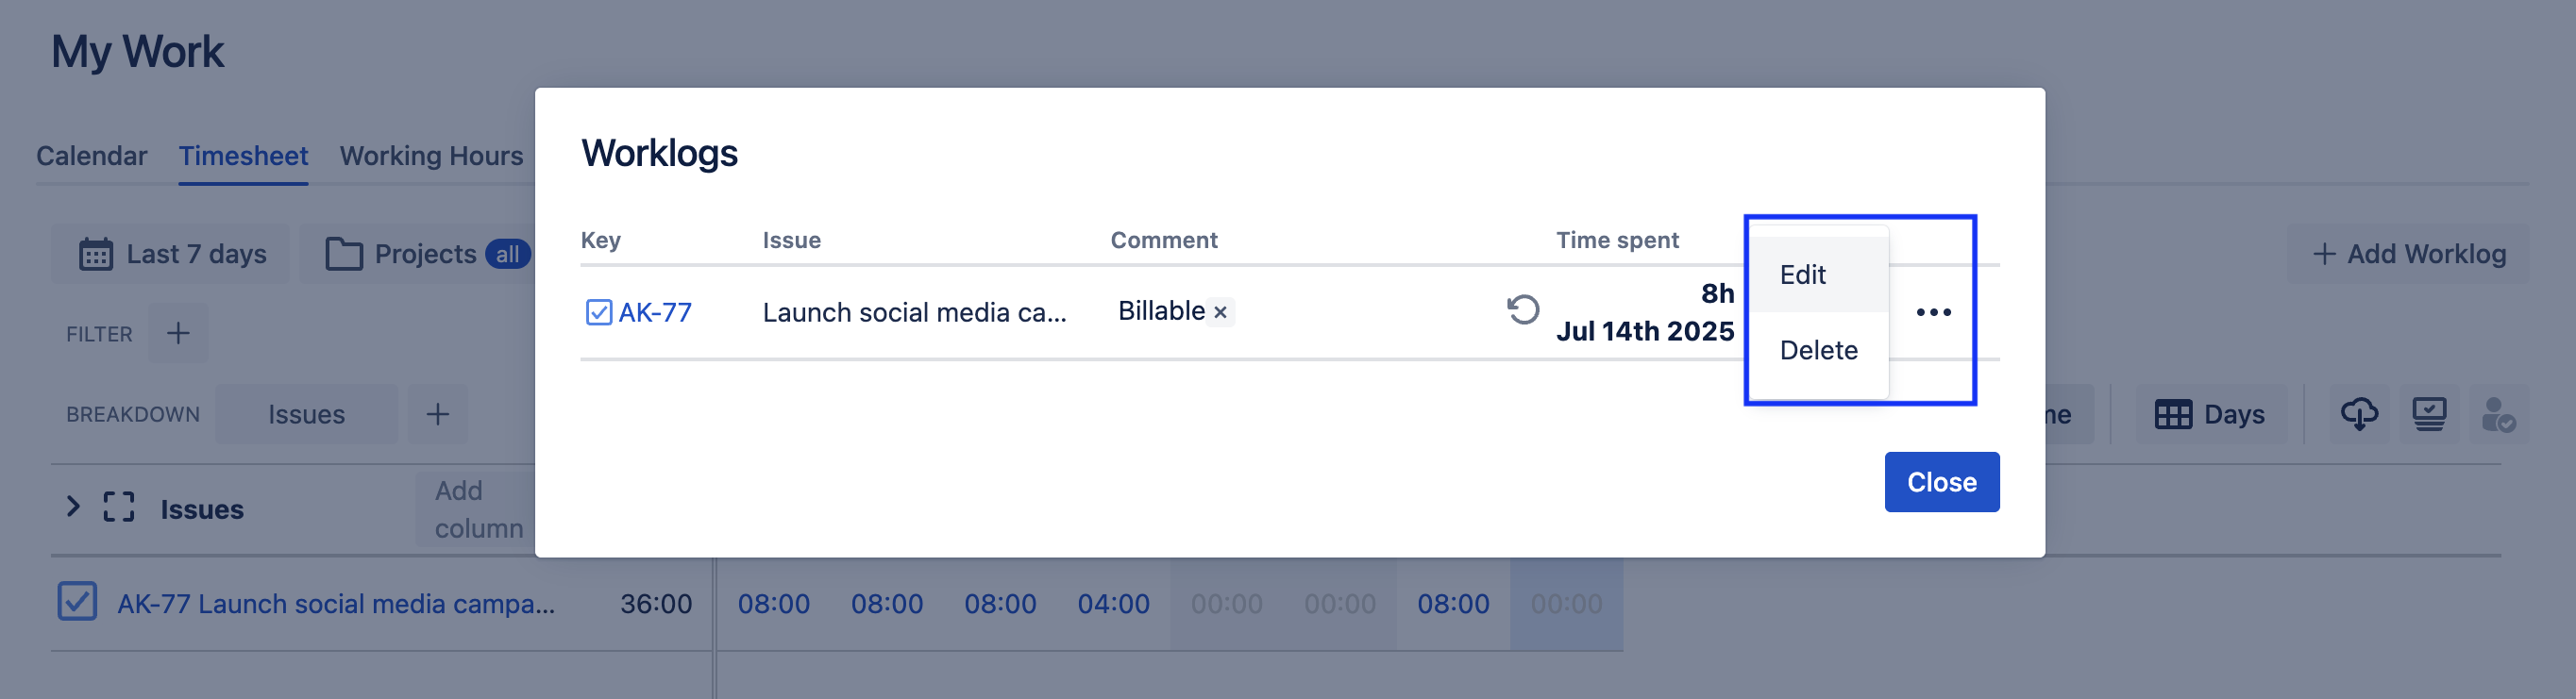
Select the worklog you want to modify and click on the … menu.
-
Select Edit.
-
Make the edits and click Save.
To Add a Worklog for an Item that Is Not on the Timesheet
-
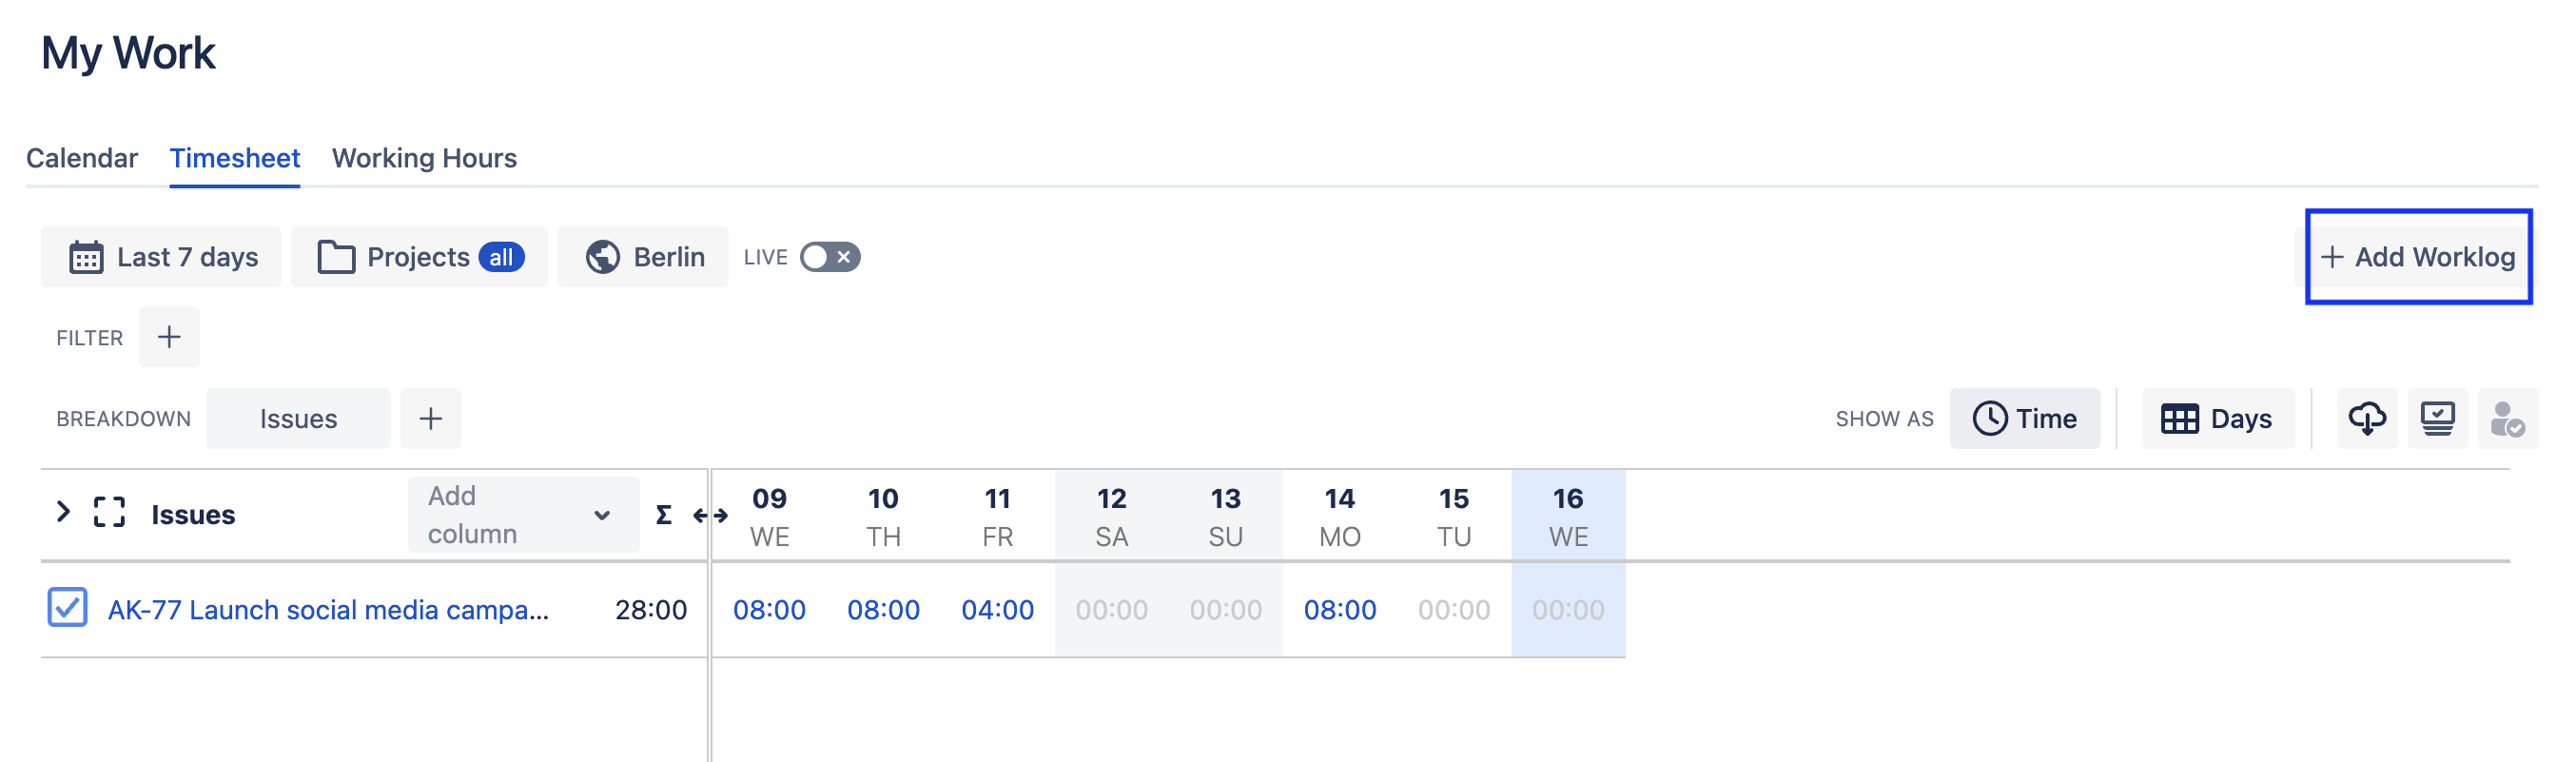
Navigate to Apps > Clockwork > My Work > Timesheet.
-
Click on the Add Worklog button in the upper right corner.
-
Use the dropdown to find the Jira work item, or begin typing the work item Summary. In Clockwork Pro, you can also use the filter buttons (Spaces, Starred, Internal) to narrow your search.
-
Add additional details (description, worklog attributes, etc.) in the dialog and Save.
Creating Worklogs from the Calendar
Calendar features are limited in Clockwork Lite. Upgrade to the Pro version to enjoy:
-
Copying/pasting worklogs
-
Repeatable worklogs
-
Calendar integrations (Google and Outlook)
-
Drag and drop editing
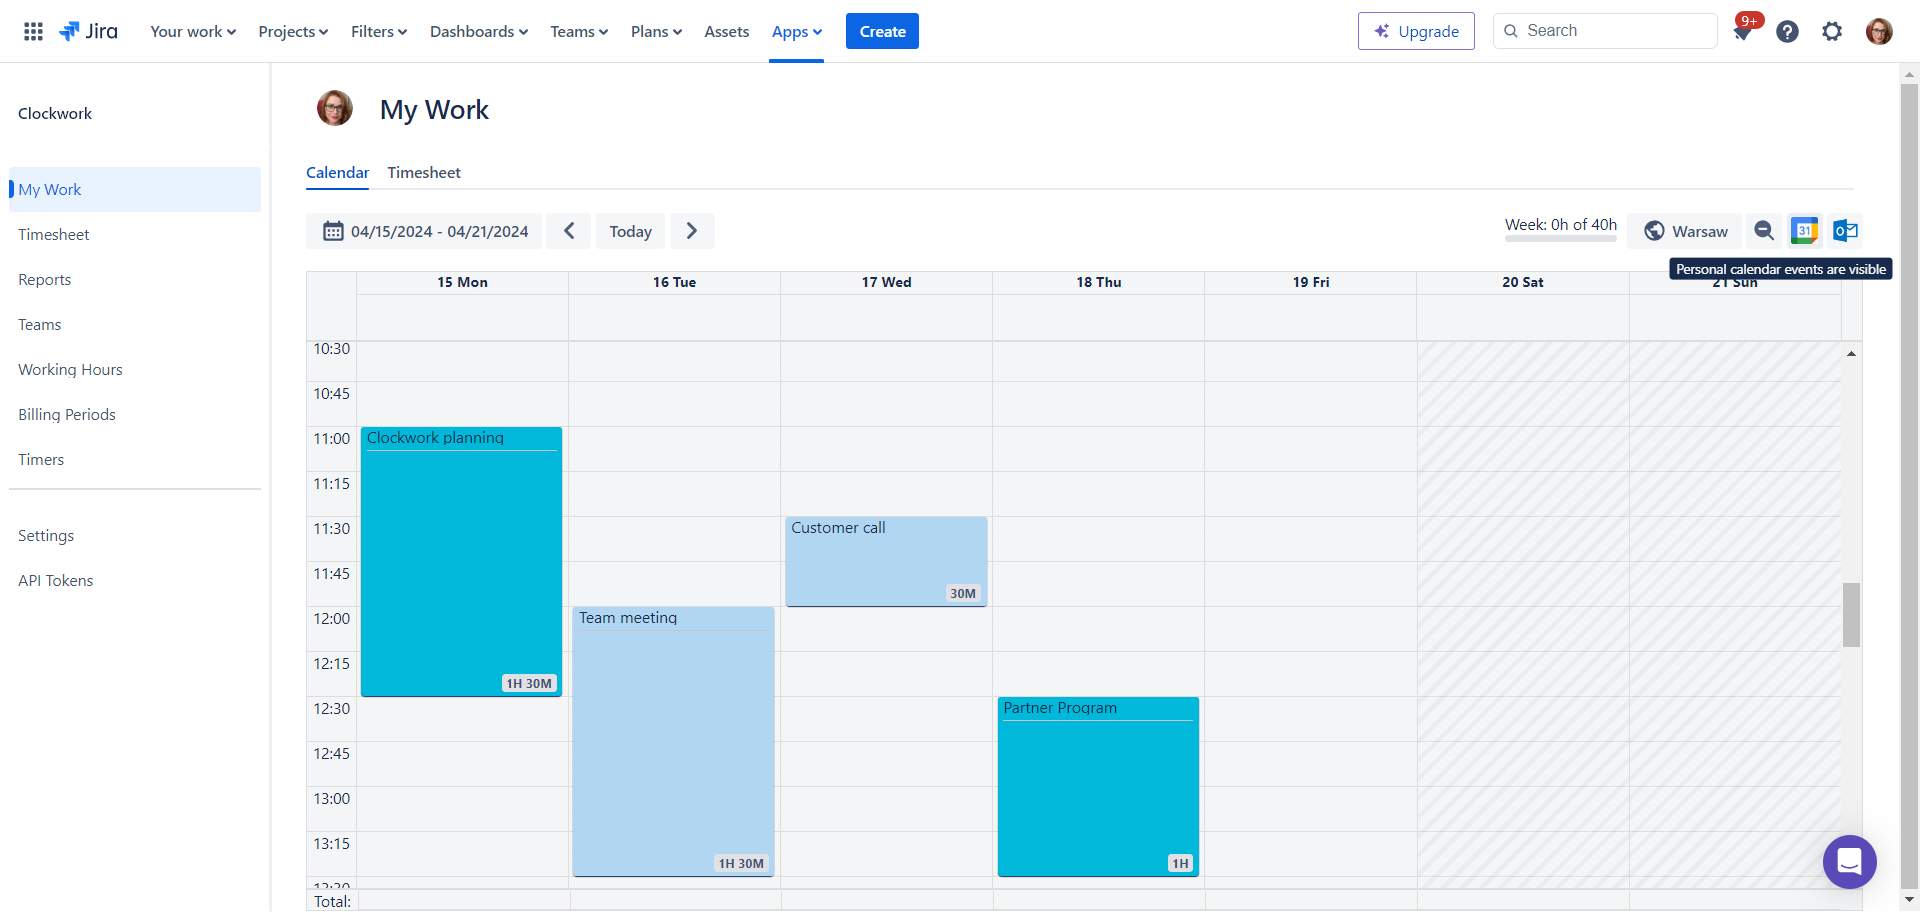
Create a New Worklog from the Calendar View
You can create worklogs directly from the Calendar View:
-
Navigate to Apps > Clockwork > My Work and select the Calendar tab.
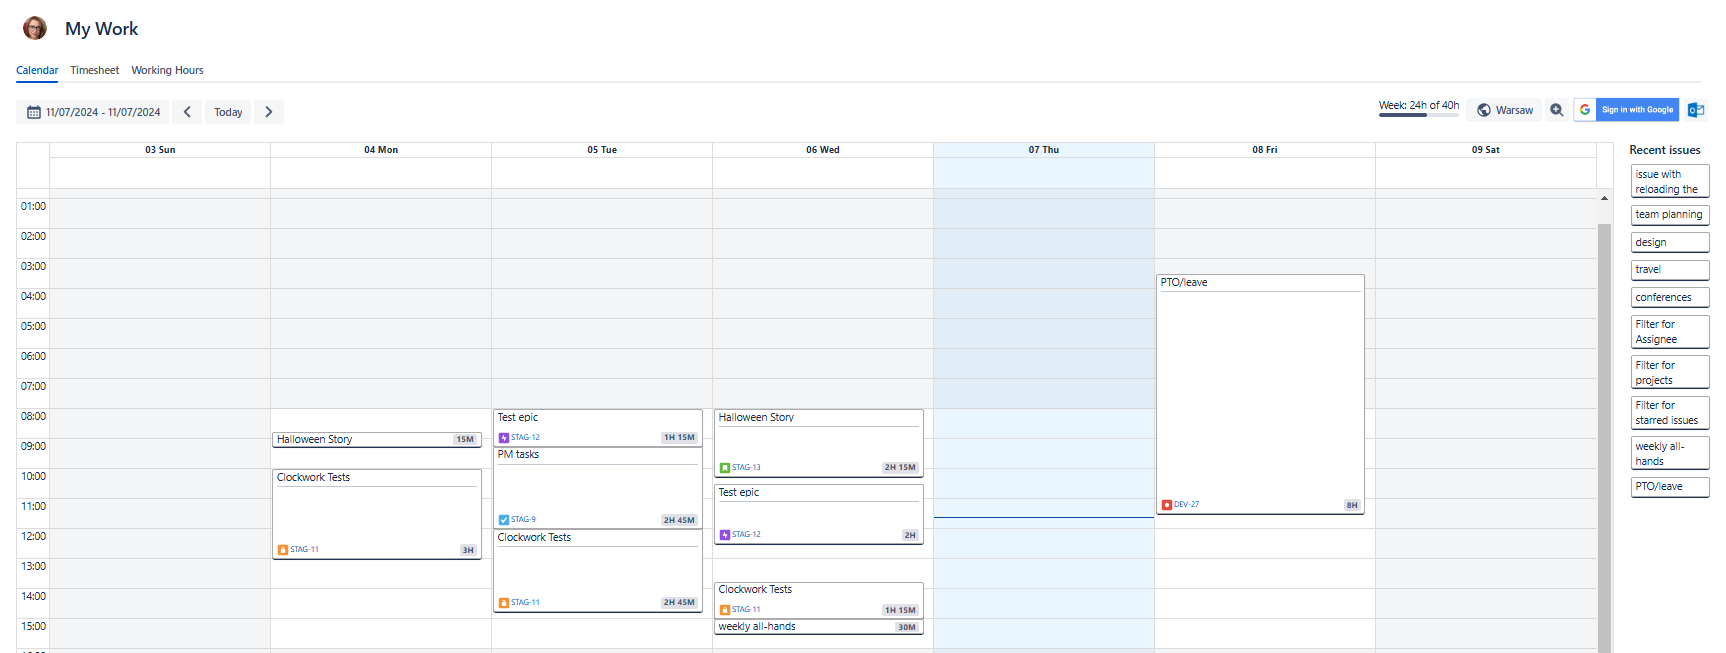
-
Click and drag on the appropriate date/time slot to create the worklog.
-
Use the dropdown to find the Jira work item, or begin typing the work item Summary. In Clockwork Pro, you can also use the filter buttons (Spaces, Starred, Internal) to narrow your search.
-
Enter additional details (description, worklog attributes, etc.) in the dialog and click Save.
Create a Worklog for a Recent Work Item
This feature is only available in Clockwork Pro.
-
Navigate to Apps > Clockwork > My Work and select the Calendar tab.
-
Drag the Jira work item from the list of Recent items to the appropriate date/time slot.
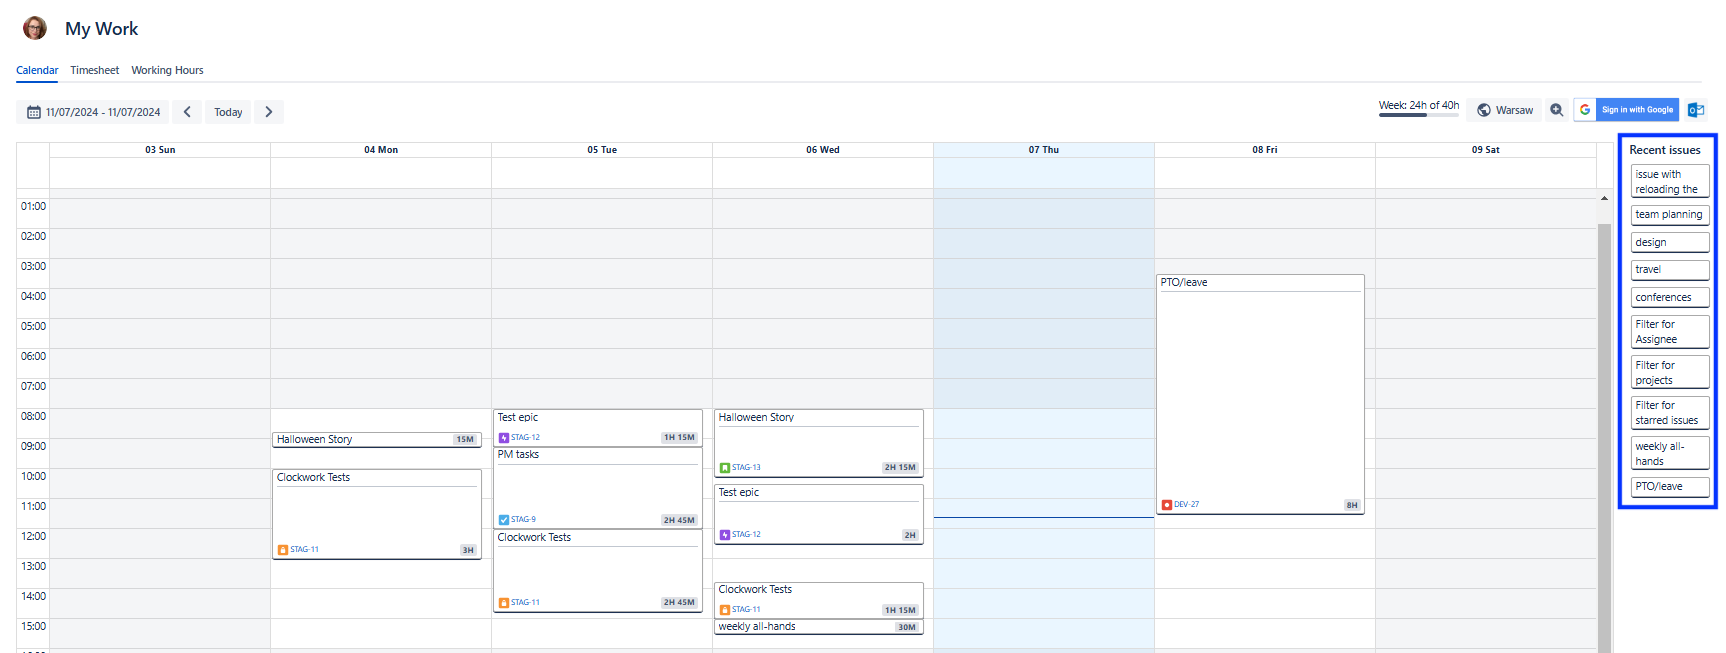
-
Enter additional details (description, worklog attributes, etc.) in the dialog and click Save.
Edit a Worklog from the Calendar View
These feature is only available in Clockwork Pro.
The calendar view also provides various editing options. You can:
-
Drag and drop a worklog to edit the date/time
-
Start or stop timers on work items
-
Delete worklogs
-
Edit existing worklogs
-
Copy worklogs
To Use Drag and Drop Editing
-
To change the date/time slot of a worklog, drag it and drop it in the appropriate time slot.
-
You can also adjust the start/stop times of a worklog by dragging the worklog border.
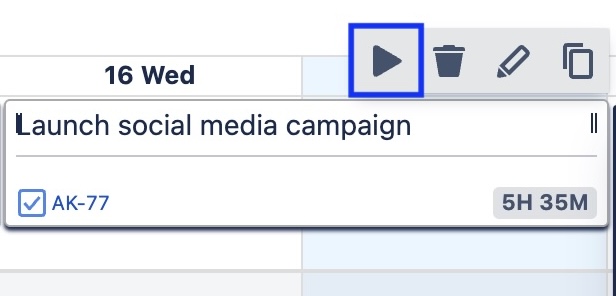
To Start / Stop a Timer on an Item with an Existing Worklog
You can start new timers on Jira items that already have worklogs in the Calendar. A new worklog for the Item will be created.
-
Click onto the worklog.
-
Click on the Arrow icon.
-
A new timer will start. Work items with currently running timers are indicated by a dotted line.

-
You can stop the timer from the Calendar view or from the Jira work item.
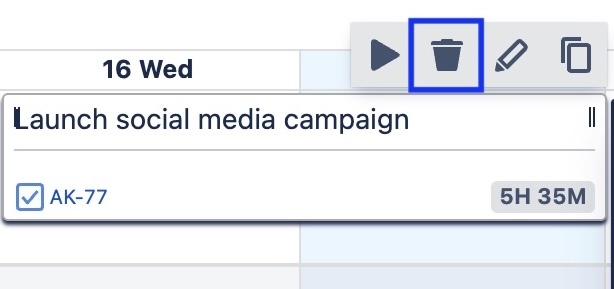
To Delete an Existing Worklog
-
Click onto the worklog.
-
Click on the Trash icon.
-
Click Delete.
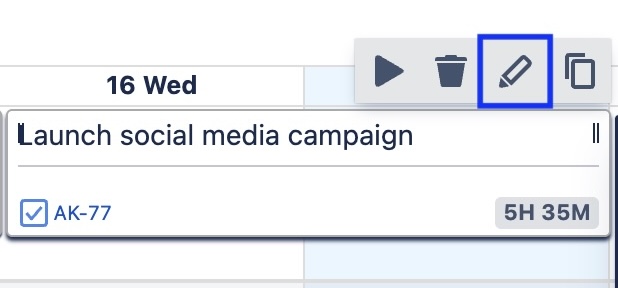
To Edit an Existing Worklog
-
Click onto the worklog.
-
Click on the Pencil icon.
-
Make the appropriate edits and click Save.
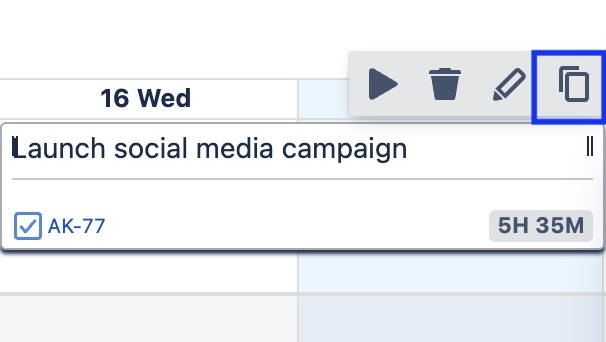
To Copy a Worklog
-
Click onto the existing worklog.
-
Click on the Copy icon.
-
A copy of the worklog will be created. Drag the new worklog to the appropriate date/time slot.
Google Calendar Integration
This feature is only available in Clockwork Pro.
You can integrate your Google Calendar with Clockwork to show scheduled events on the calendar view of your Clockwork timesheet.
-
To create a worklog, navigate to Apps > Clockwork > My Work and select the Calendar tab.
-
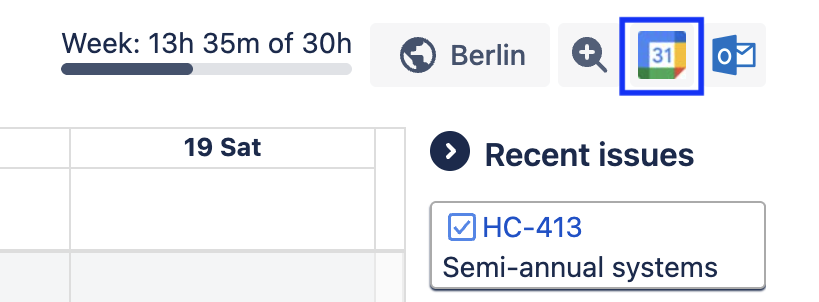
Click on the Google Calendar icon in the upper right corner to sign in with Google .
-
You will see a pop-up from Google stating that clockwork.report wants to access your Google calendar. Click the checkbox for View events on all your calendars.
-
The icon will be colored when events are shown, and grayscale when events are hidden.
-
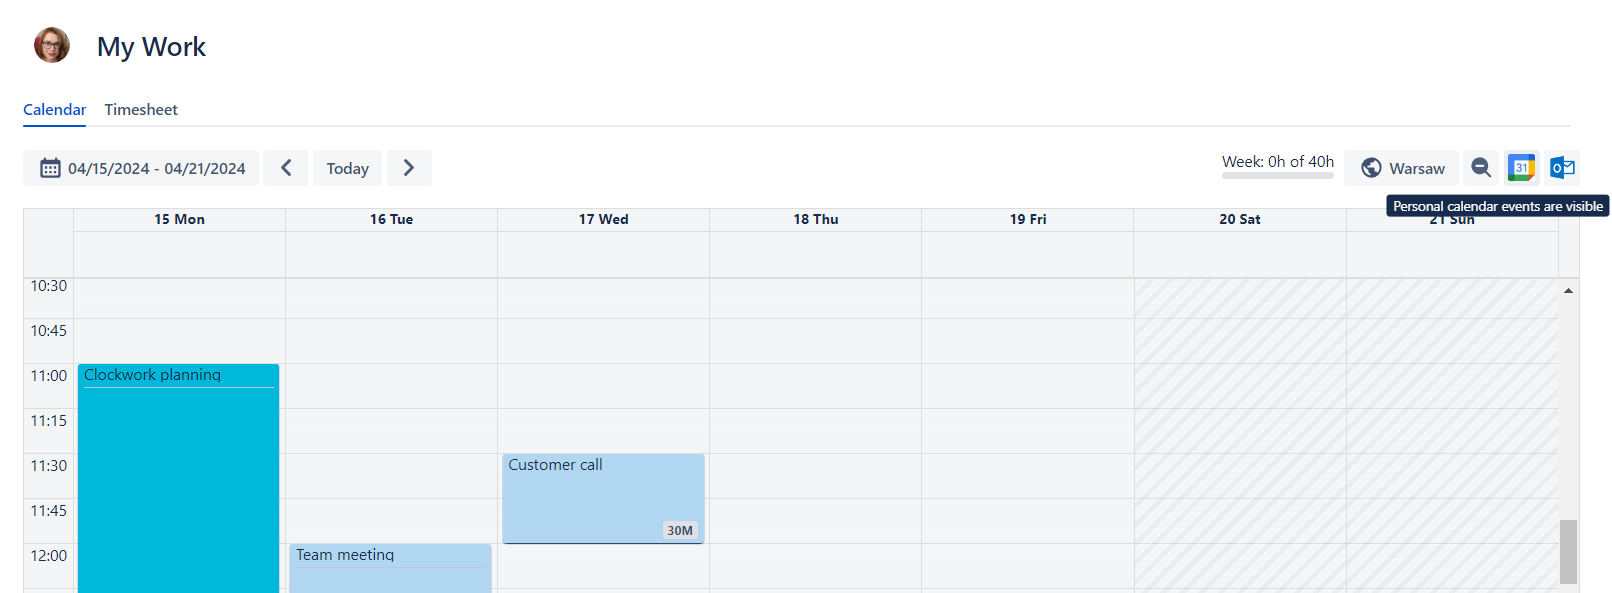
Events from a Google calendar will be presented with a turquoise color.
Create a Worklog from a Google Calendar Event
-
Ensure the Calendar integration is on (the Google Calendar icon in the upper right corner is rendered in color).
-
Click on the appropriate event in the Clockwork calendar.
-
Select the Jira work item from the dropdown, or type in the work item Key or Summary to select the item.
-
The worklog dialog will open with the date and time fields pre-populated from the calendar event. Complete any other required fields.
-
Click Save.
Outlook Calendar Integration
This feature is only available in Clockwork Pro.
You can integrate your Outlook Calendar with Clockwork to show scheduled events on the calendar view of your Clockwork timesheet. To create a worklog from an Outlook Calendar event:
-
,Navigate to Apps > Clockwork > My Work and select the Calendar tab.
-
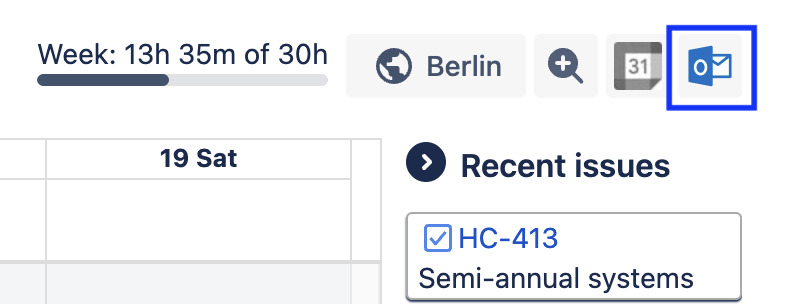
Click on the Outlook Calendar icon in the upper right corner.
-
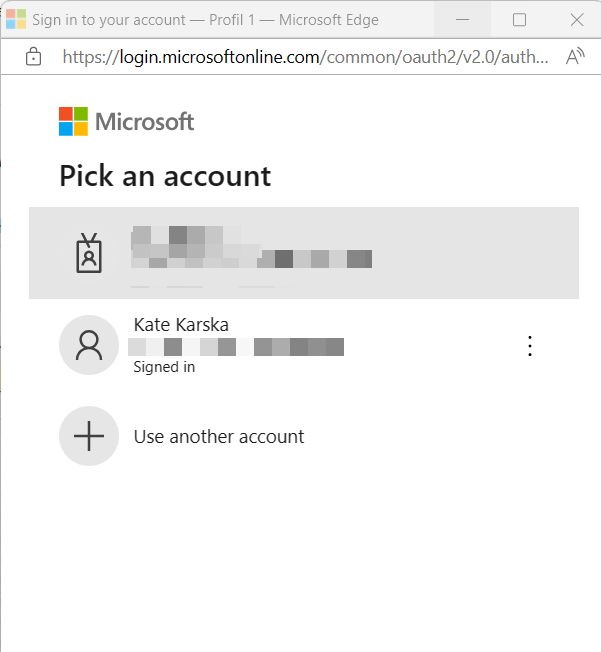
Sign in to your Outlook account to connect your calendars.
-
The calendar icon will be colored when events are shown, and grayscale when events are hidden.
-
Events from the Outlook calendar will be presented with a light blue color.
Create a Worklog from an Outlook Calendar Event
-
Ensure the Calendar integration is on (the Outlook Calendar icon in the upper right corner is rendered in color).
-
Click on the appropriate event in the Clockwork calendar.
-
Select the Jira work item from the dropdown, or type in the work item Key or Summary to select the item.
-
The worklog dialog will open with the date and time fields pre-populated from the calendar event. Complete any other required fields.
-
Click Save.
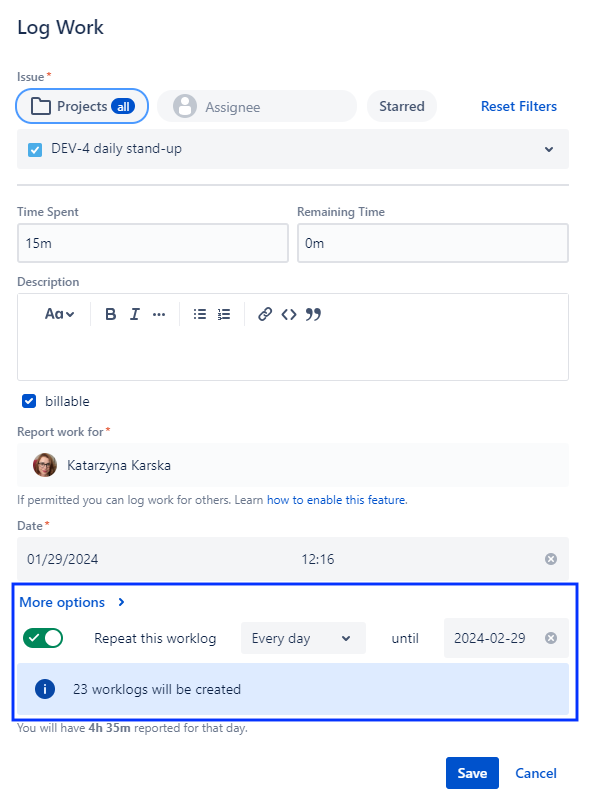
Add Repeatable Worklogs
This feature is only available in Clockwork Pro.
This feature requires Working hours to be properly configured in Clockwork settings.
To add a series of identical worklogs across multiple days:
-
Open the log work dialog as usual.
-
Fill in the time and other required details.
-
Click on More options.
-
Toggle on the Repeat this worklog option and select the appropriate interval (daily or weekly).
-
Select the end date when the worklog will cease to be repeated.
-
Click Save.
Once you save the worklog, the info panel will show the number of worklogs to be created.
We do not yet support bulk editing or deleting worklogs. If you make an error while creating a repeating worklog, you’ll need to manually update each of the resulting worklogs.
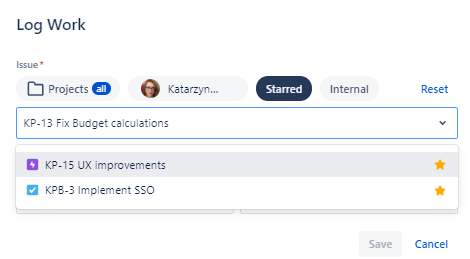
Log Work Dialog Filters
Filters at the top of the worklog dialog allow you to quickly find items you want to log work on.Previously selected filters remain selected when you open the Log Work dialog, so you can keep using the same filter, make adjustments, or reset the filters. Available filters include:
-
Spaces you currently work in
-
Your assigned work items
-
Your starred work items
-
Internal work items (Clockwork Pro only)
Starring your Work Items as Favorites
If you want a work item to be saved as your favorite and appear in the Starred filter:
-
Start typing the work item Summary and select it in the dropdown.
-
Click the star on the right of the work item listing.
Now, every time you just click on the Starred filter in the worklog dialog in every Clockwork view (Work item, Timesheet, Calendar), you’ll be able to select a work item from your starred items.
To remove an item from your favorites, simply unclick the star.
Time Formats
Clockwork accepts the following time formats:
-
1:15 for one hour and 15 minutes
-
1h 15m for one hour and 15 minutes
-
1.25 for one hour and 15 minutes
-
1h for one hour
-
1.0 for one hour
-
15m for 15 minutes
-
15 for 15 minutes
-
0.25 for 15 minutes
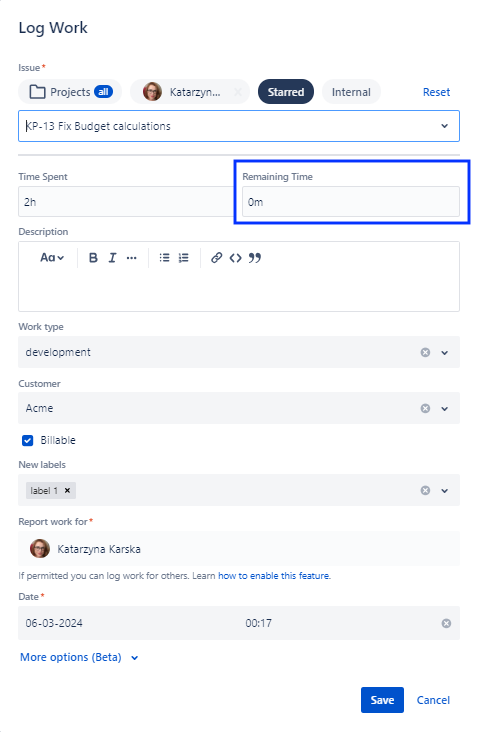
Time Remaining
When you manually create a worklog, you can add Remaining Time. This allows you to show an estimate of how much time will be needed to complete the work item. Whenever work is logged on the work item, the remaining time will be recalculated.
The Remaining Time estimate can be manually changed when creating new worklogs or editing an existing worklog.