
Adding Templates to Issues
When a template is applied to an issue a separate copy of the template is added to the issue (as opposed to being linked to or referenced by the issue). If a template is later deleted from the templates list, copies of template that have been added to issues will remain. If the template items contain mentions to users, this will reflect in the resulting checklist items and may also result in a notification being sent to the mentioned users.
Adding Templates to Issues Manually
To manually add a template to an issue:
Click on the … menu for the Checklist.
Select Load templates.
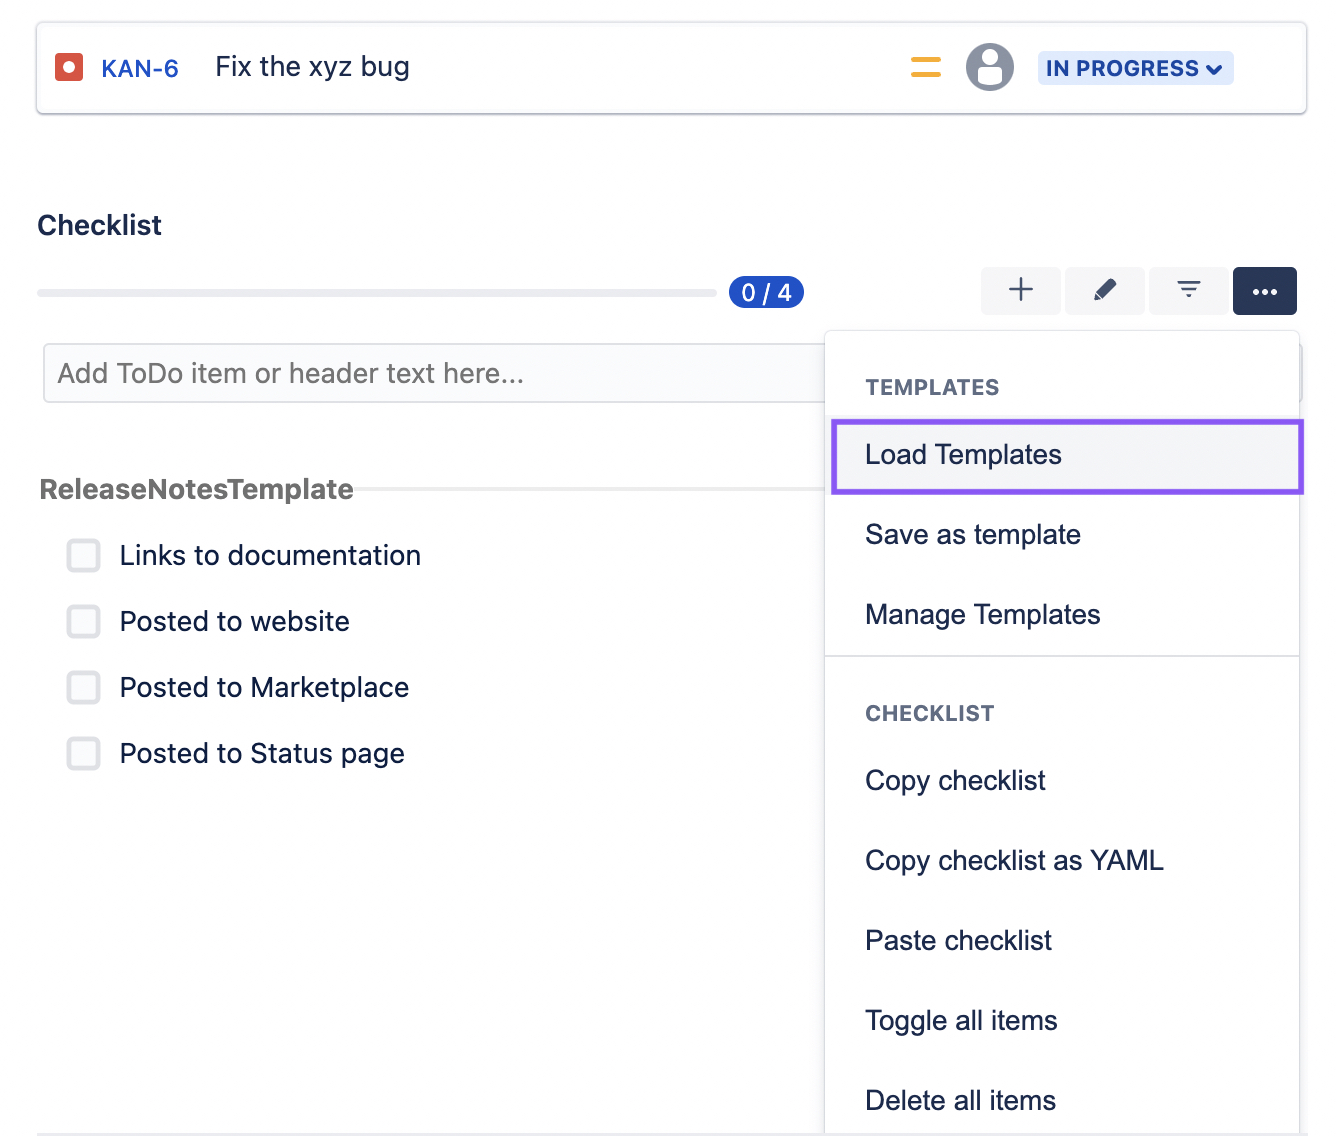
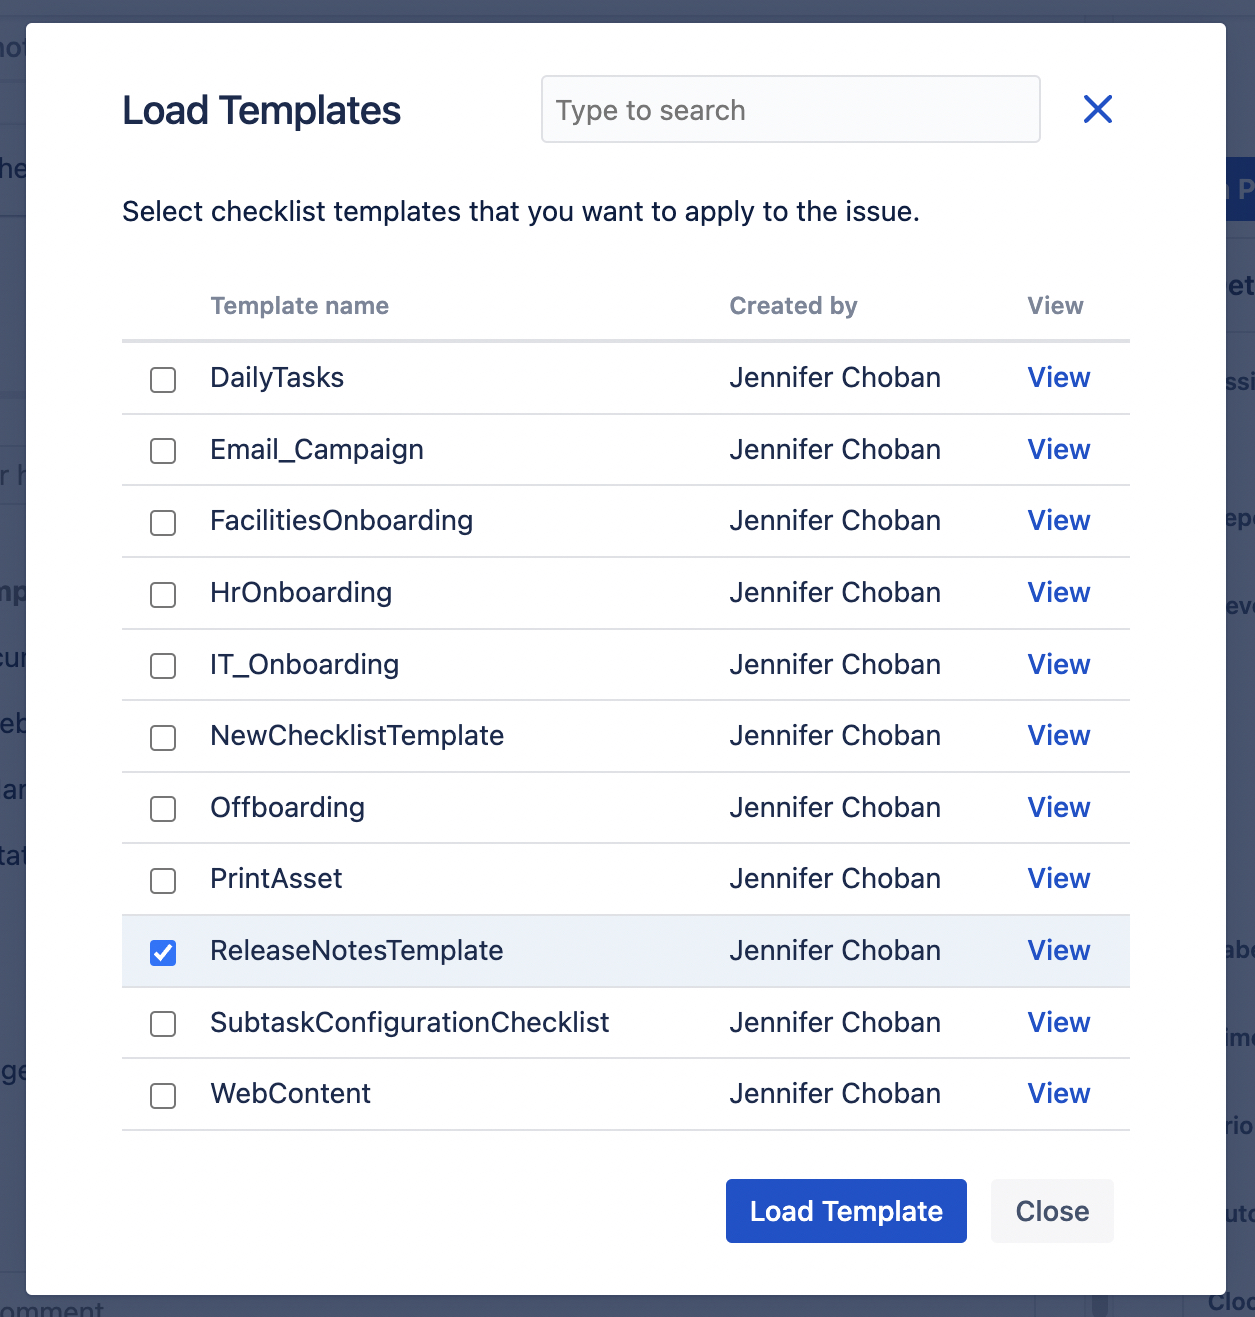
Use the checkboxes to indicate the template(s) you want to add to the issue. If there are more than ten templates in the project there will be a search bar you can use to find the desired template.
Click Load template(s). The selected templates will be added to the issue.
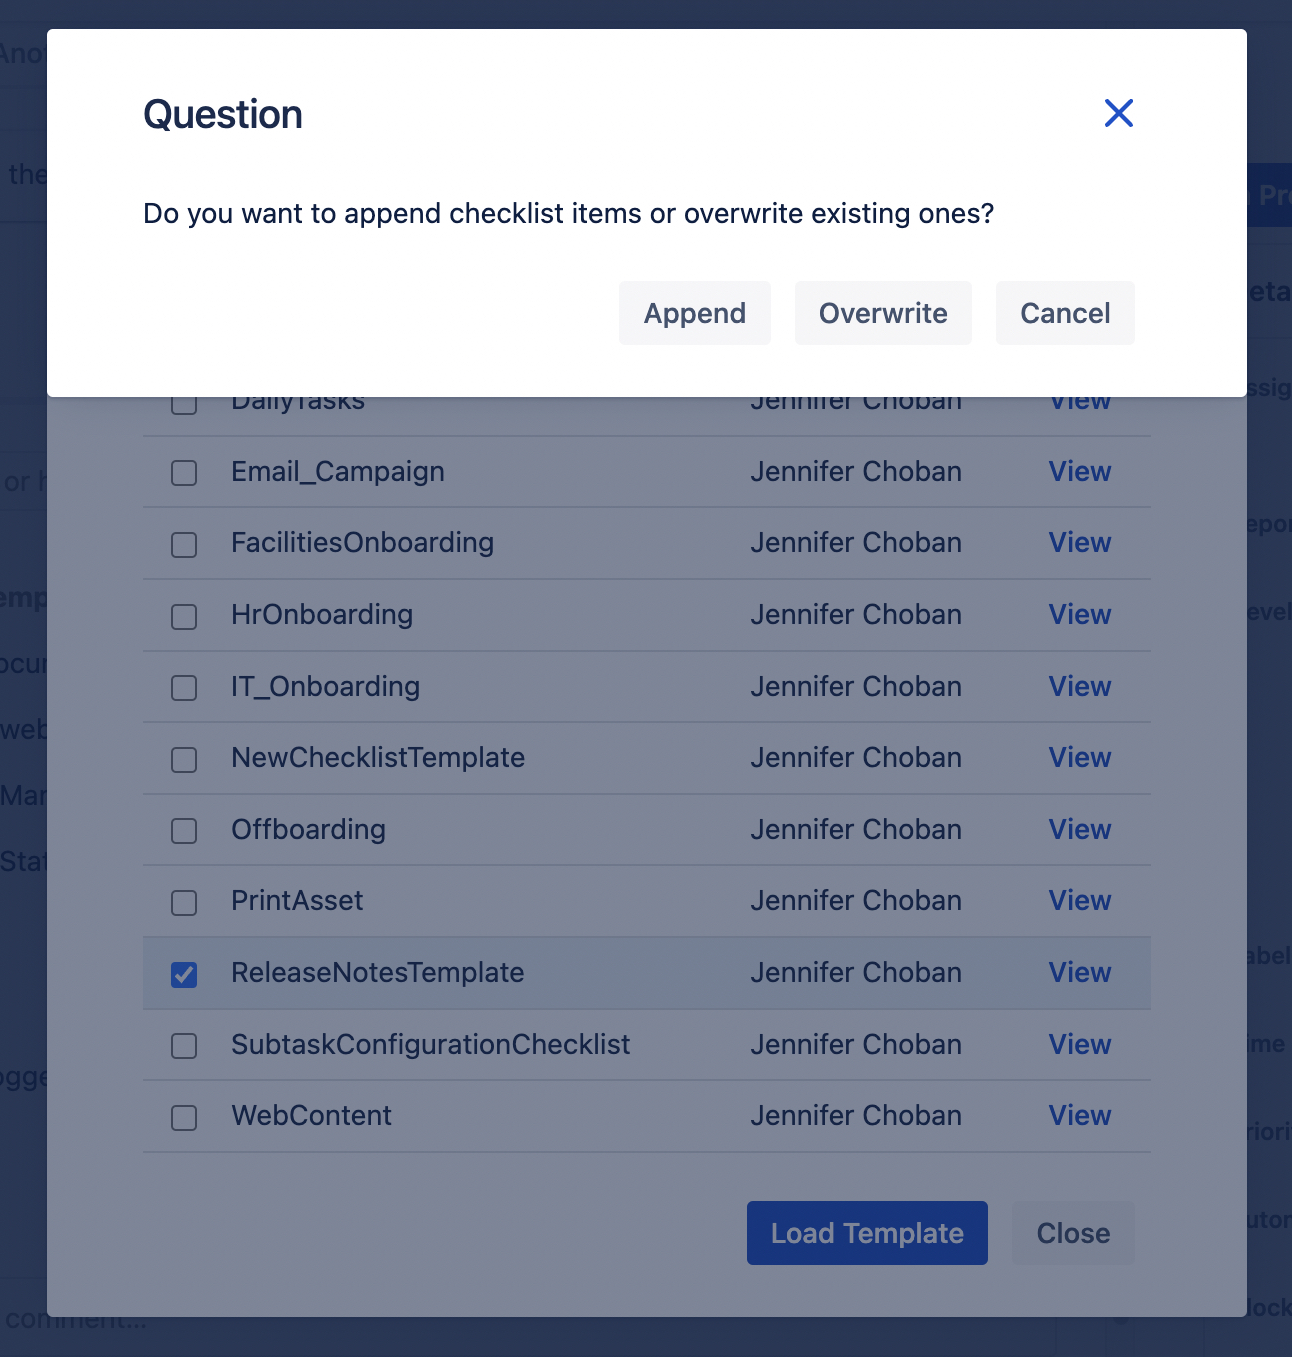
If the issue already has a checklist, you will be asked whether you want to append or overwrite the existing checklist. If you select Append, the template's items will be added to the end of the existing checklist. If you select Overwrite, all preexisting checklist items will be deleted prior to applying the template.
Adding Templates Automatically (Default Templates)
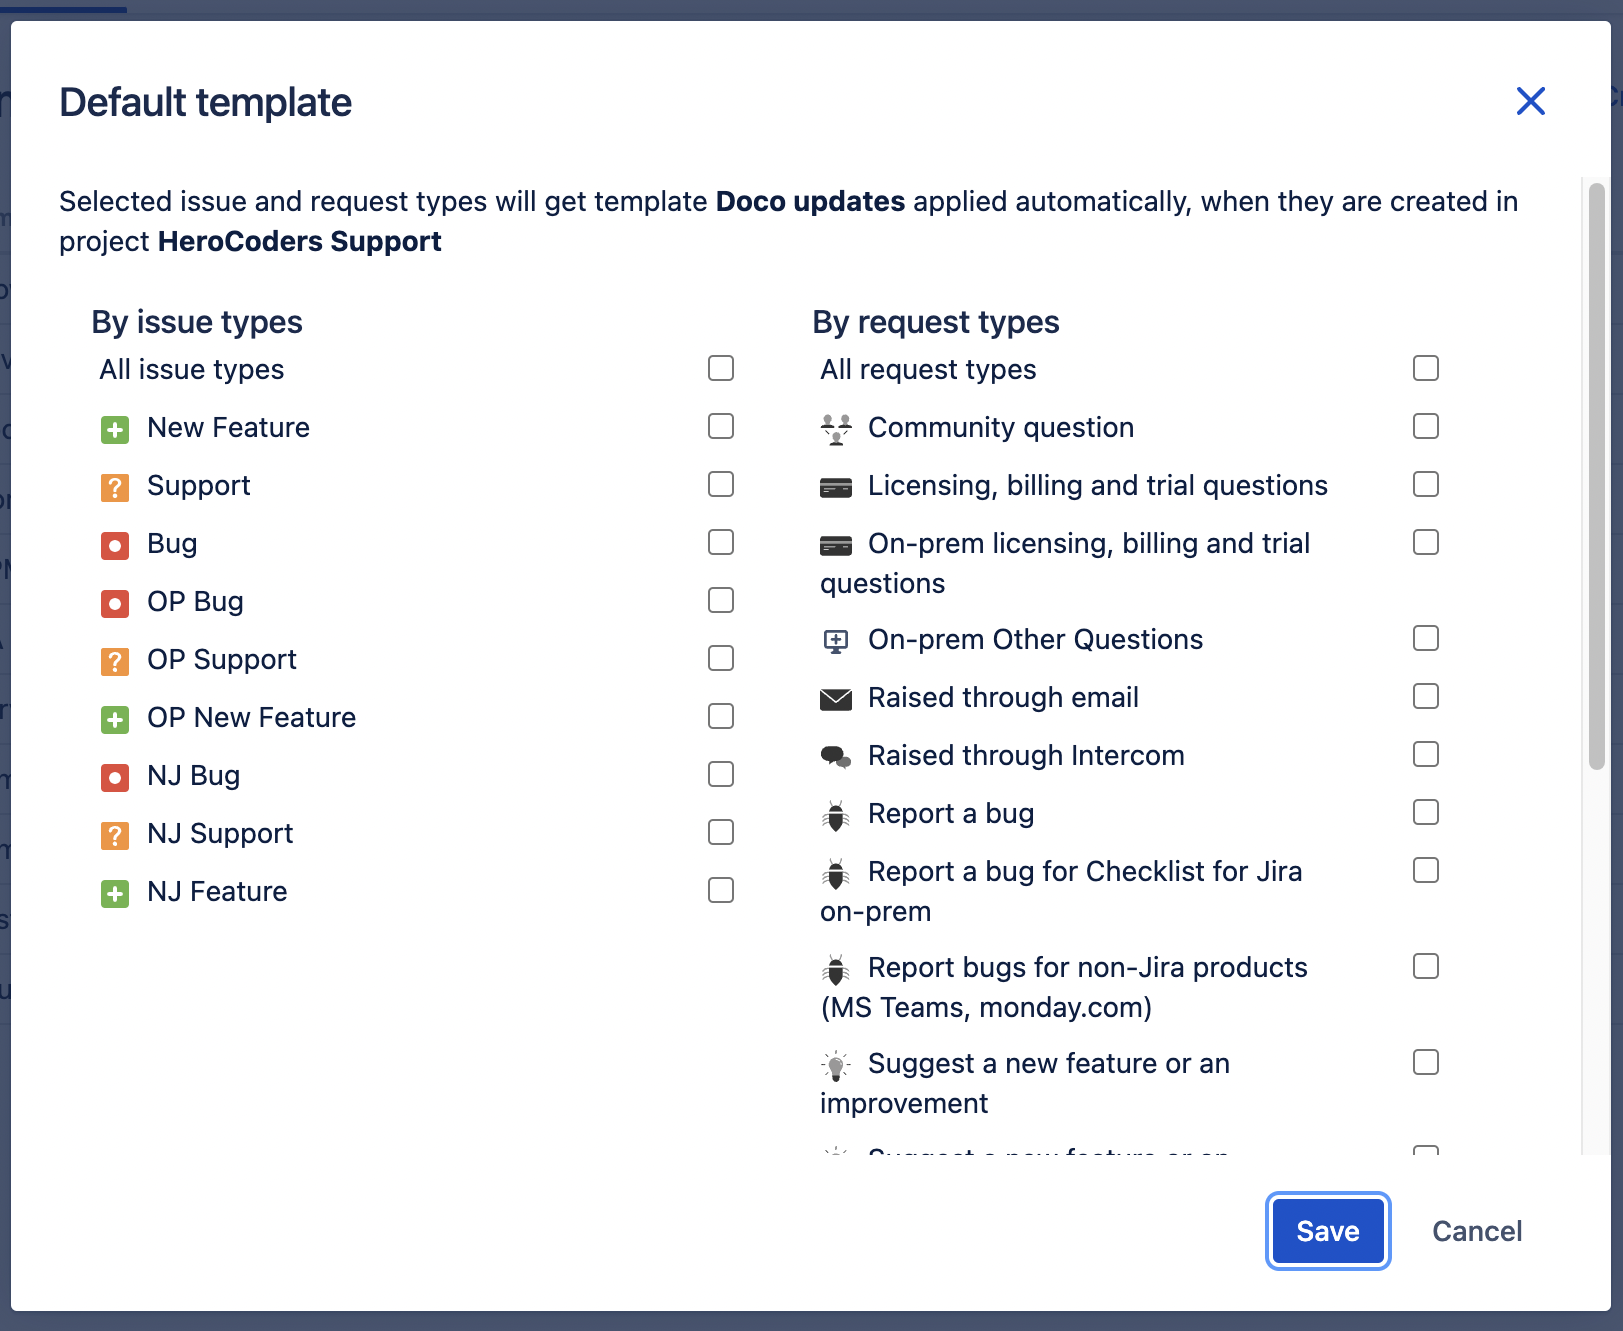
You can set a Default Template that will be automatically added whenever an issue or request of the indicated type is created. Default Templates are defined per project and issue type / request type, allowing you to set different default templates for each type within each project.
Templates can also be added to issues from the via automation or the REST API.
Default Template is not applied when issue / request type is changed later in “issue update” operation.
You must have project administrator permission to set default templates.
To set a default template:
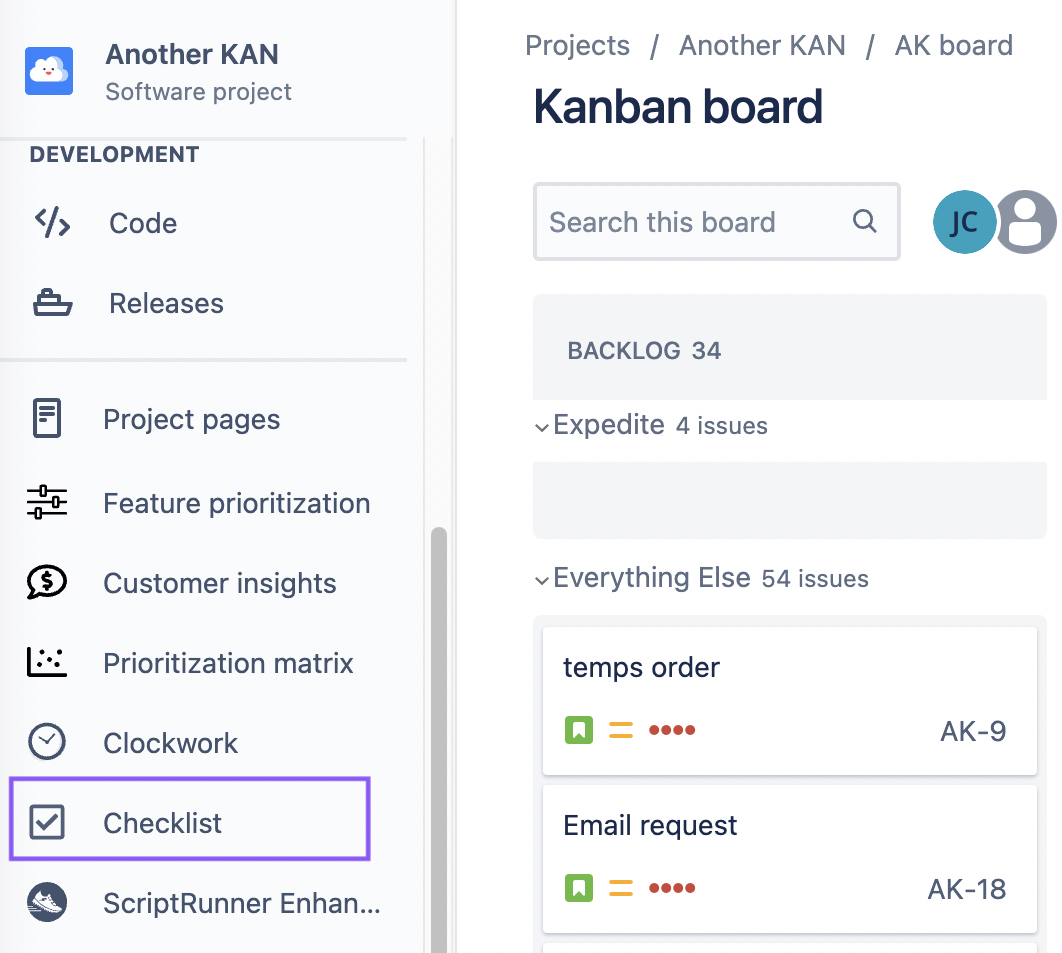
Navigate to the templates page either by selecting Checklist from the left project nav bar or by selecting Manage templates from the … menu for the Checklist.
Click Set default for the appropriate template.
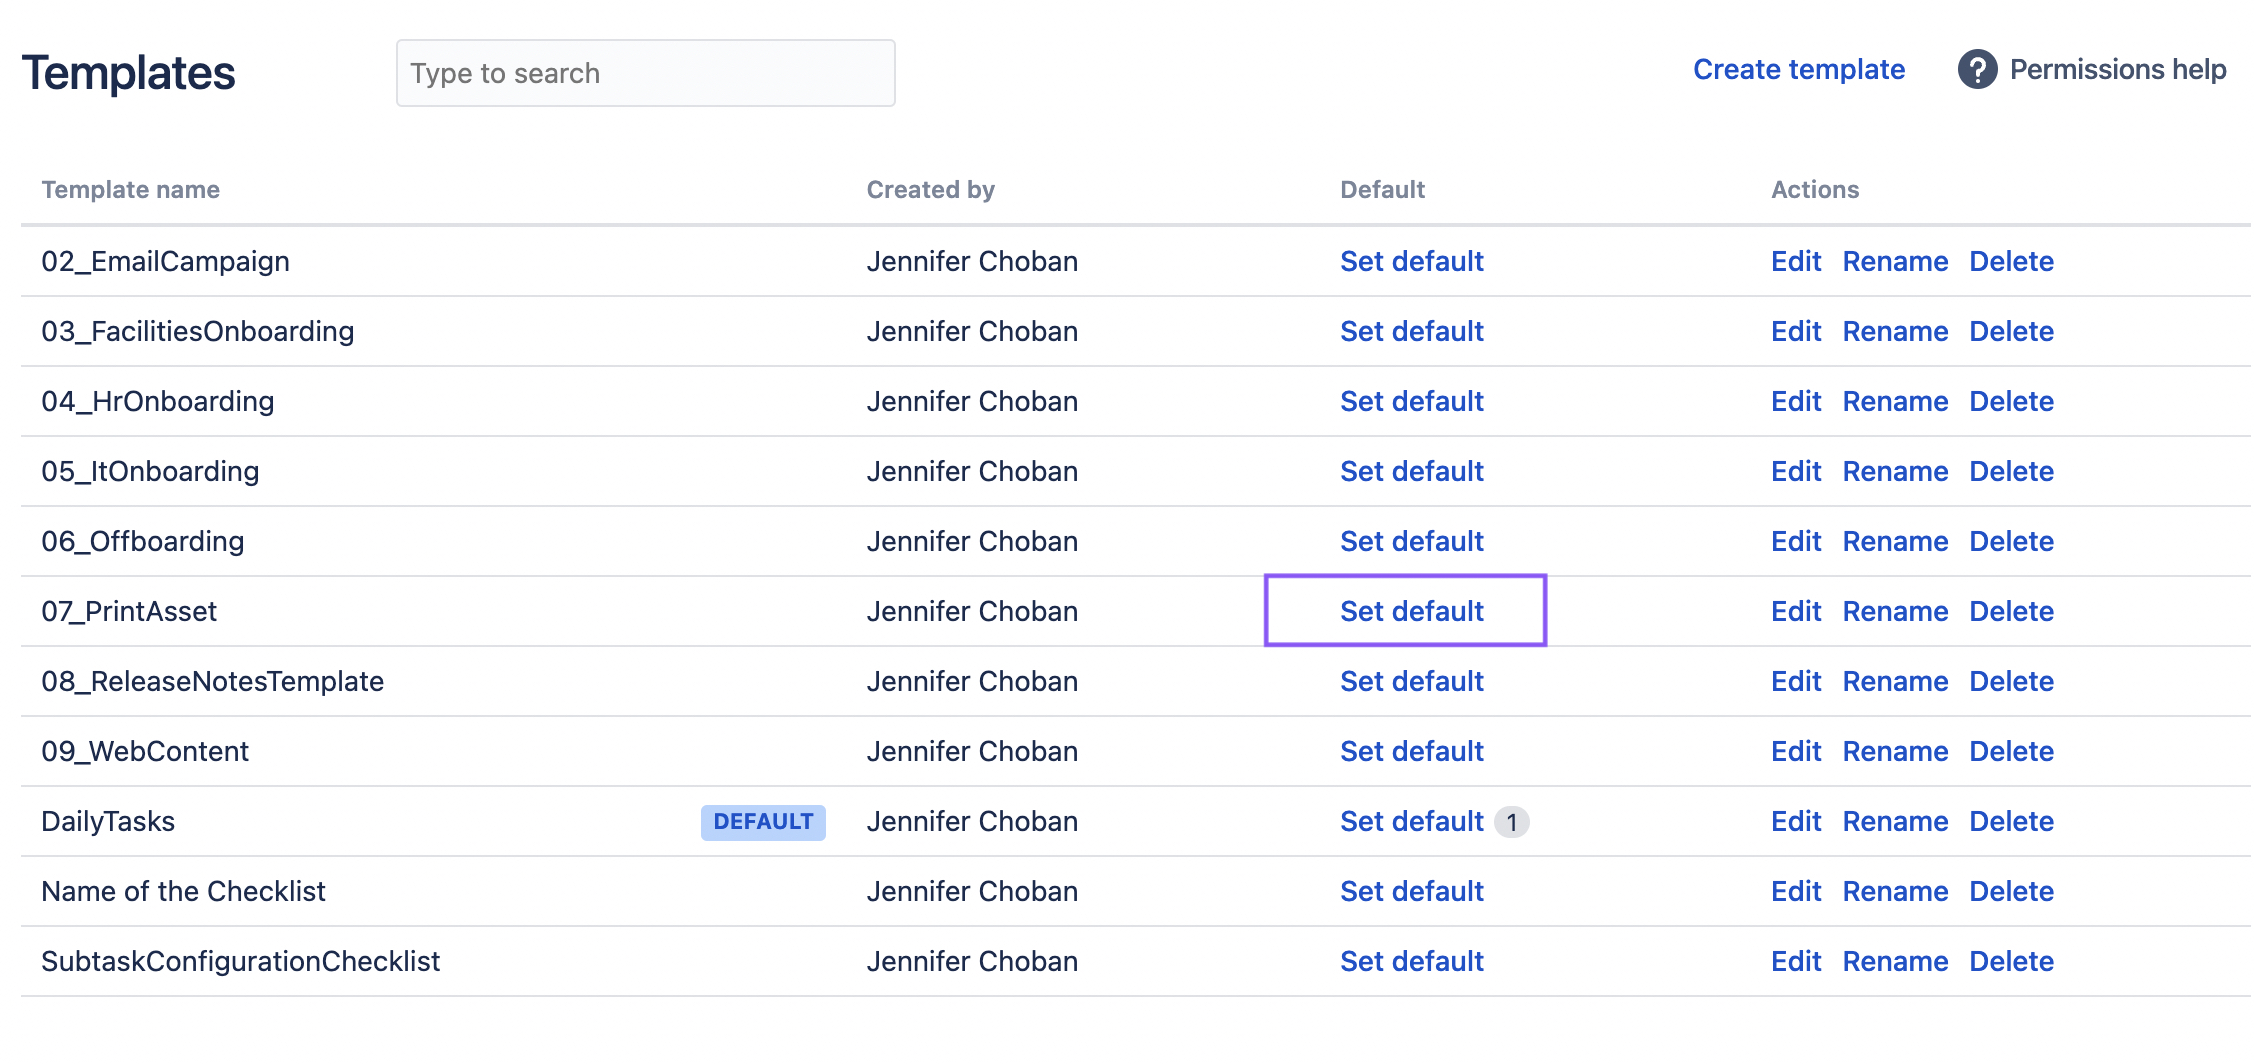
Select the Issue types and/or request types you want the template to be applied to.
Note that cloned checklist takes precedence over a default checklist. If an issue with a checklist is cloned, the default template will not applied.
Every Jira workflow contains an Issue Created post-function by default. This is required for default templates to work and should not be removed.
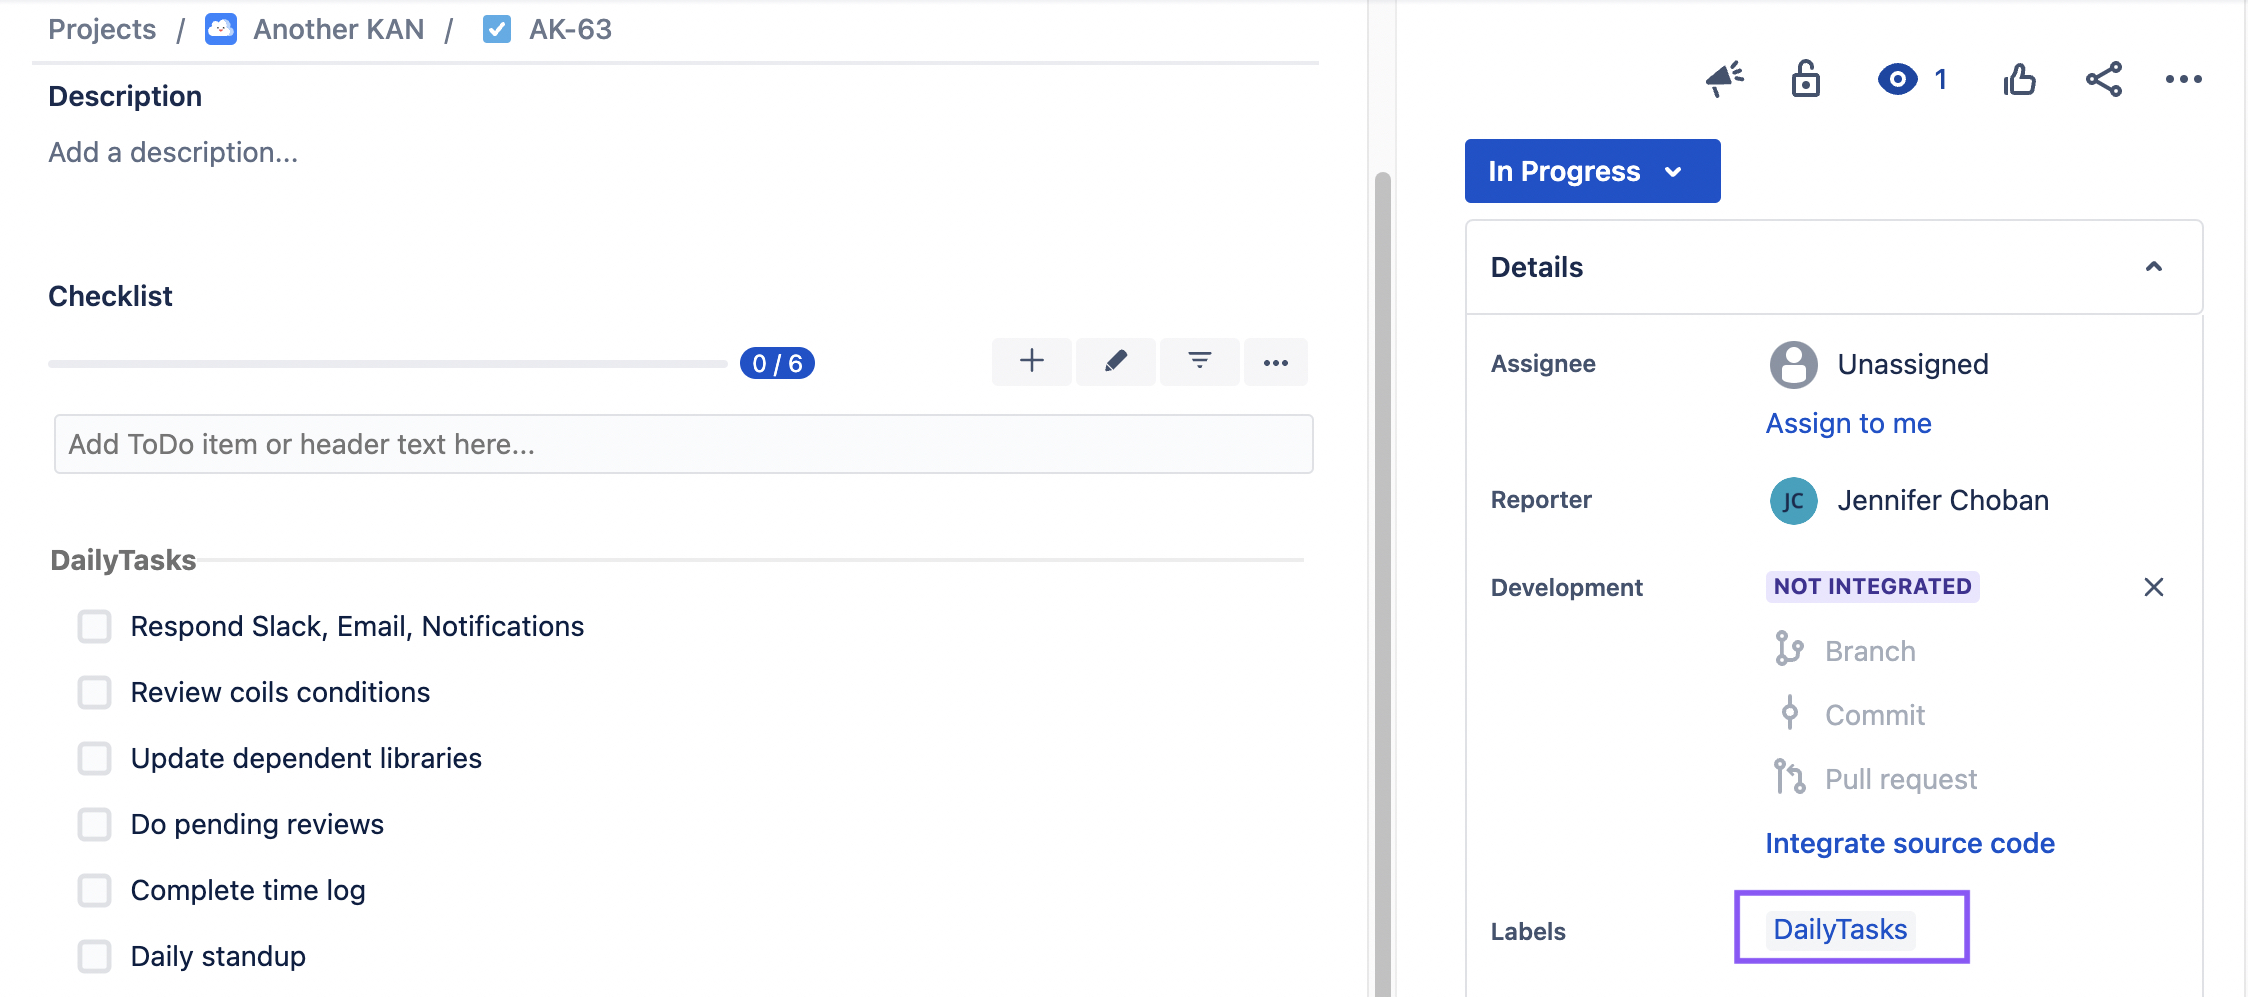
Adding Templates Based on an Issue Label
In Issue Checklist Pro, you can automatically add templates based on a value in the Jira labels field. To add a template based on a label.
Ensure that the Apply checklist templates via labels global setting is enabled.
Ensure that the template name does not include any spaces.
Add a label (when creating or editing the issue) that exactly matches the name of the template (case sensitive).
The template will be added to the issue. Note that removing the label will not remove the template once it has been applied.
If you remove and add a label (having a corresponding template) multiple times, checklist template will be applied every time you add the label, thus checklist items can get duplicated.
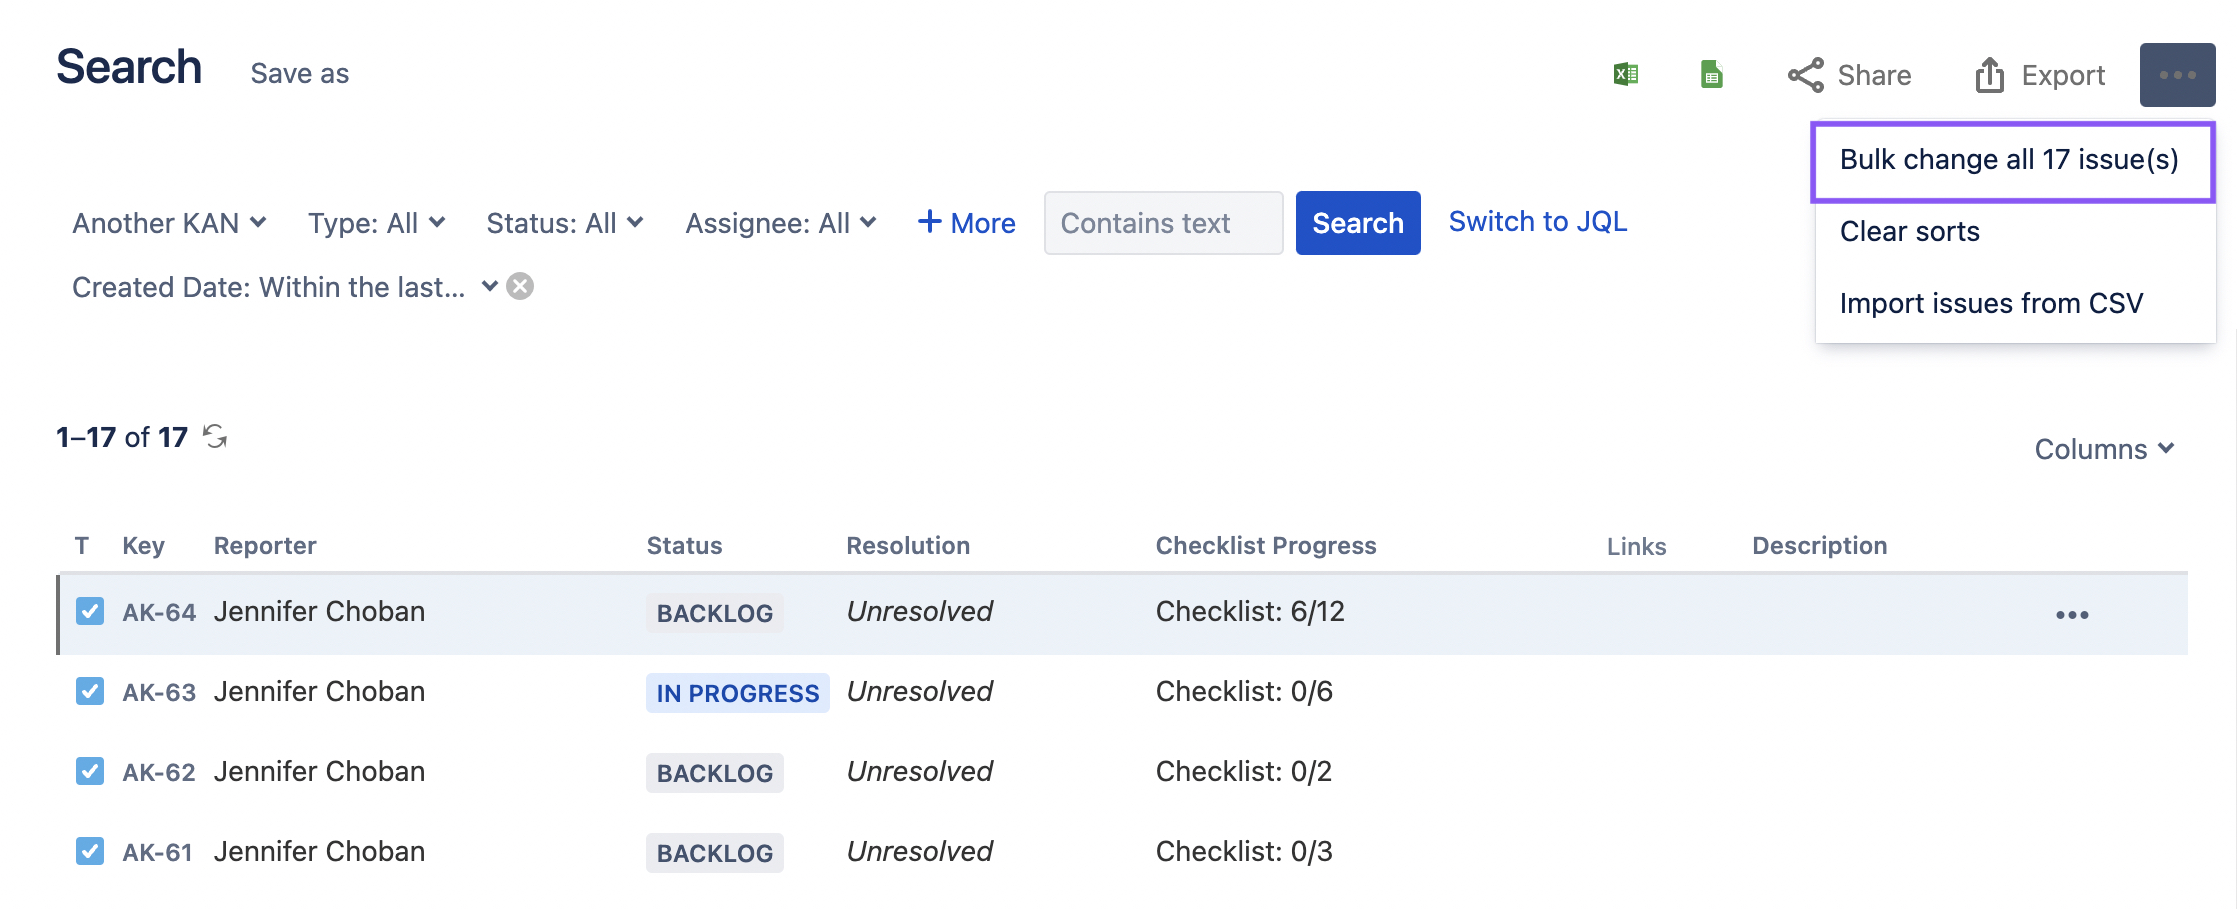
Bulk Adding Templates
To apply a template in bulk:
Ensure that the Apply checklist templates via labels global setting is enabled.
Use JQL to select the issues you want to add the template to.
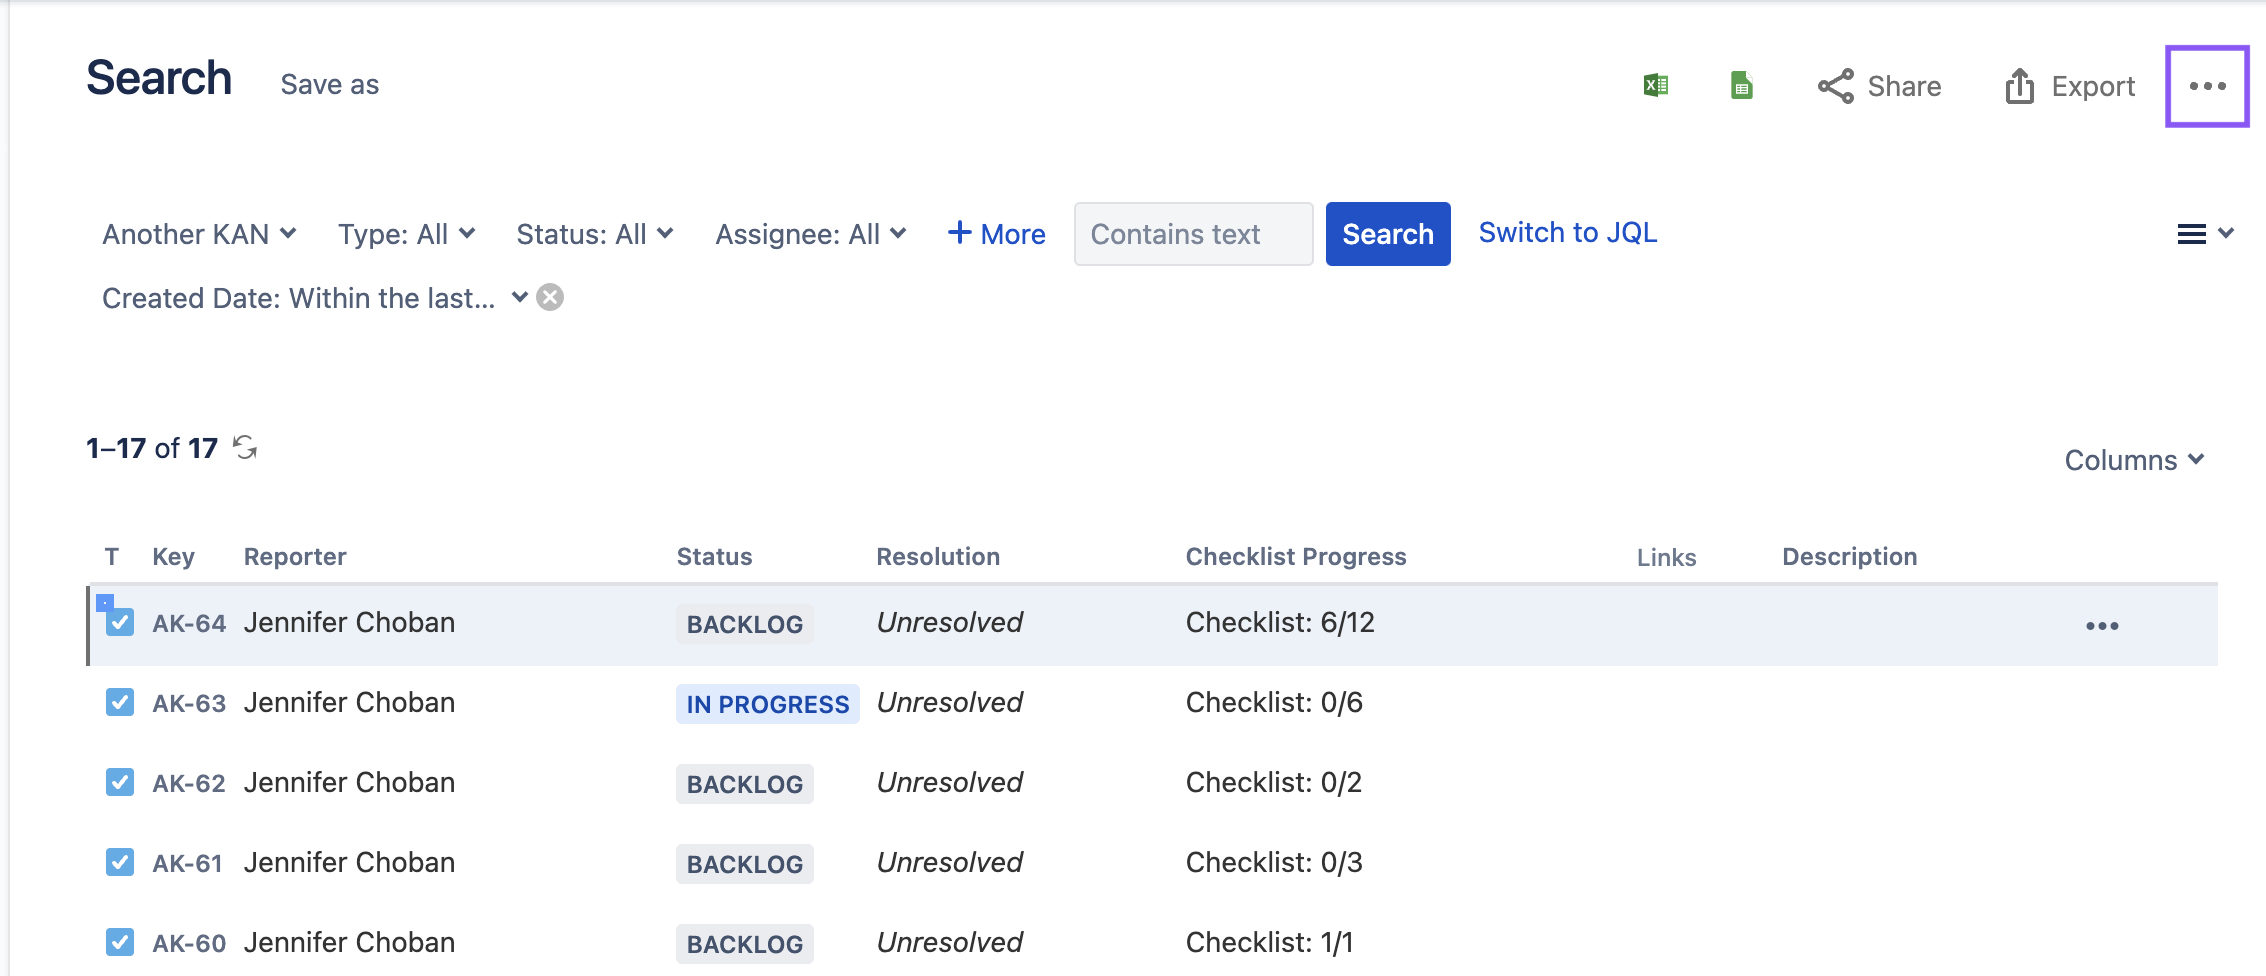
Click on the … menu and select Bulk change all x issues.
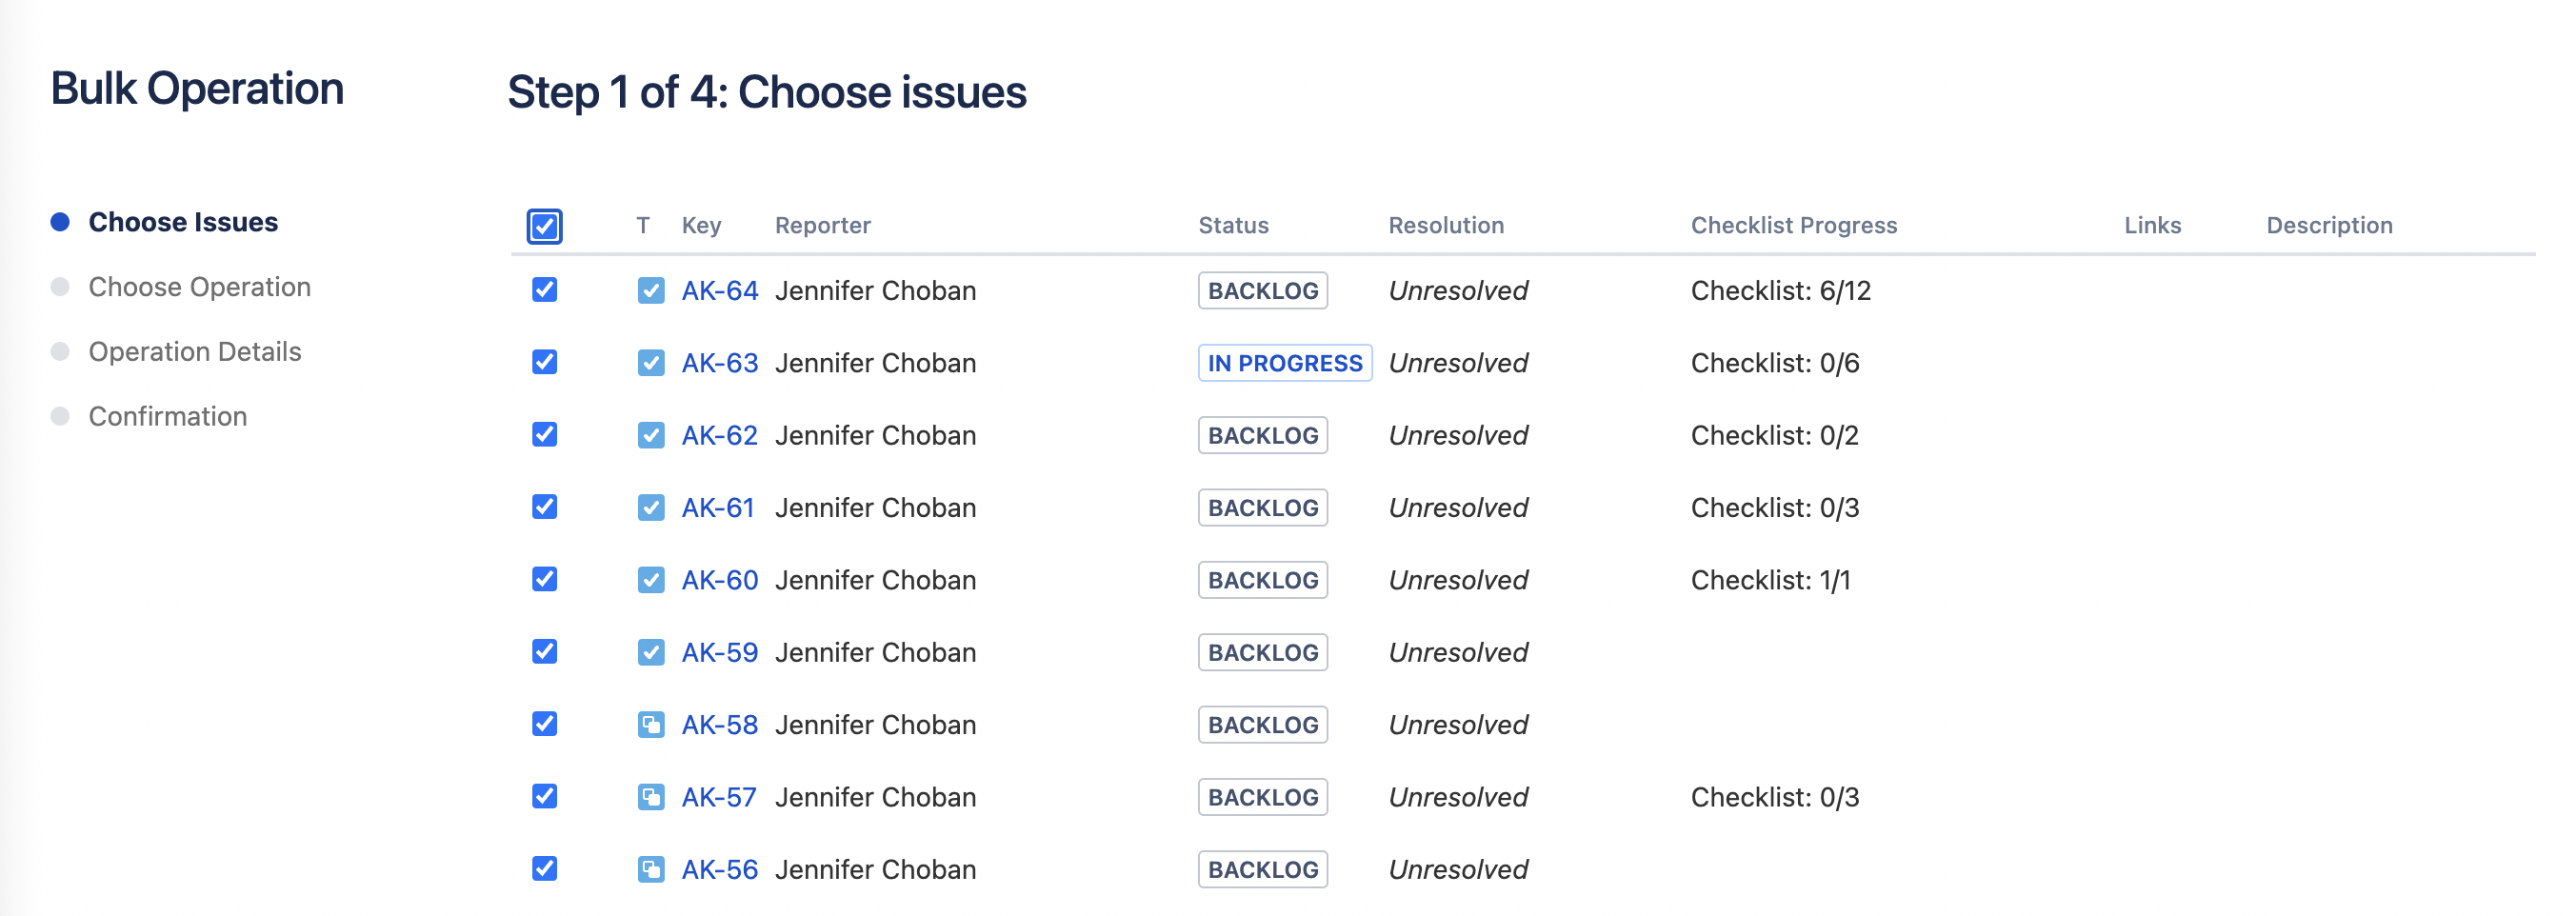
Use the checkboxes to select the issues you want to add the template to. Click Next.
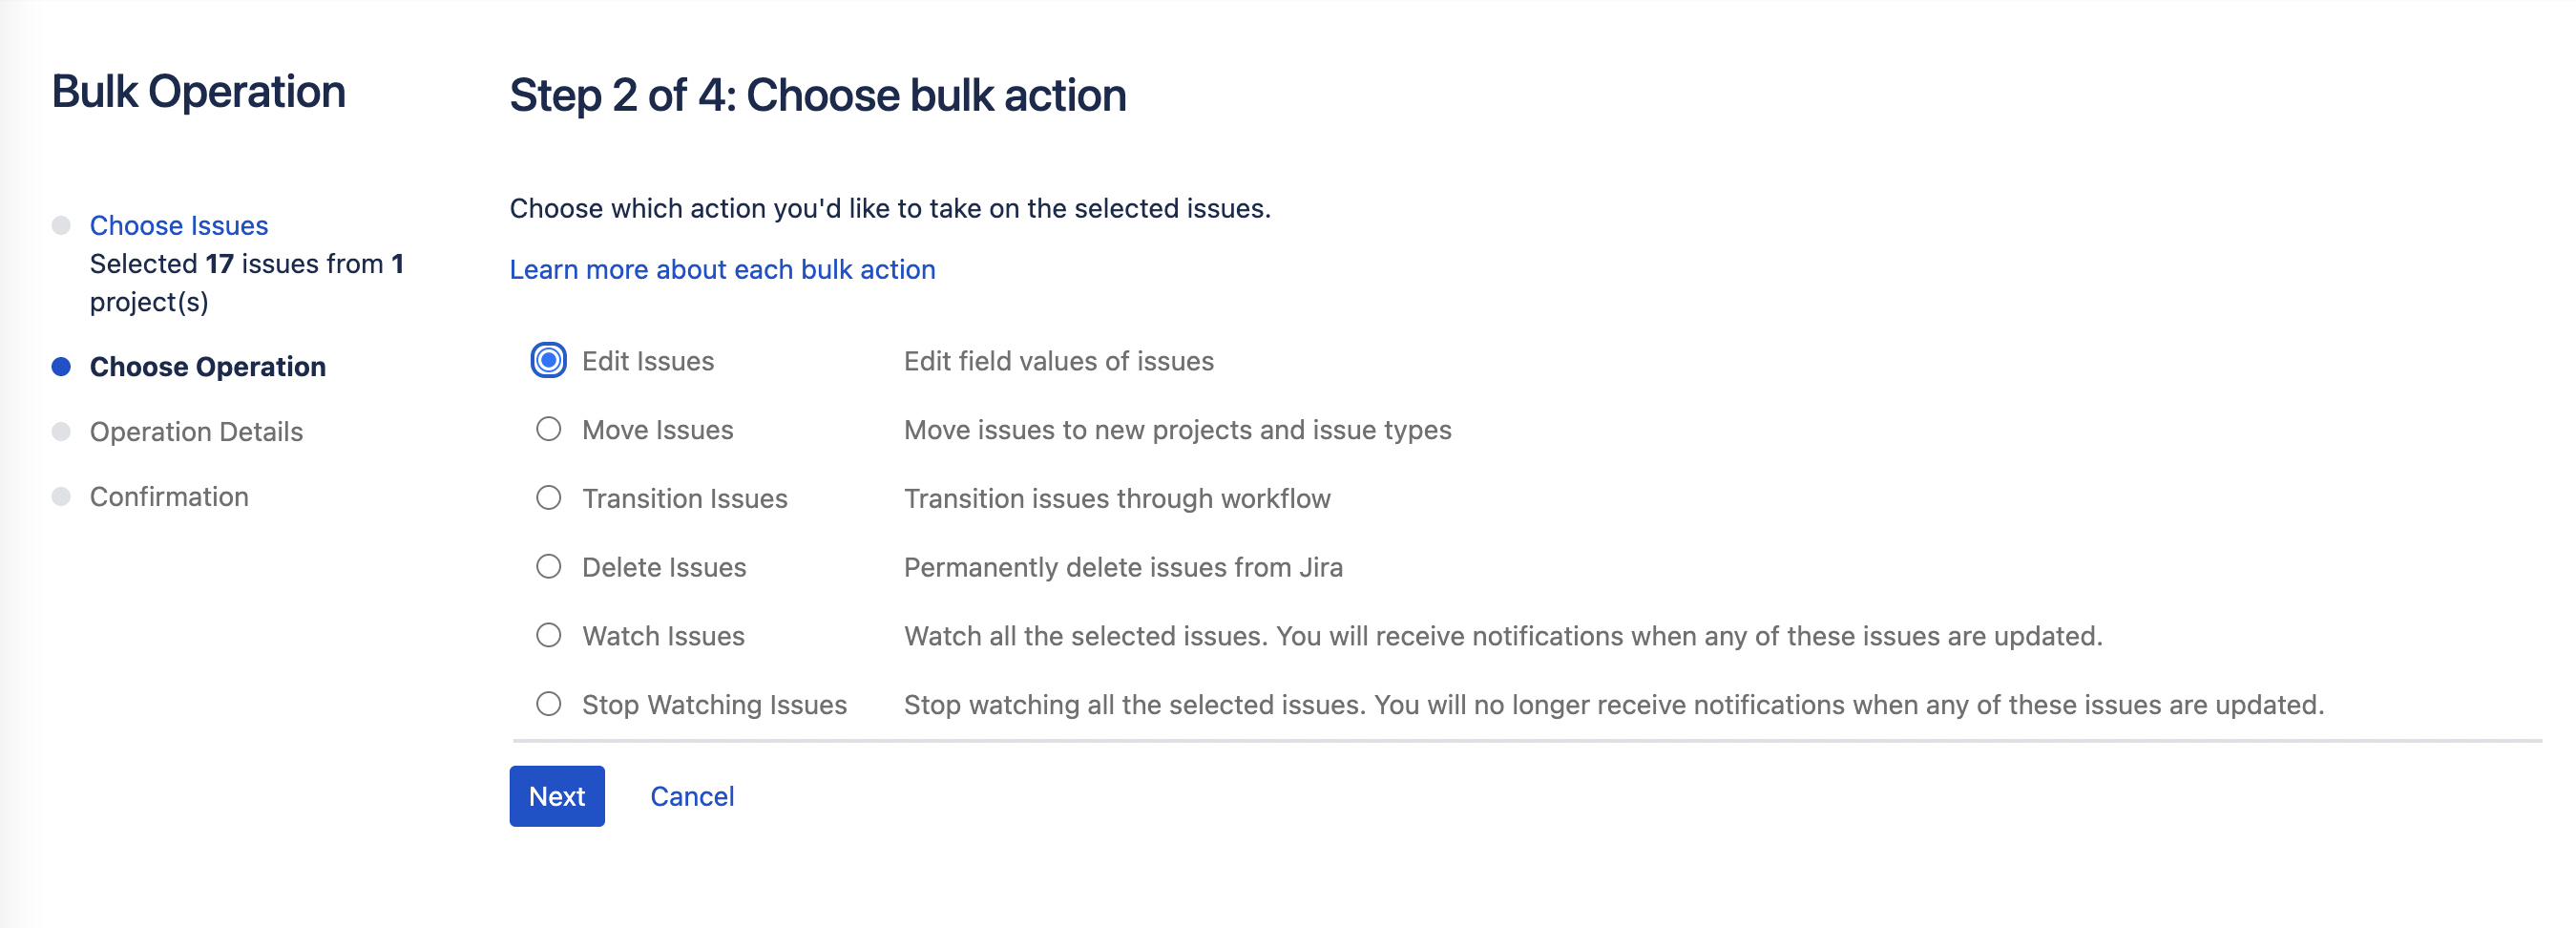
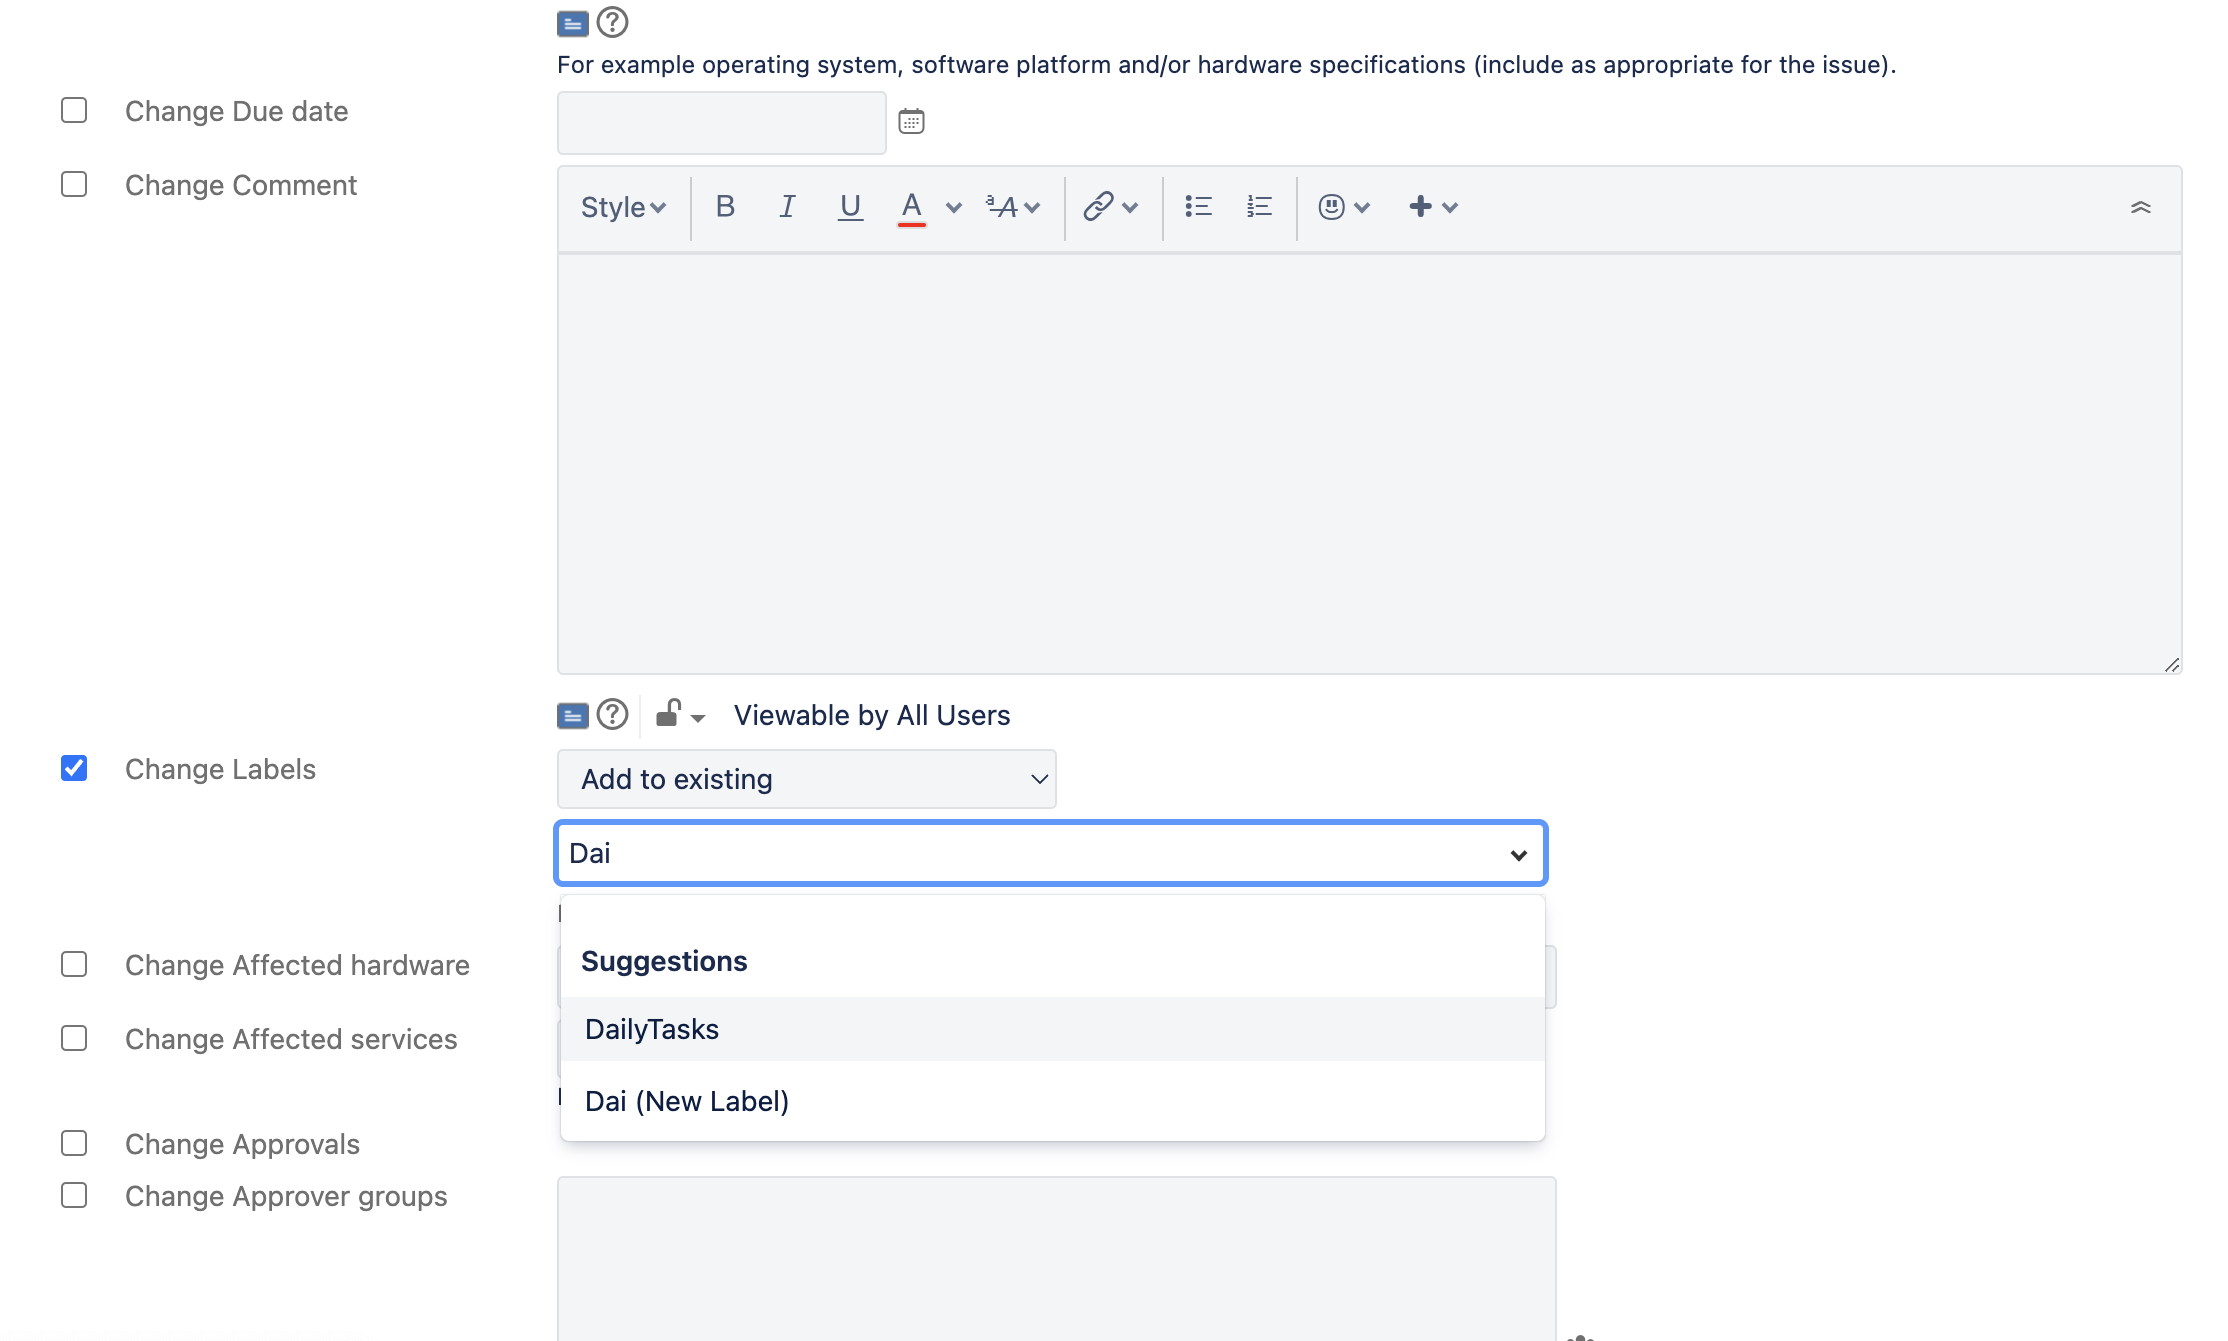
Select Edit issues and click Next.
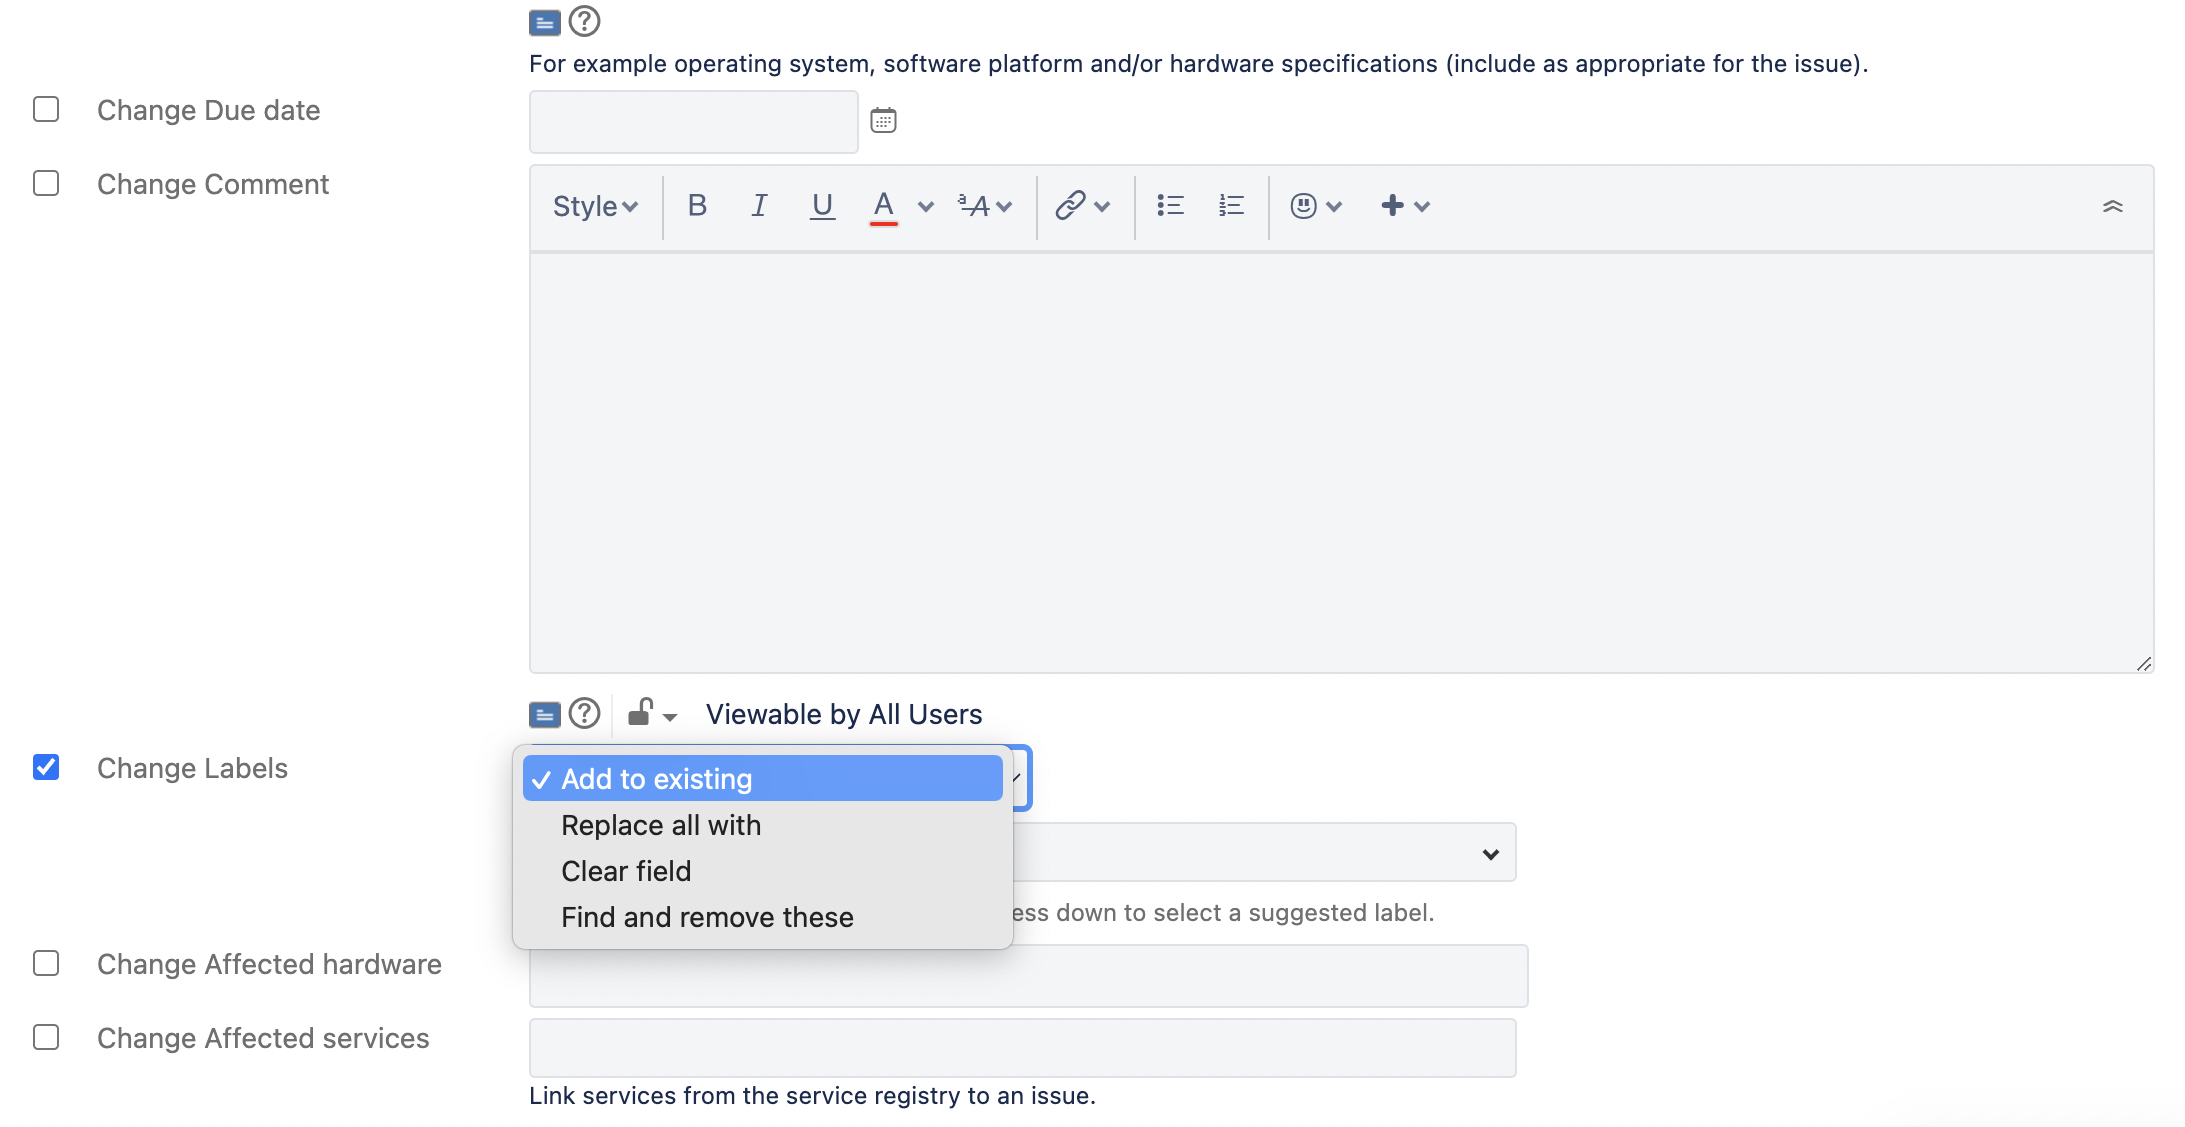
Select Labels as the field to be edited.
Use the dropdown to indicated if you want to add the label to existing labels, or replace the existing values. Note that removing a label from an issue will not remove corresponding checklist templates.
Select the label that corresponds with the indicated template and click Next.
Click Confirm.
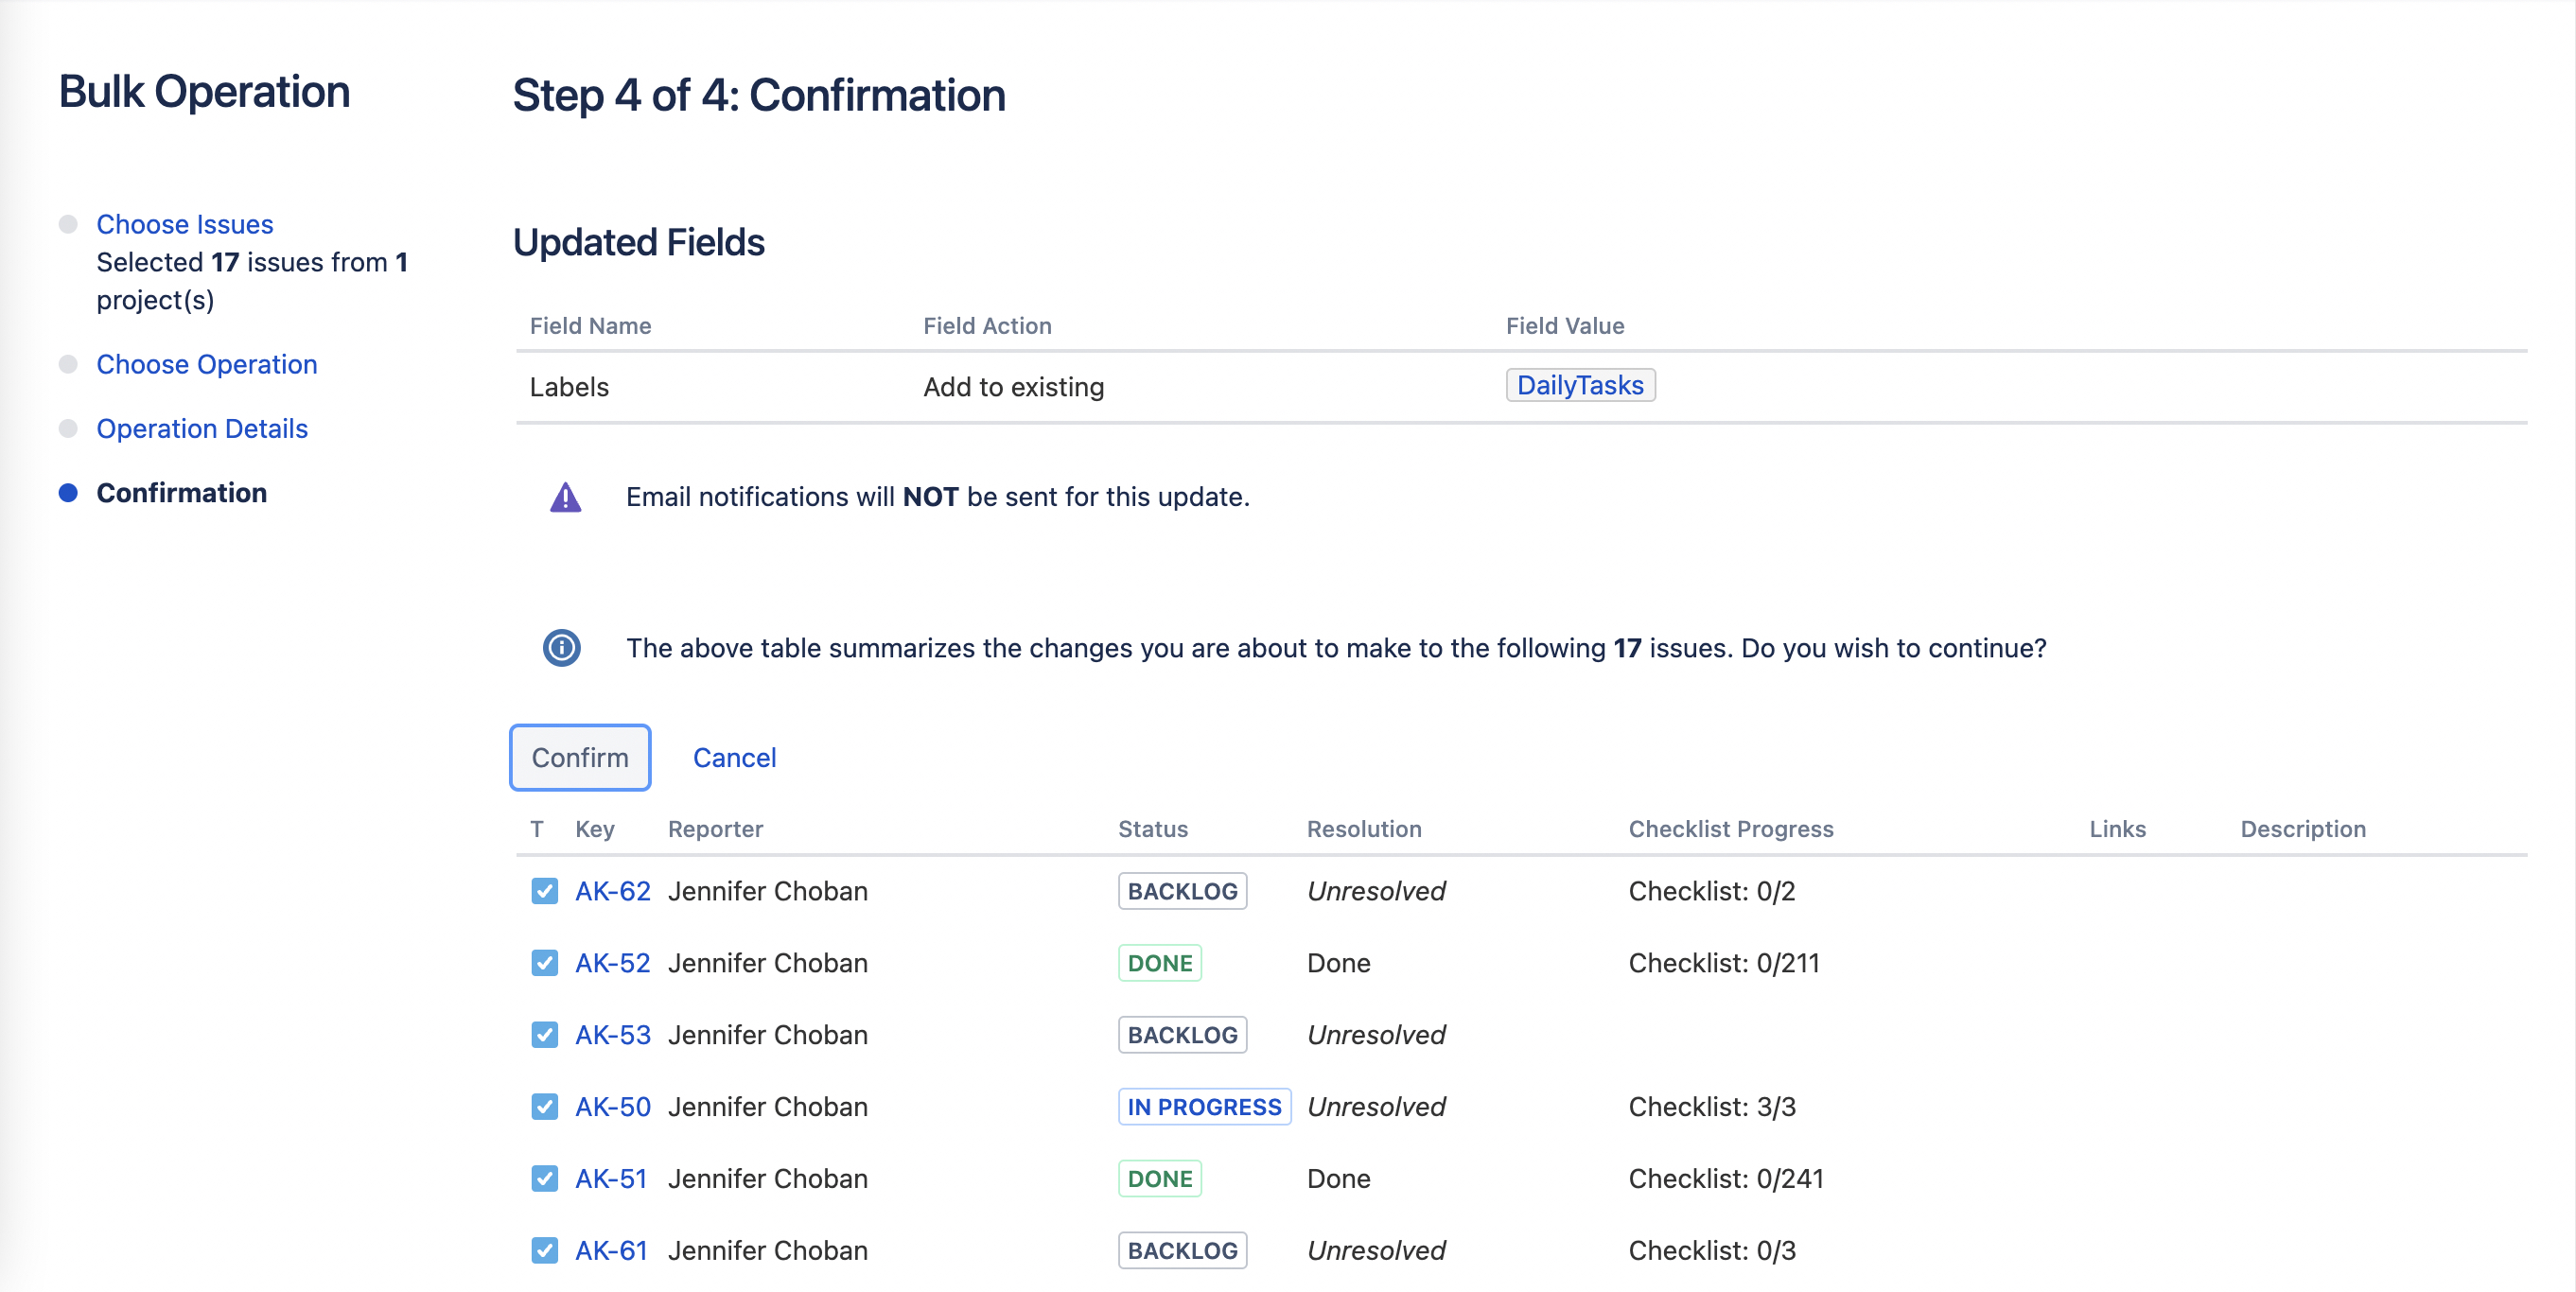
Click Done when the update is complete.