Delete a Checklist
In Checklists for Jira ENTERPRISE , users cannot delete Global Checklists, or items in Global Checklists, from work items. Only Jira Admins can remove Global Checklists from work items by changing the context or deleting the Global Checklist.
Delete Checklist Items
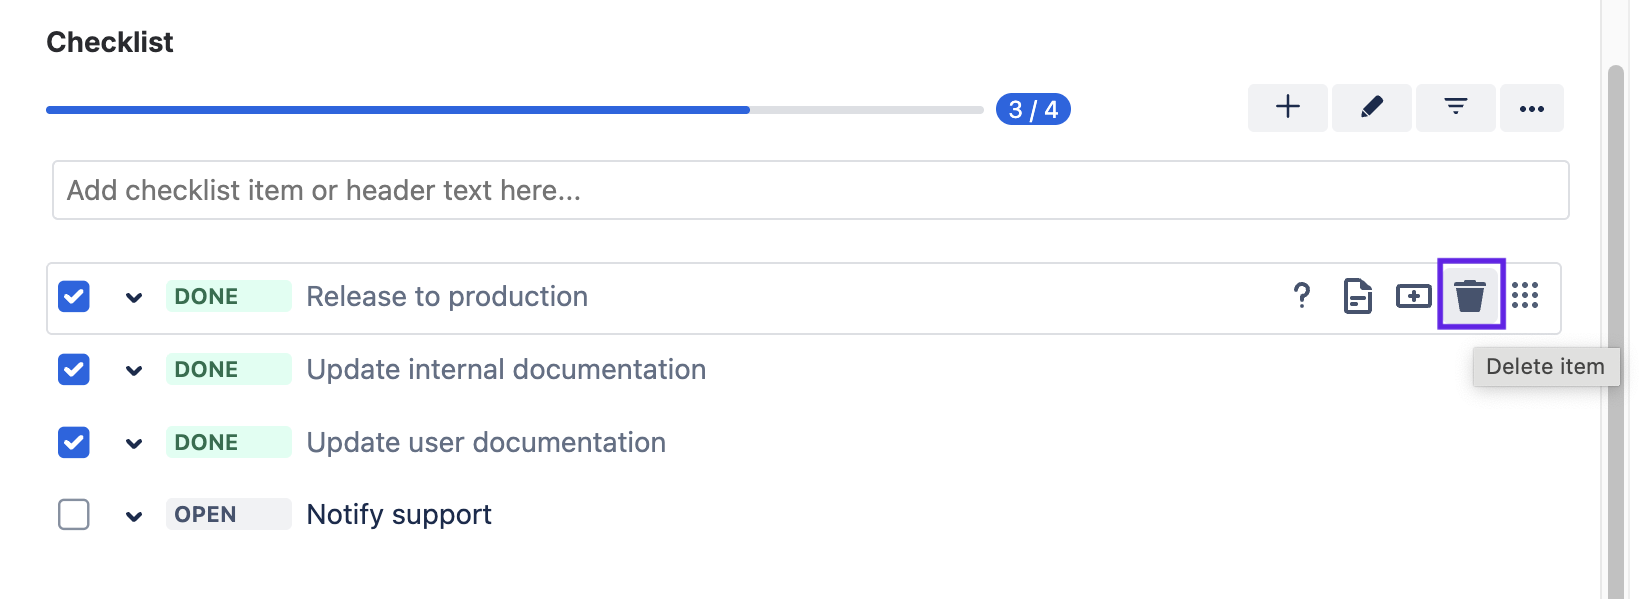
To delete a local checklist item, click on the trash icon to the right of the item.

Delete the Entire Checklist
To delete the entire checklist:
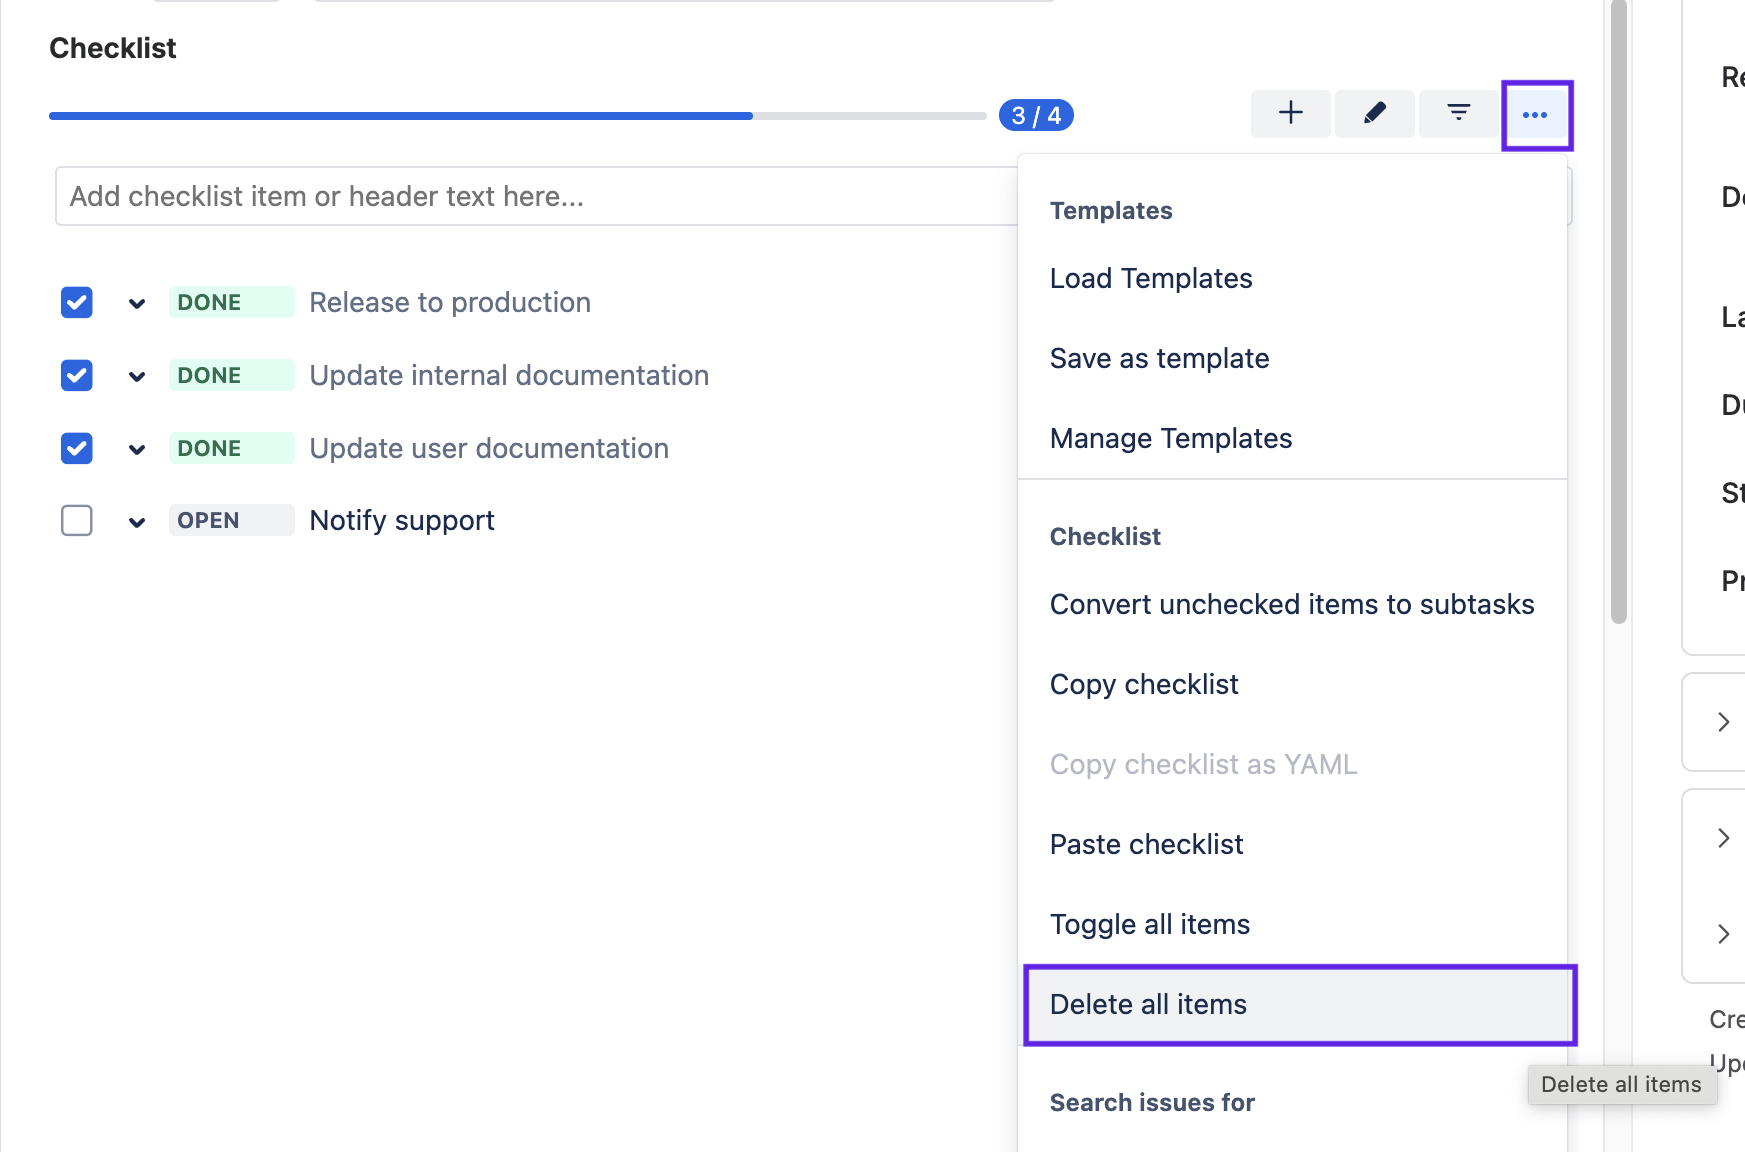
Click on the … menu for the Checklist.
Select Delete all items.

Bulk Delete Multiple Checklists Across Multiple work items
This method is only available for Company-managed projects.
You can use a bulk update to delete checklists from multiple Jira wok items:
Ensure that the Sync checklists to Custom Fields global setting is enabled. (If the Sync was not previously enabled, it’s recommended that wait up to 24 hours to ensure syncing is complete before proceeding.)
Ensure that the Checklist Text custom field is present on the Edit Work item screen. If not, add it to the screen following the instructions here.
Use JQL to select the work items you want to add the checklist to. You can use this expression
"Checklist Text" is NOT EMPTYto retrieve Jira work items that have checklists.To bulk edit the select work items, click the … menu in the upper right corner and select Bulk change all x issue(s).
Use the checkboxes to indicate which work items you want to add the checklist to. Click Next.
Select Edit work items and click Next.
Select the checkbox for Change Checklist Text and delete all the contents (if any) of the Checklist Text field.
Use the checkbox at the bottom to indicate if you want an email to be sent to notify users of the bulk update.
Click Next.
Click Confirm to initiate the update.
Click Acknowledge when the update is complete. The checklist will have been removed from the selected work items.
