
Importing Checklists Between Jira Cloud Instances
You may be able to perform a single Jira-Jira migration, so work item and project IDs do not change. Please confirm with Atlassian support if your instance is qualified (if work item IDs will stay the same). Then contact our support team to have the checklist data moved between instances on a database level.
If your instance does not include JSM or Team-managed spaces, you may want to use Atlassian’s Cloud Migration tool, as described here, as an alternative to the instructions on this page.
Limitations
-
This process only works with Company-managed Jira spaces.
-
If you are using Checklists for Jira ENTERPRISE , note that this process cannot import Global Checklists. Global Checklists are not saved to the Checklist Text custom field and therefore will not be imported with the work items.
-
Templates are not migrated in the process described here and will have to be added manually. If you have a large number of templates and are performing a single Jira-Jira migration (so project IDs did not change), please contact us for assistance.
Source Jira Cloud Instance
-
Enable the Sync checklists to Custom Fields global setting. This will ensure that all local checklist data will be stored in Jira custom fields and migrated automatically with the other Jira data. Note that the initial save might require a few hours if the setting was previously disabled.
-
Export the work items from Jira to a CSV file using the Backup Jira method. Checklists data will be preserved in the Checklist Text field.
Target Jira Cloud Instance
-
Install Checklists for Jira if it is not already installed.
-
Ensure that the Sync checklists to Custom Fields global setting is enabled.
-
Find and note the custom field ID of the Checklist Text field.
-
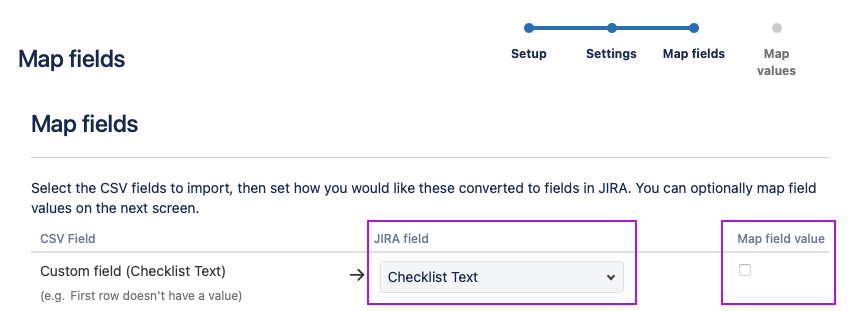
Import the Jira data using the External System Import wizard. This will create Checklists; custom fields. On the Fields page, select Checklist Text as the corresponding Jira Field for the Checklist Text field in the CSV file, but leave the Map field value checkbox unchecked. This will ensure that to the field values are imported exactly as stored in CSV file.
-
The Checklist Text field will now be populated with data from the import. However, an automation rule needs to be run in order to re-sync the Checklist Text field with the UI. Go to Space settings > Automation and click Create rule.
-
Create an automation rule:
-
Trigger: Select Scheduled.(The scheduled time does not matter – the rule will be manually ran once and then disabled.) Check the Run a JQL search and execute actions for each work item in the query checkbox and enter an expression that returns the imported work items (ex:
project = AK AND key > AK-10 AND key < AK-24).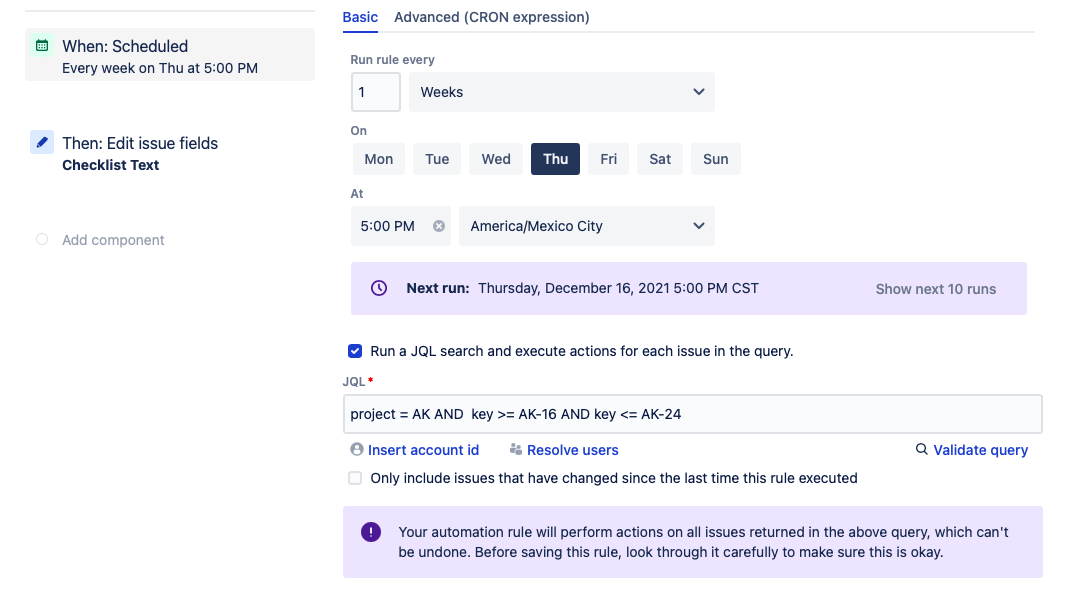
-
Action – Edit work items, select Checklist Text as the field to be updated and enter (where 10039 is the custom field ID of the Checklist Text field.
{{work item.customfield_10039}}
---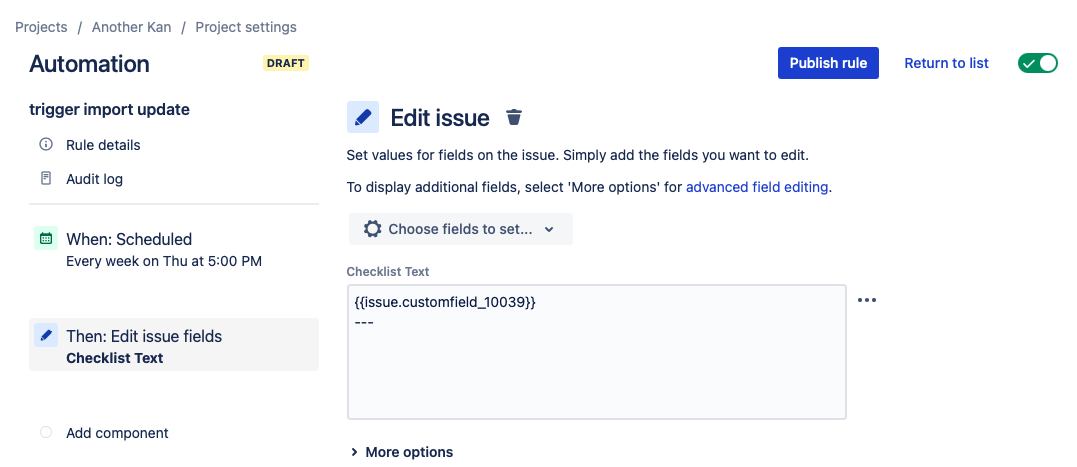
-
Save and Run the rule.
-
After confirming that the work items were updated, disable the rule.
-