
Clockwork permissions are only available in Clockwork Pro
To use Clockwork in your Jira instance, you usually don’t have to configure anything - it’s ready to use straight out of the box, and the users typically have all the required permissions. If you encounter issues accessing our app’s features, please ensure the users have the required permissions to complete the attempted action.
Jira Permissions that Impact Clockwork
Along with Clockwork custom permissions, Clockwork also uses the following Jira permissions:
-
Work On Issues Permission – The Work on Issues permission is required for users to log work on a work item.
-
Browse Projects Permission –To view worklogs in the Timesheet, you must have the Browse Projects permission for all of the spaces referenced by the worklogs.
-
Delete All Worklogs Permission – To delete all worklogs created on work items, a user must have permission to Delete All Worklogs permission.
-
Delete Own Worklogs Permission – The Delete Own Worklogs permission allows users to delete their worklogs from Jira work items.
-
Edit All Worklogs Permission – The Edit All Worklogs permission allows users to edit all worklogs.
-
Edit Own Worklogs Permission – The Edit Own Worklogs permission allows users to edit their worklogs.
-
Assignable User – For a user to appear in the “Log work for“ dropdown, they need:
-
The Assignable User permission
-
The Work on Issues permission
-
Clockwork Global Permissions
Clockwork Pro comes with it’s own set of Global and Space permissions that can help you further fine-tune your control over user interactions with the app.
Clockwork Global permissions include:
-
Clockwork Admin Access – This permission gives you access to Global and Space Timesheets, Timers, API, Teams, and Billing Periods. It is granted to all users by default.
-
Clockwork Timesheet Access –This permission gives you access to Global and Space Timesheets, Reports, and API. It is not granted to users by default.
Clockwork Edit Own Working Hours Access
Enabling this permission allows users to edit their own Clockwork Working Hours. By default, only Jira Administrators have access.
Clockwork Edit All Working Hours Access
This permission gives users the ability to edit all Clockwork Working Hours. By default only Jira Administrators have access.
Clockwork Bugdeting Access (BETA)
Ability to set and view hourly costs and rates for users and see costs and revenue reports. Learn more
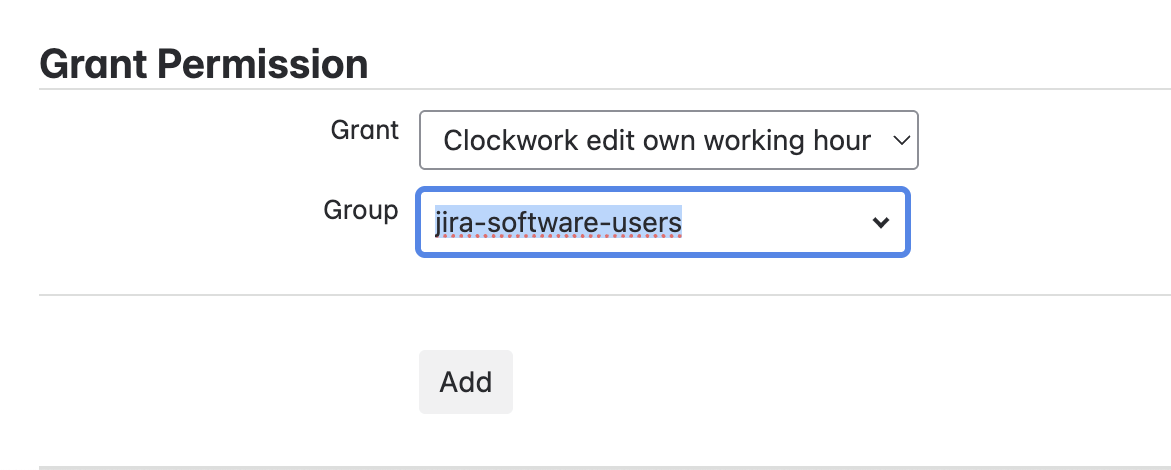
Setting Clockwork Global Permissions
-
Log in as a Jira Administrator and go to Jira Settings > System > Global permissions.
-
Scroll down to Grant Permission.
-
Select the appropriate permission in the Grant dropdown.
-
Select the appropriate user group in the Group dropdown.
-
Click Add.
Clockwork Space Permissions
These permissions require you to configure Clockwork as the time tracking provider in your global Jira settings.
Clockwork View All Worklogs
By default, the Clockwork tab showing worklogs will be visible only to people who have Work On Issues space permission. If you want to make worklogs visible to other users, use this permission.
Clockwork View All Hours
This permission allows you to show a summary of time spent by each user on the work item without showing the users' worklogs.
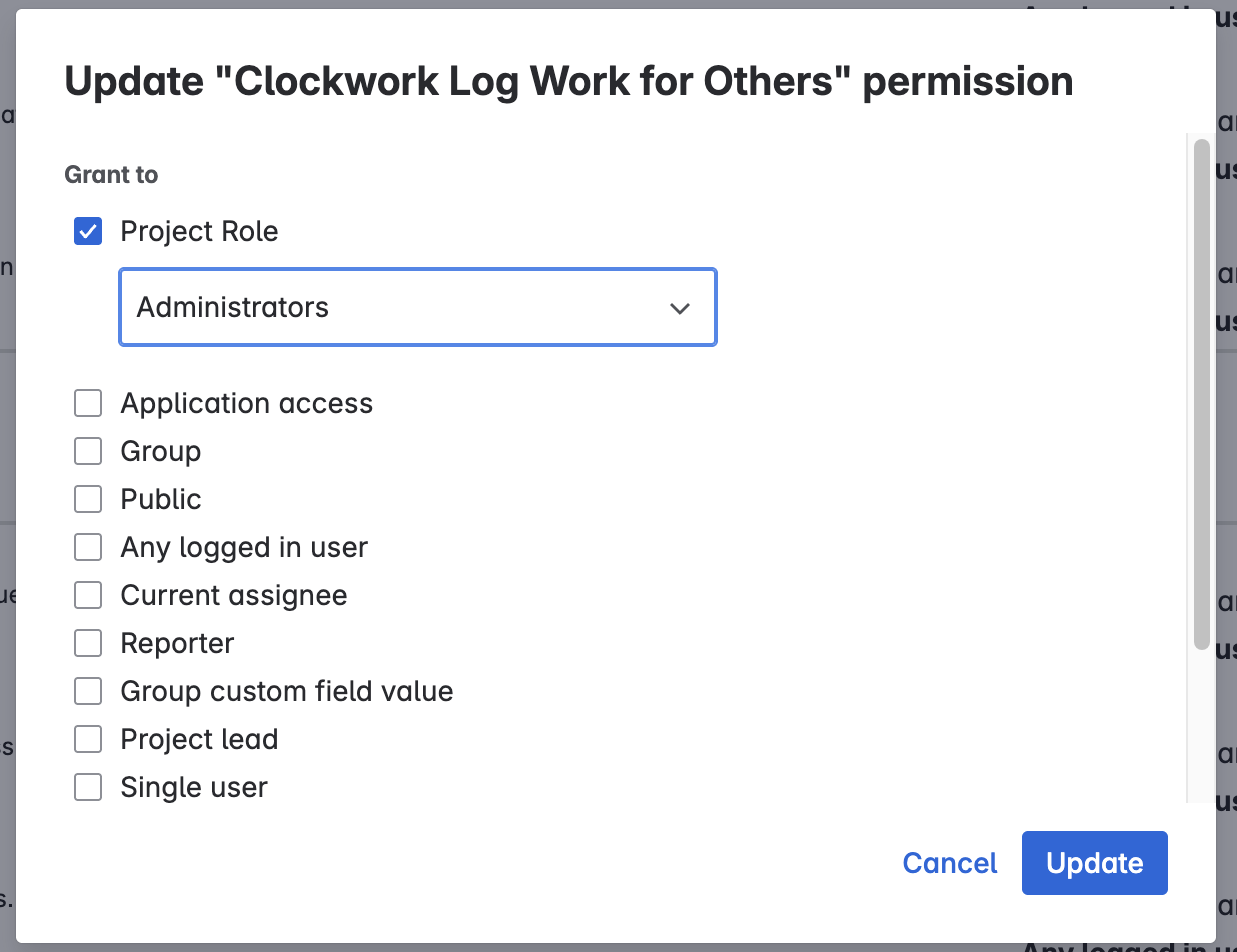
Clockwork Log Work for Others
Users with this permission can report time on behalf of other users. See this page for more details.
Setting Space Permissions in Company-managed Spaces
-
Navigate to Space Settings > Permissions.
-
Click Edit Permissions under the Actions menu.

-
Scroll down to Time Tracking Permissions.
-
Click Update for the appropriate permission.

-
Use the checkboxes to indicate who you want to grant the permission to.
-
Click Update.
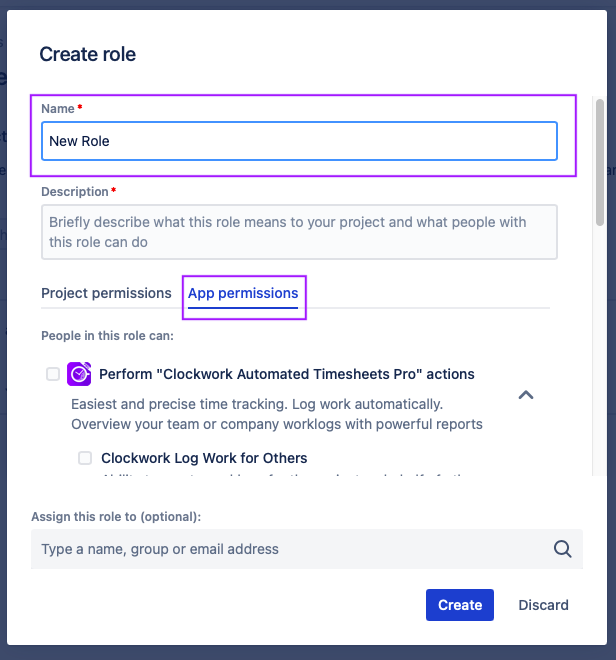
Setting Space Permissions in Team-managed Spaces
-
Navigate to Space Settings > Access.
-
Click the Manage roles button (top right).

-
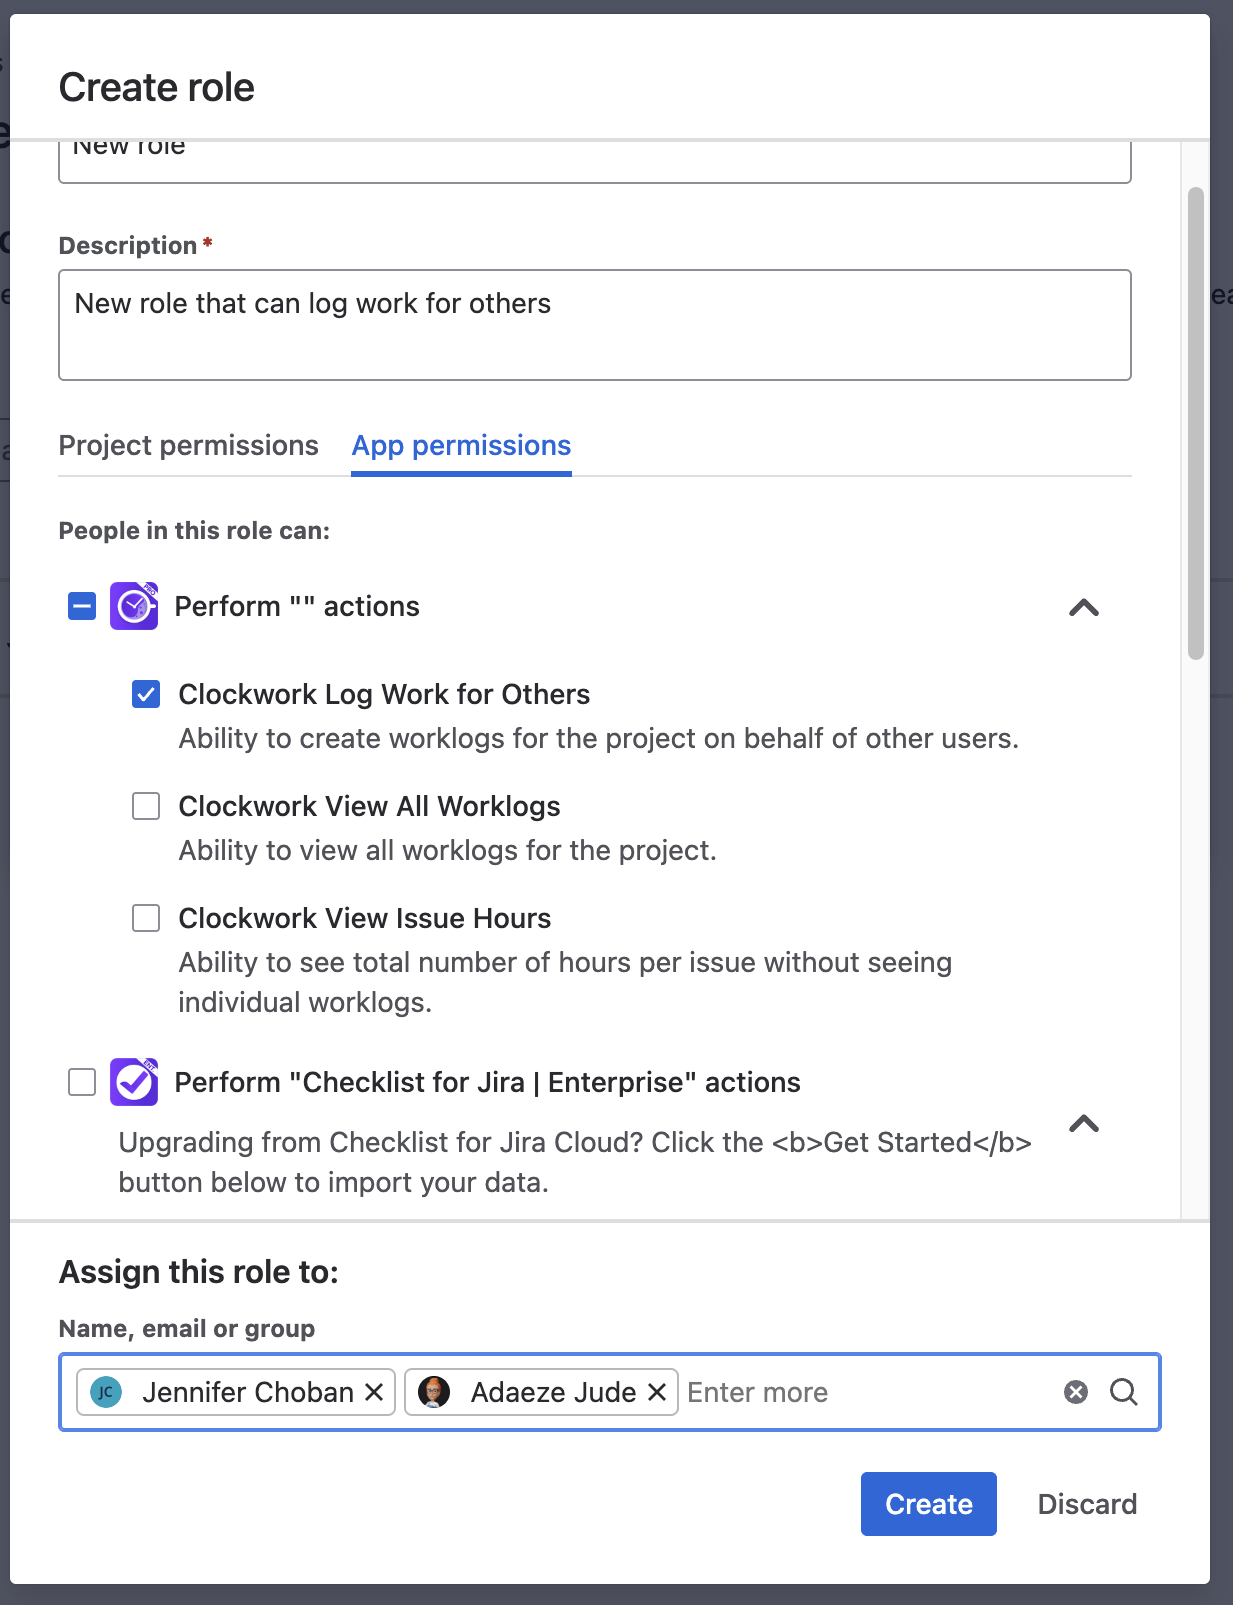
Click Create role.

-
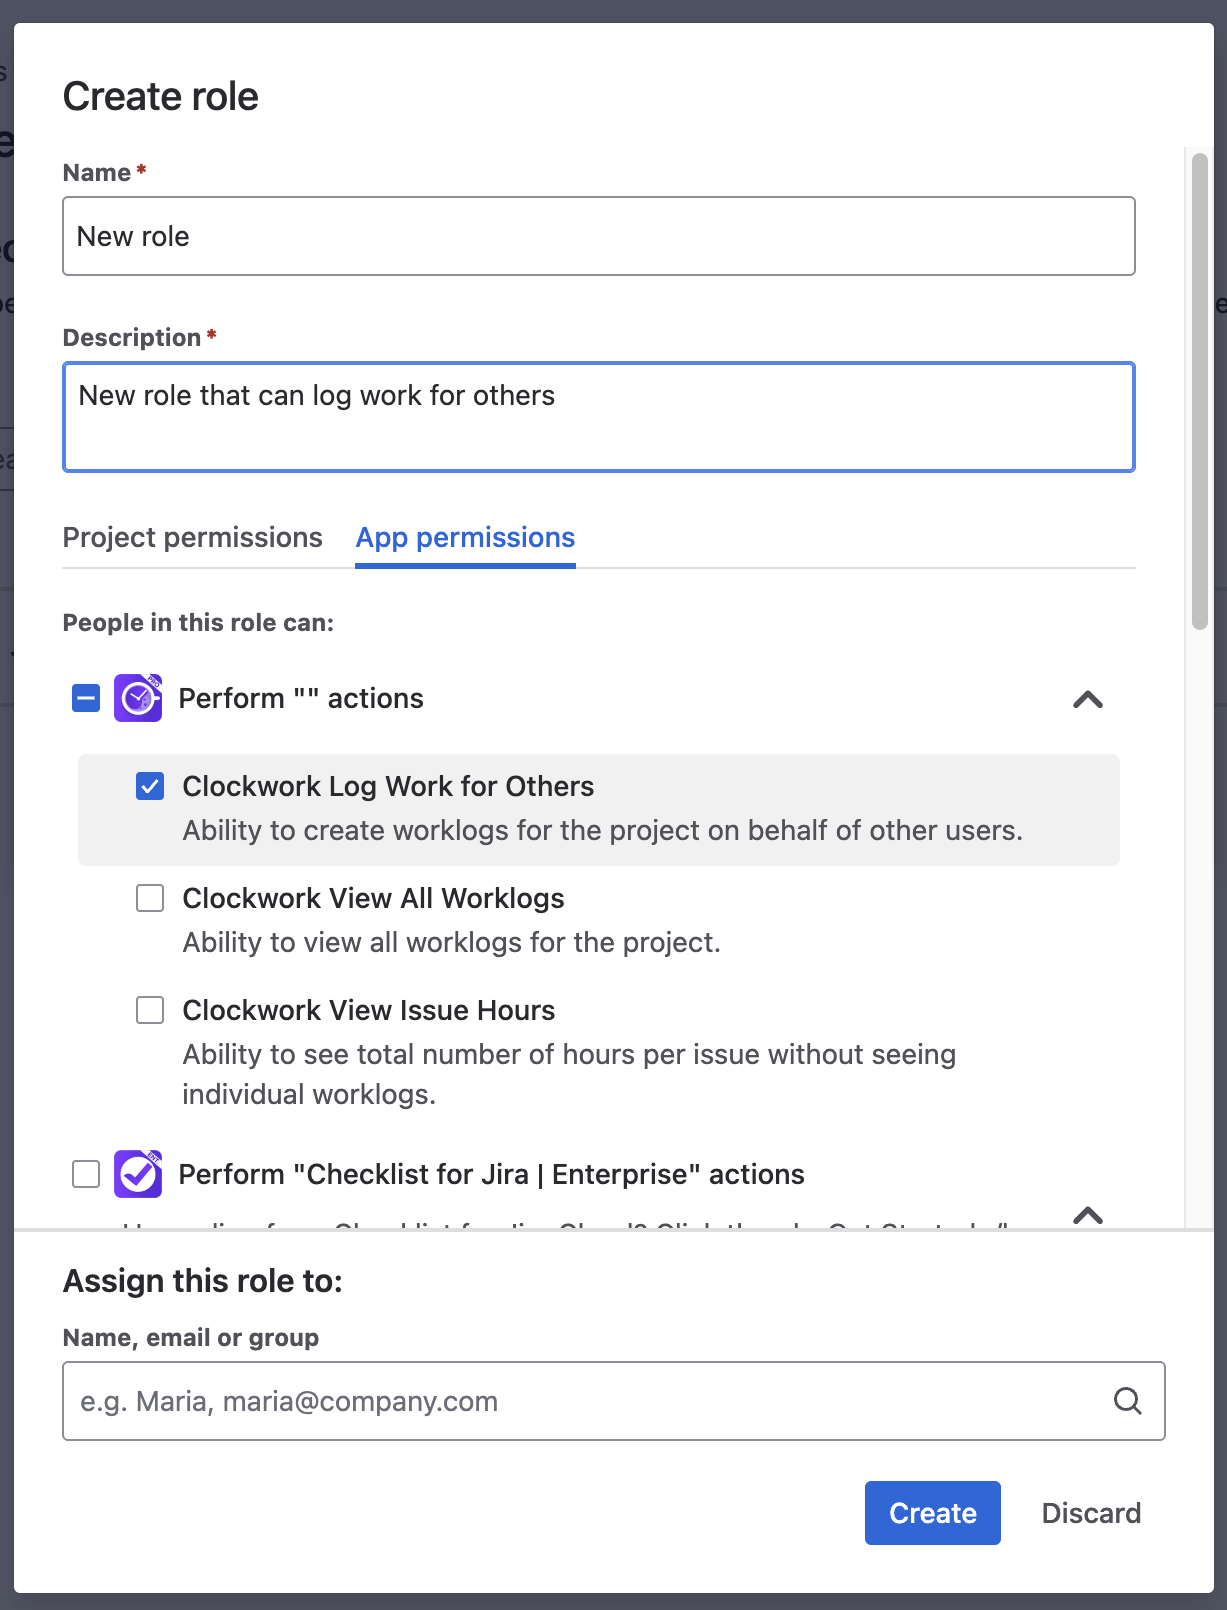
Name the role and select the App permissions tab.
-
Select the appropriate permission.
-
Select the users/groups who will be added to the role.
-
Click Create.