
This rule adds a label to indicate that a specific checklist item has been completed.
Limitations
-
You will need to modify the regular expressions if you have custom checklist statuses.
-
If you are using Checklists for Jira enterprise , note that this rule will not respond to items in Global Checklists. The rule is triggered by changes in the Checklist Text custom field. Global Checklists are not saved to the custom field and therefore cannot be referenced by the automation rule.
Notes
If you are using this rule in a team-managed space, you first need to add the Checklist Text custom field to the space. To add a field to a space:
-
Navigate to Space settings > Fields.
-
Click Add field.
-
Select the Checklist Text.
-
Click Add 1 field.
Modifications
This example uses the Field value changed trigger. You can modify the rule to use another trigger such as Work item transitioned. Do not use the generic Work item updated trigger because when a label is added to the work item, a “Work item updated” event is sent by Jira which may make the automation rule run repeatedly.
Add Label When a Given Checklist Item Completed
-
Ensure the Sync checklists to Custom Fields global setting is enabled, and that the Jira space has the Checklist Text field.
-
Navigate to Space Settings > Automation (or Jira Settings > System > Automation rules).
-
Click Create rule.
-
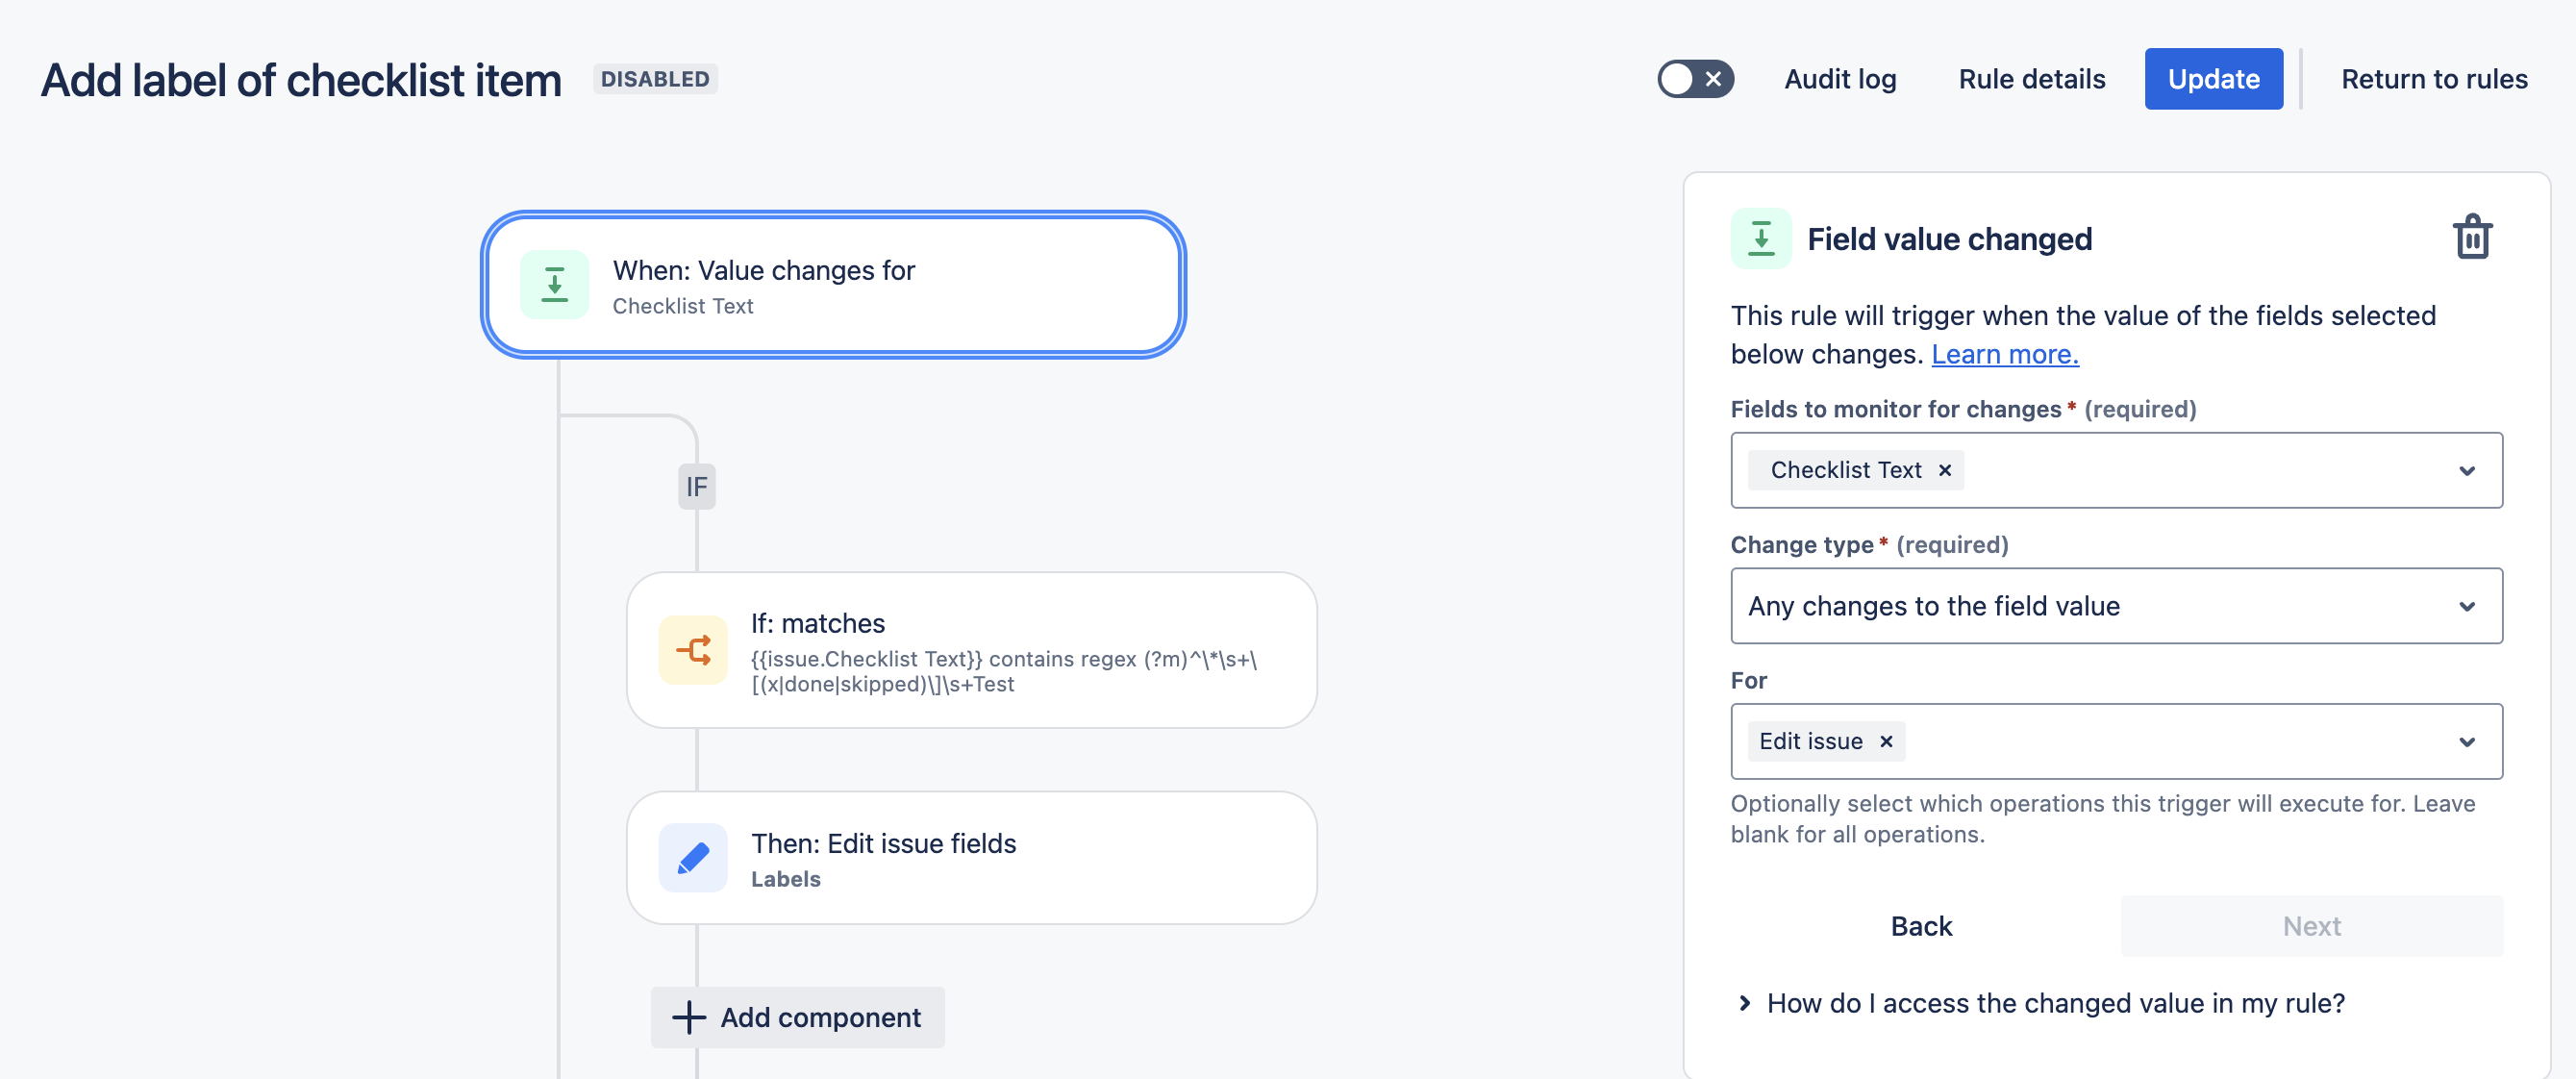
Select the Field value changed trigger and click Next.
-
Select Checklist Text in the first dropdown list and then select Edit work item in the second dropdown list. Click Next.
-
Click New condition and select If / else block.
-
Click Add conditions... and select {{Smart value}} condition.
-
Enter the following:
-
{{issue.Checklist Text}} -
contains regular expression
-
(?m)^\*\s+\[(x|done|skipped)\]\s+TestWhere Test is the text/summary of the checklist item that will trigger the label.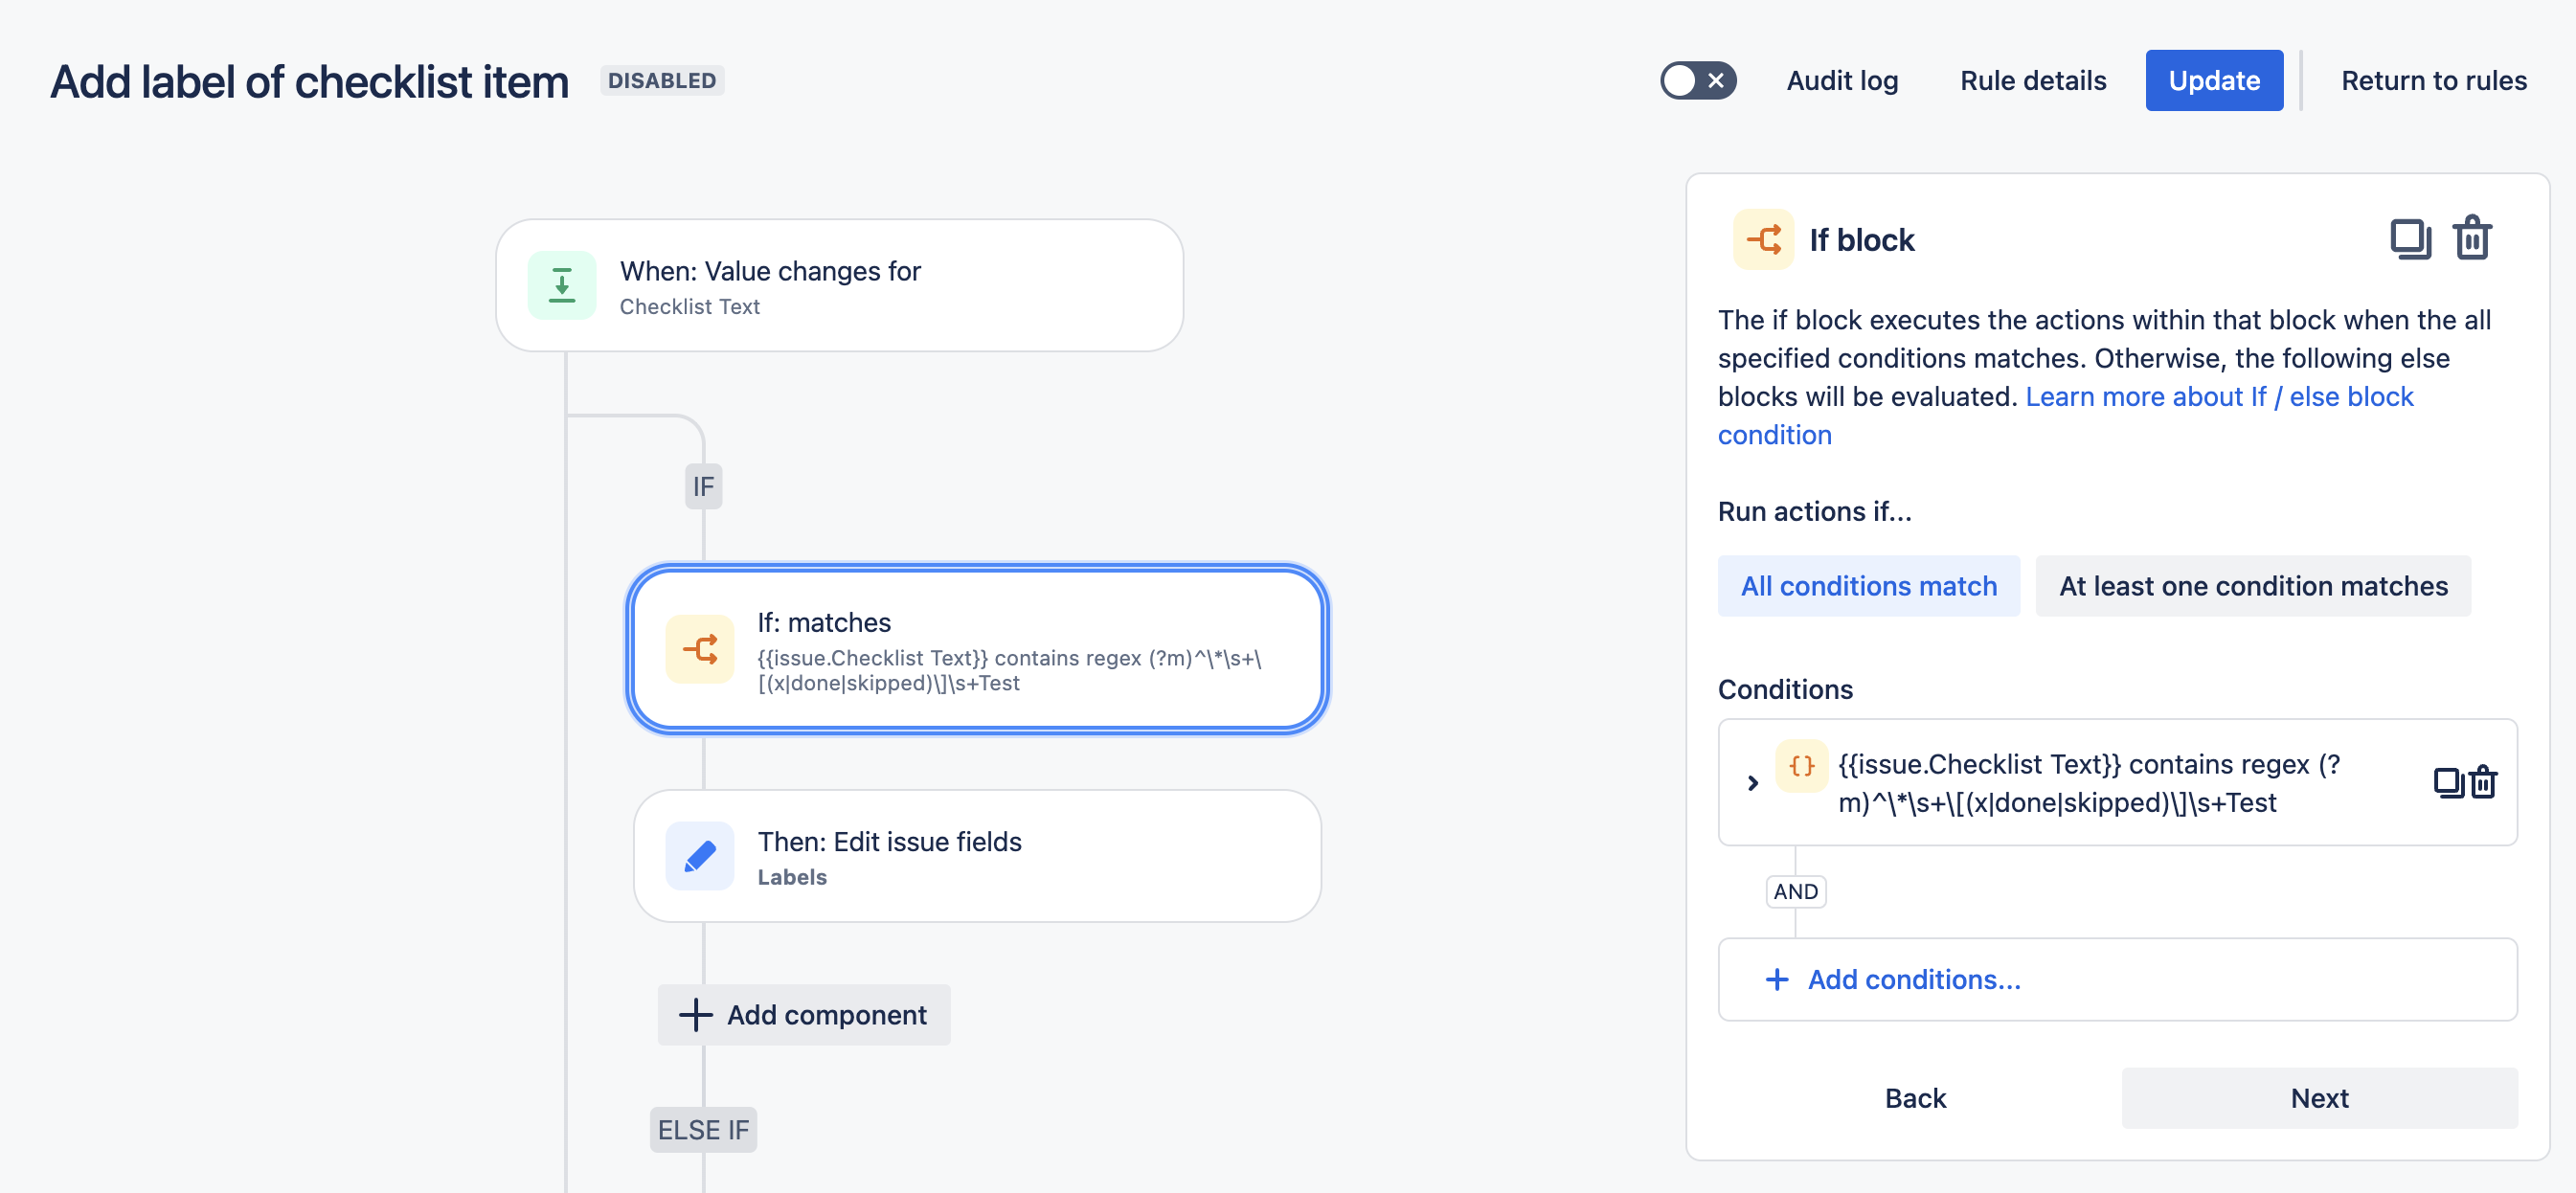
-
-
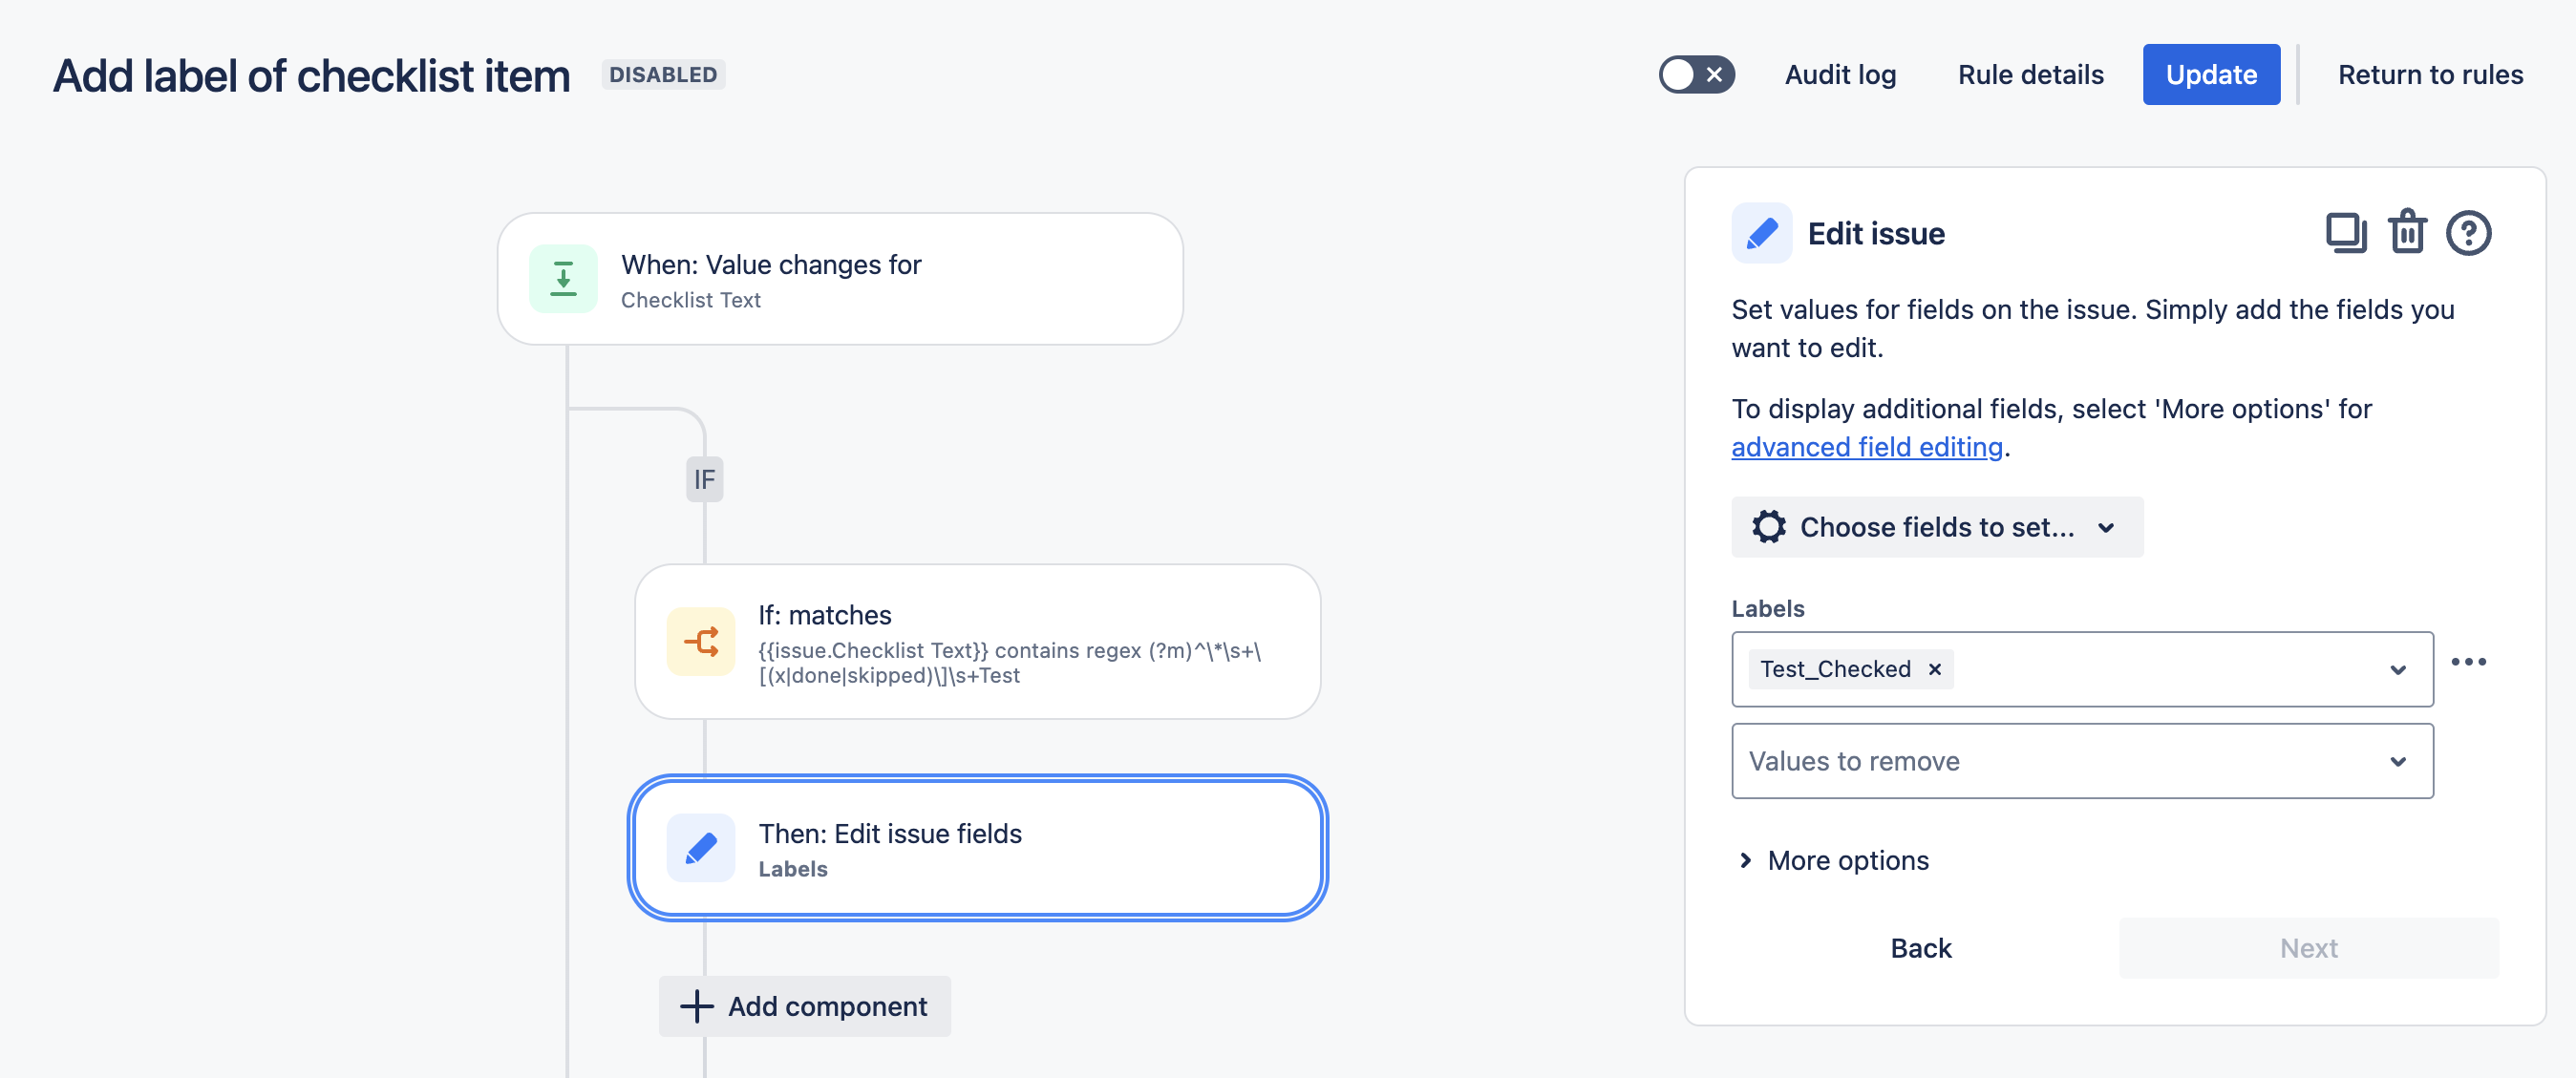
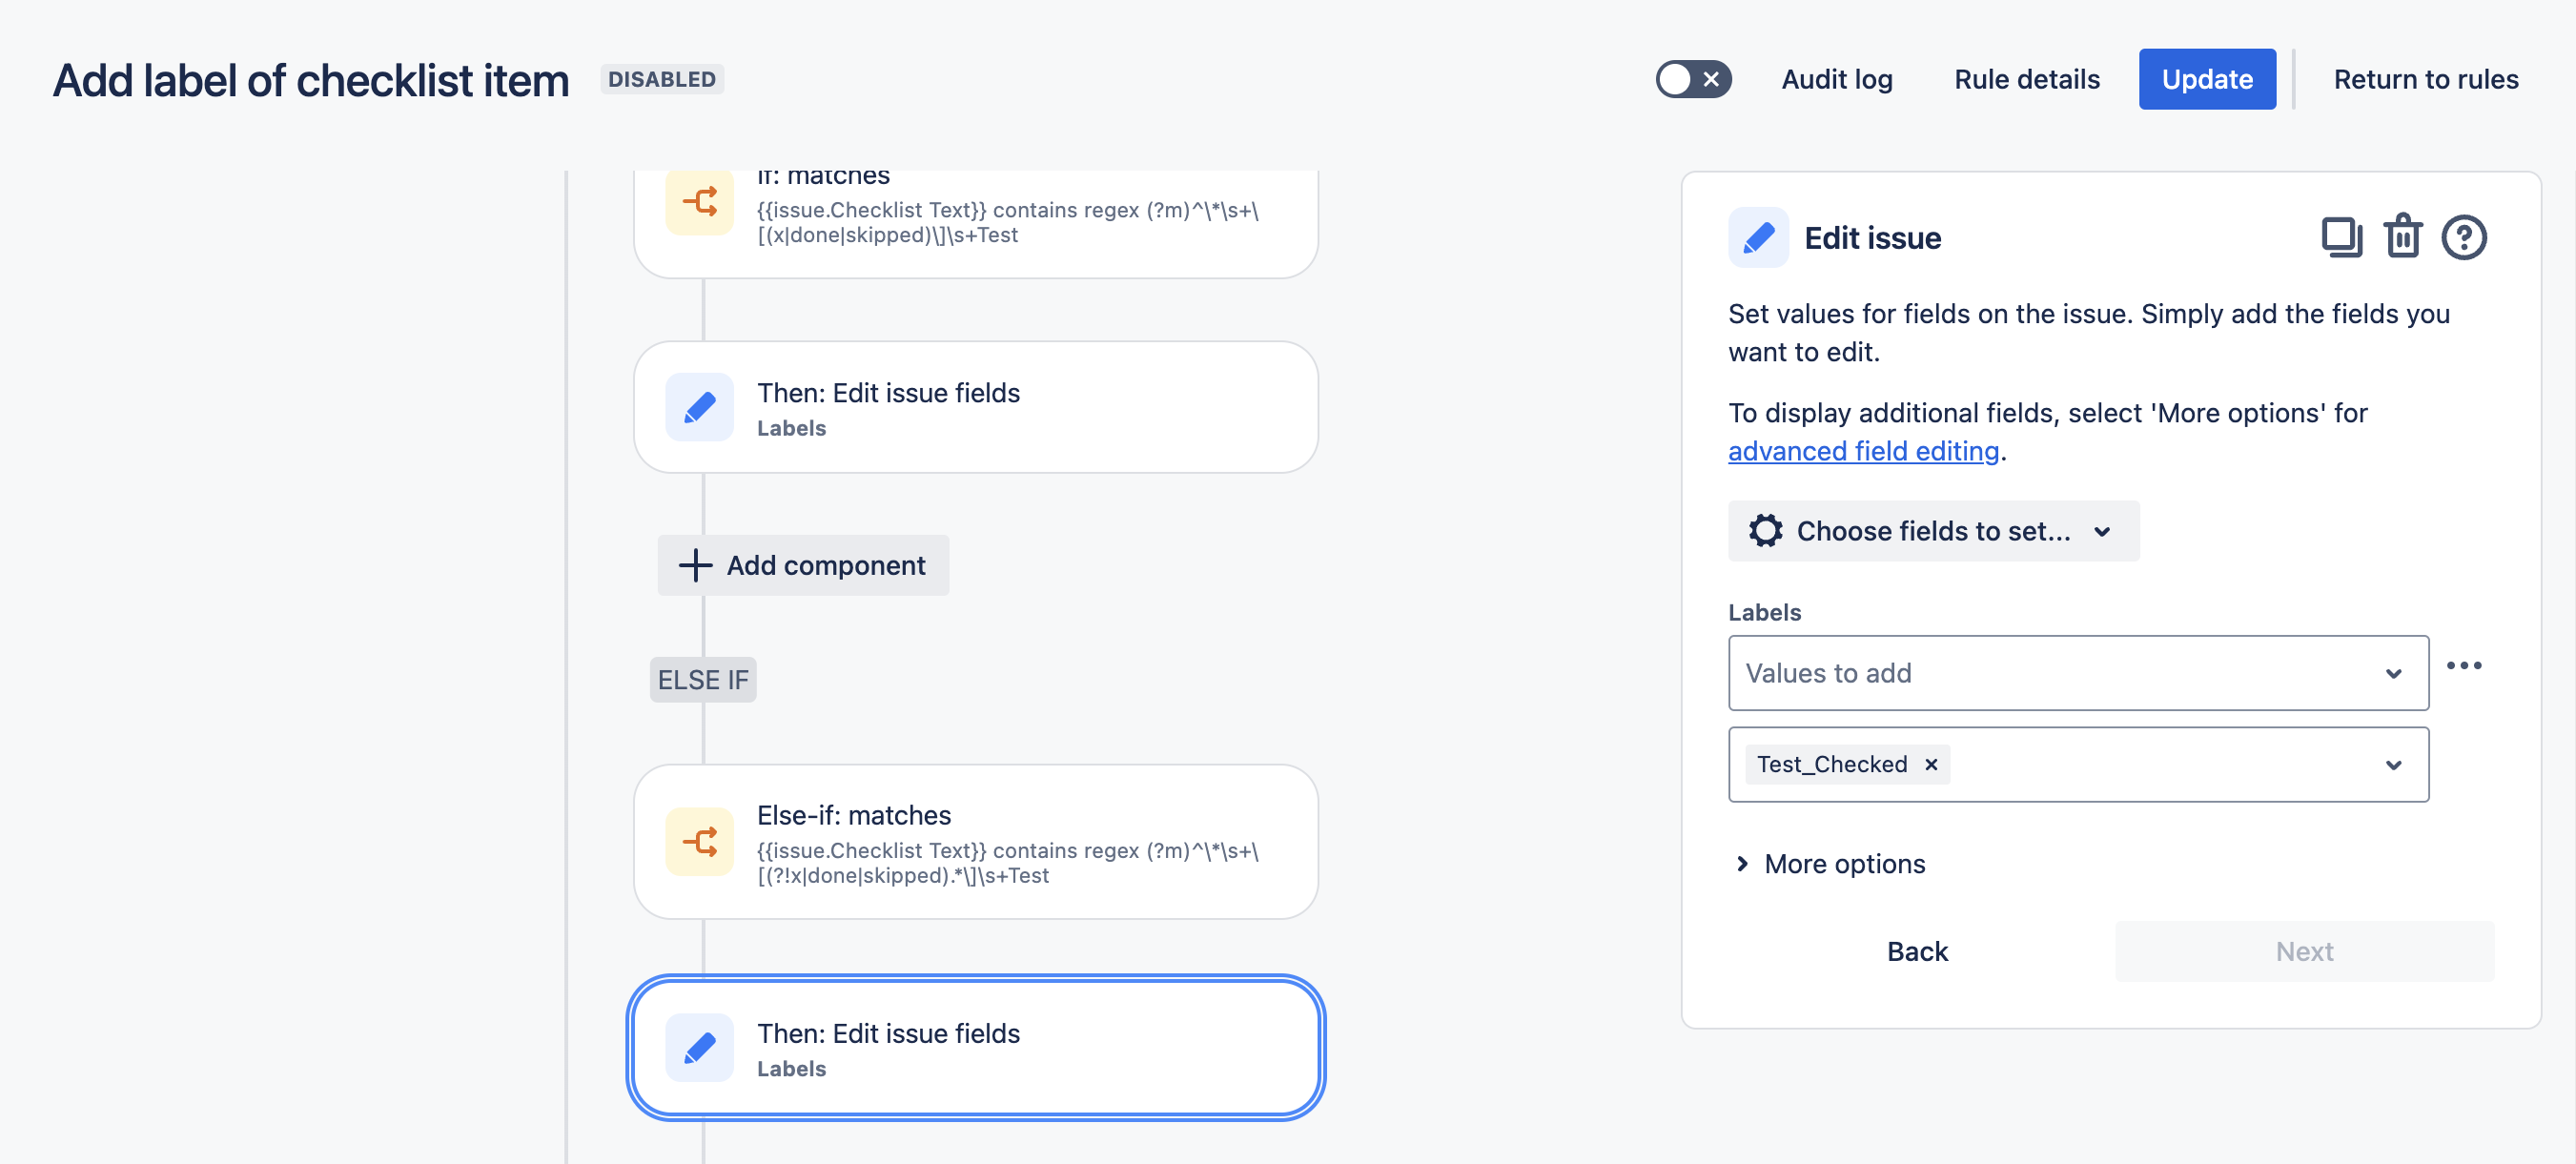
Select New action.
-
Select Edit work item and select Labels as the field to be edited.
-
Click on the … to the right of the fields dropdown and select Add/remove values.
-
Enter the text of the label you want to add. This is the label that will be added if the corresponding checkbox is checked. Click Next.
-
Click Add else.
-
Click Add conditions... and select {{Smart value}} condition.
Alternatively, you can skip this step and go directly to step 16. In this case, the label "Test_checked" will be removed not only when Test item becomes unchecked, but also if it is deleted. -
Enter the following:
-
{{issue.Checklist Text}} -
contains regular expression
-
(?m)^\*\s+\[(?!x|done|skipped).*\]\s+TestNote that this expression differs from the one in step 8c.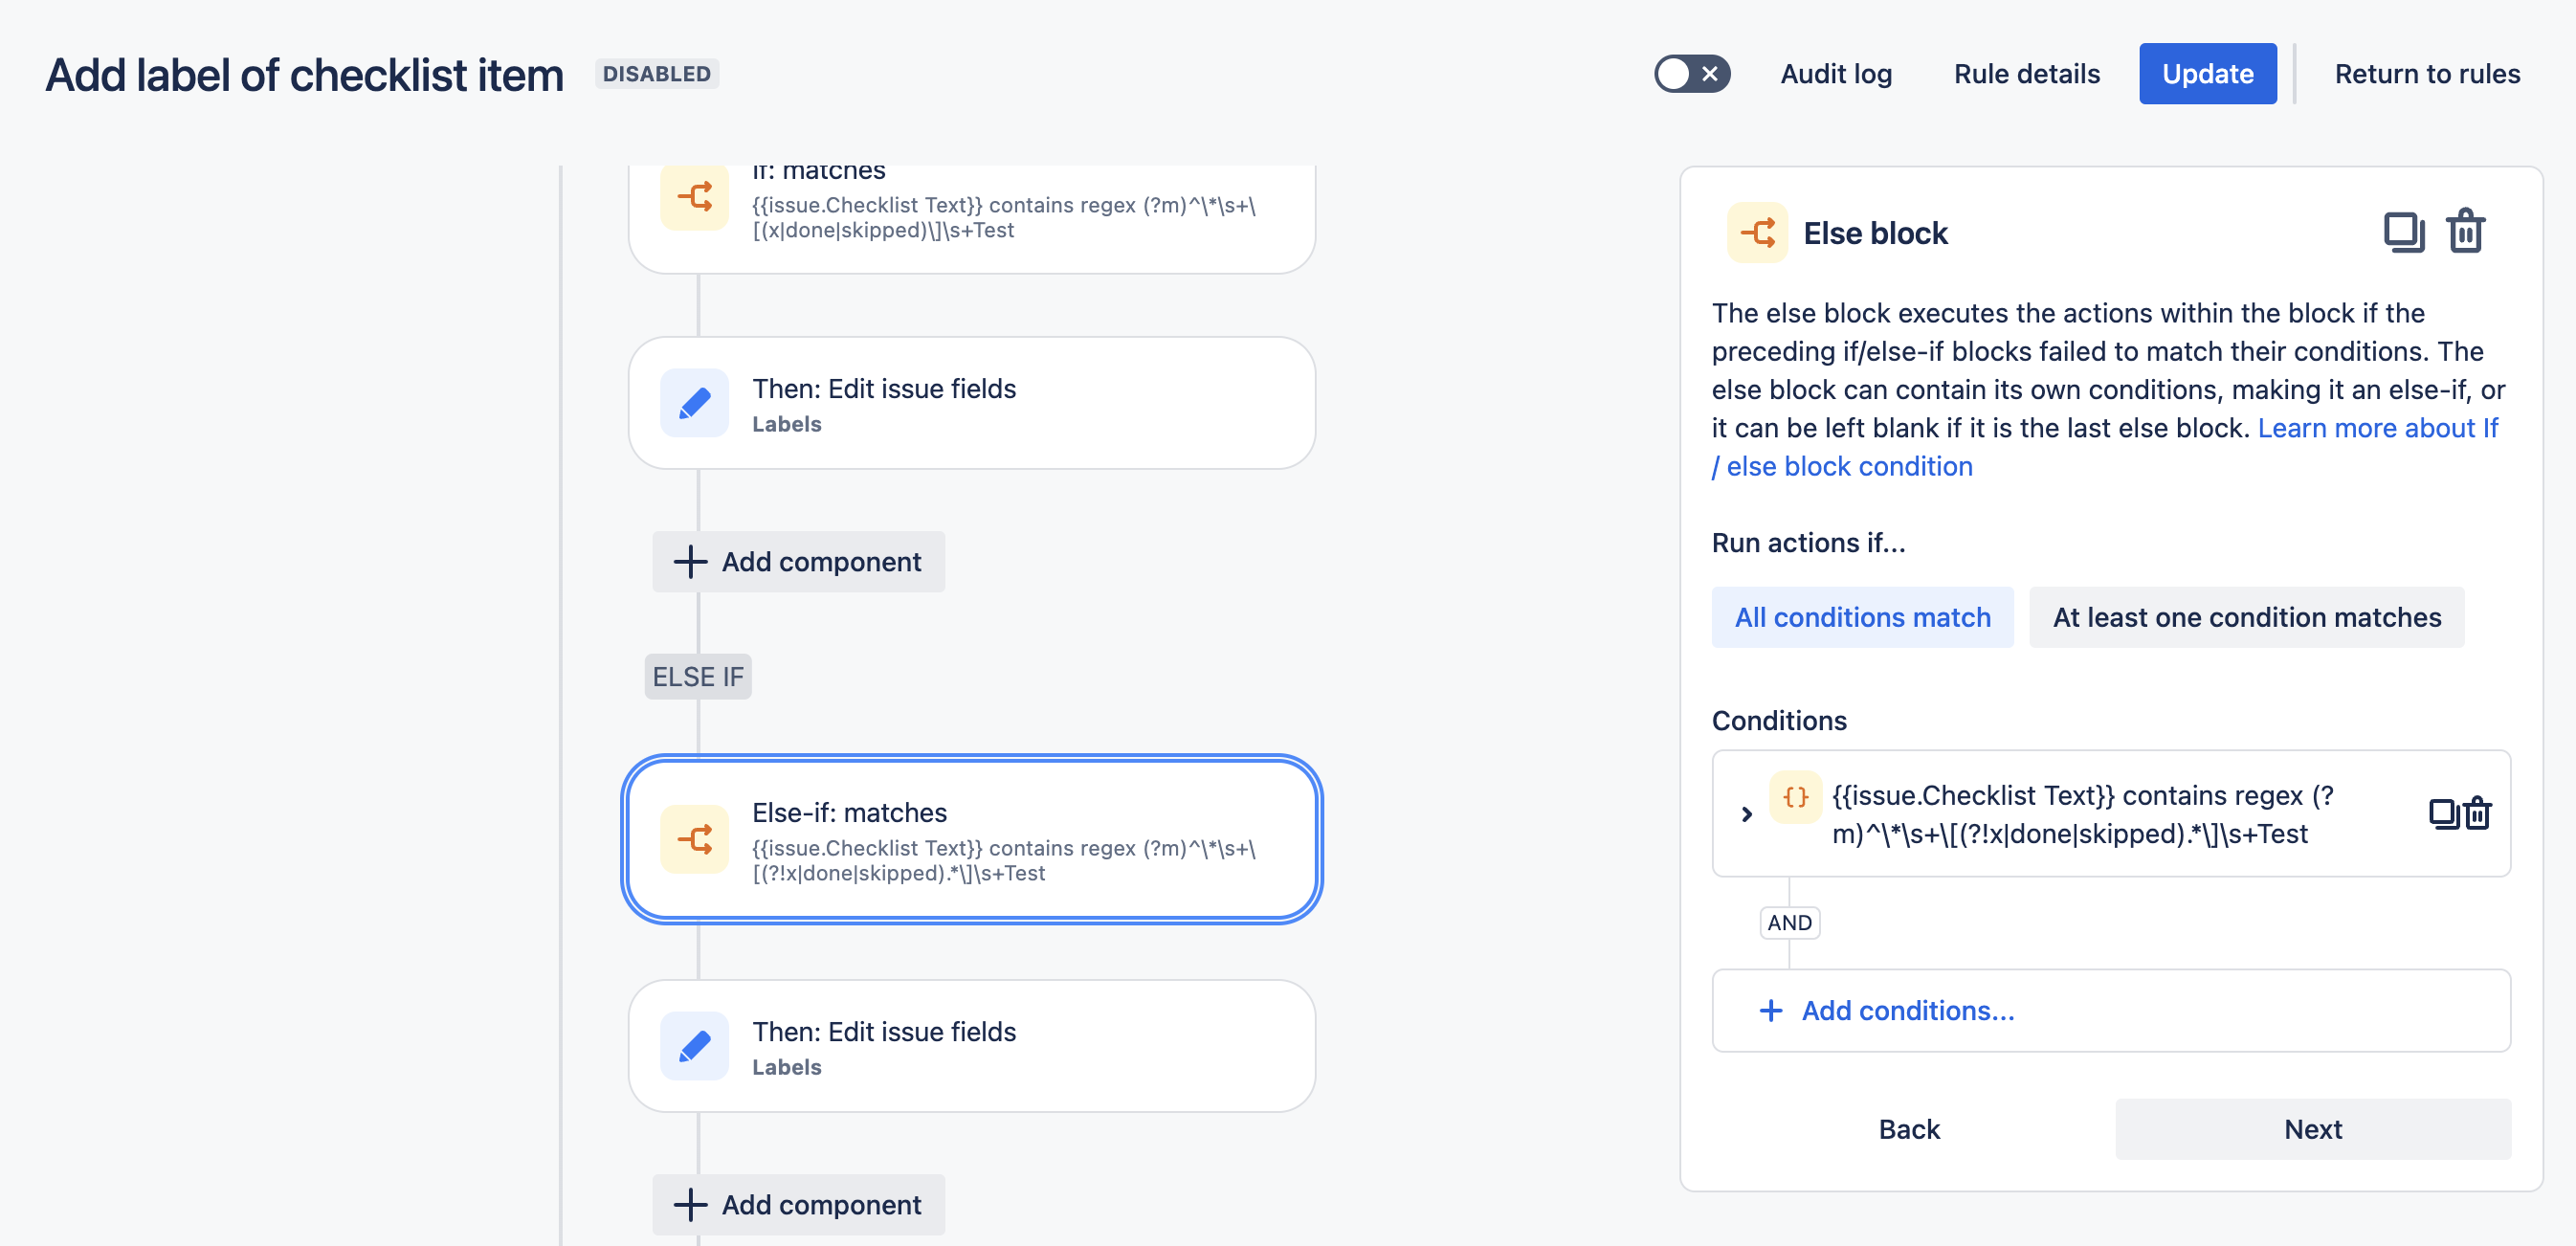
-
-
Select New action.
-
Select Edit work item and select Labels as the field to be edited.
-
Click on the … to the right of the fields dropdown and select Add/remove values.
-
Enter the text of the label you want to remove. This will remove the label if the corresponding checkbox is not checked. Click Next.
-
Name the rule and click Turn it on.