
Checklists for Jira creates custom fields which can be used with Jira automation to automatically execute Jira actions (i.e. transition a work item) in response to changes on the checklist; or to automatically add or update a checklist in response to changes on a Jira work item.
Sample Automation Rules
-
Add a Second Template When Work Item Created -
Add Checklist Based on a Custom Field Value -
Add Label When a Given Checklist Item Completed -
Append Checklist Item(s) on Work Item Transition -
Append Checklist Item(s) with User Mentions -
Apply Checklist Template -
Apply Template to New Subtask -
Change Item to Custom Status on Transition -
Close Work Item when Checklist Completed -
Create Checklist from Email Request -
Create Checklist Item from Dropdown Selection -
Create Work Items with Checklists on a Schedule -
Disable Checklist on Newly Created Projects -
Reopen Work Item when Checklist becomes Incomplete -
Replace Checklist Items on Work Item Transition -
Reset Checklist Daily -
Send Slack Message with Checklist Progress -
Transition Work Item When an Indicated Checklist Complete -
Transition Work Item when a Given Item is Complete -
Validate Checklist Complete - Team Managed Projects
Limitations
-
If an automation rule references the Checklist Text field, the Sync checklists to Custom Fields global setting must be enabled for the rule to function. After enabling the Sync checklists to Custom Fields setting, the sync may take a few hours up to a full day, to complete, depending on the size of your instance. Please allow adequate time before using the field in automation rules.
-
Jira Service Management currently includes Automation and Legacy Automation. The examples on these pages refer to Automation.
-
The Default Checklist feature is not compatible with automation rules that use the Work Item Created trigger. Both actions depend on Jira’s Work item created notification and an order of operations error may occur.
-
When creating automation rules in Team-managed spaces, you need to add Checklists custom fields to the space before they can be referenced in an automation rule.
-
When you make changes to the checklist via the Checklist Text field, the tooltip for each item in the checklist will be stamped as the time that change was made.
Adding Checklist Custom Fields
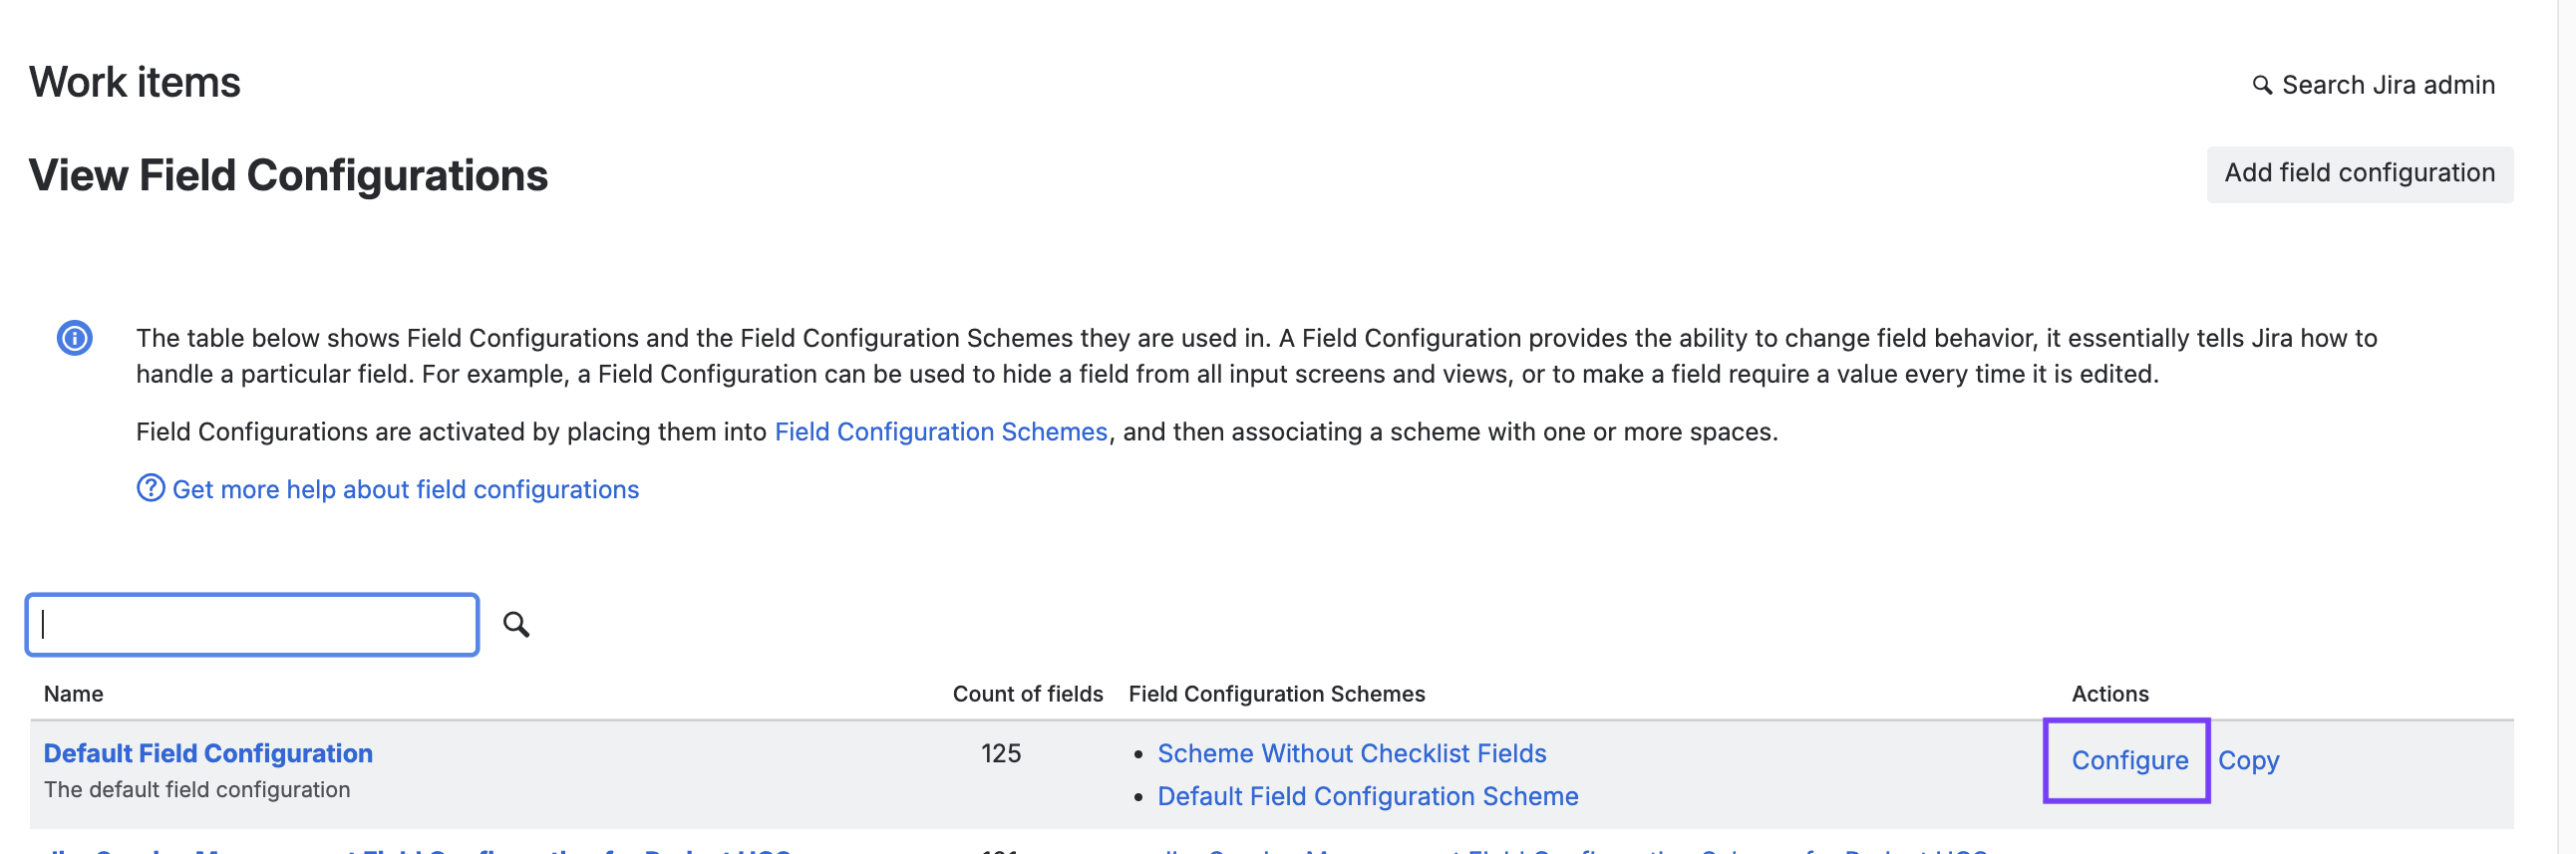
To get the most out of the Checklists app, we recommend that you add the Checklists for Jira custom fields to your Default field configuration, or whichever field configuration(s) are used by the spaces where you’ll be using checklists.
-
Navigate to Jira settings > Work items > Field Configuration.
-
Go to the the appropriate field configuration and click on Configure.
-
Use the Add field button to add the following fields:

Adding Checklists Custom Fields to a Team-managed Space
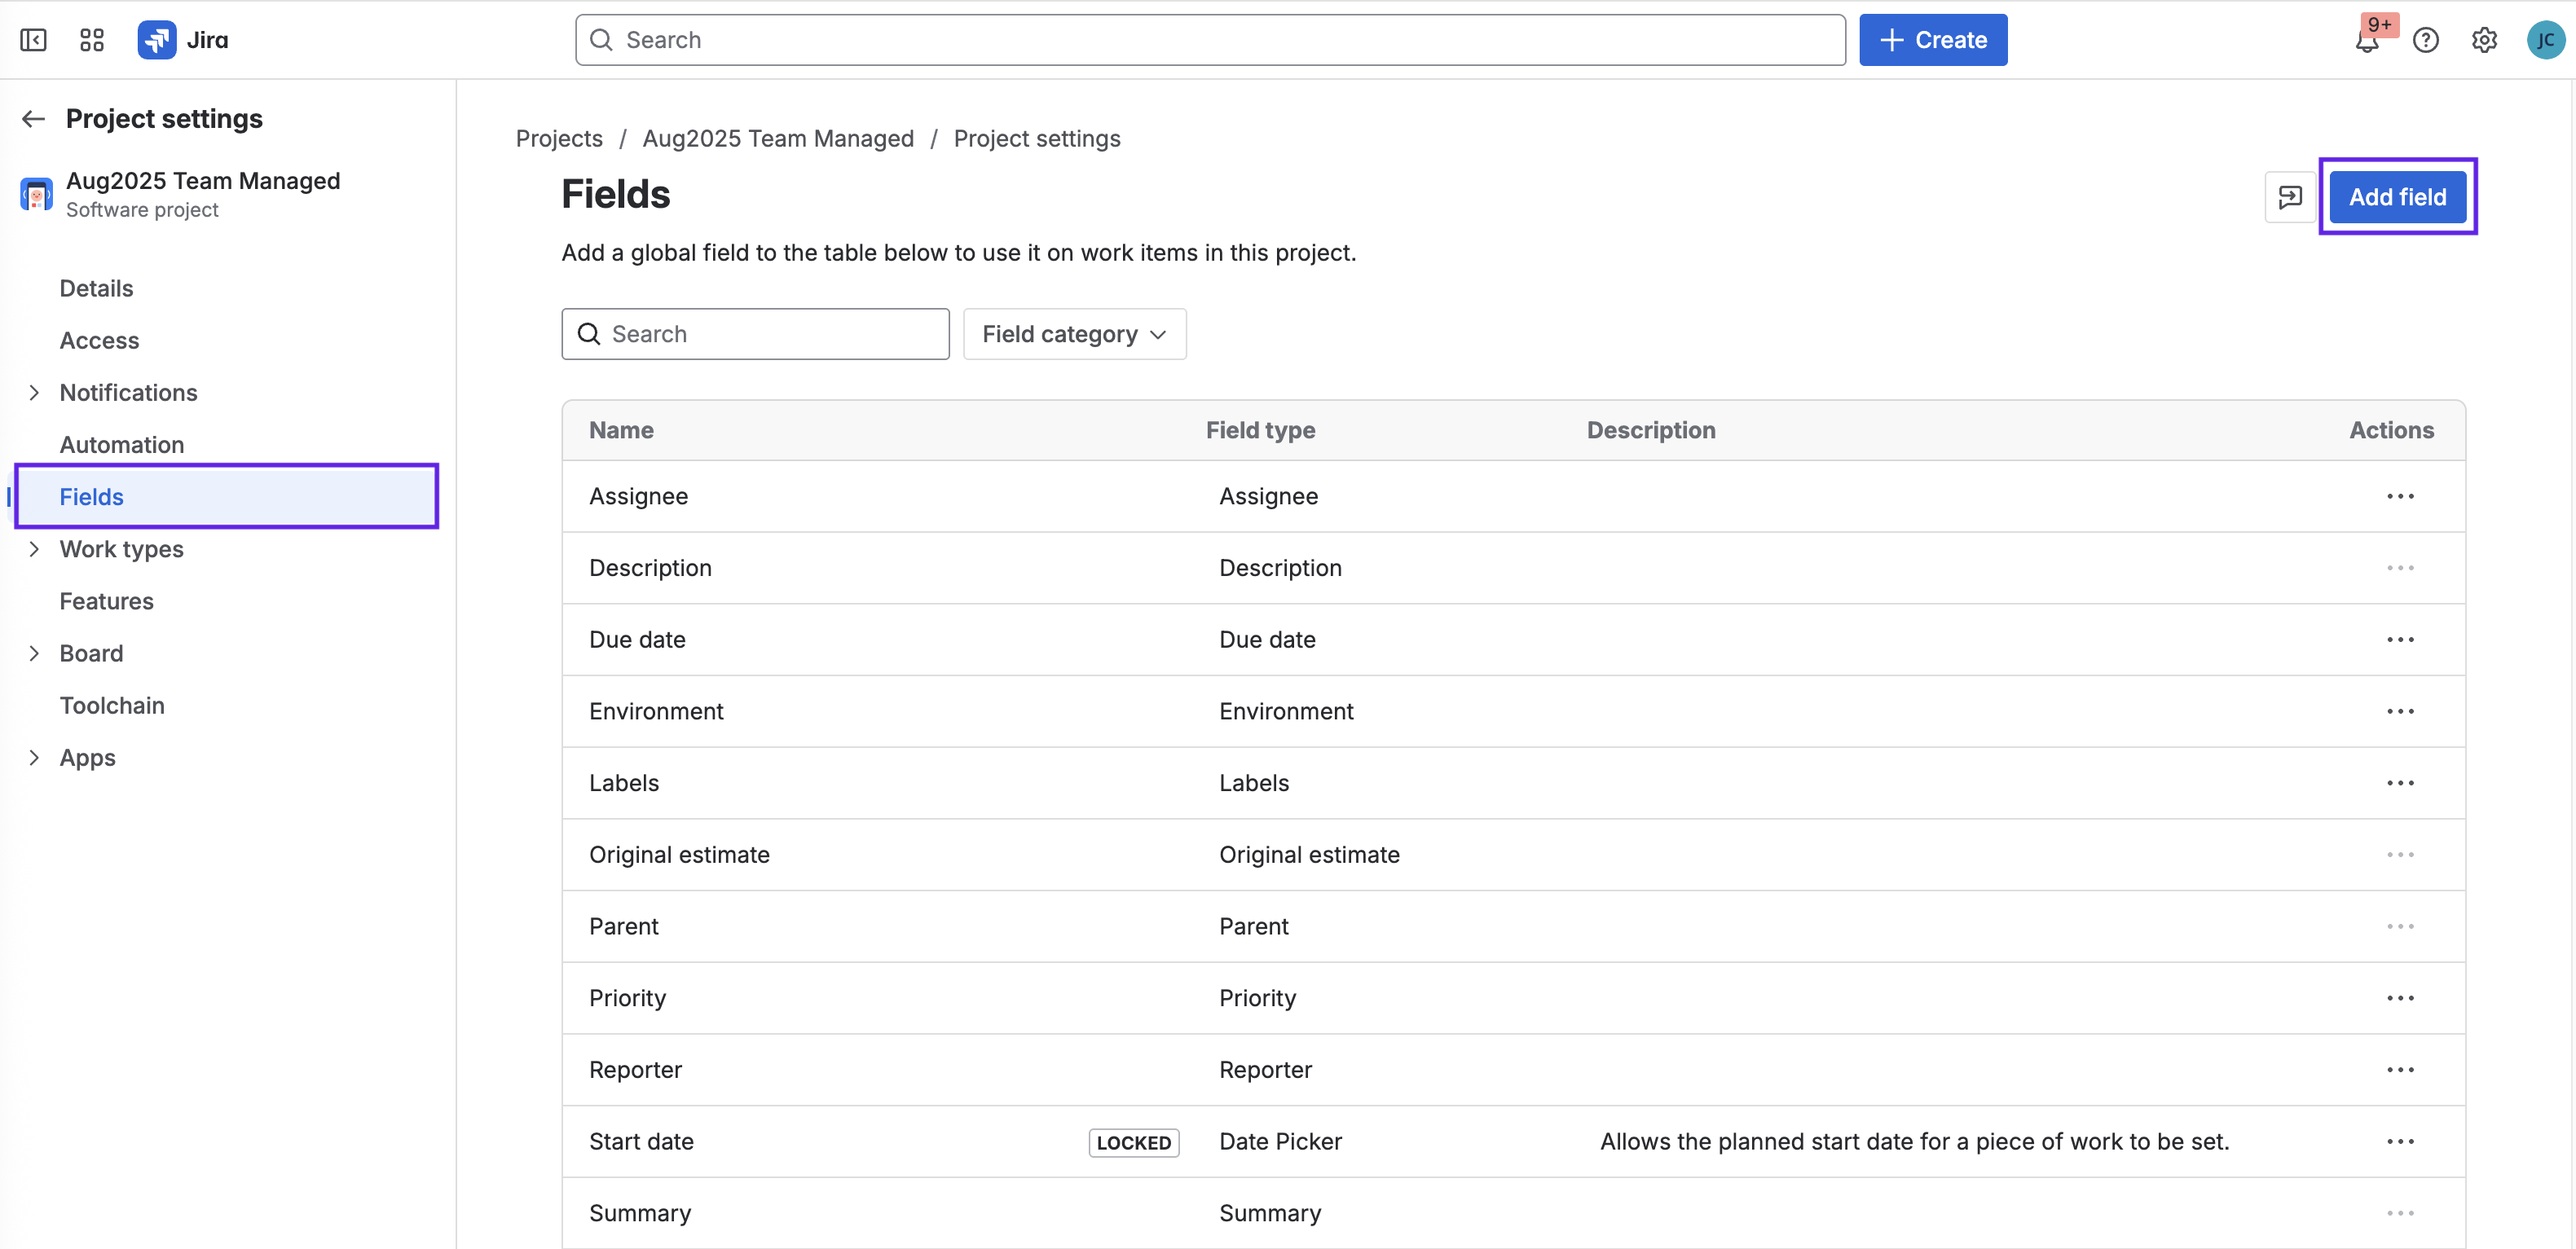
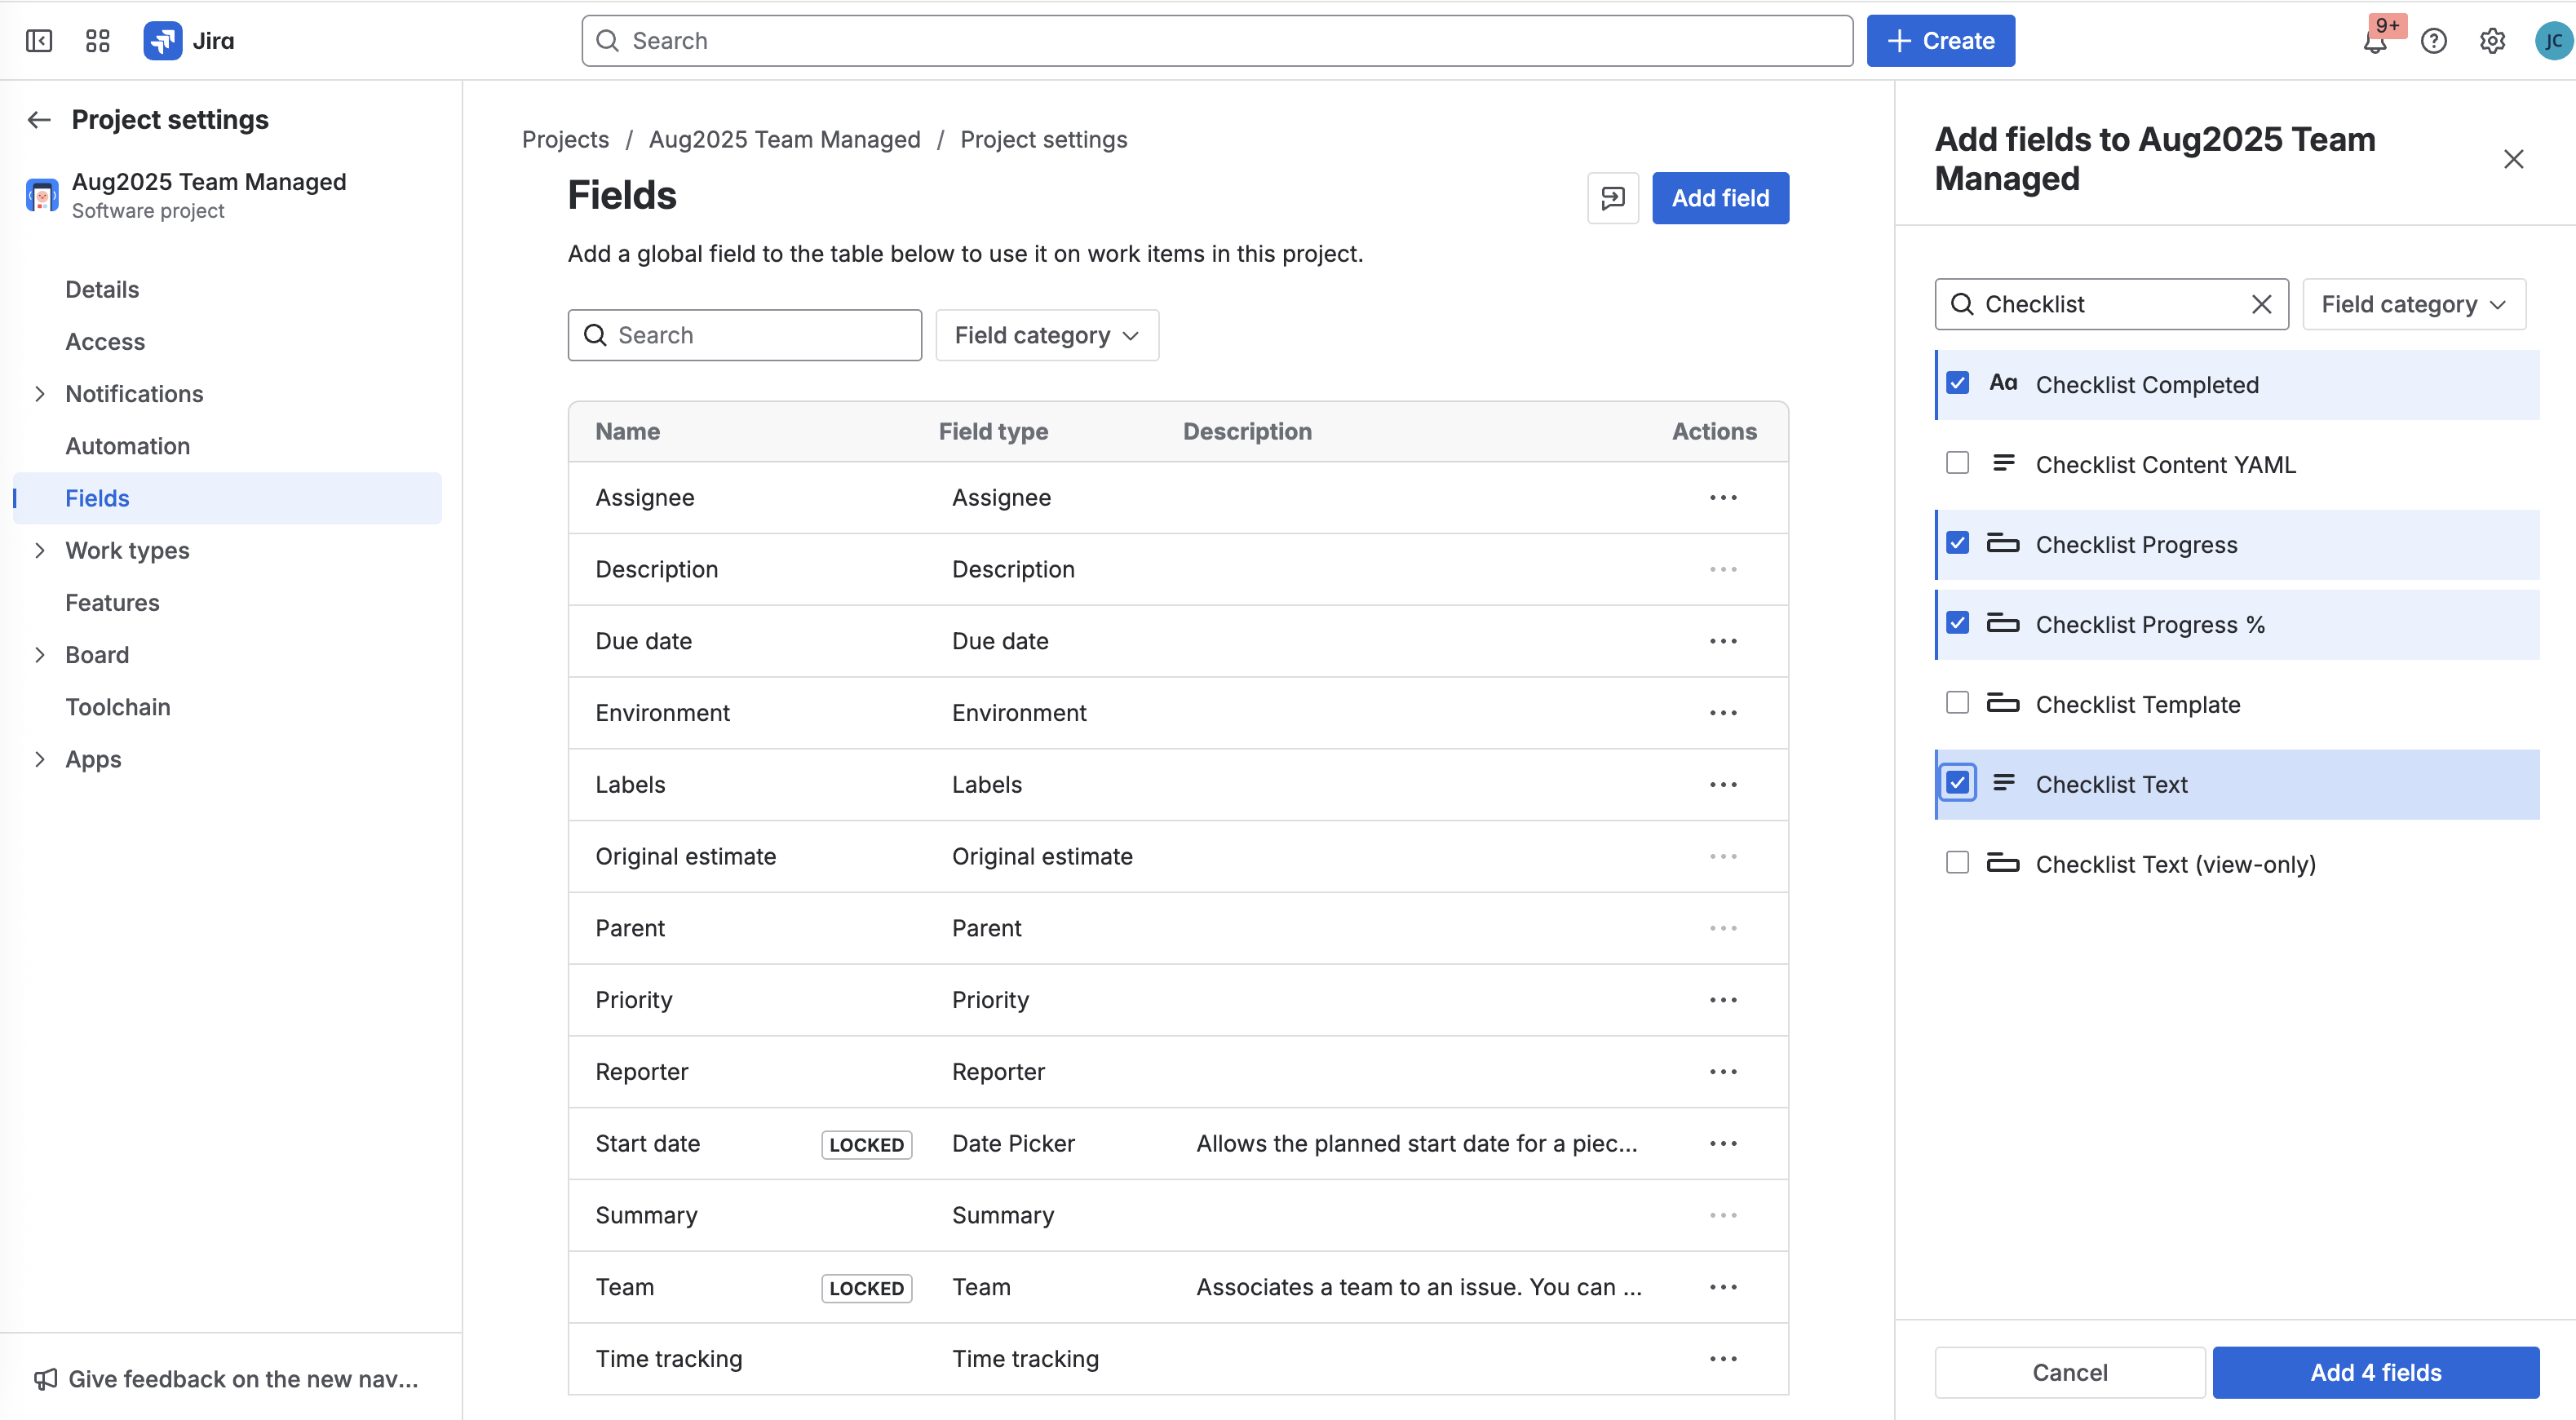
In team-managed spaces, you need to add the Checklists custom fields to the space before you can reference those field in automation rules, exports, etc.. To add the fields to a space:
-
Navigate to Space settings > Fields.
-
Click Add field.
-
Type checklist in the search box and use the check boxes to select the fields. It is recommended that you add the Checklist Completed, Checklist Progress, Checklist Progress % and Checklist Text fields to the space. (The Checklist Content YAML field and the Checklist Template field have been deprecated.)
-
Click Add 4 fields.
Copying Checklist Text
If you need a to reference the text of a checklist in an automation rule, copy the contents of the checklist editor.
Using Checklists with Jira Automation Smart Values
Smart values allow you to access and edit Jira data with automation rules. Smart values can be used in both rule conditions and rule actions.
Smart values for work item fields take the form of double curly brackets, “issue” and the name of the item property you want to access. So {{issue.key}} returns the work item key and {{issue.summary}} returns the summary.
In team-managed spaces, to ensure that Checklists smart values work correctly, add the Checklists custom fields to the space before creating automation rules.
The smart values for checklist Custom Fields are:
|
Custom Field |
Smart Value |
Possible Use |
|---|---|---|
|
Checklist Completed |
|
|
|
Checklist Progress |
|
|
|
Checklist Progress % |
|
|
|
Checklist Text |
|
|
|
Checklist Text (view-only) |
|
|
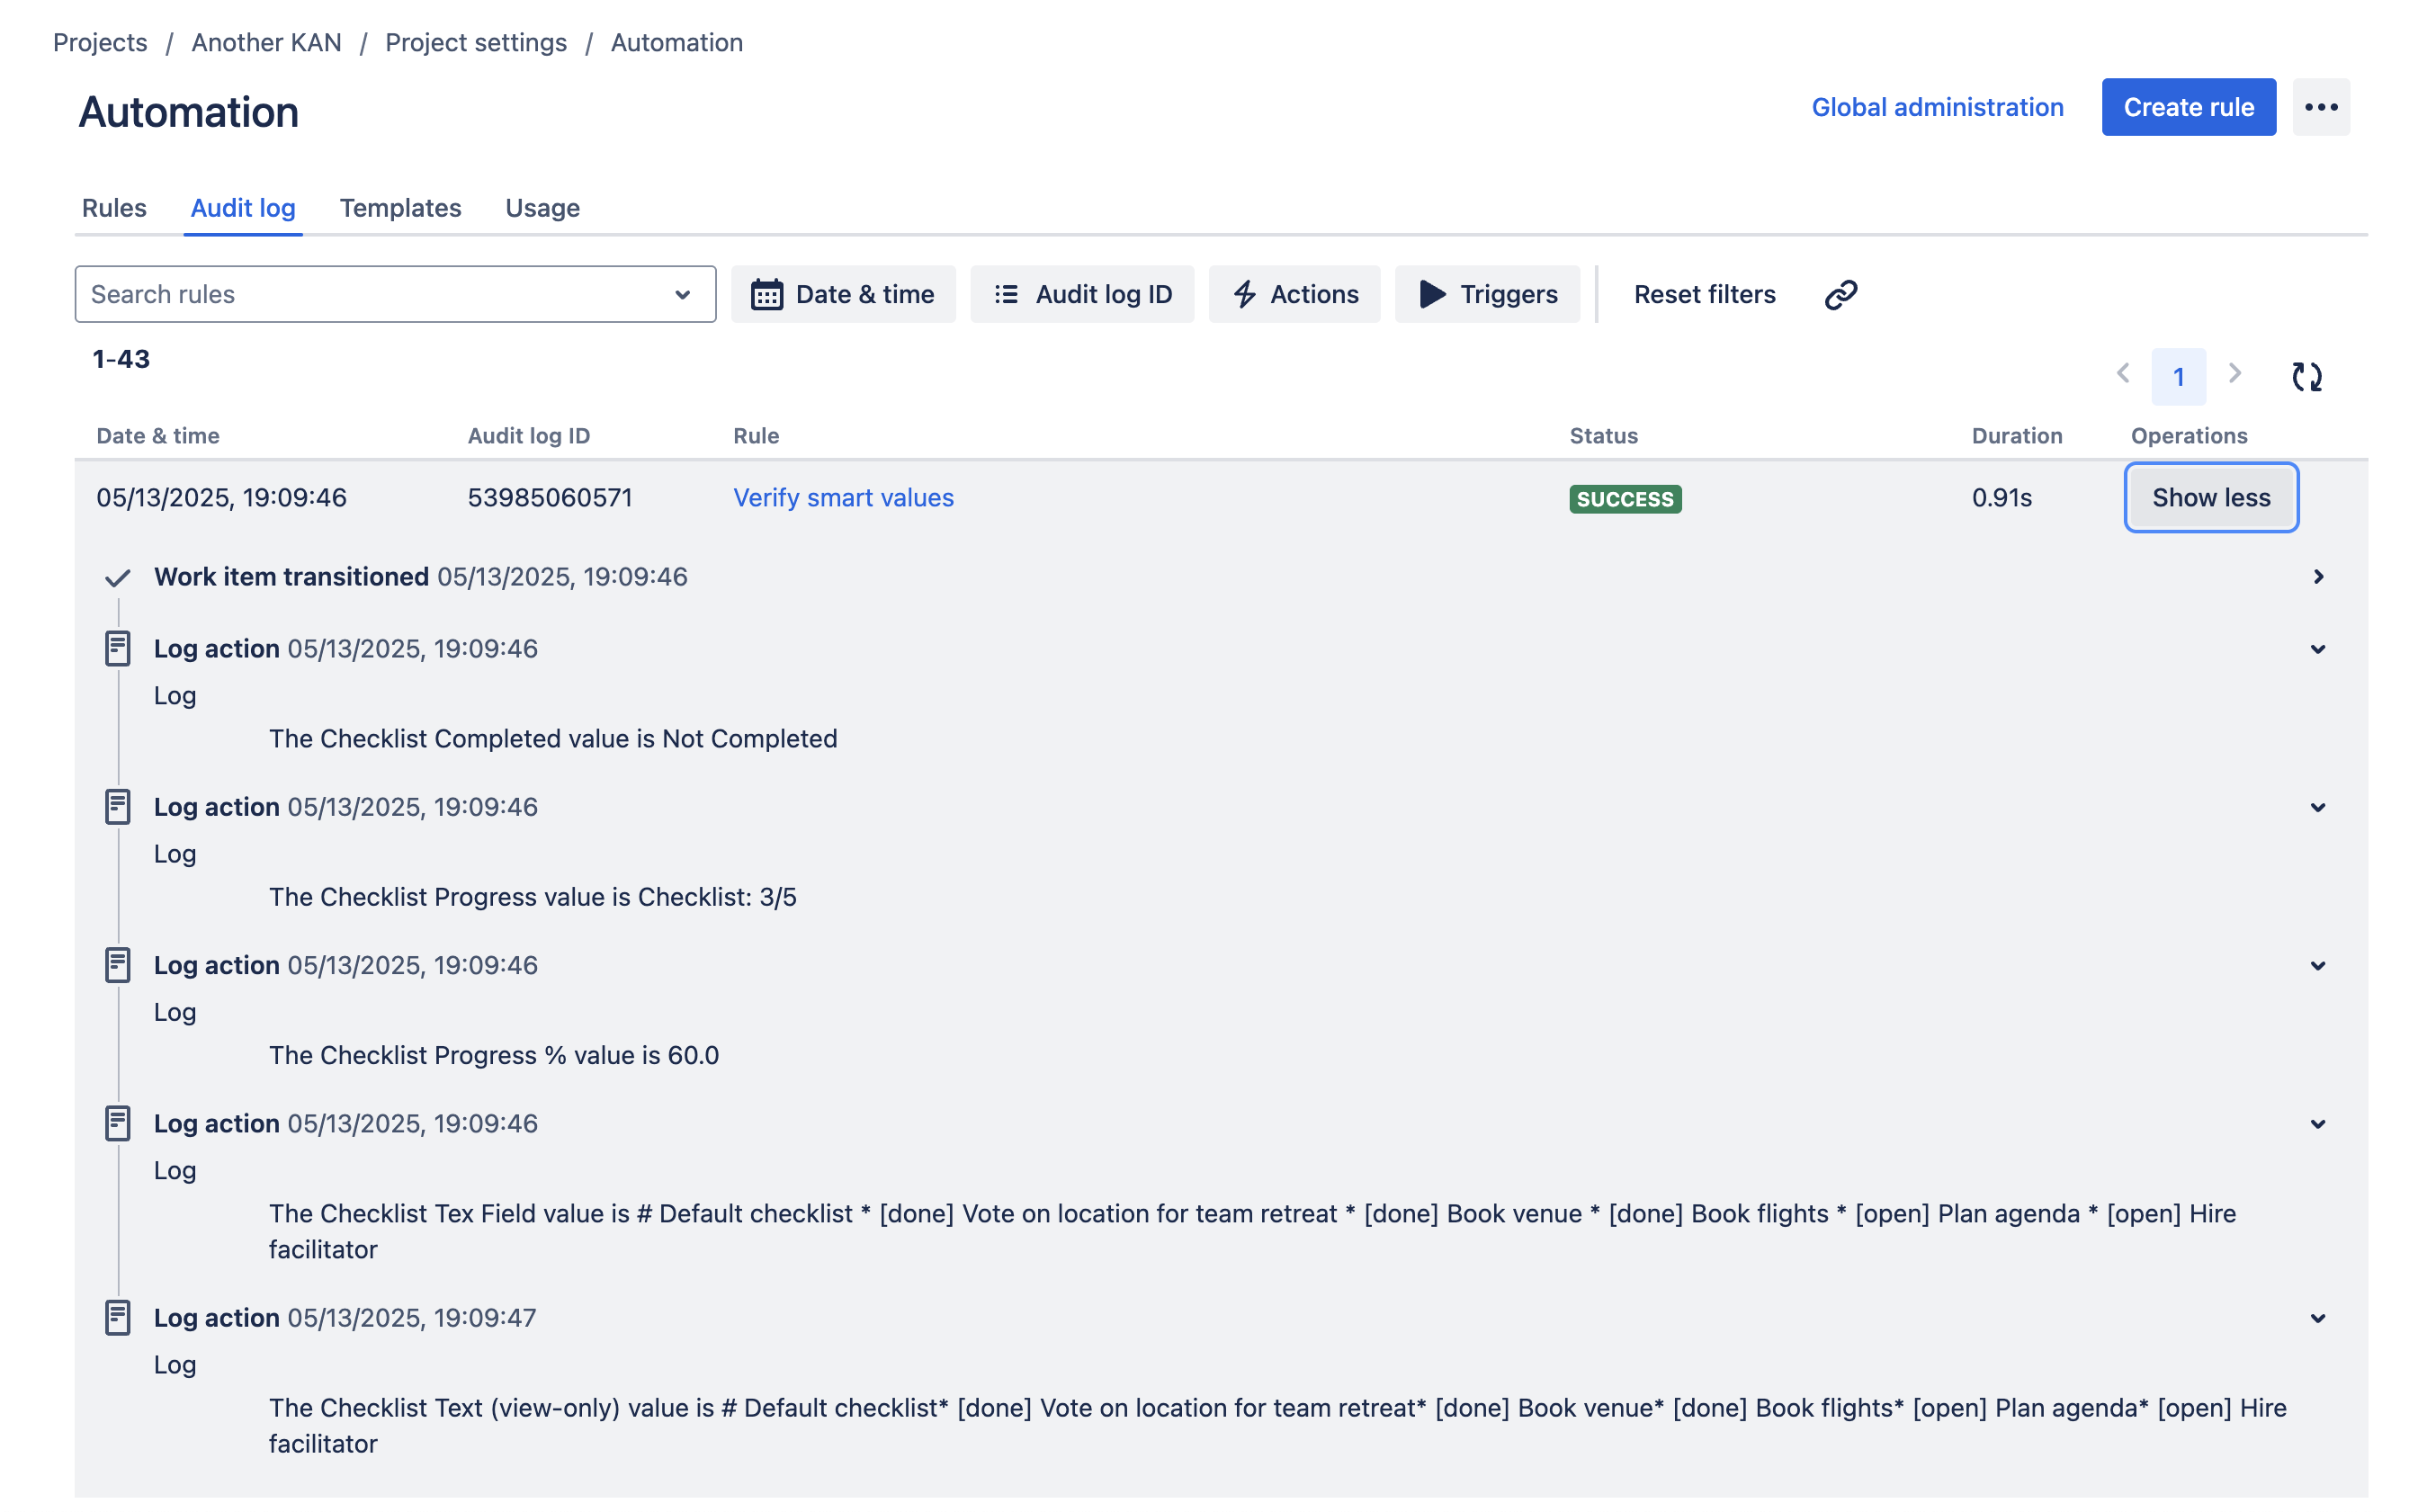
You can test that your smart values are correct by setting up a manually triggered rule and using the Log action. After running the rule, you’ll be able to see what the smart value returns in the rule’s audit log.
Learn More About Jira Automation Smart Values:
Finding Custom Field IDs
One of the most common actions you’re likely to use in automation is editing a work item. When you select the Edit work item action, you’ll be prompted to select the field(s) to be edited from a dropdown list. In the event that the field you are editing is not listed in the dropdown, you can still set its value using JSON. In this case, you will want the Custom Field ID.
To find the ID of the custom field:
-
Log in as a Jira Administrator.
-
Go to Jira Settings > Issues > Custom fields.
-
Search for the indicated custom field.
-
Click the More menu (…) and select Edit Details.
-
Copy the URL of the page. The URL will end with the ID number of the custom field.

Custom fields can be duplicated by some errors or rare scenarios. If you are experiencing issues with accessing custom fields, make sure you are referencing the custom field that is currently used by Issue Checklist.
More Jira Automation Resources
Basic Jira Automation Documentation
|
Advanced Automation Documentation
|
Other
|
|---|---|---|