Close Issue when Checklist Completed
These rules allow you to close an issue when the checklists is completed. Due to differences in how custom fields work, the process is different depending on whether you are using the FREE PRO, or ENTERPRISE app, and whether you are using Team-managed or Company-managed projects.
Close Issue When Local Checklist Complete
Limitations
The rule below will only check the completion Local Checklists only. If you are using Issue Checklist for Jira ENTERPRISE and want to check the combined completion status of both Local and Global Checklists, use the second rule.
Ensure the Sync checklists to Custom Fields global setting is enabled.
Navigate to Project Settings > Automation (or Jira Settings > System > Automation rules).
Click Create rule.
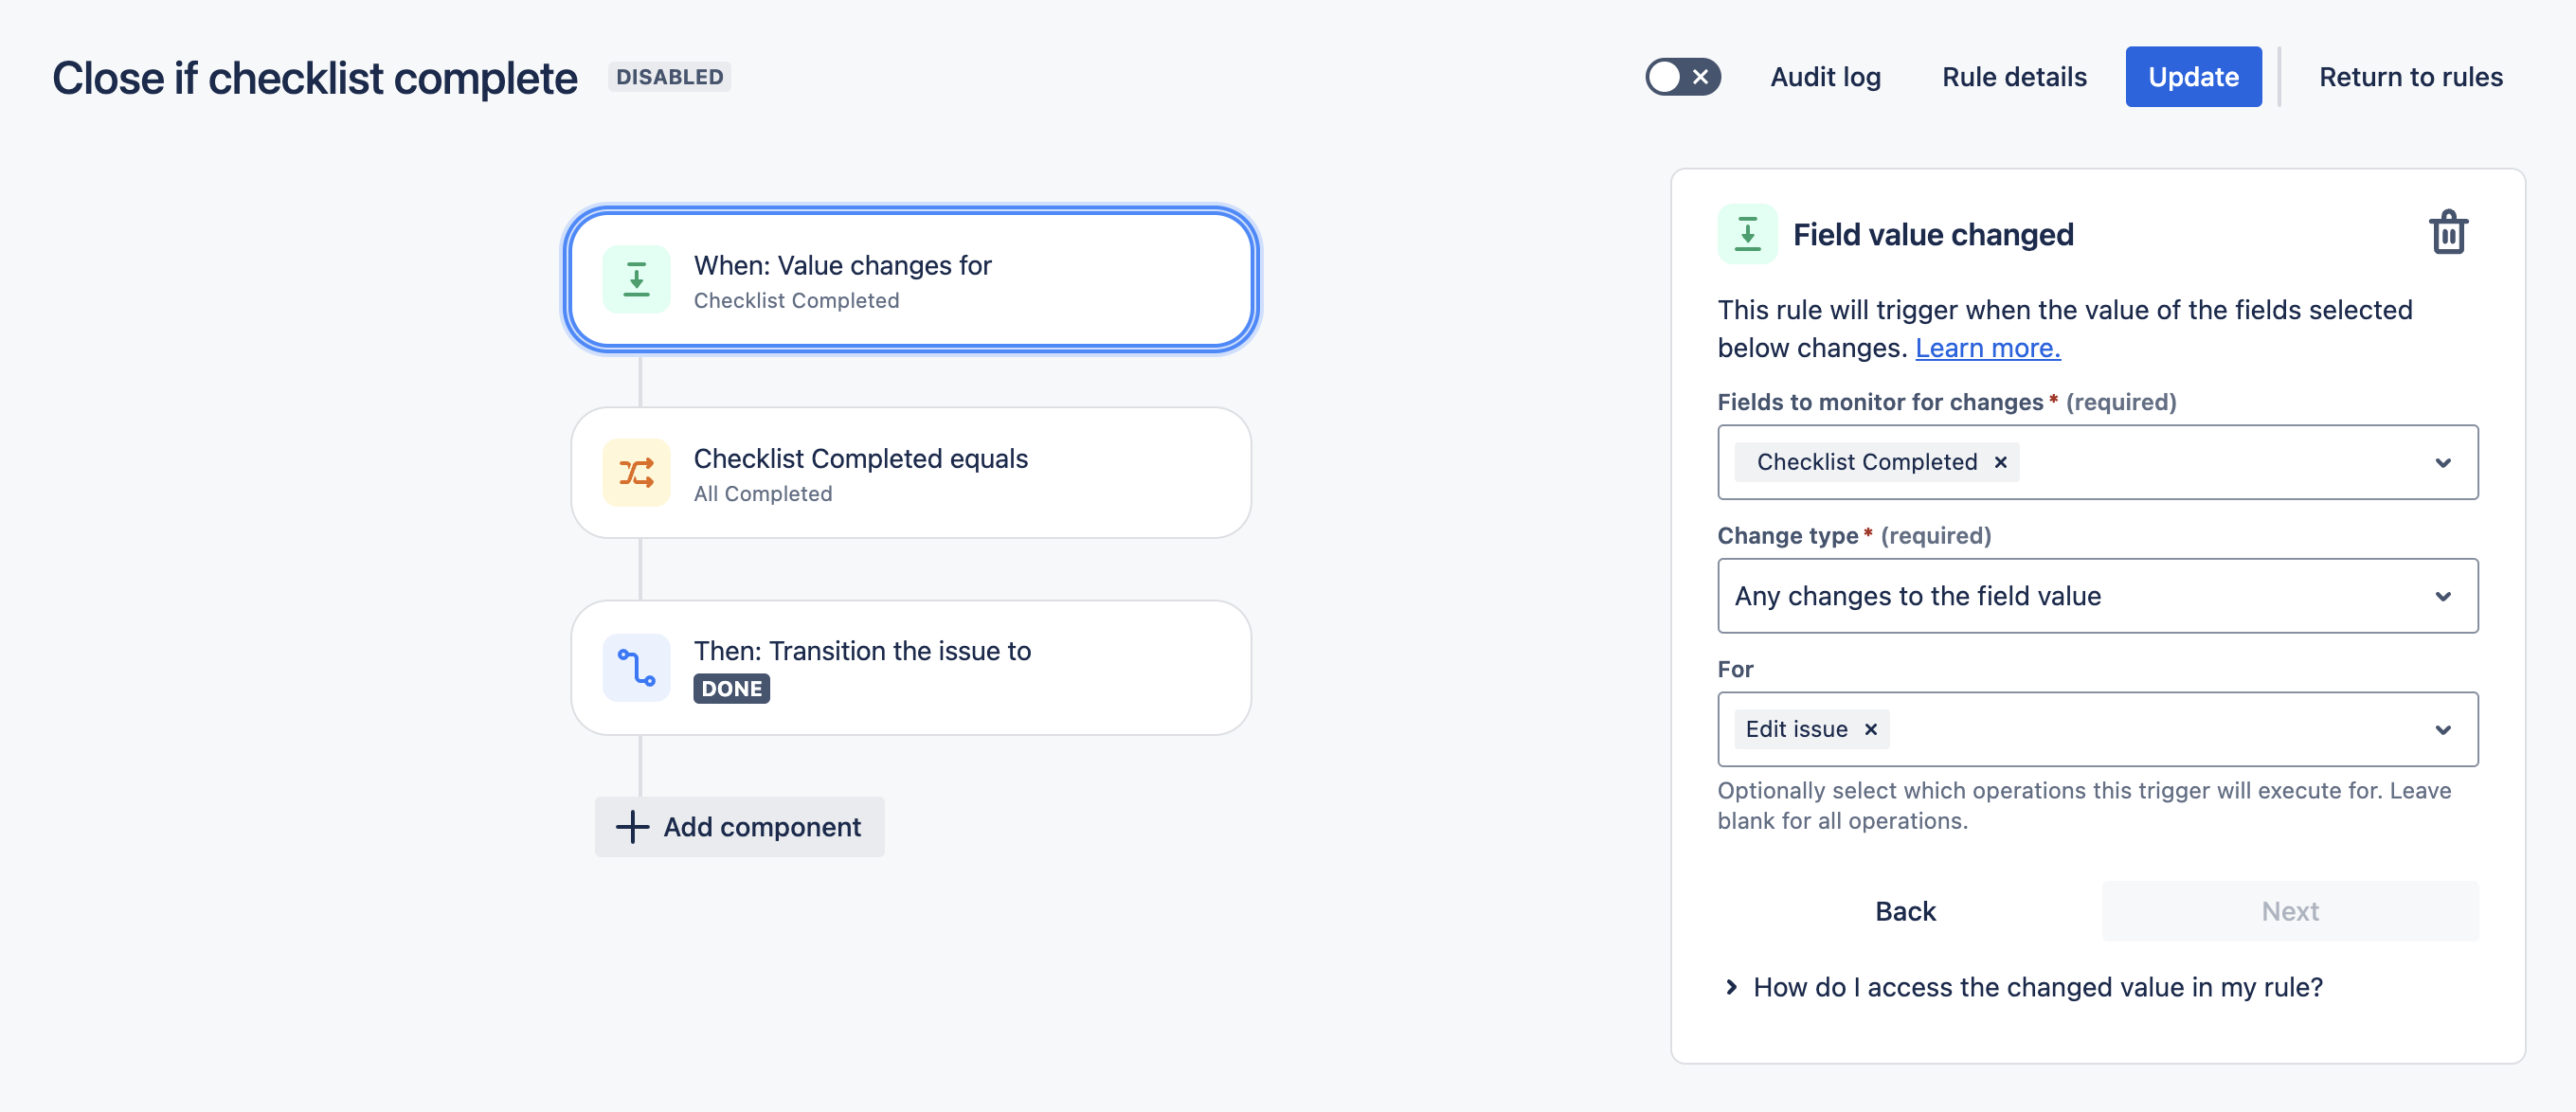
Select the Field value changed trigger.
Select the Checklist Completed field in the first dropdown and Edit issue in the second list. Click Save.
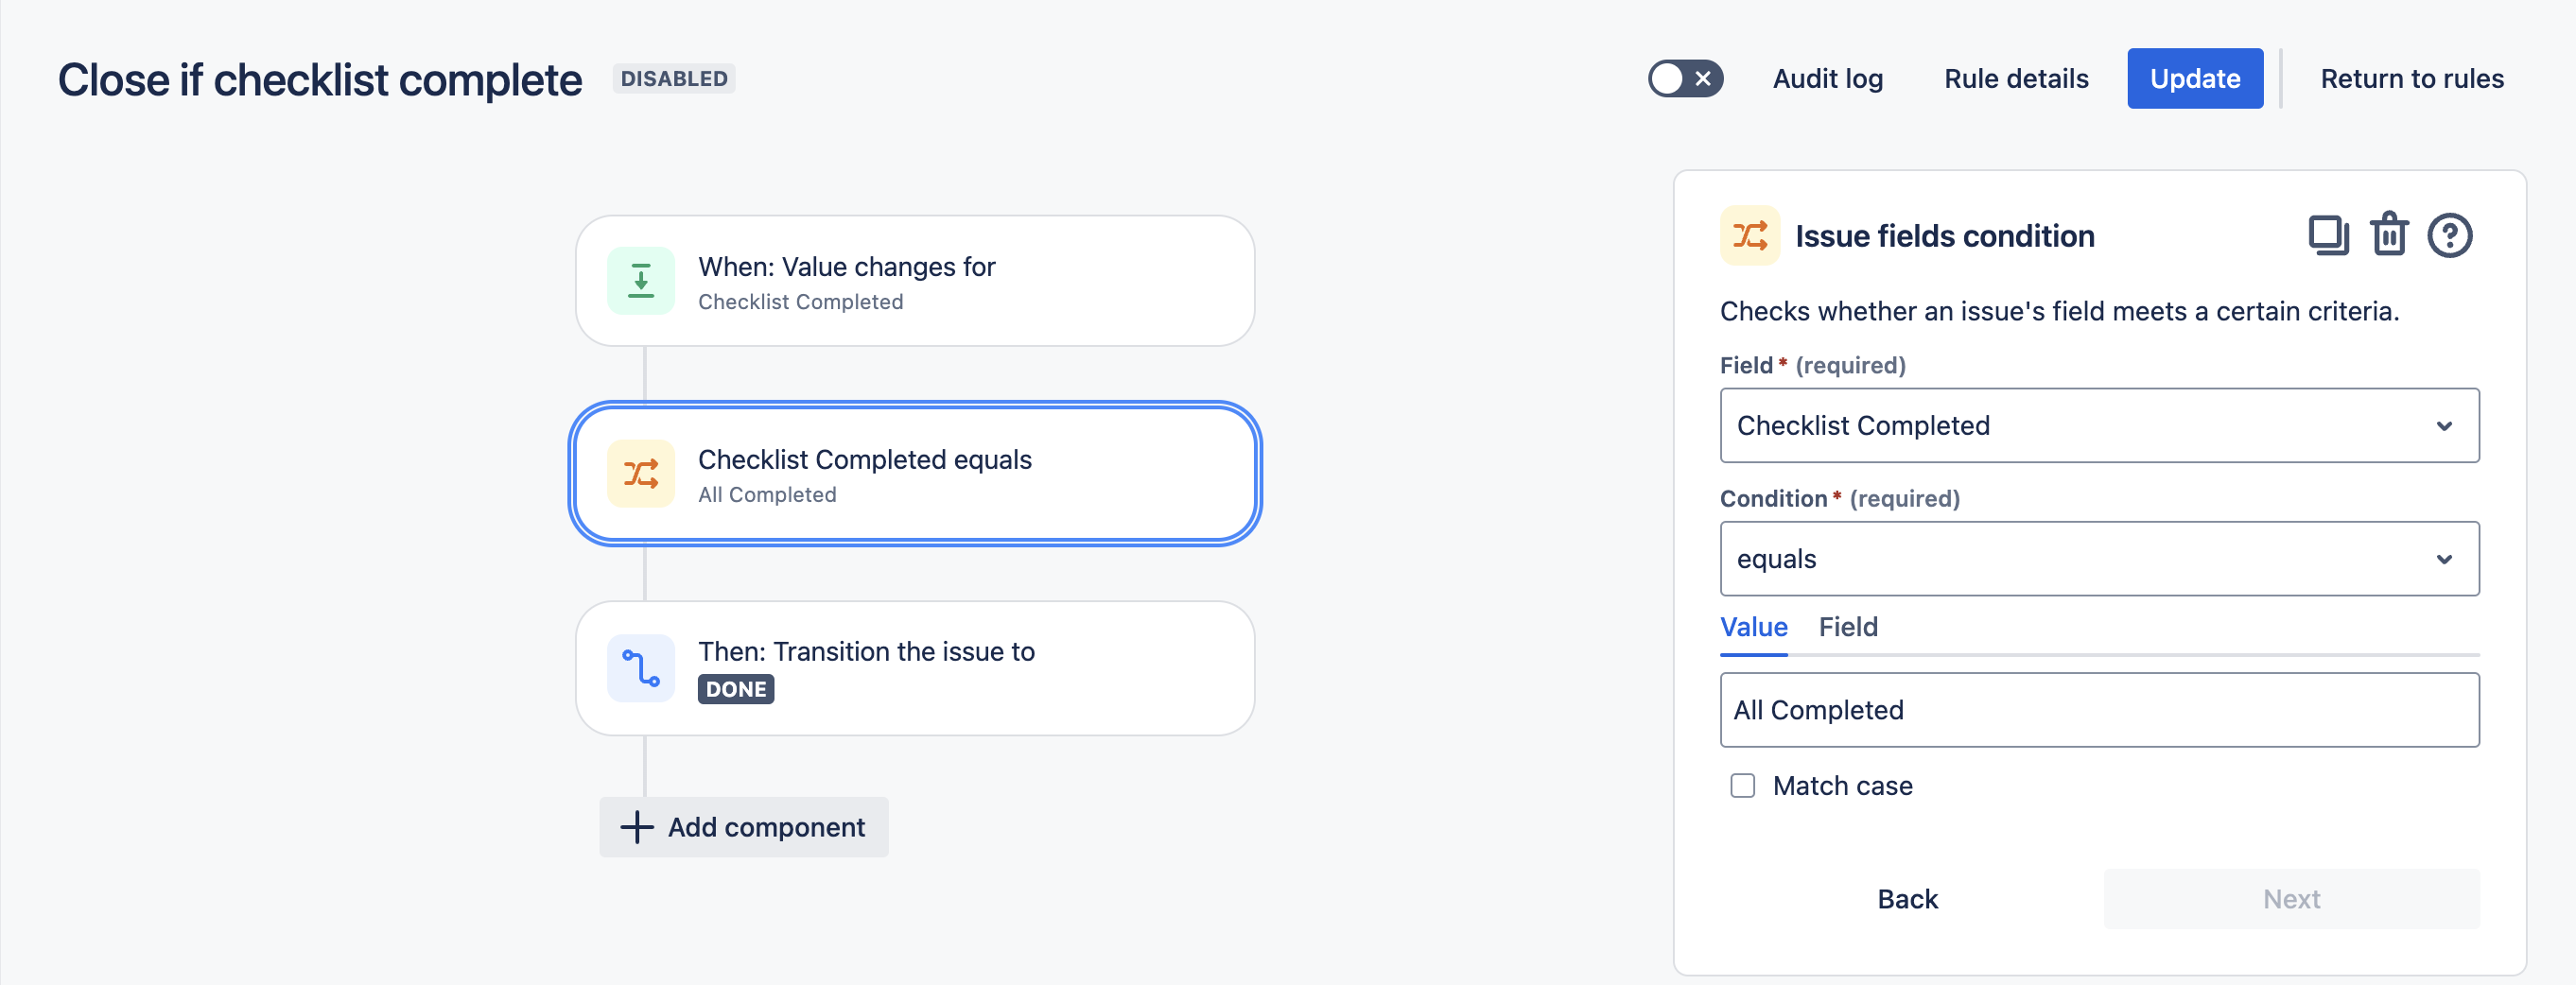
Click New condition and select Issue fields condition.
Select Checklist Completed from the list of fields. Select equals in the condition dropdown, and All Completed in the value text box. Click Save. Note that this condition will also be met if all checklist items are deleted. If you want to avoid this, add another condition that verifies that the Checklist Text custom field is not empty.
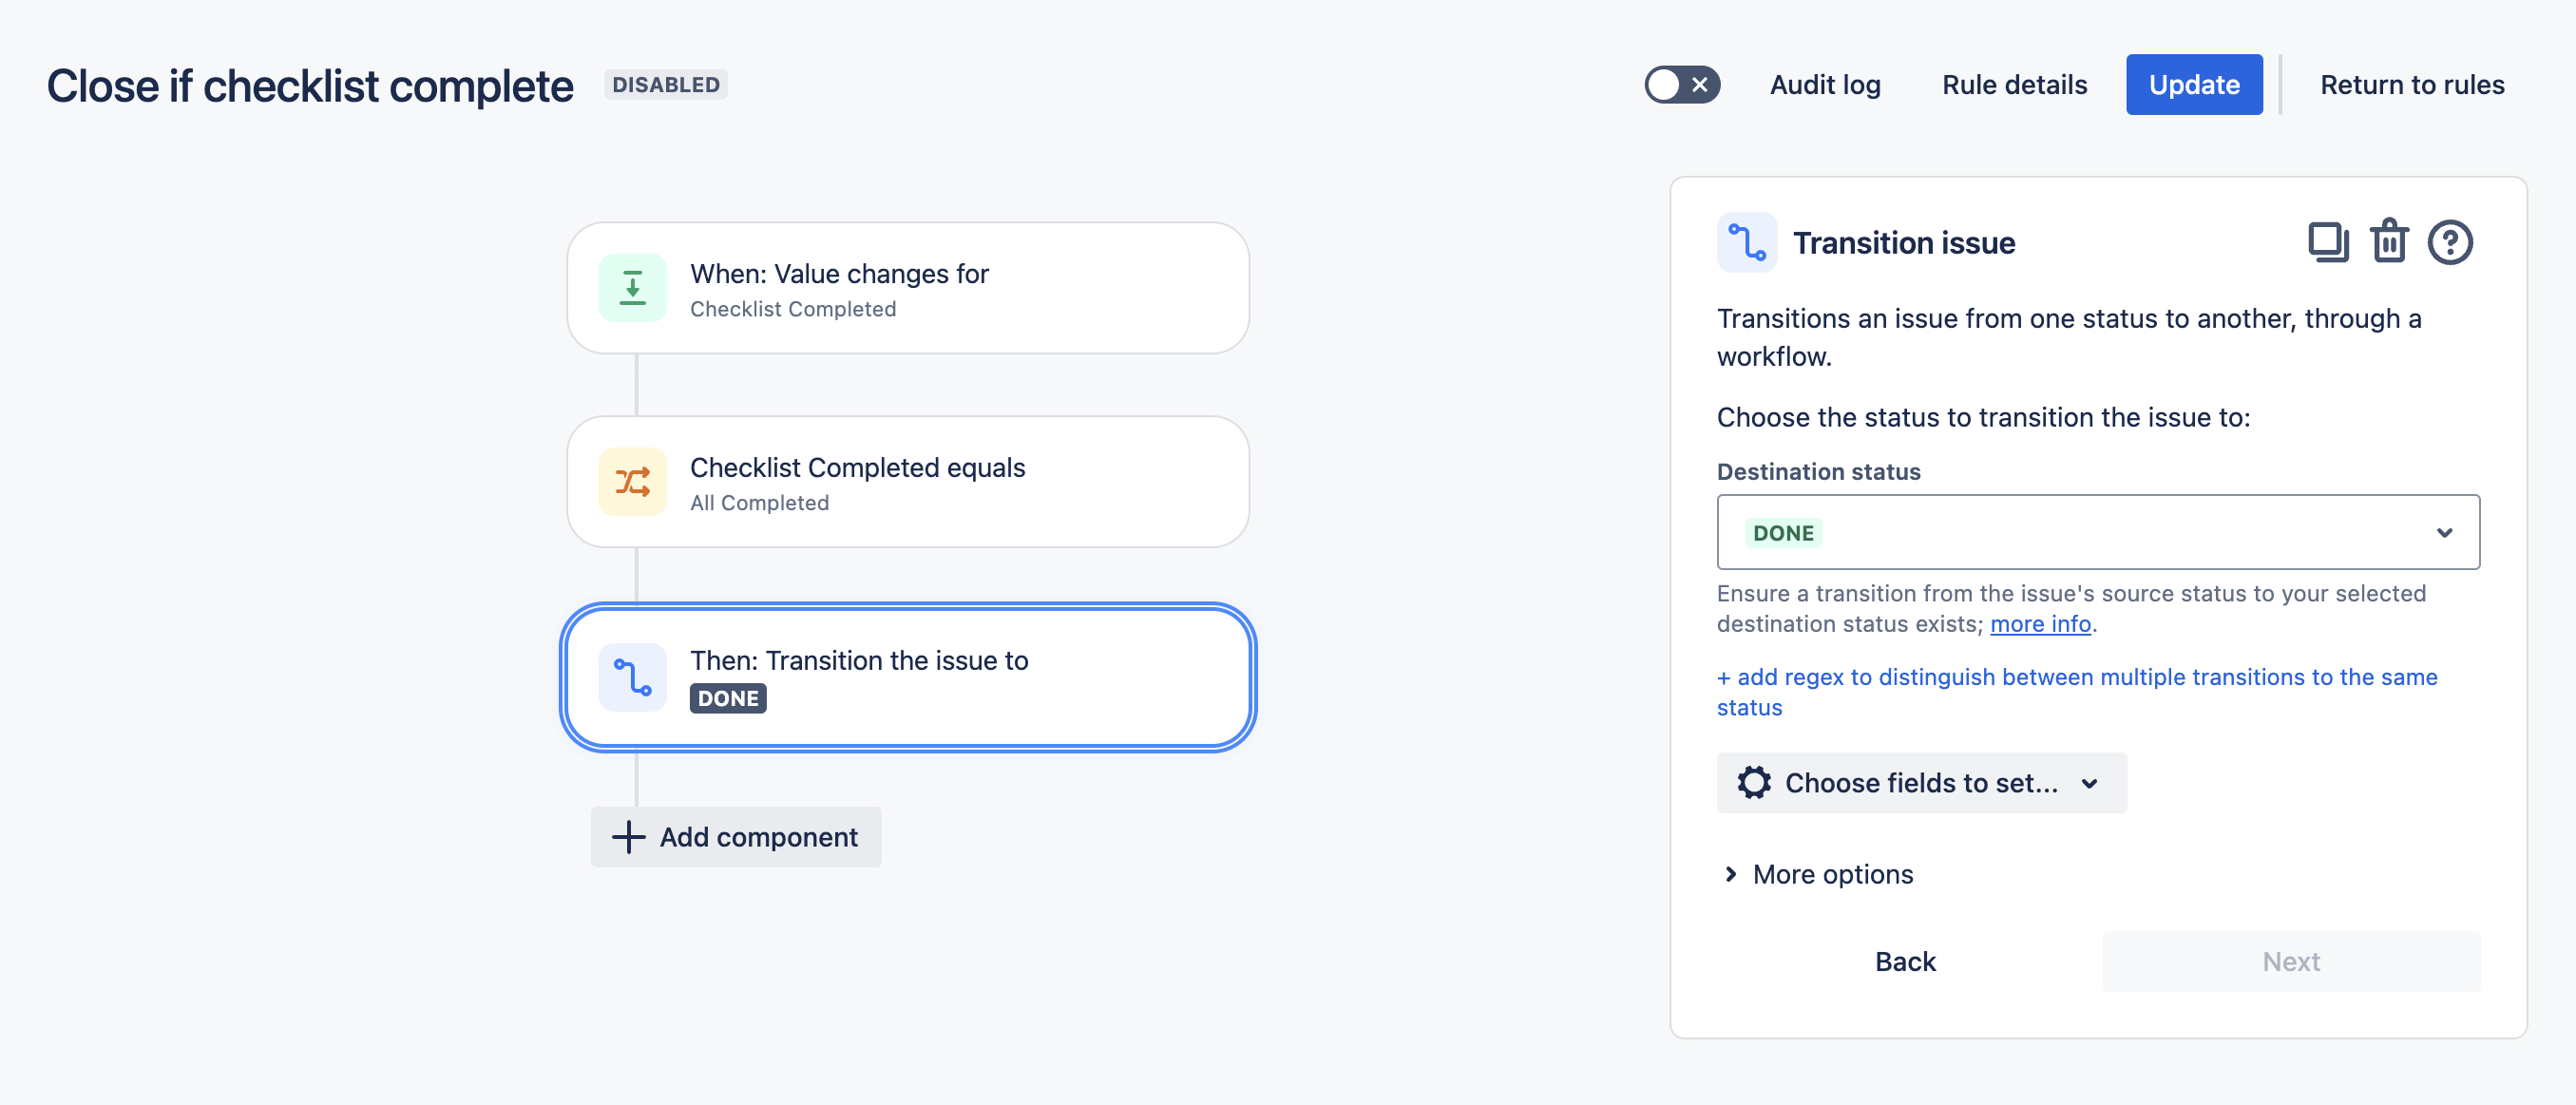
Select New action and Transition issue. Select the appropriate status and click Save.
Name the rule and click Turn it on.
Tip: You may also want to add a step that sets the Resolution.
Close Issue If All Checklists (Including Global Checklists) Become Complete
Limitations
If you use the ENTERPRISE app, and have Global Checklists enabled, then changes to checklists will not trigger the Jira issue updated webhook, and therefore cannot be used to trigger automation. As a workaround, you can create an automation rule that runs on schedule to check if any checklists have become incomplete.
The rule below will check the combined completion status of both Local and Global Checklists. If you want to check the completion status of Local Checklists only, use the first rule.
Navigate to Project Settings > Automation (or Jira Settings > System > Automation rules).
Click Create rule.
Select the Scheduled trigger and select the appropriate time interval and the JQL to identify the correct issues. Click Save.
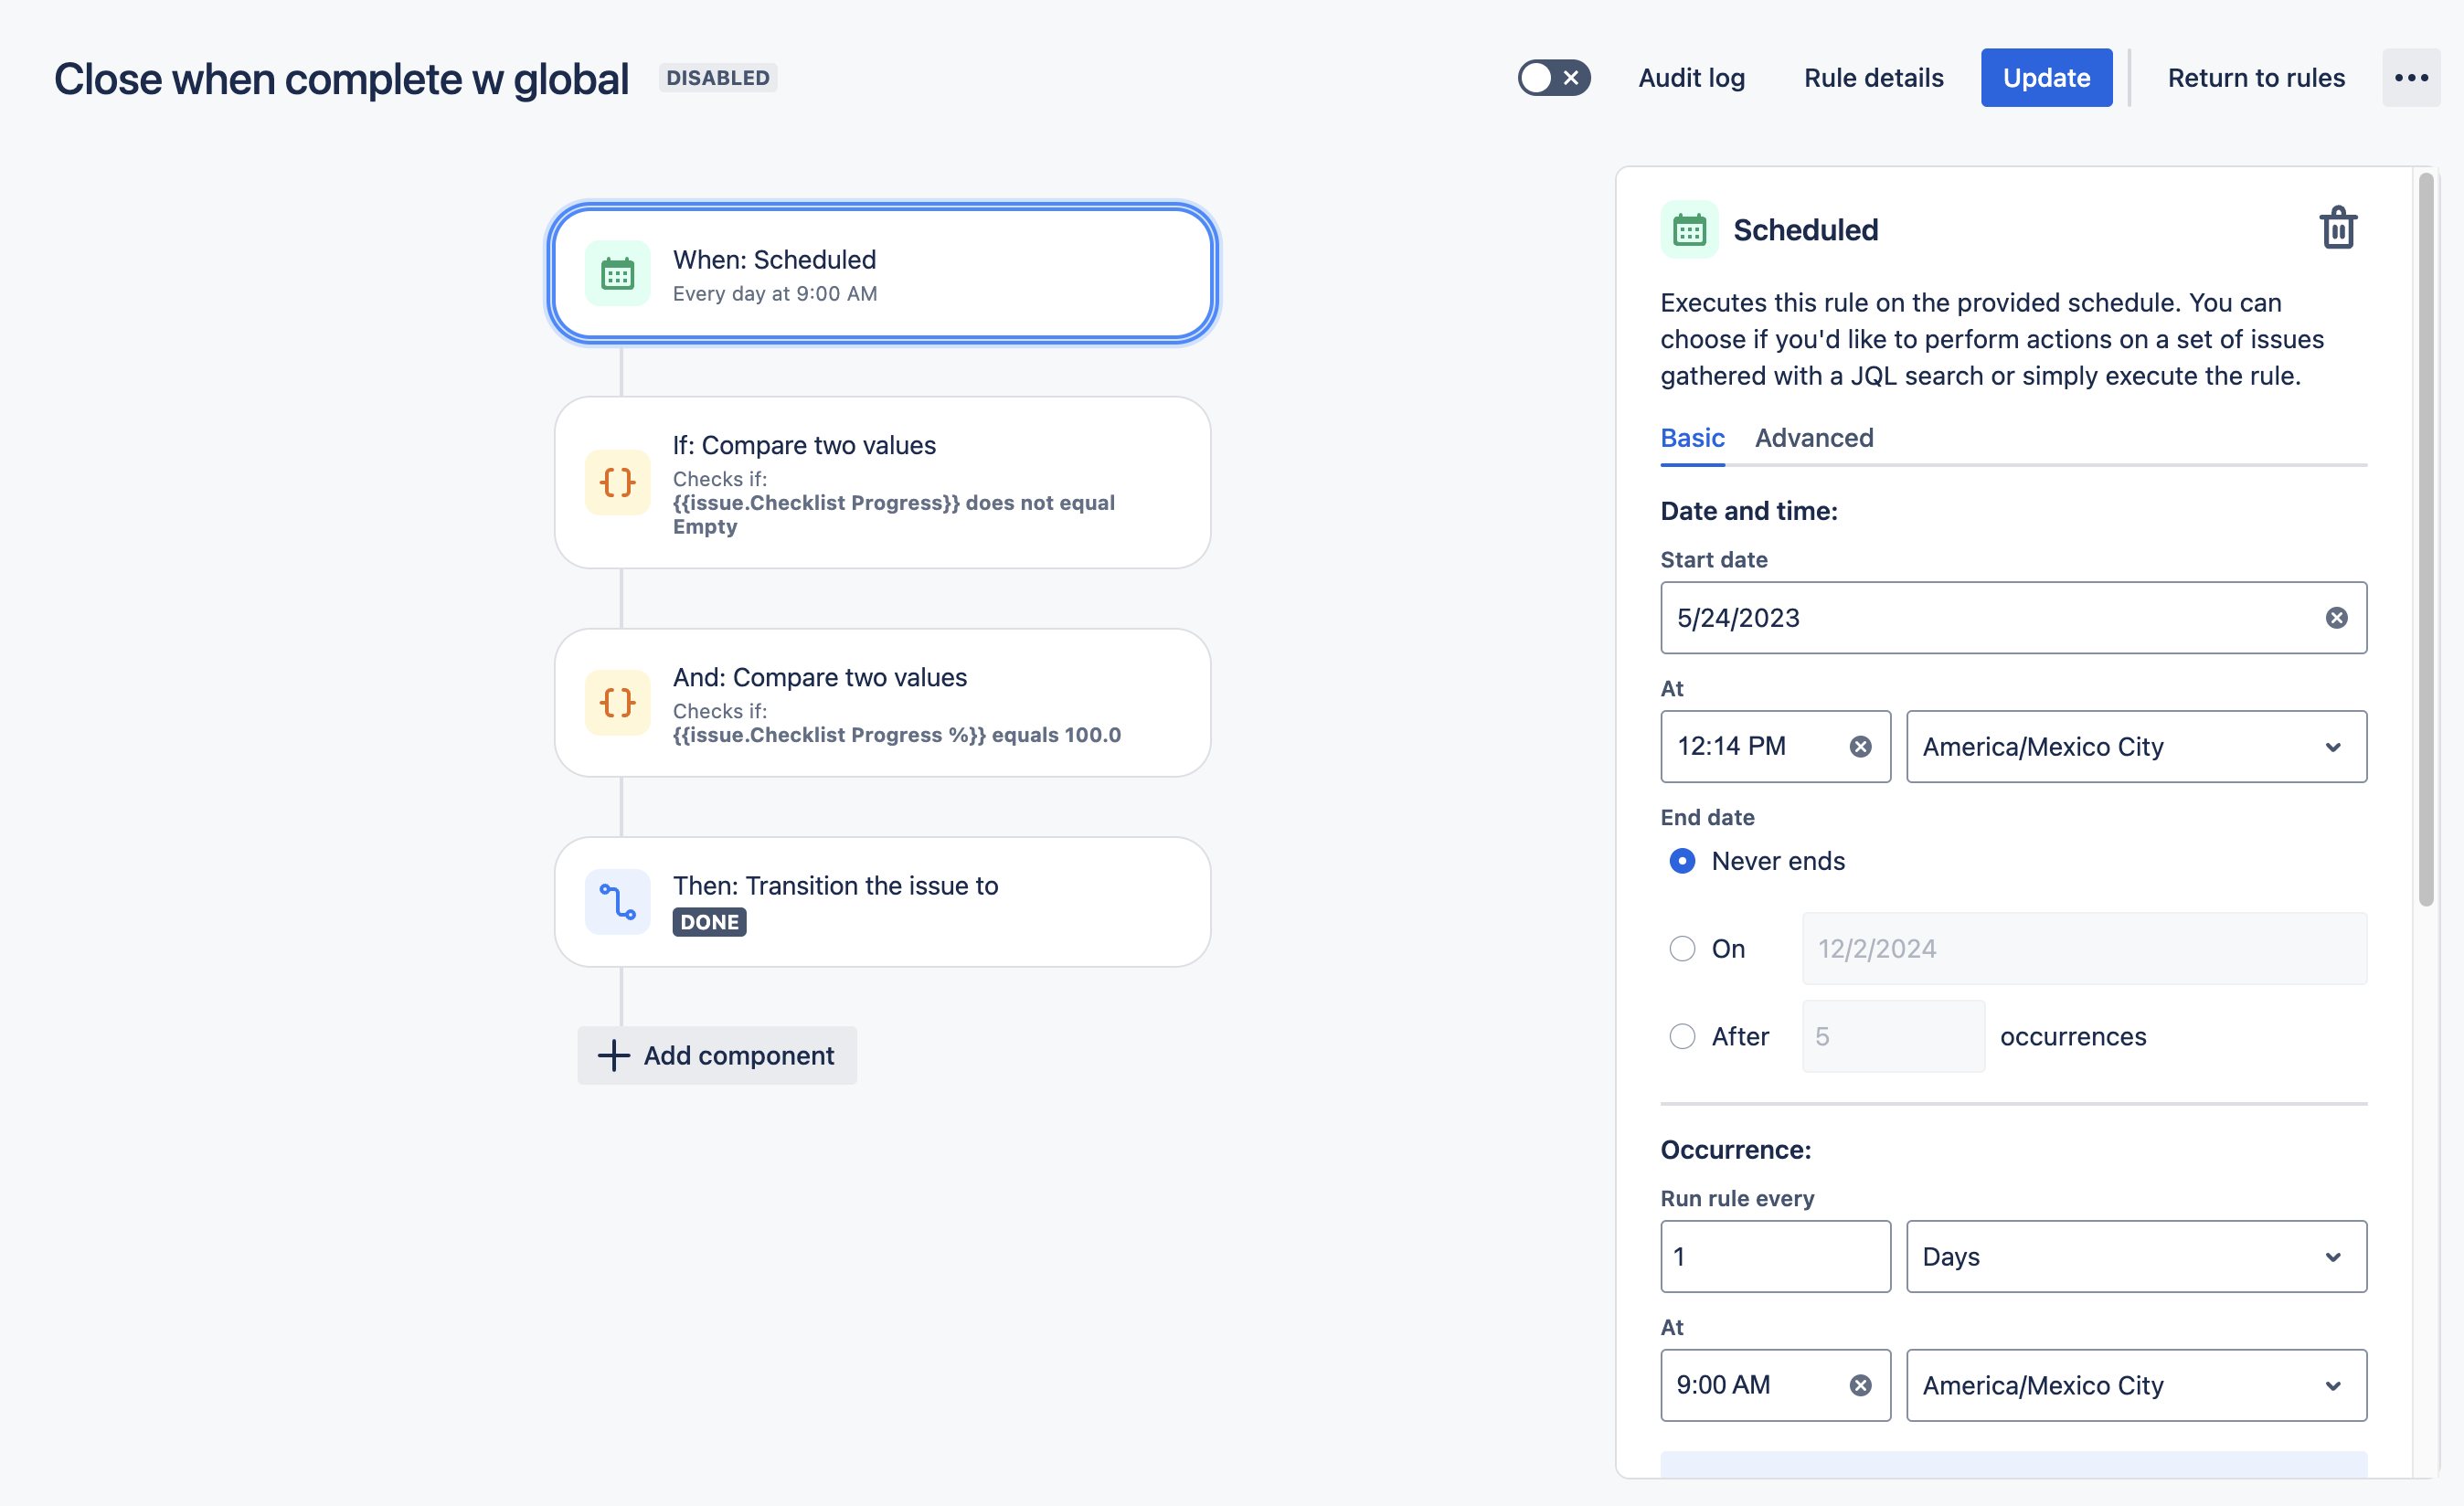
Click New condition and select {{Smart values}} condition.
Put
{{issue.Checklist Progress}}as the First value; does not equal as the Condition; and Empty as the Second value. This will ensure that the rule is only applied to issues that have checklists. Click Save.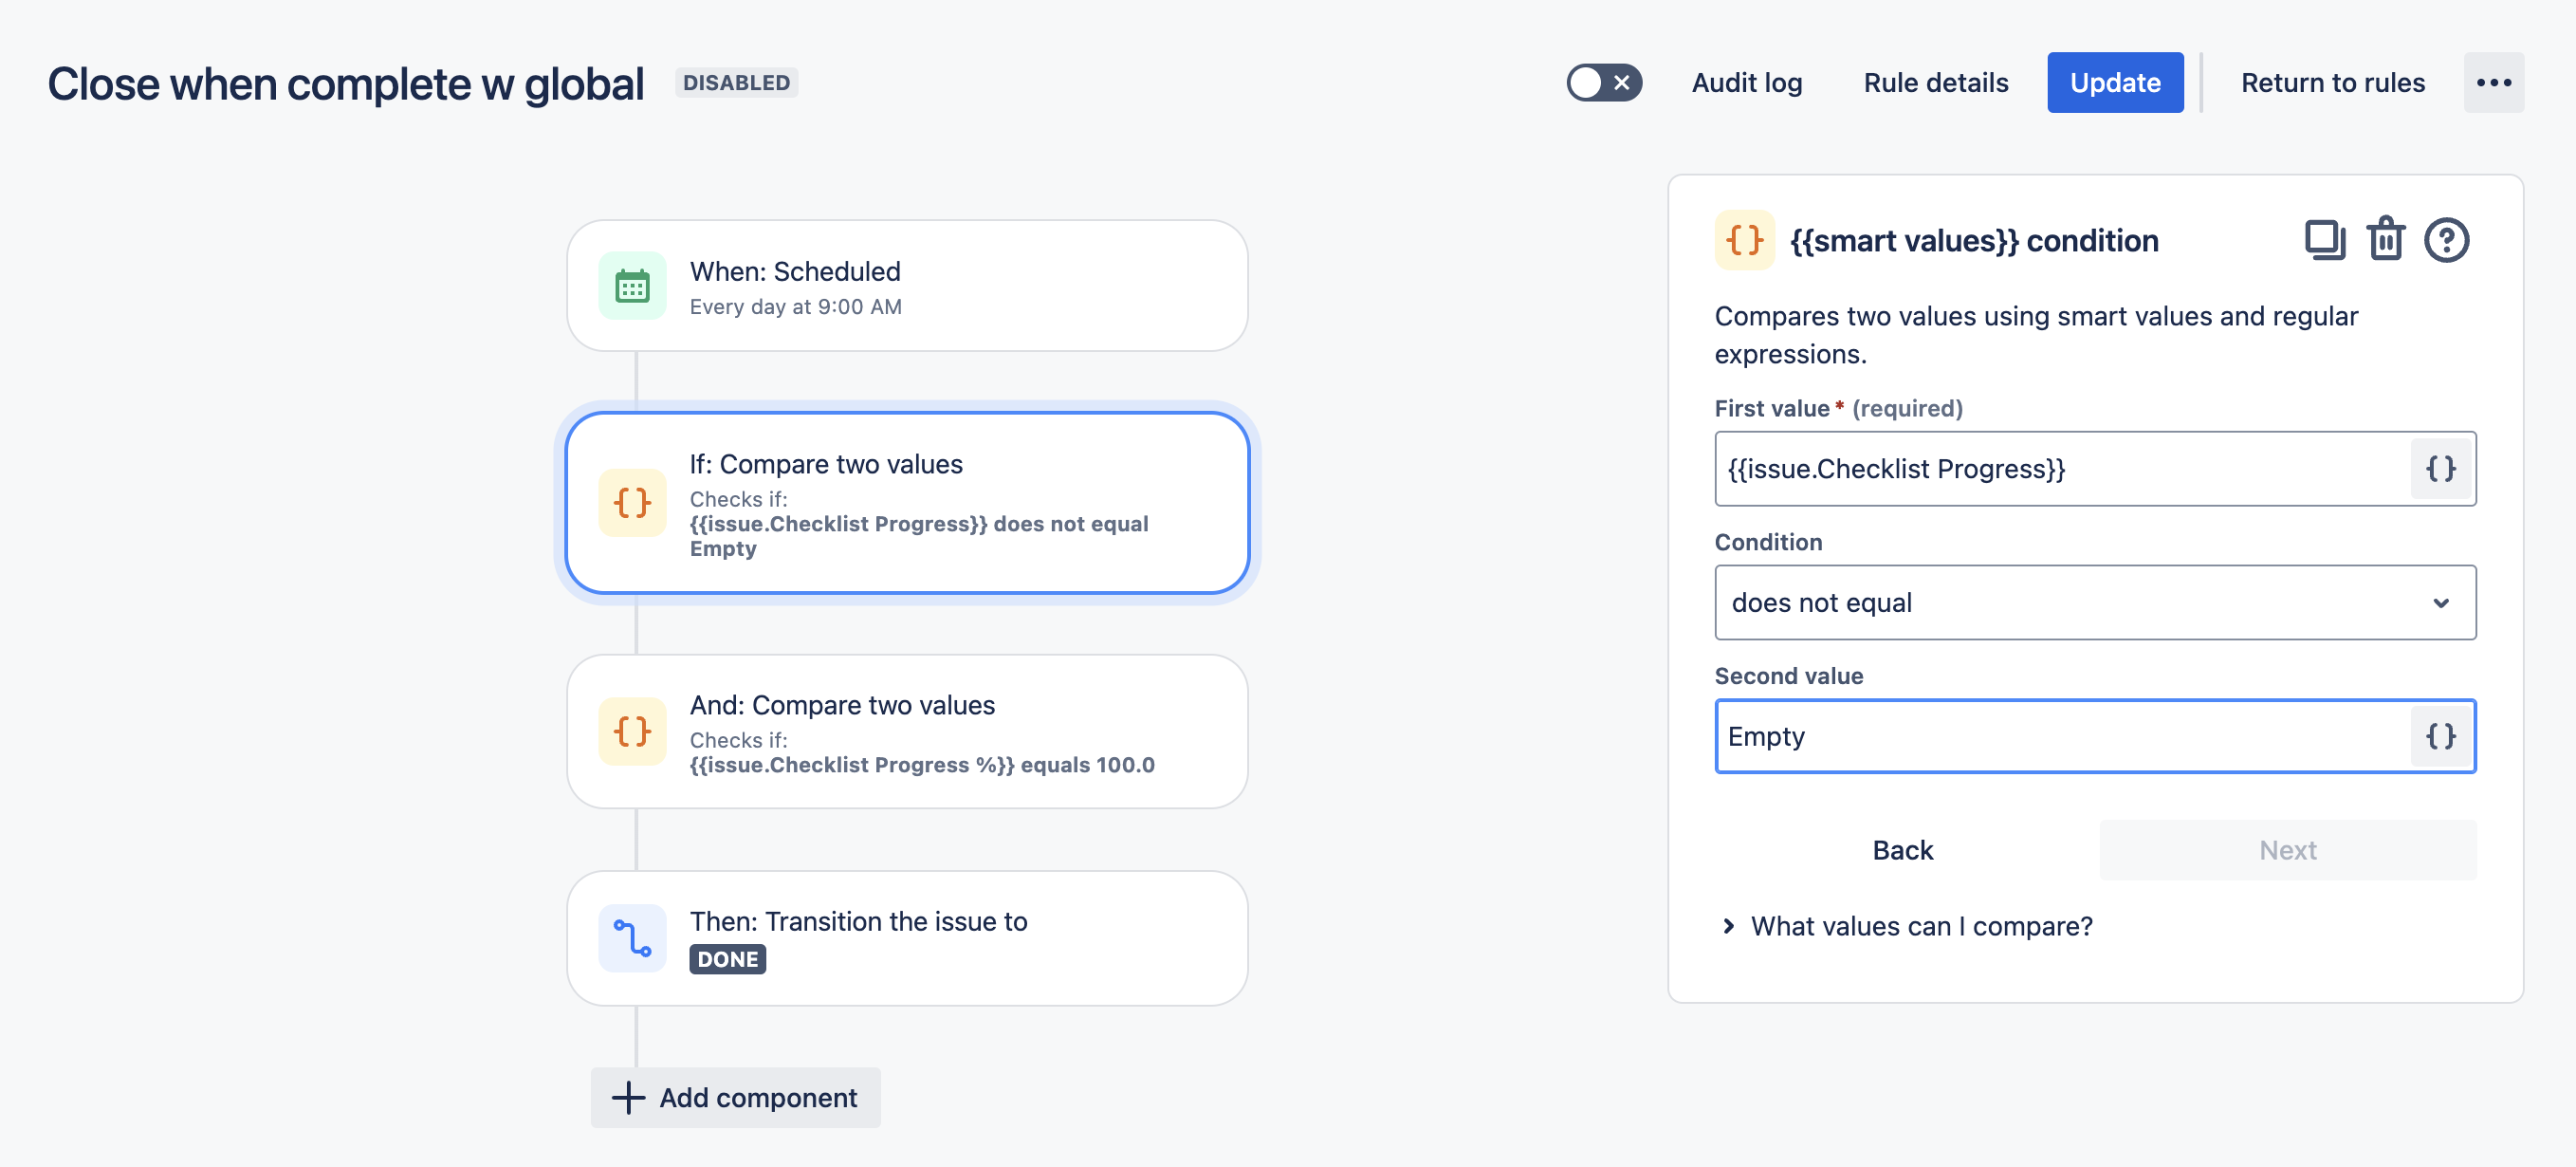
Click New condition and select {{Smart values}} condition.
Put
{{issue.Checklist Progress %}}as the First value; equals as the Condition; and100.0as the Second value. This will check for issues where the checklist is incomplete. Click Save.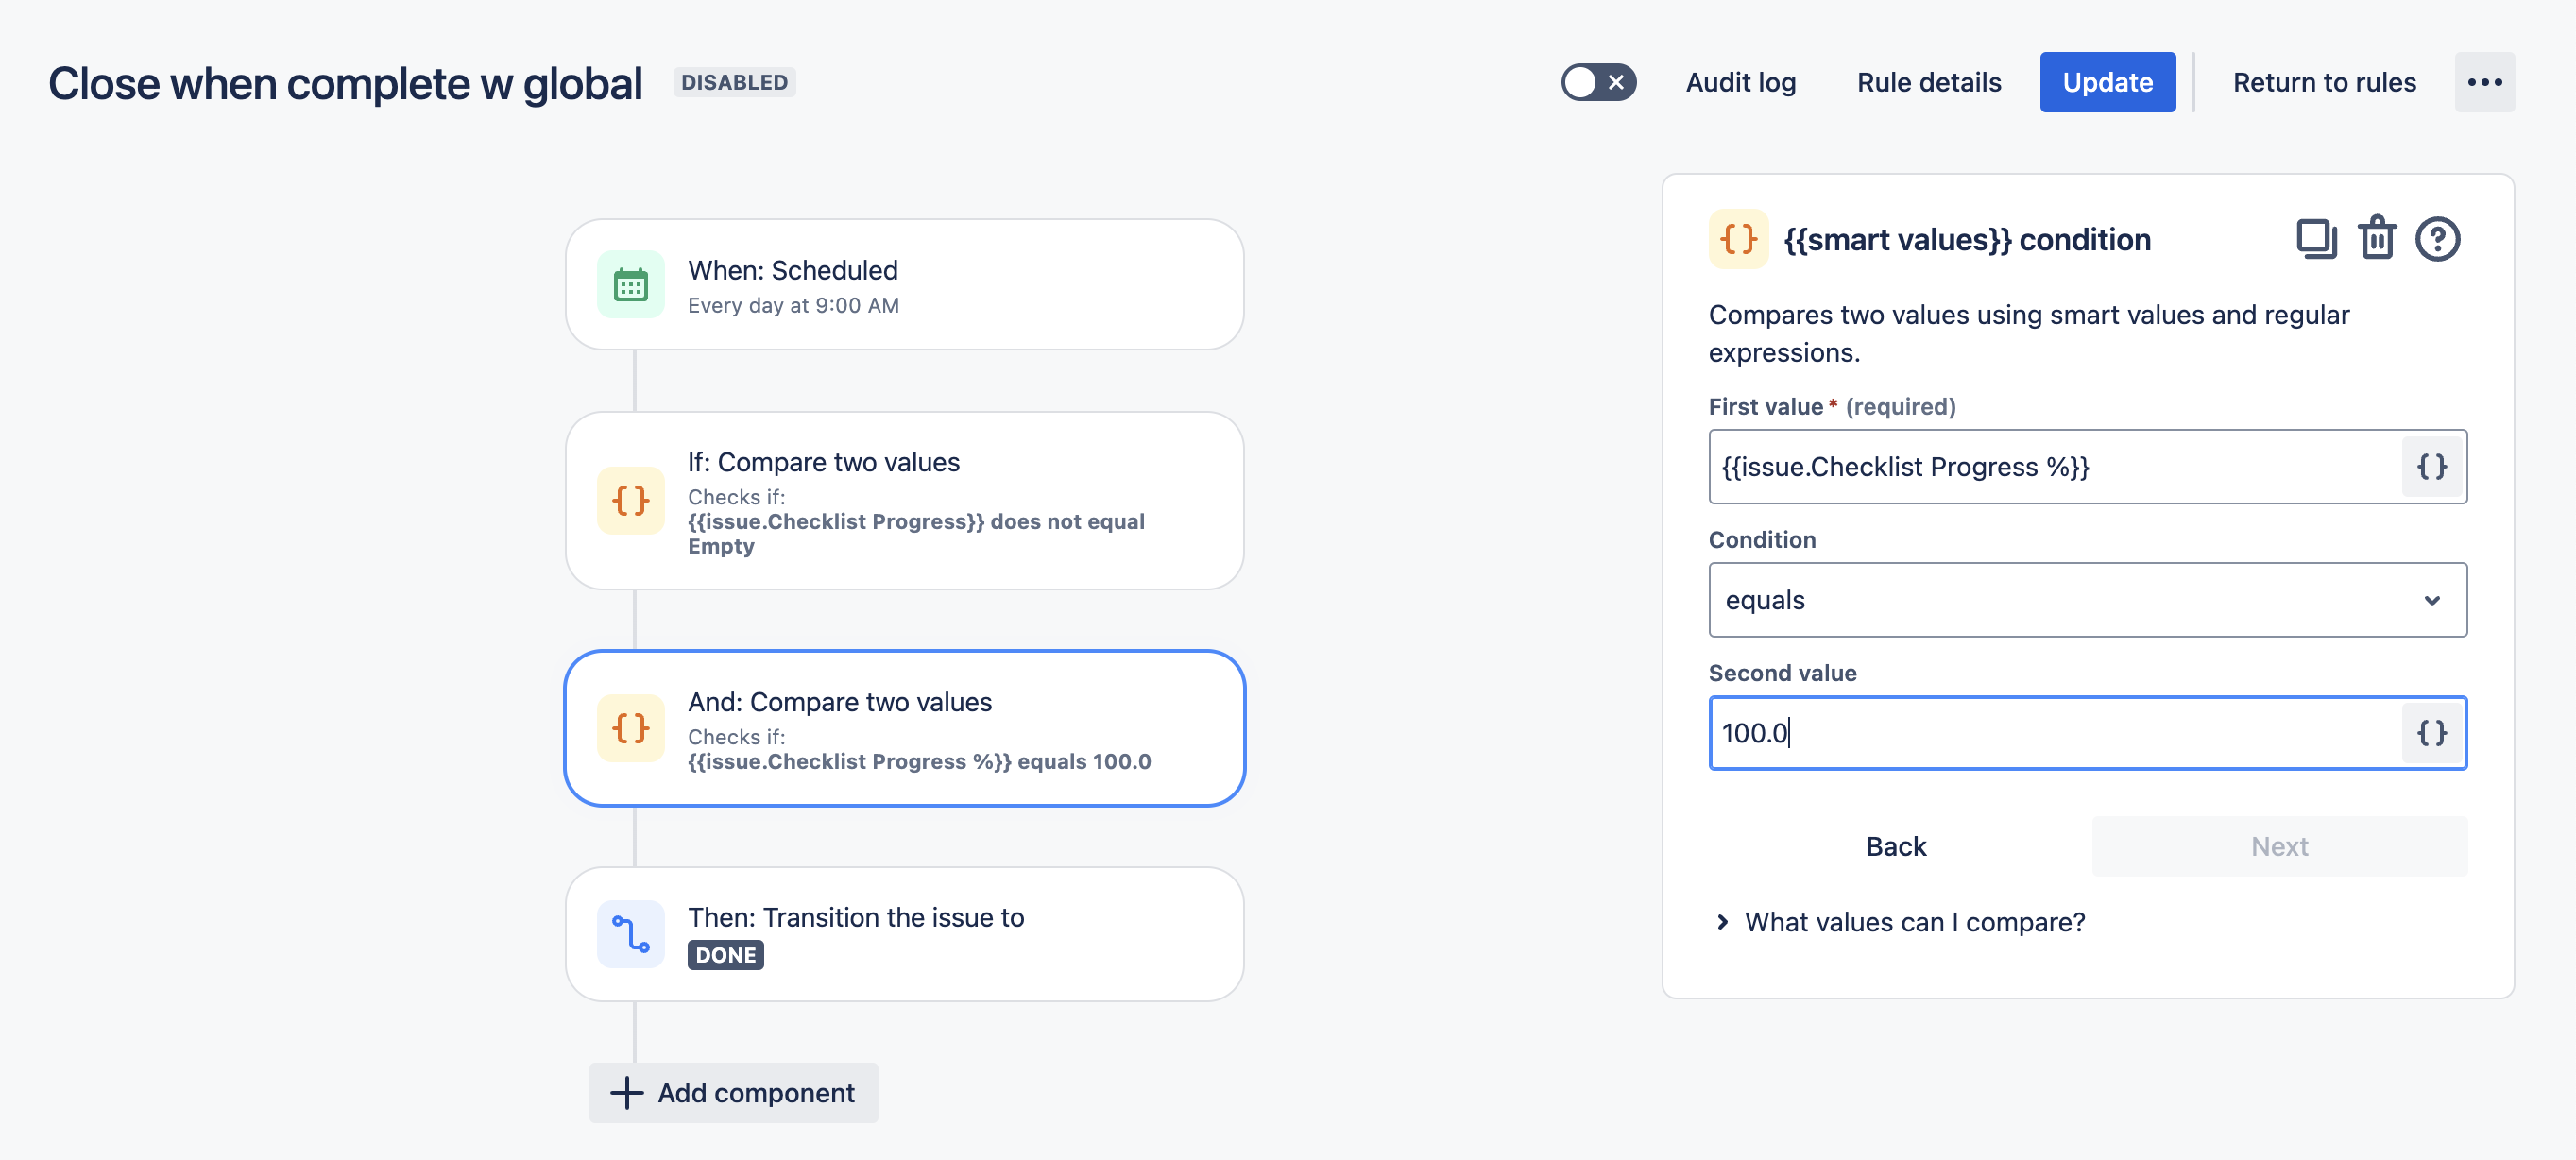
Select New action and Transition issue. Select the appropriate status and click Save.
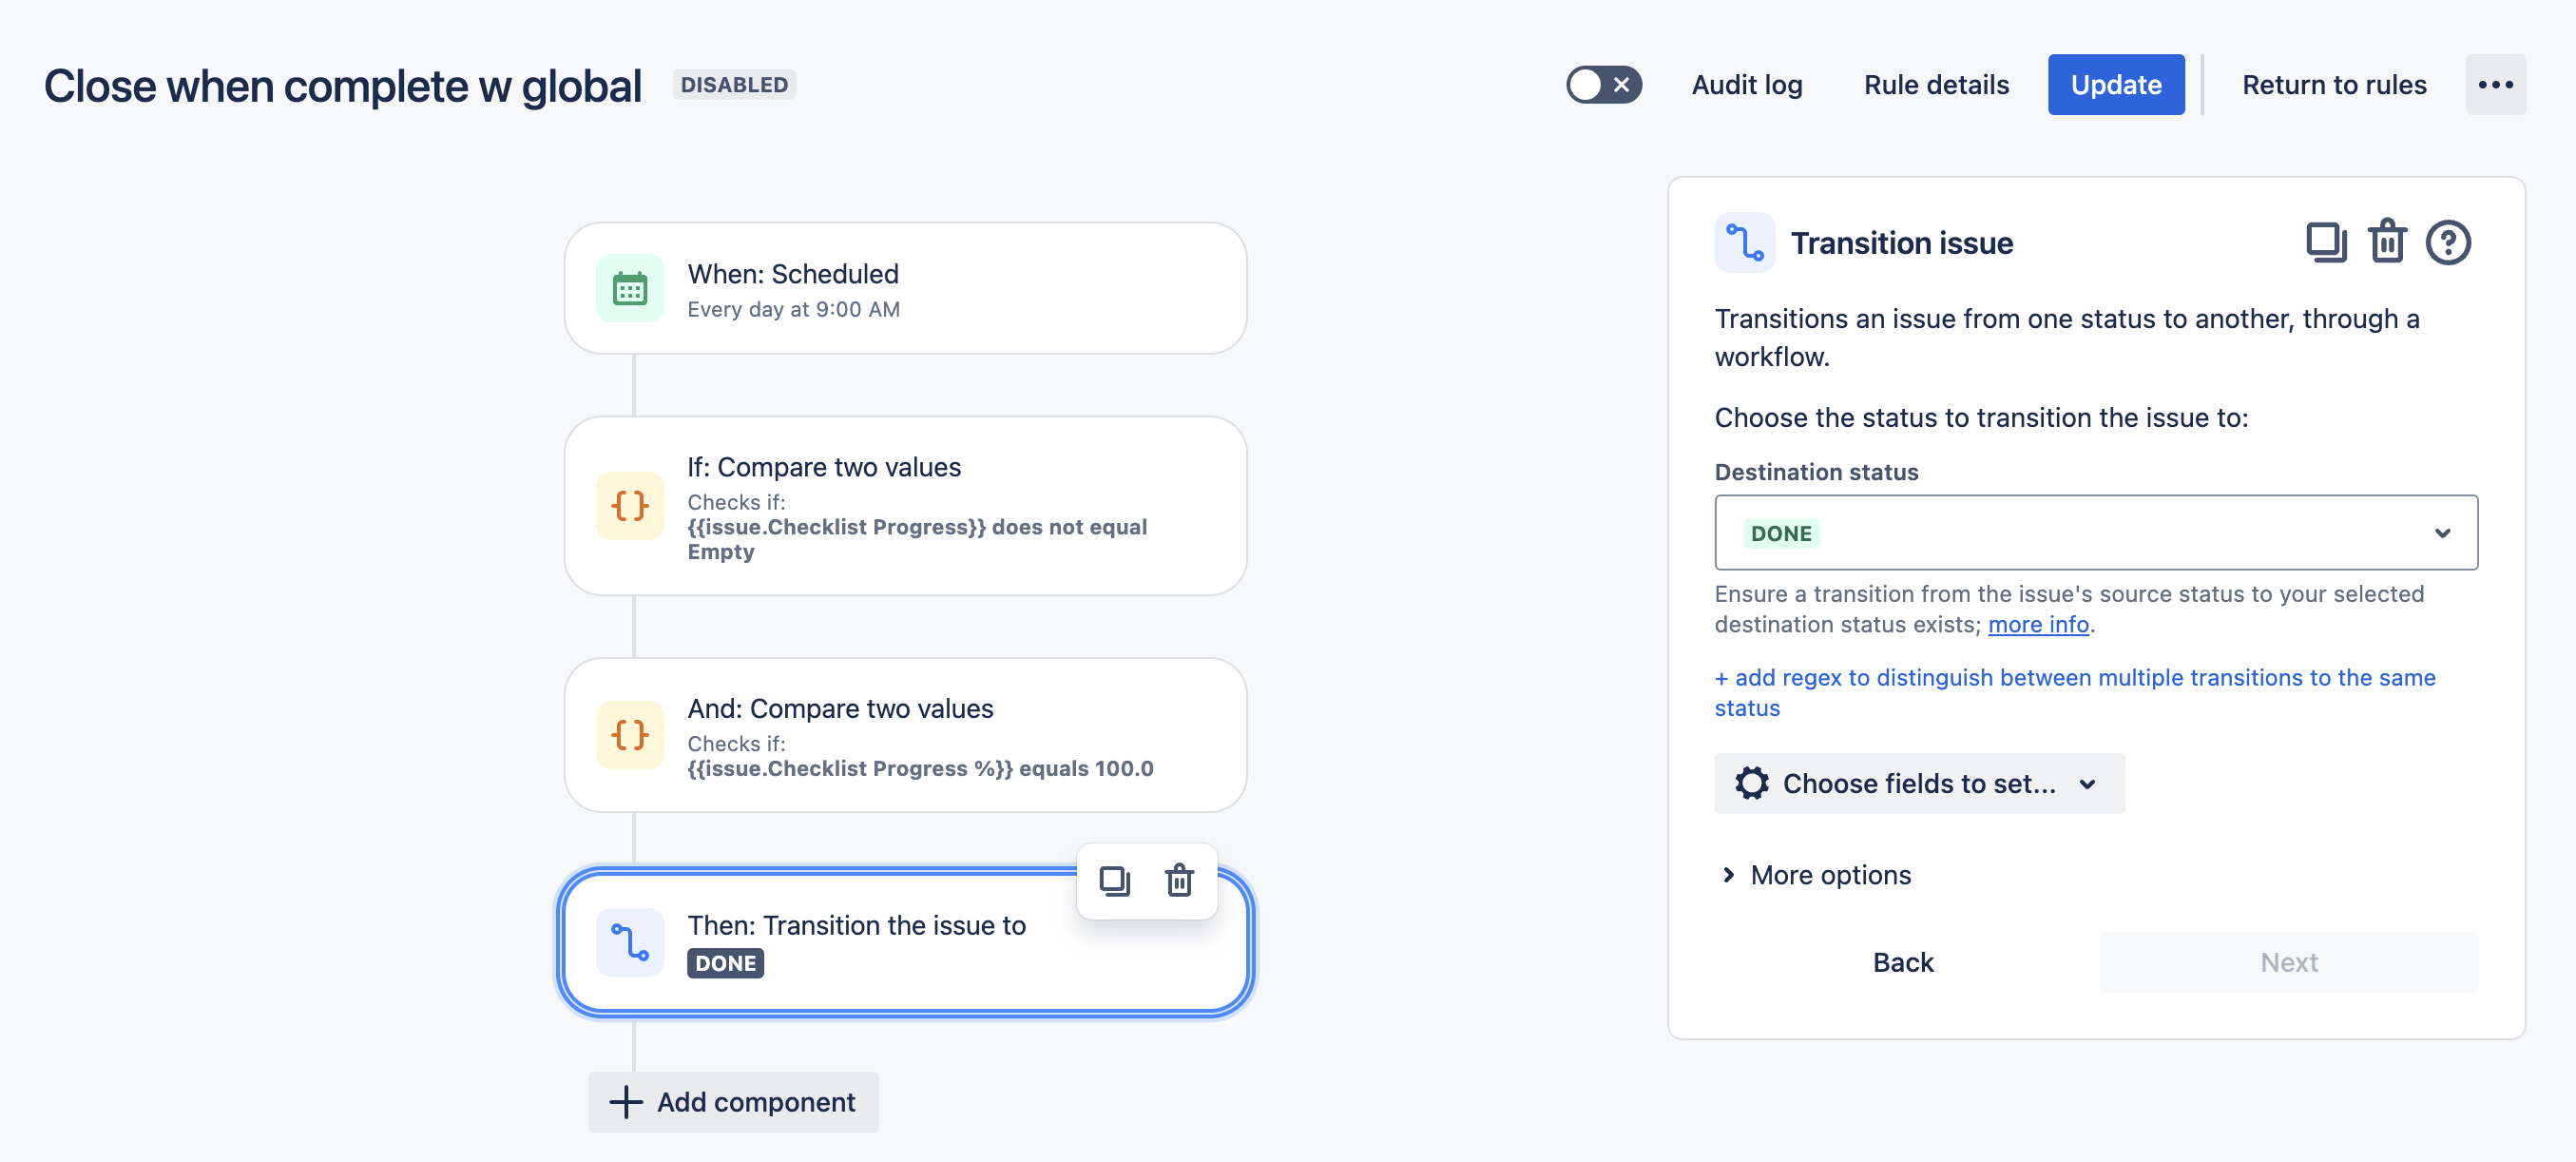
Name the rule and click Turn it on.
Tip: You may also want to add a step that sets the Resolution.
