Enable/Disable Checklists on a Project
Project Administrators can enable or disable Checklists for Jira for a given project. This will override the global setting.
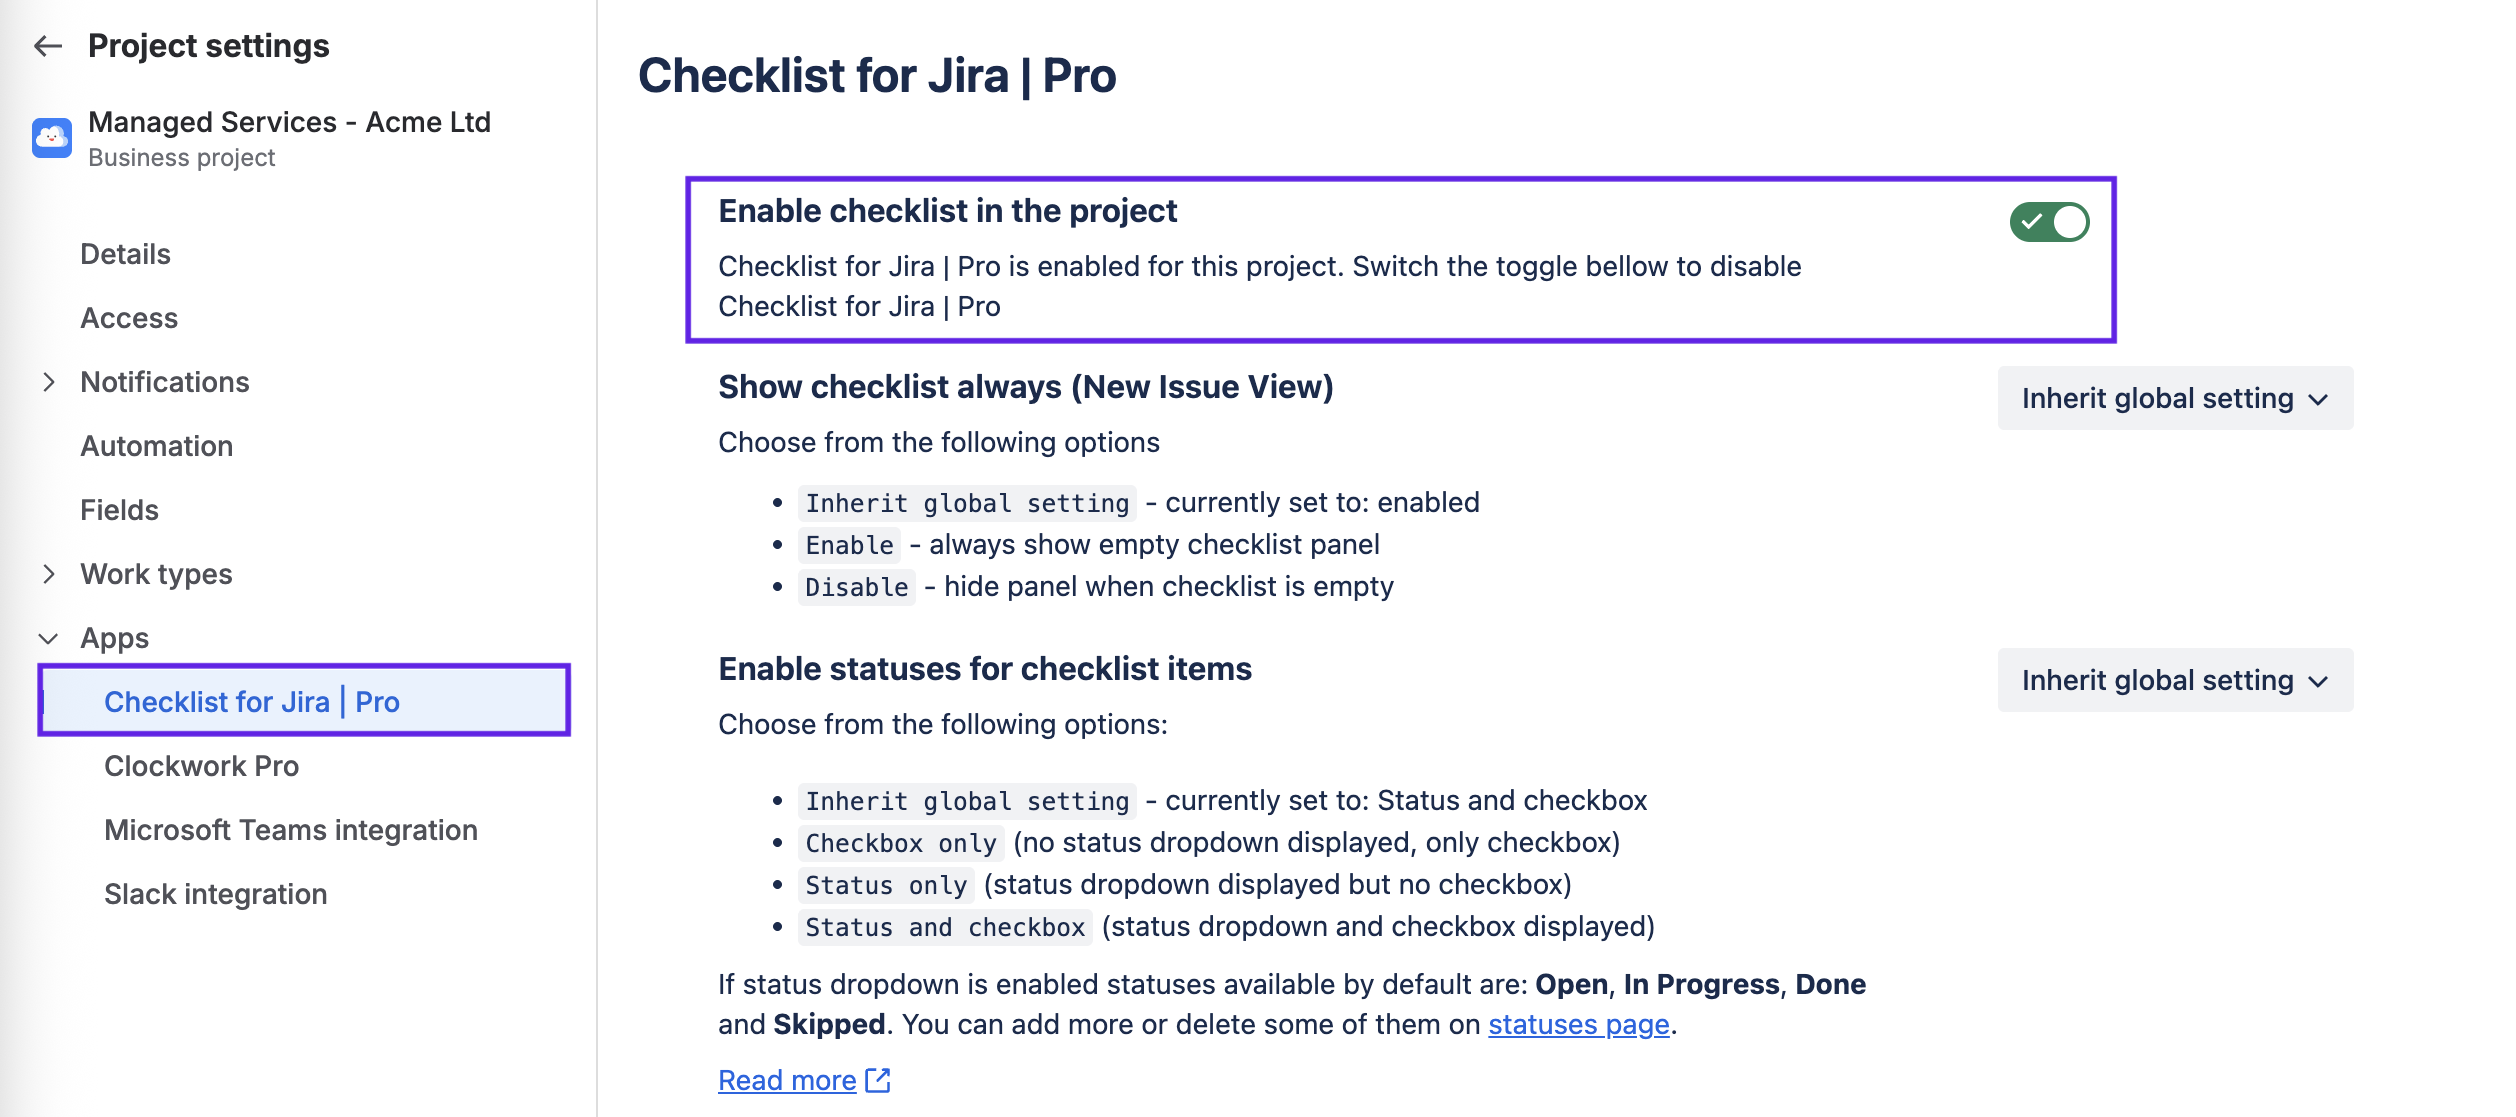
To enable/disable Checklists for Jira on a specific project, log in as a Project Administrator and go to Project Settings > Apps > Checklists for Jira. Use the toggle to enable/disable Checklists on the project.
Alternatively, go to Project Settings > Summary and use the toggle to enable/disable checklists on the project.
Note that you can also control which users and groups can view and access checklists via permissions.
Show Checklist Always PRO ENTERPRise
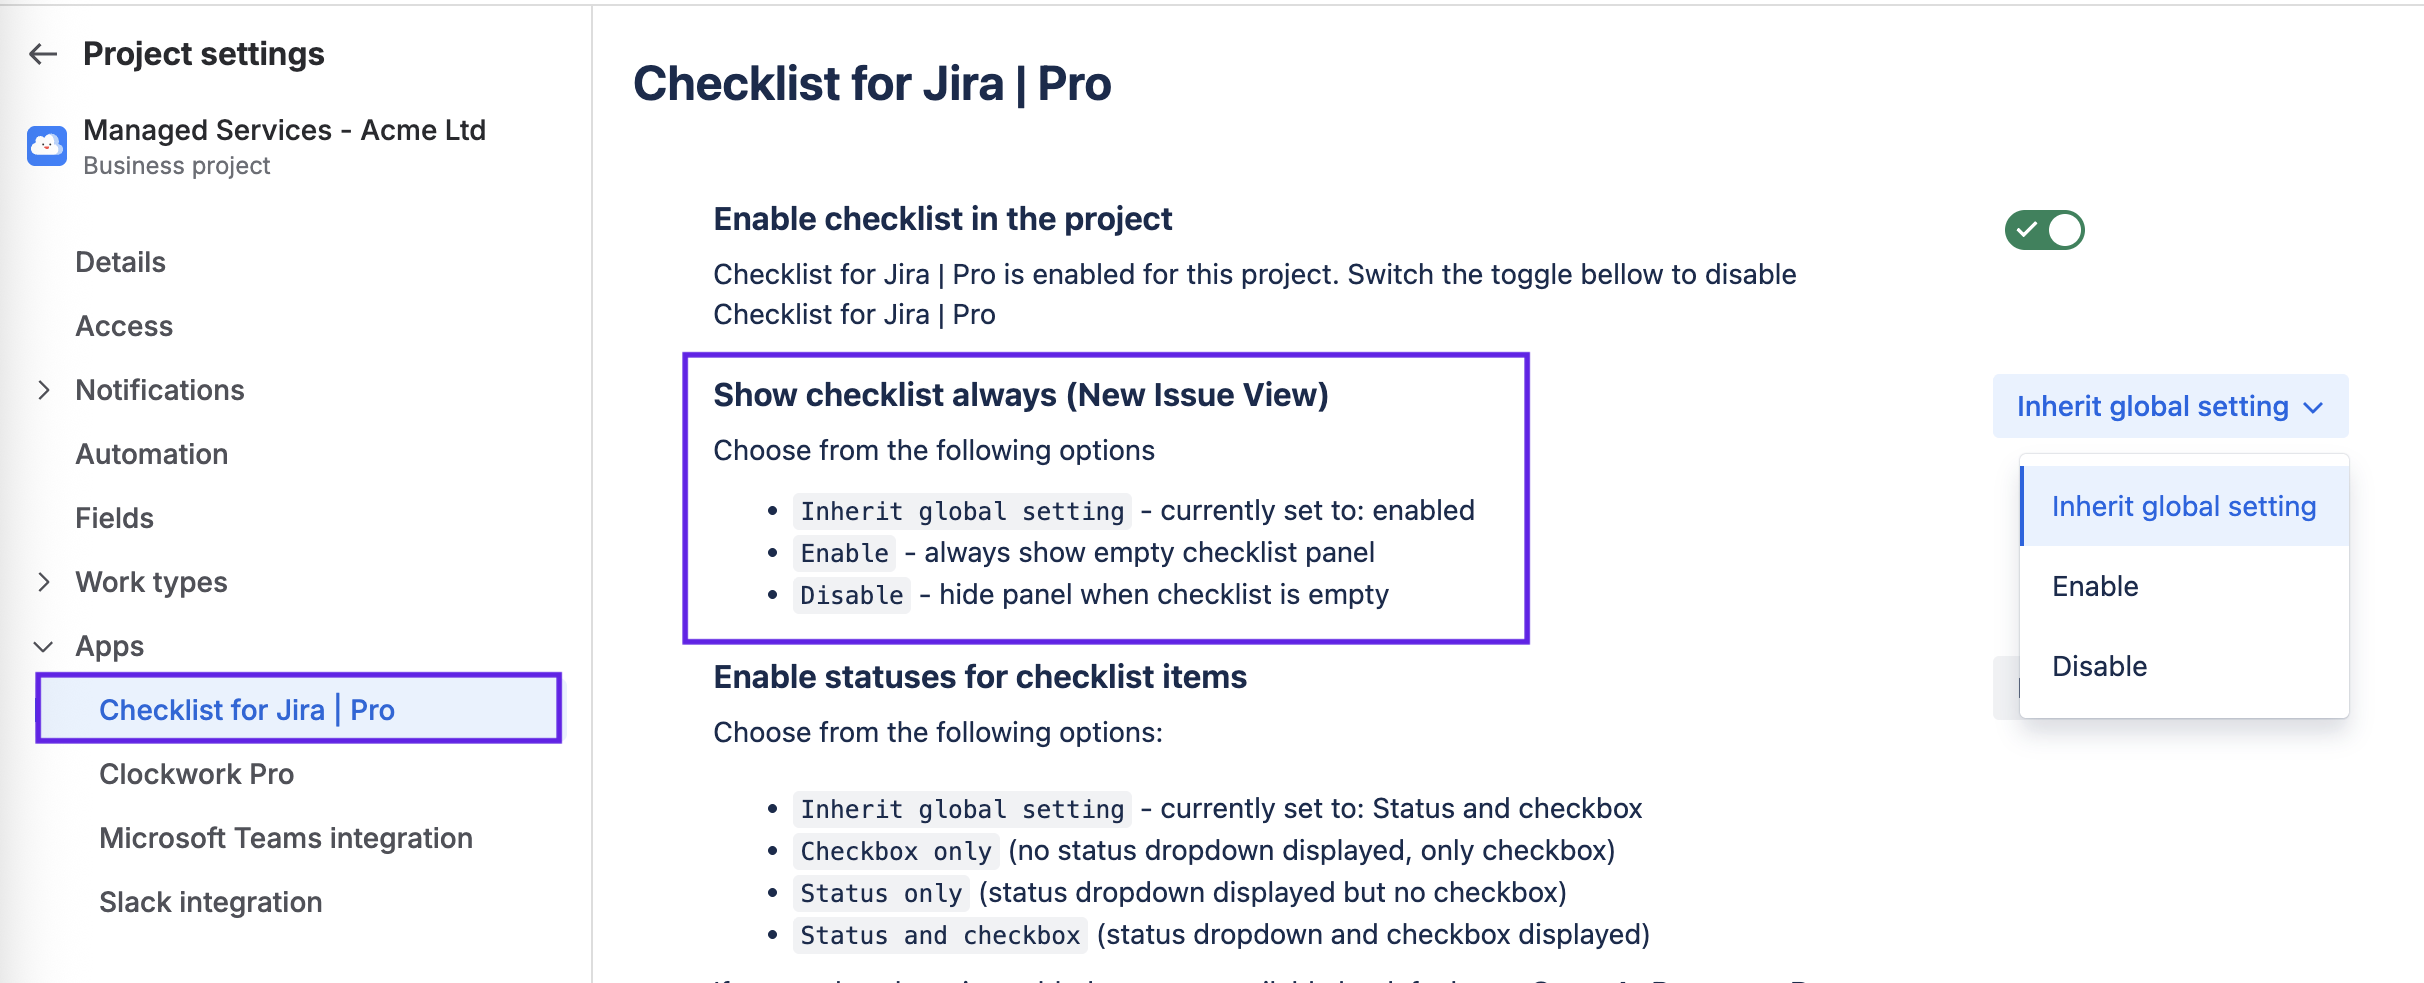
Checklists for Jira allows you to control if visibility of the checklist UI in New Issue View. The Show checklist always setting for the project will be inherited from the global setting by default. Use the dropdown to override the global setting. If Enabled, the checklist UI will be shown on all work items in the project, even if the checklist is empty. If Disabled, empty checklists will be hidden.
Enable Checklists in the JSM Portal PRO ENTERPRise
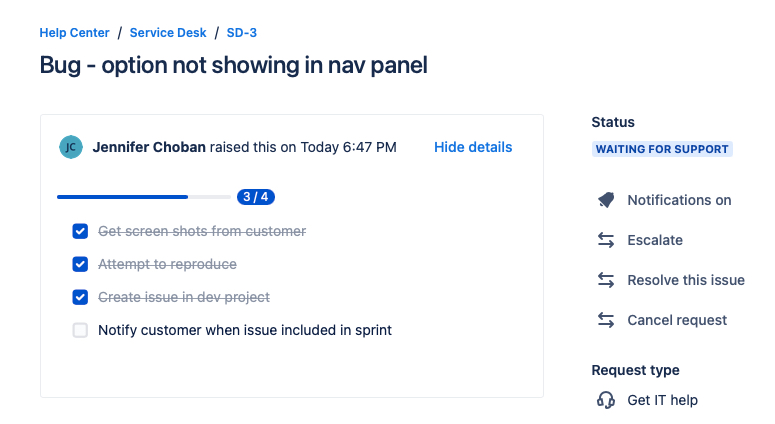
If Checklists for Jira is enabled in a Service Management project, agents will be able to see and work with the checklist in the same way as in other types of Jira projects. With Checklist for Jira PRO and enterprise you can display checklist progress, as well as a read-only copy of the checklist on the customer portal.
Show Checklist Progress
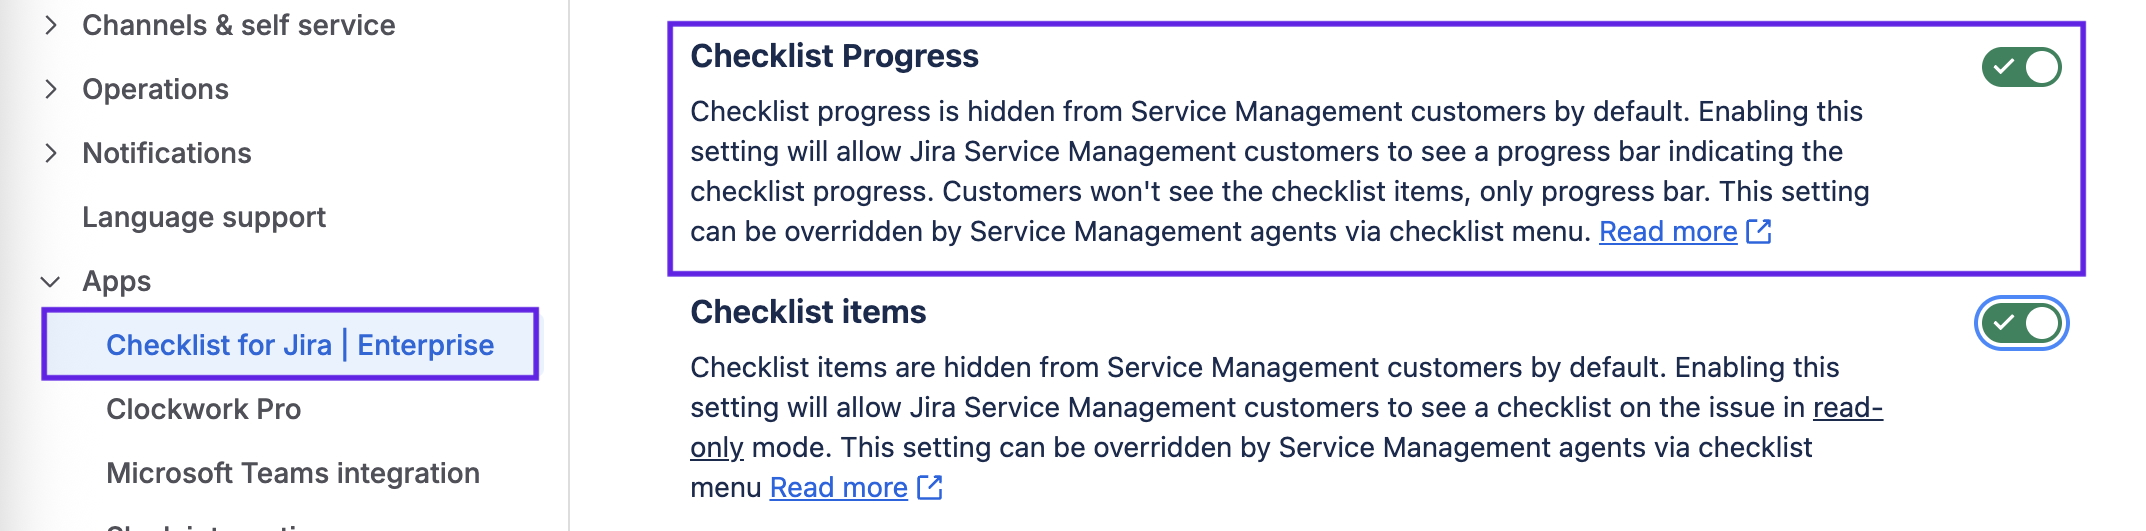
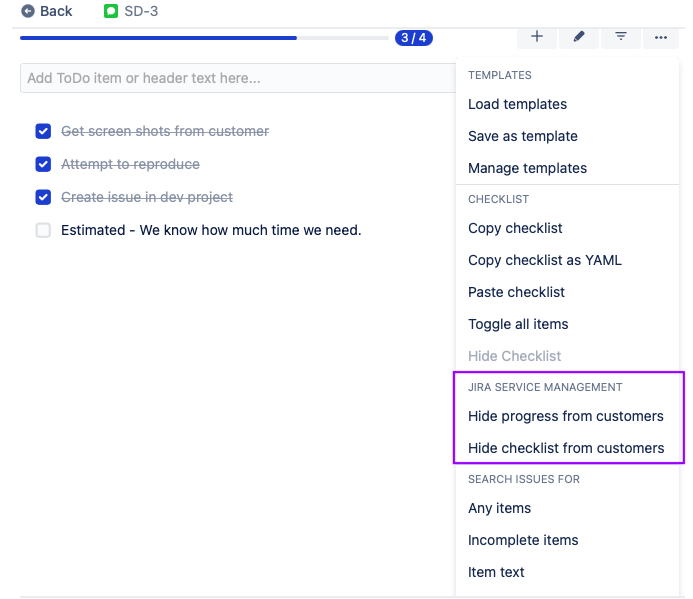
To show checklist progress on the JSM portal, navigate to Project settings > Apps > Checklists for Jira. Use the toggle to enable Checklist Progress on the JSM portal. Once enabled, the progress of the checklist will be visible by default to JSM customers. (The checklist progress bar is not visible for an empty checklist.) The checklist menu gives agents the option to override this setting on individual JSM requests.
Show Checklist Items (read-only)
To show checklist items on the JSM portal, navigate to Project settings > Apps >Checklists for Jira. Use the toggle to make a read-only copy of the checklist visible on the JSM portal. (The checklist panel is not visible for an empty checklist.)
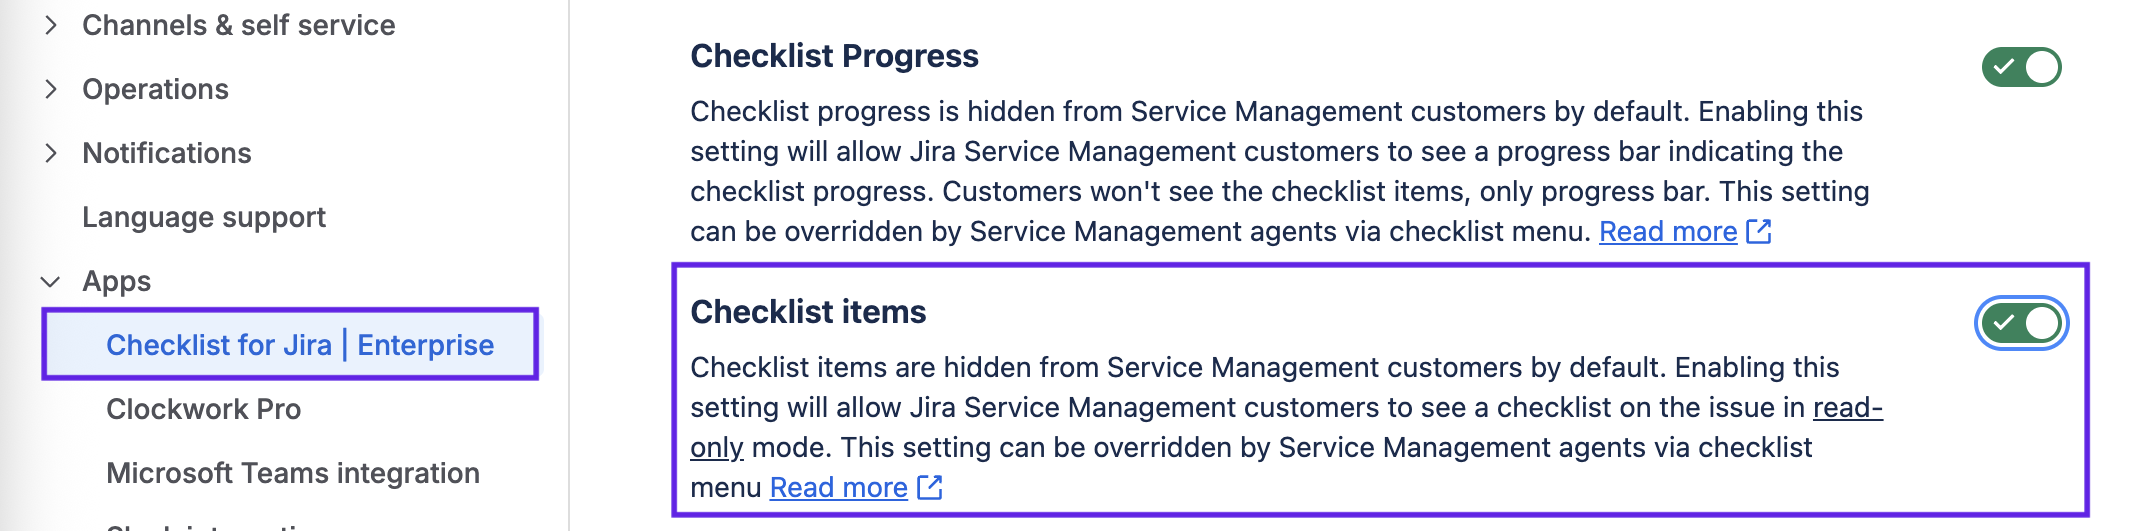
The checklist menu gives agents the option to override this setting on individual JSM requests.
Note that when this feature is enabled a people icon will be displayed on the agent view to alert agents that information in the checklist is visible to customers.

Enable/Disable Statuses on Checklists
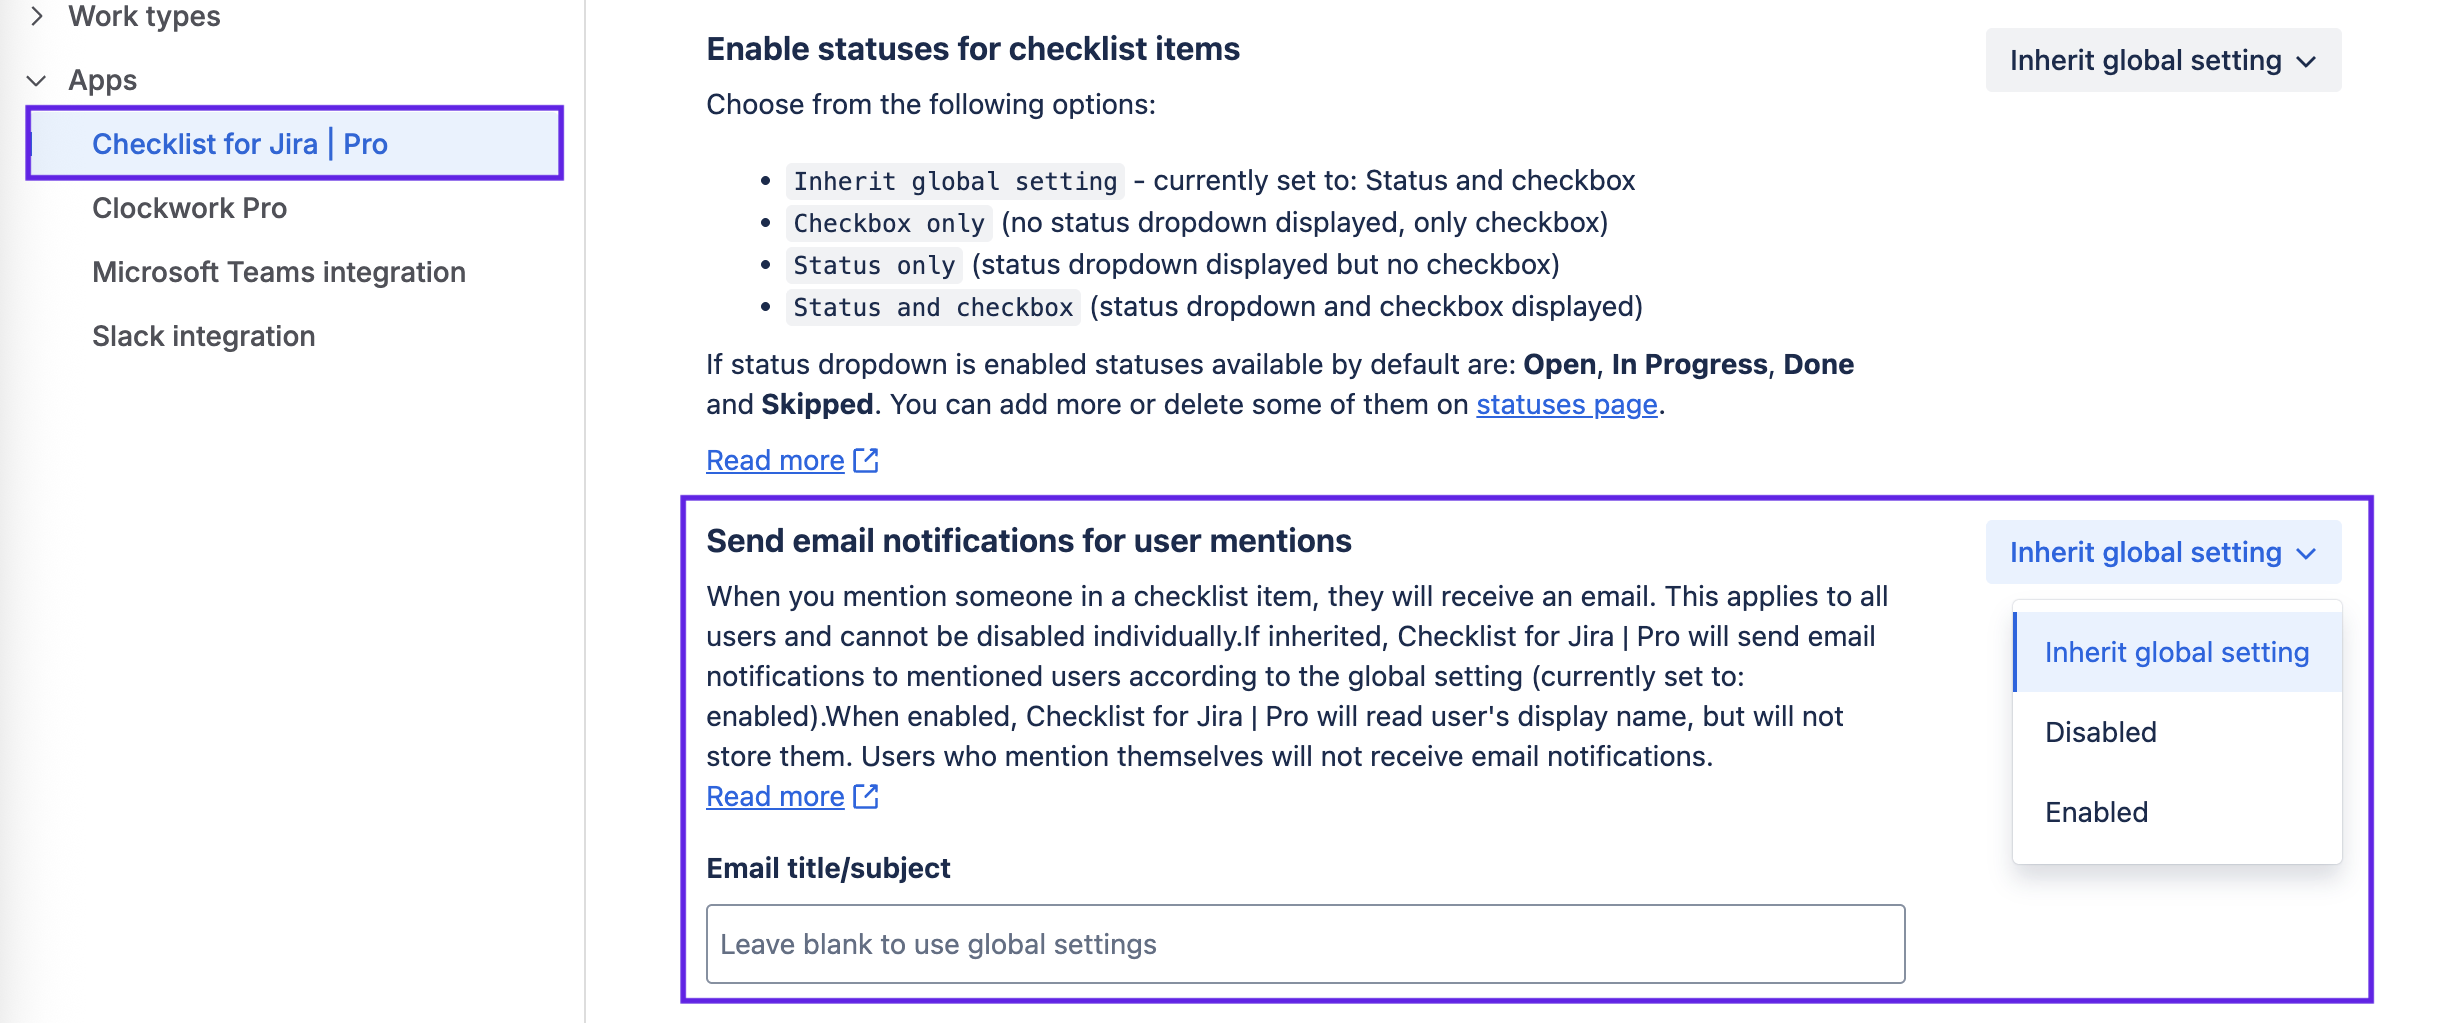
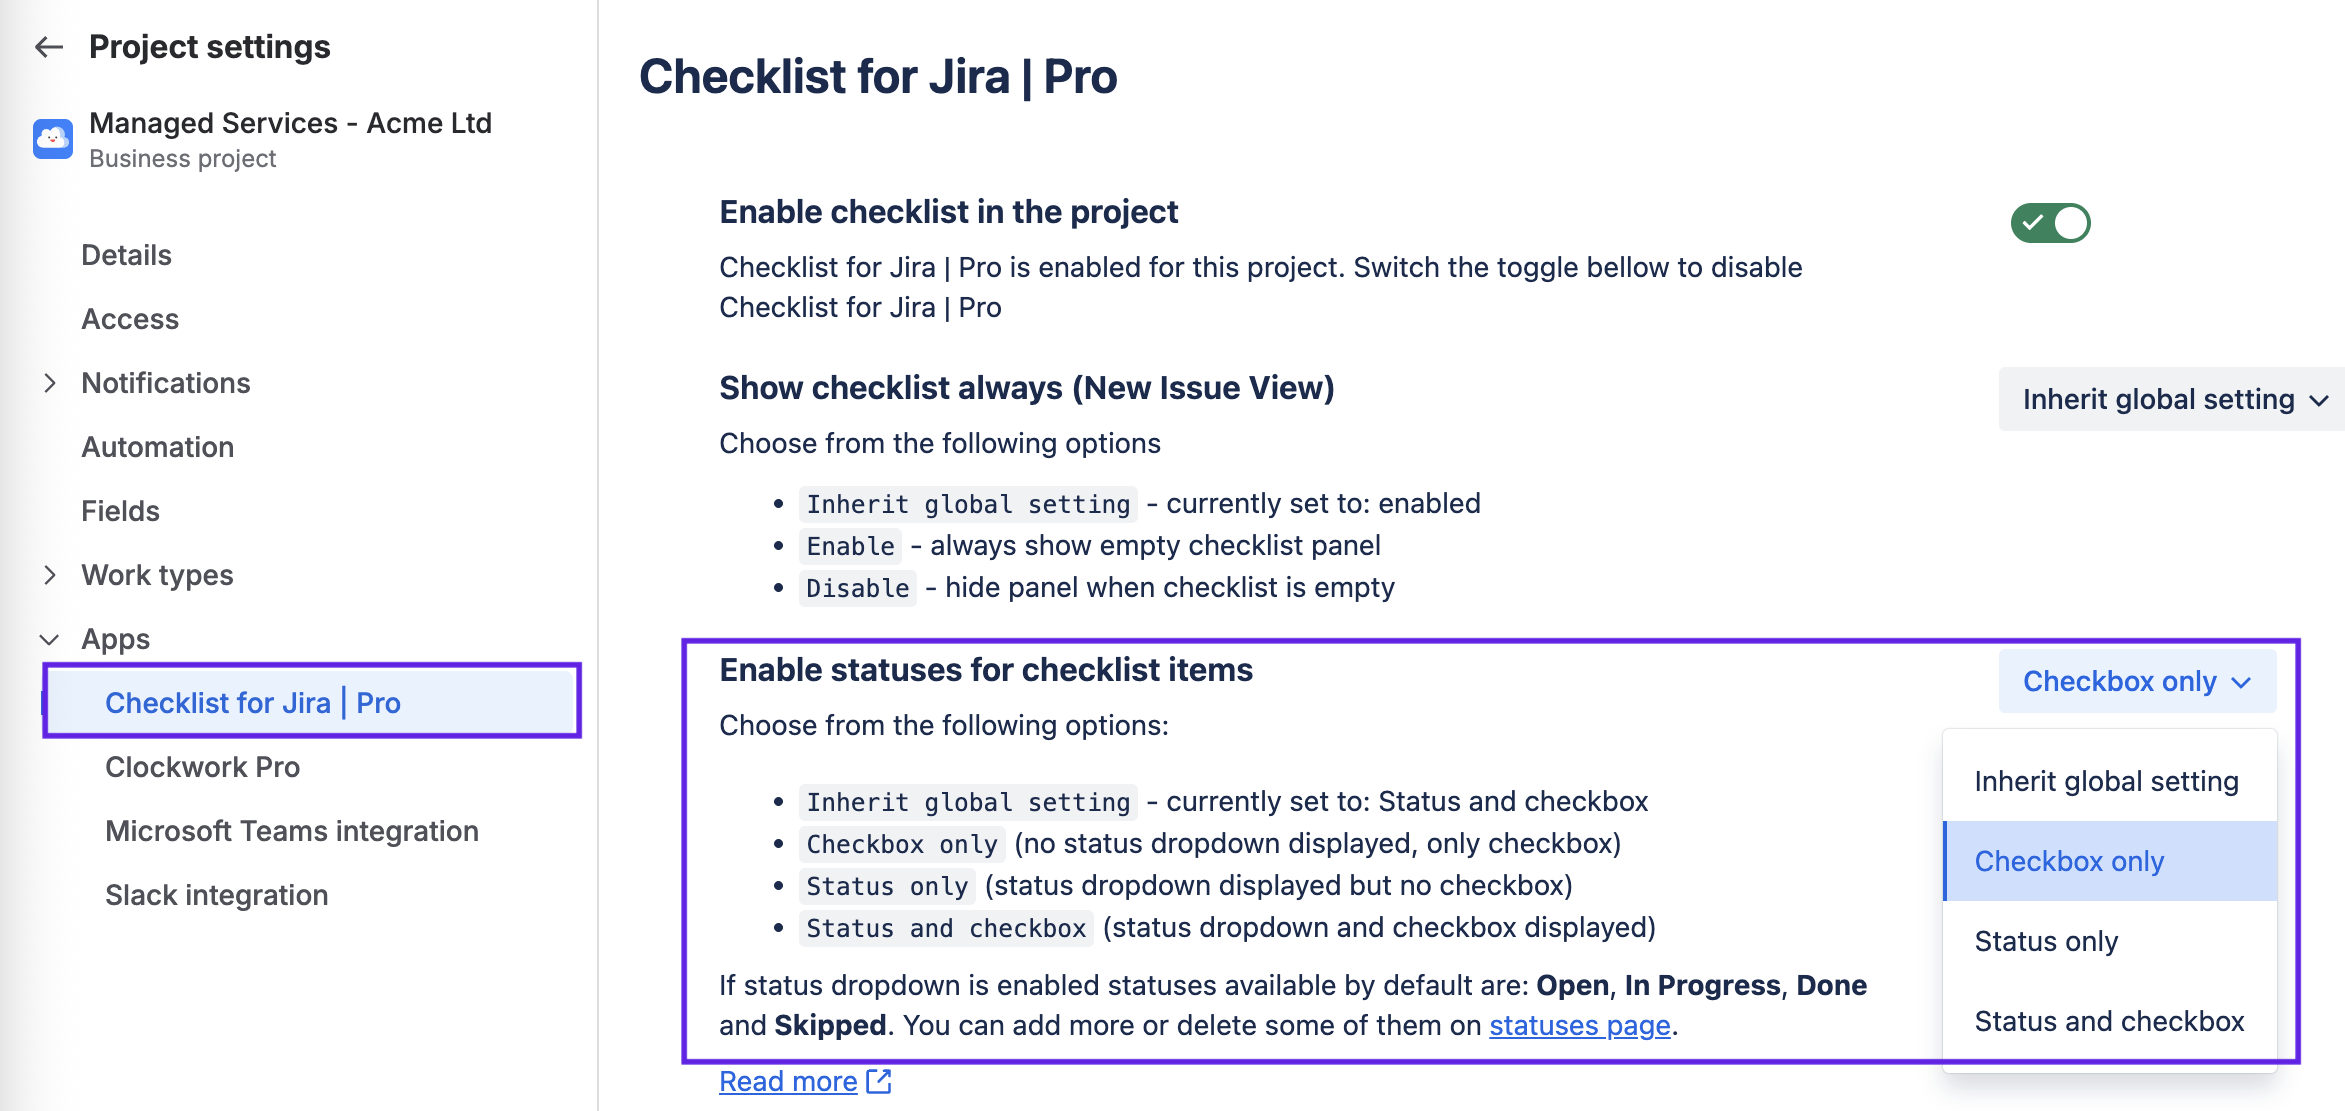
Checklists can be displayed as simple checkboxes, as statuses, or both. In Checklists for Jira pro and enterprise , this setting can override the option selected in global settings. Navigate to Project settings >Apps > Checklists for Jira. Use the dropdown to select checkboxes, status or both. Note that the available statuses can be customized in the global settings.
Send Email Notifications for User Mentions PRO ENTERPRise
Checklists allows you to @mention users in checklist items. If you are using Checklist Pro/Enterprise and enable the Send email notifications option, an email will be sent when a user is mentioned on a checklist item. The Send email notifications project setting will override the global setting.
Emails are sent when new items are added, when items are edited or when a template is applied to the Jira work item. Email notifications are not sent if a user is mentioned while editing the checklist in the editor or through the Checklist Text custom field. Note that currently there is now way for an individual user to unsubscribe from Checklists notifications.
To modify the email subject line, click into the text box and type the desired text. Click the checkmark to save your changes.