
This example allows you to create issues, including a checklist, on a schedule.
Create Jira Work Items with Checklists Daily, Weekly or Biweekly (Jira Due Date)
You can now schedule Jira issues/work items to recur:
-
Daily
-
Every week day
-
Weekly
-
Every two weeks
If the original work item has a checklist, it will be repeated on subsequent iterations of the Jira work item. Note that new iterations of the work item will have an exact copy of the checklist as it was on the original Jira work item (including the checklist item statuses). You can use the Toggle all items feature to reset the Checklist. You may also want to reset checklist item due dates and/or assignees.
To create a recurring issue/work item with a checklist:
-
Create the Jira work item.
-
Add a checklist.
-
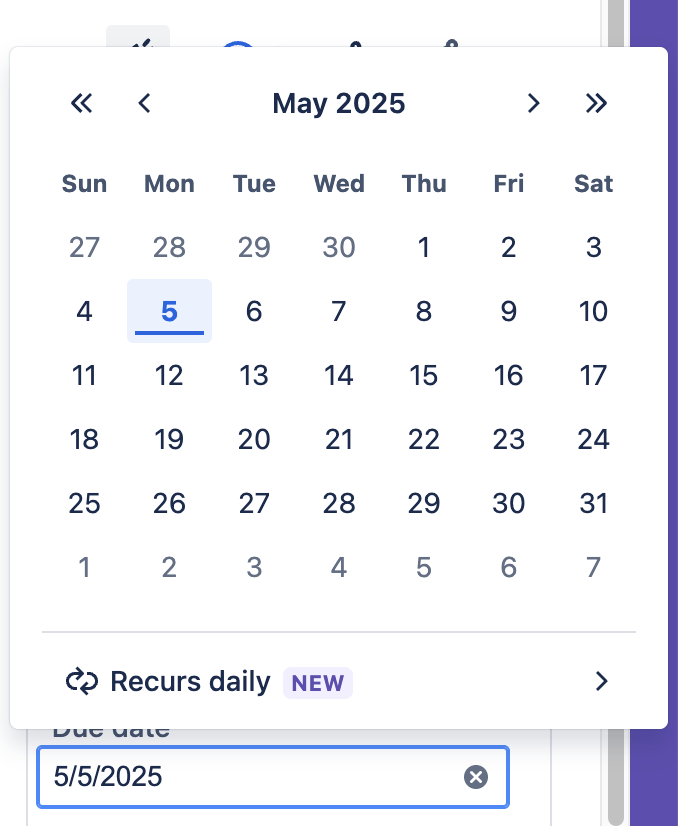
Click into the Due date field on the work item.
-
Click on the Set to recur button in the calendar popup.
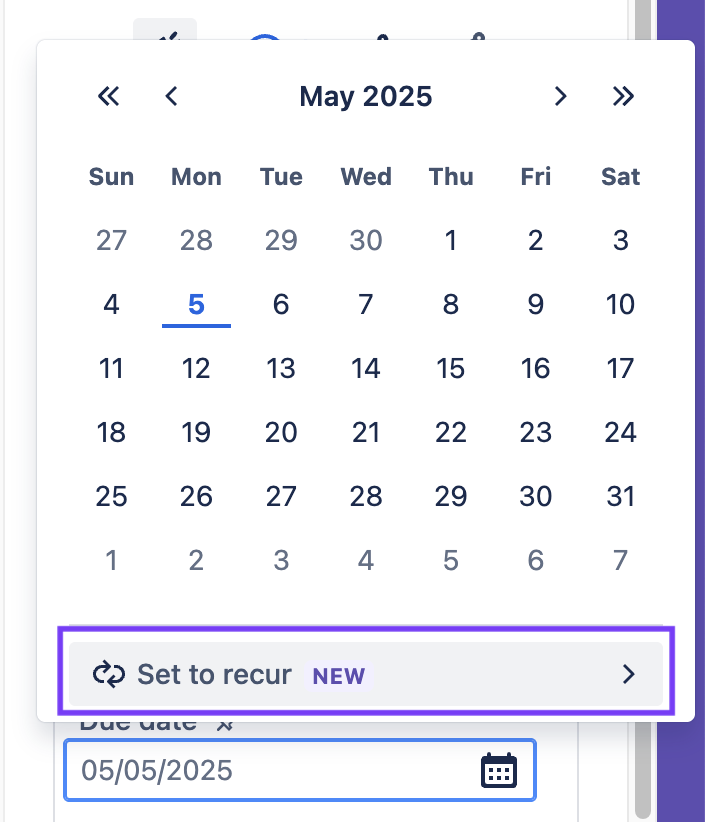
-
Select the appropriate interval.

-
You can select to have the new work item created on a schedule or when the previous issue is completed.

-
Click Save. A flag at the bottom of the calendar popup will indicate that the work item is recurring.
Create Work Items with Checklists on Any Schedule (Jira Automation)
Limitations
-
If you are using Checklists for Jira ENTERPRISE , note that this rule cannot be used to create or modify Global Checklists.
-
When you make changes to the checklist via the Checklist Text field, the tooltip for each item in the checklist will be stamped as the time that change was made.
Notes
If you are using this rule in a team-managed space, you first need to add the Checklist Text custom field to the space. To add the field to a space:
-
Navigate to Space settings > Fields.
-
Click Add field.
-
Select the Checklist Text.
-
Click Add 1 field.
-
Ensure the Sync checklists to Custom Fields global setting is enabled, and that the Jira space has the Checklist Text field.
-
Navigate to Space Settings > Automation (or Jira Settings > System > Automation rules).
-
Click Create rule.
-
Select the Scheduled trigger and select the appropriate time interval. Click Next.
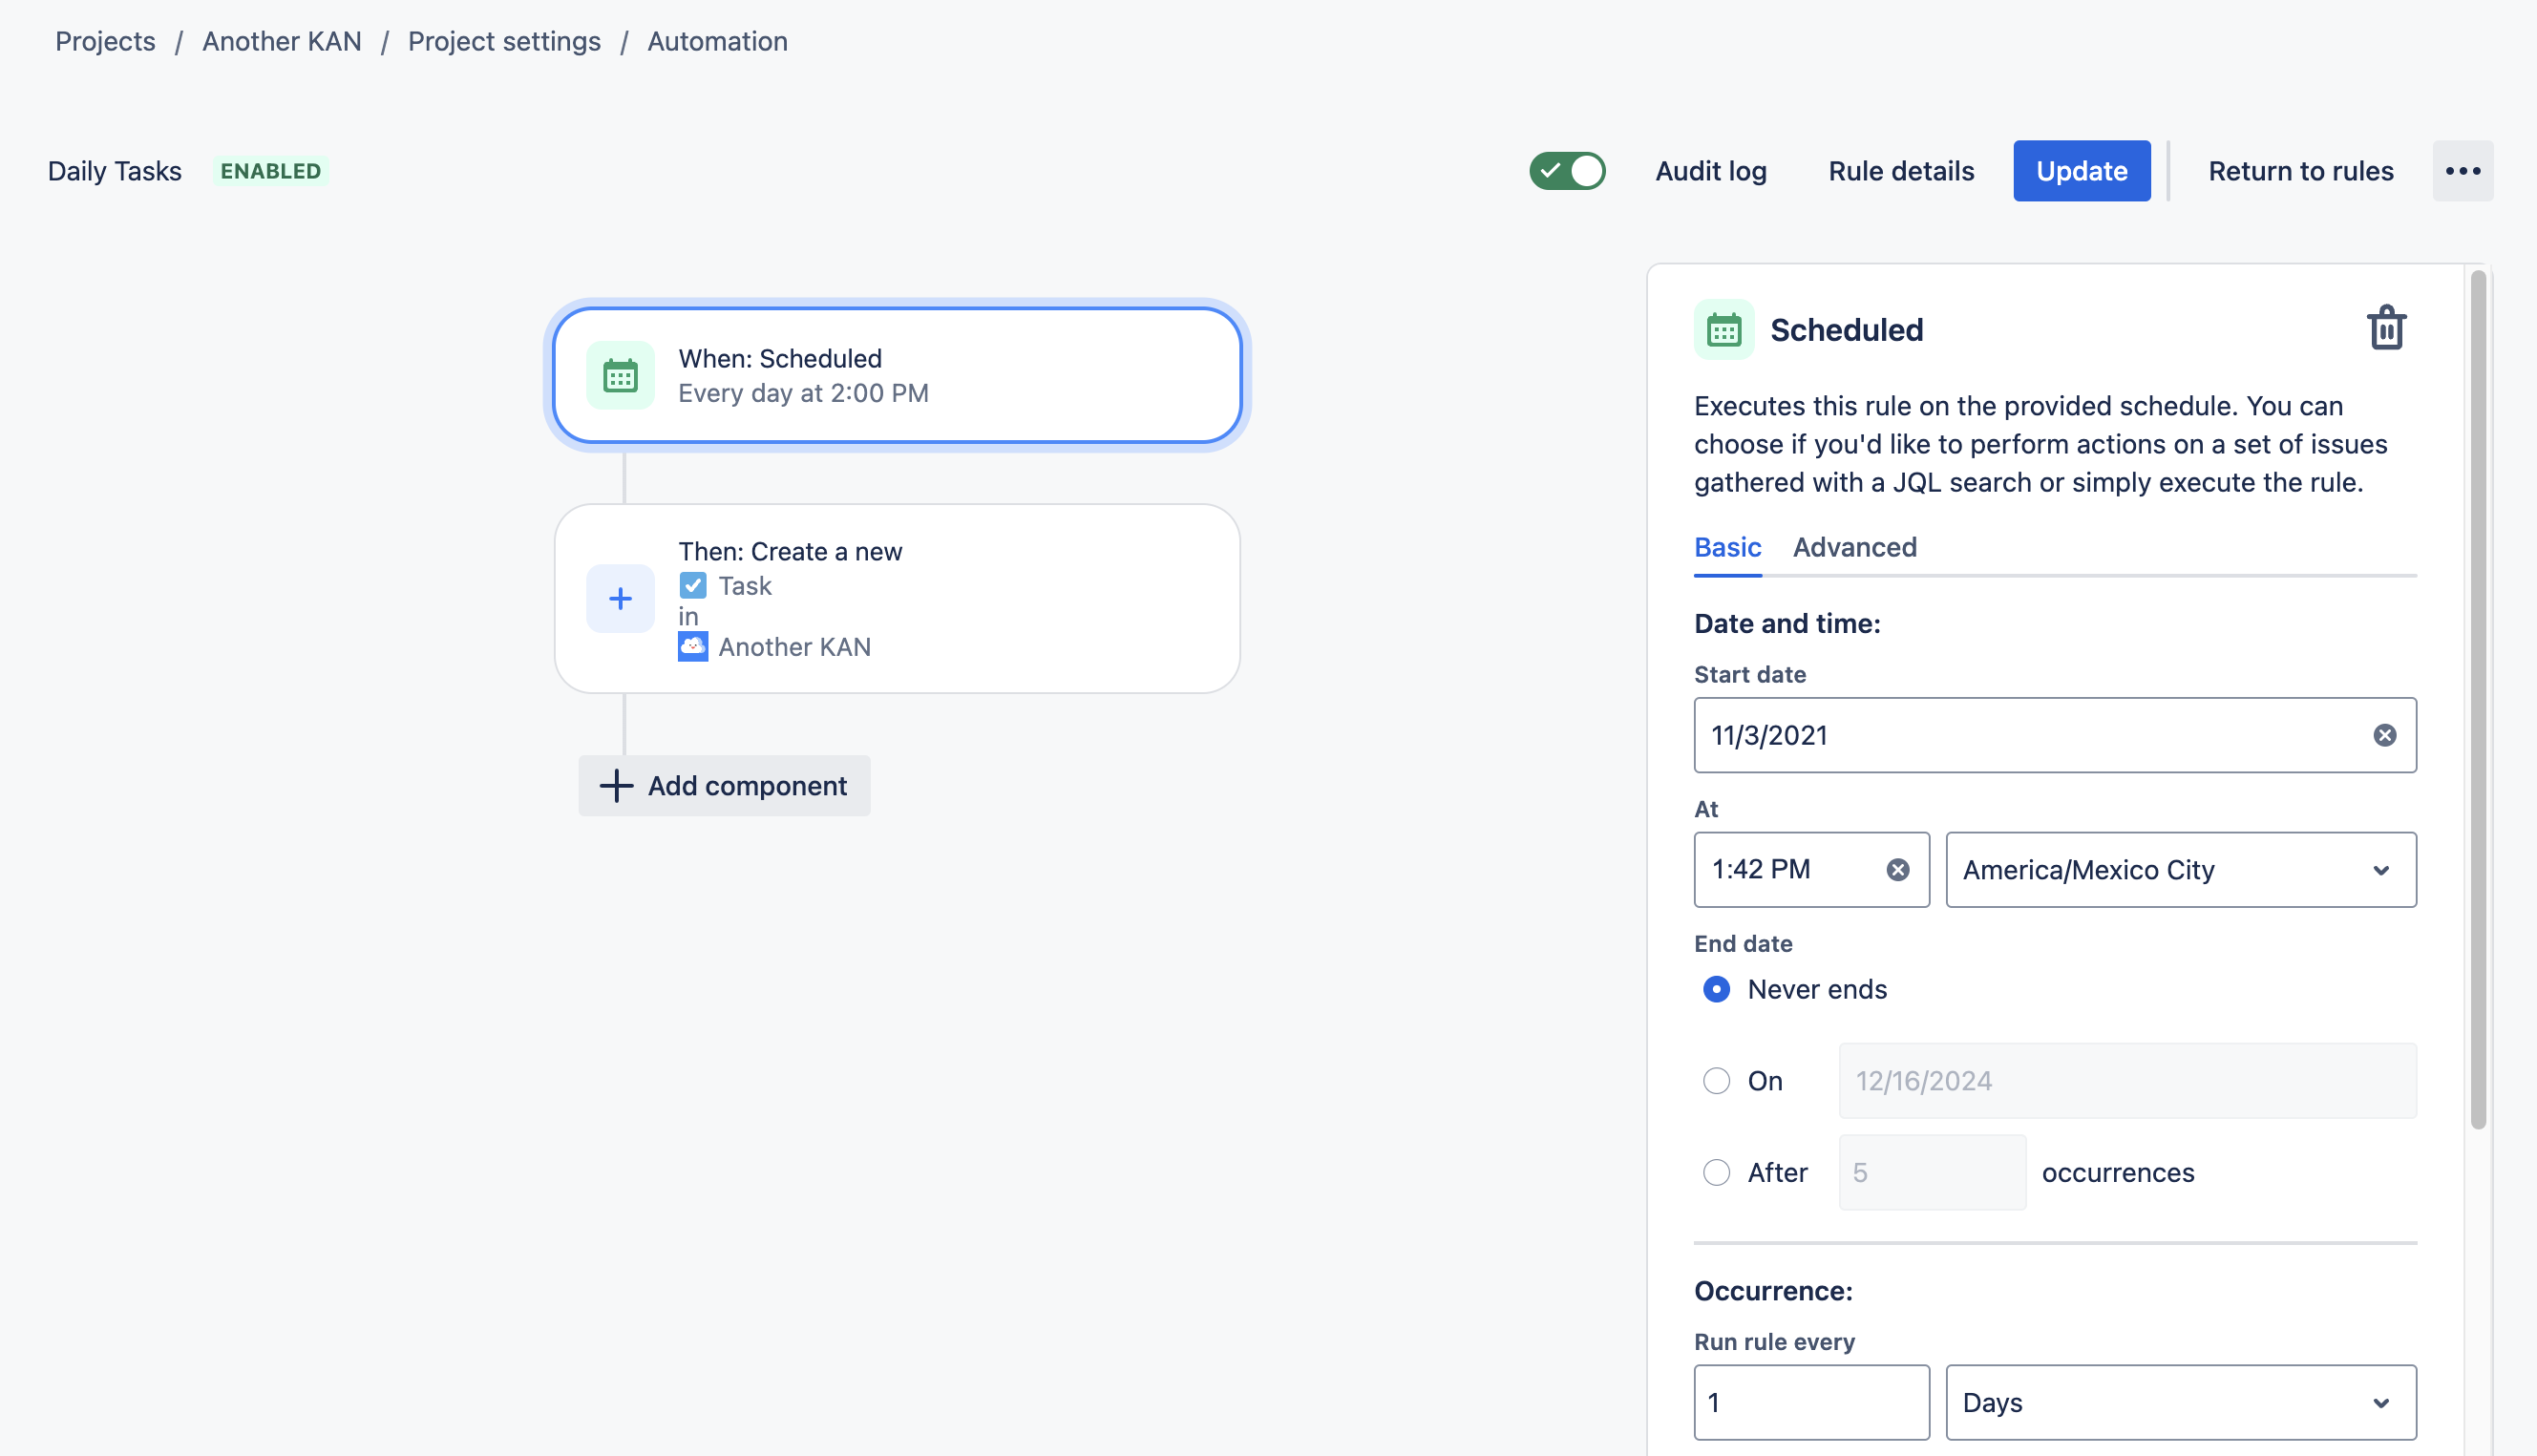
-
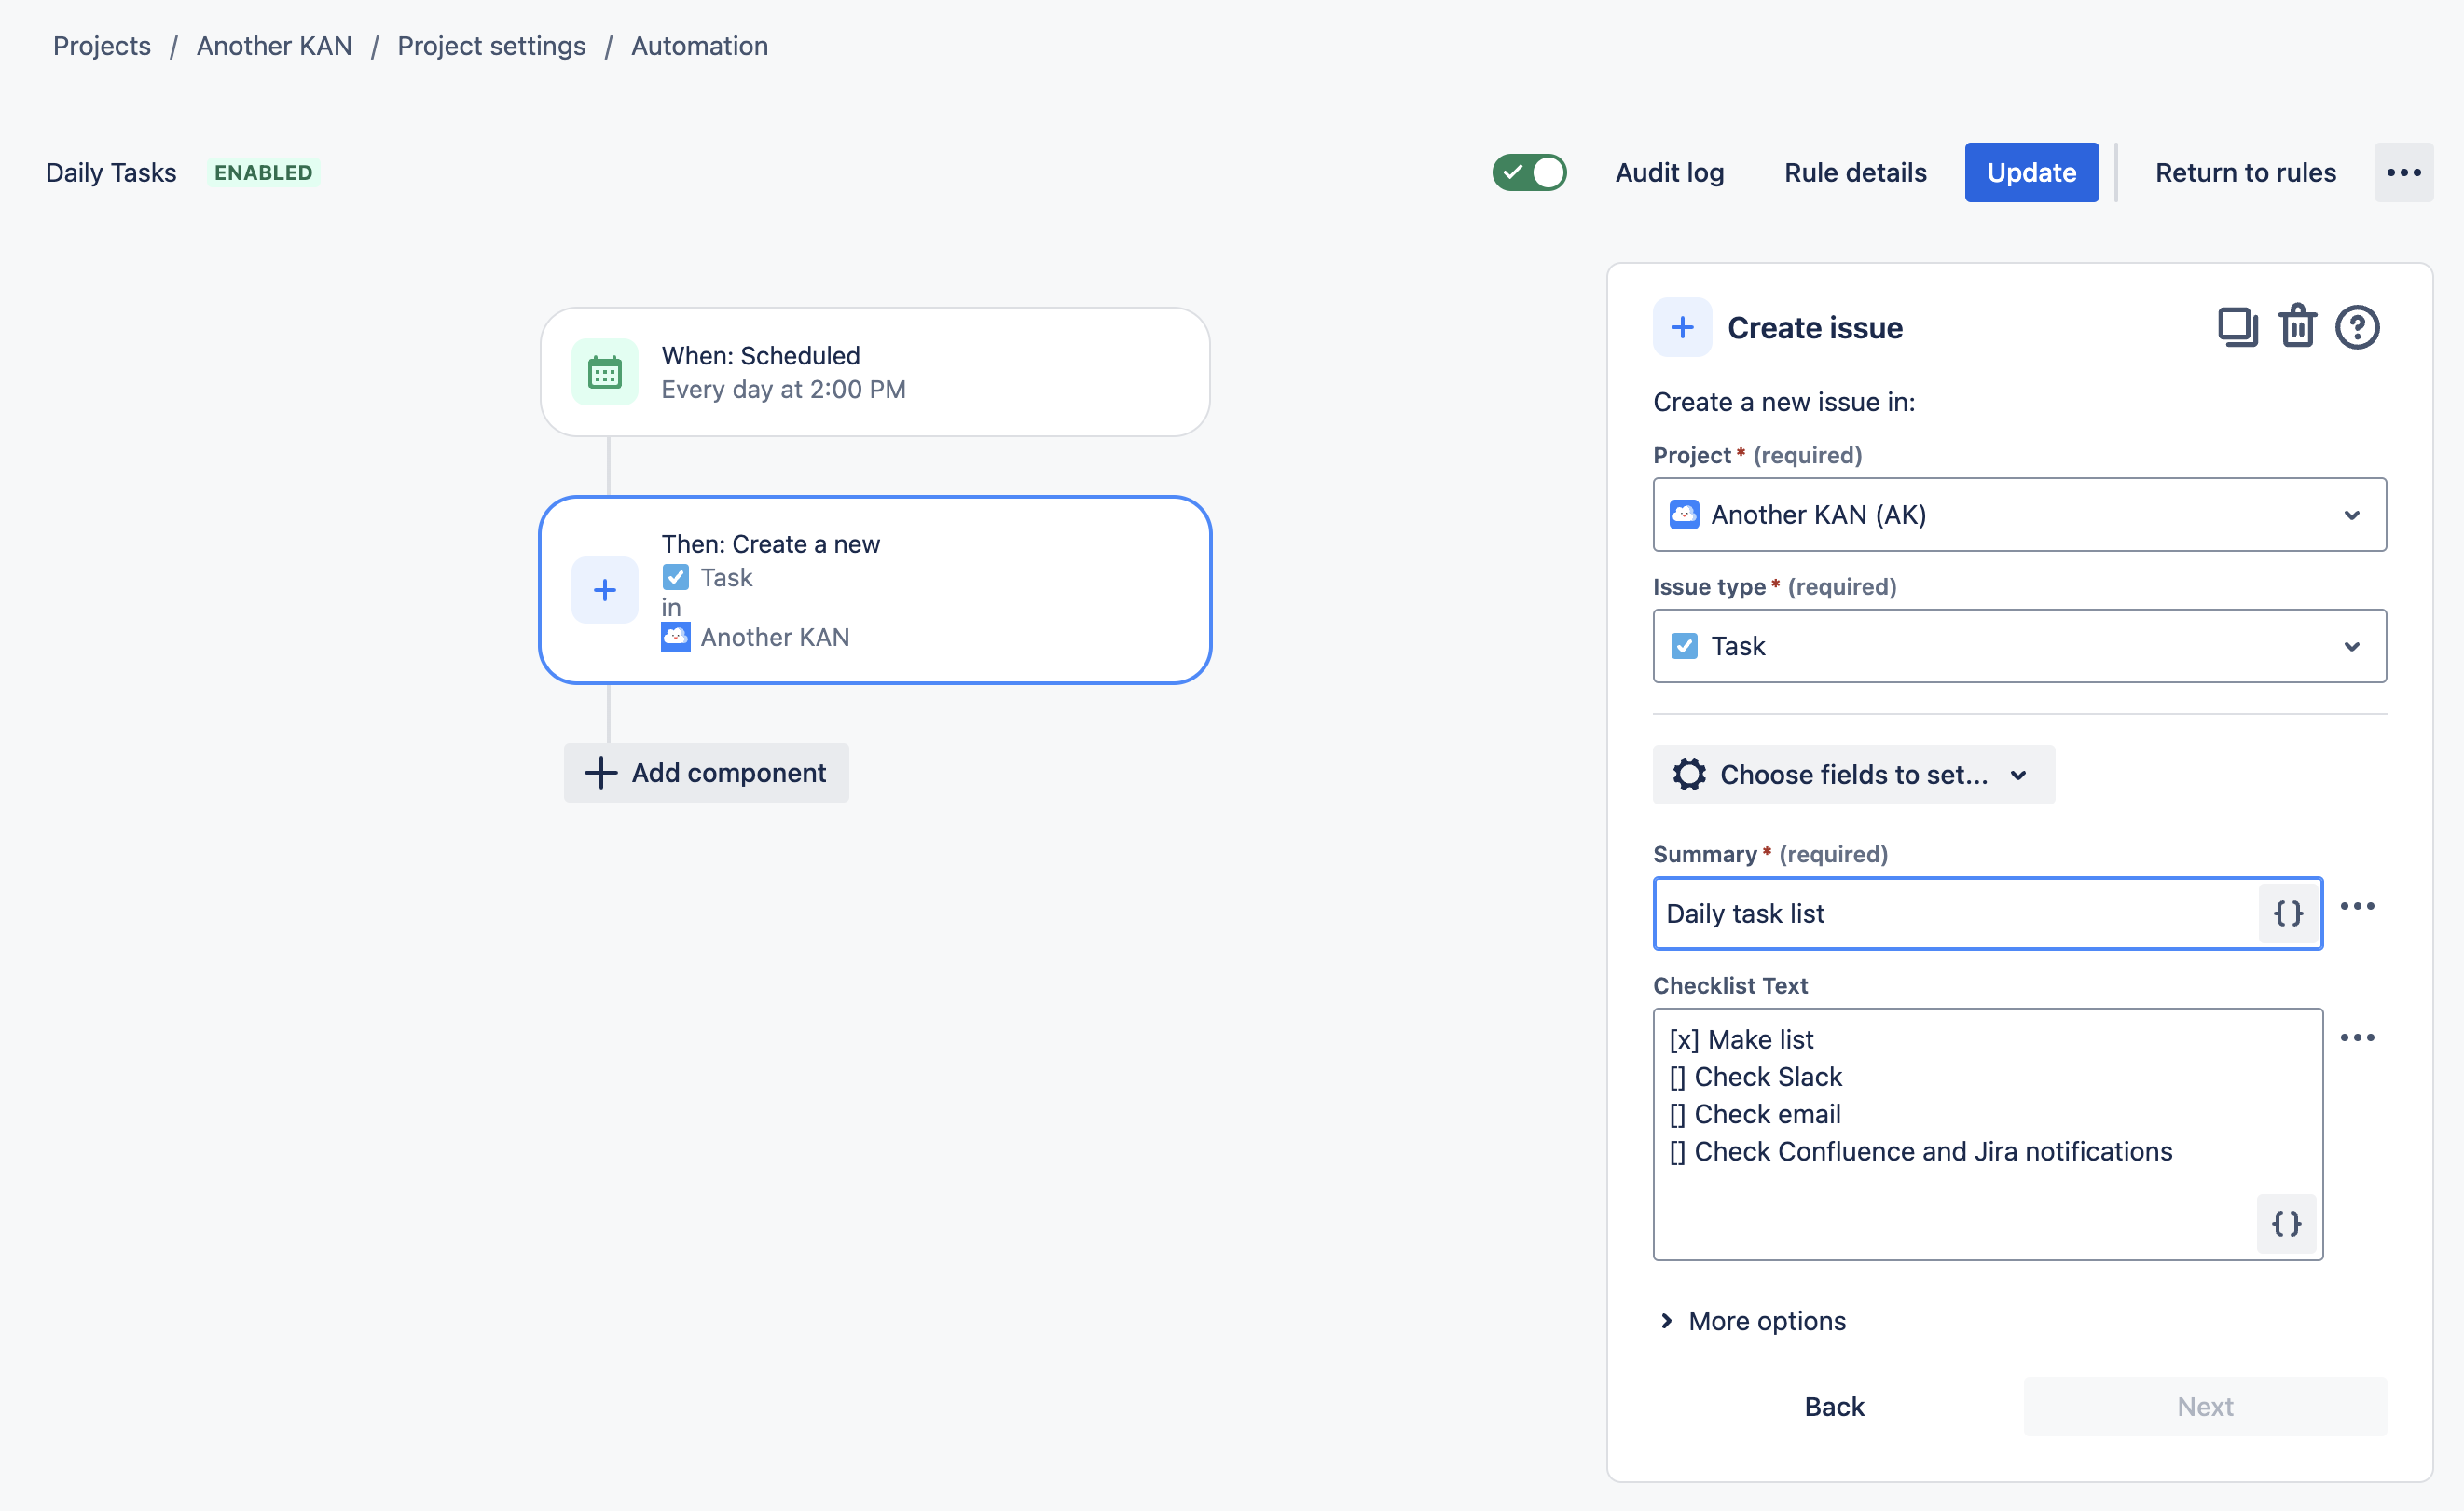
Click add component and select New action.
-
Select the Project and Work item type.
-
Click on the Choose fields to set dropdown and select Checklist Text.
-
Set the Summary field for the new issues.
-
Add the formatted text to the Checklist Text field. Click Next.
-
Name the rule and click Turn it on.