
If you updated by mistake or are not ready for the latest version, we can guide you through the process of downgrading. Please reach out to our support team for assistance. However, please note that the legacy version will only be supported until the end of 2024, after which it will no longer be available.
Checklists for Jira (Free), Checklists for Jira (Pro), and Checklists for Jira (Enterprise) use a common codebase. Therefore, you can only use one of these products at a time. If you have been using Checklists for Jira (Pro) and Checklist for Jira Cloud simultaneously, you will need to uninstall Checklists for Jira (Pro) before updating from Checklist for Jira Cloud to Checklists for Jira (Enterprise).
Upgrading from Checklist for Jira Cloud to Checklists for Jira (Enterprise) is free. Your existing license will be used and no additional cost will be applied.
To upgrade to Enterprise:
-
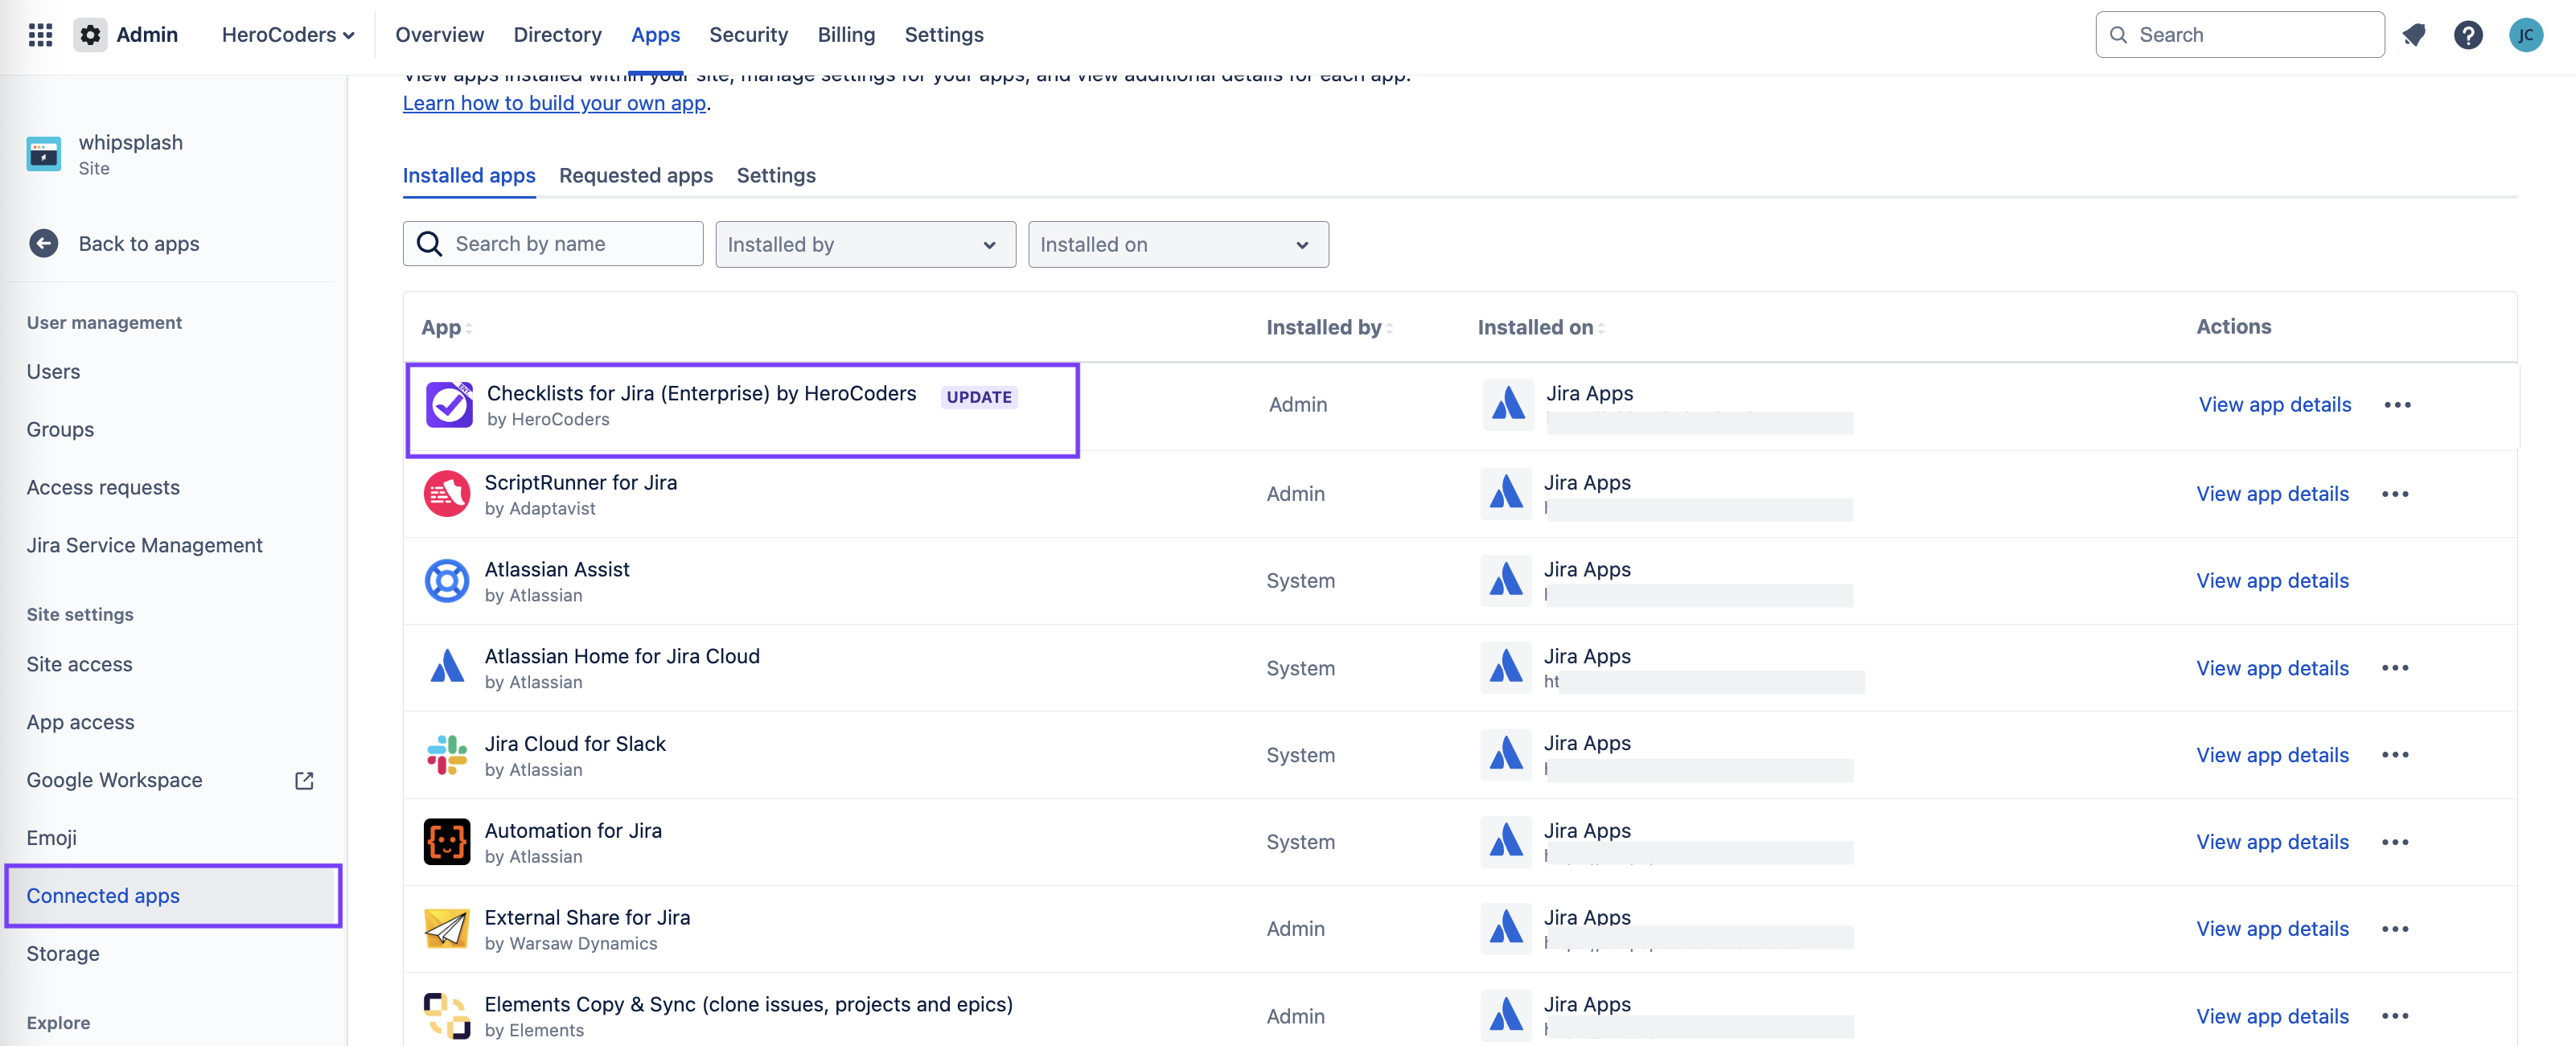
Navigate to admin.atlassian.com. Select the appropriate Organization. Click on the … menu to the right of the appropriate Product and select View product.
-
Click on Connected apps from the left nav bar. The Checklists for Jira (Enterprise) app will have an Update flag.
-
Click on View app details for Checklists for Jira Enterprise.
-
Click on the Update button to see a description of the update

-
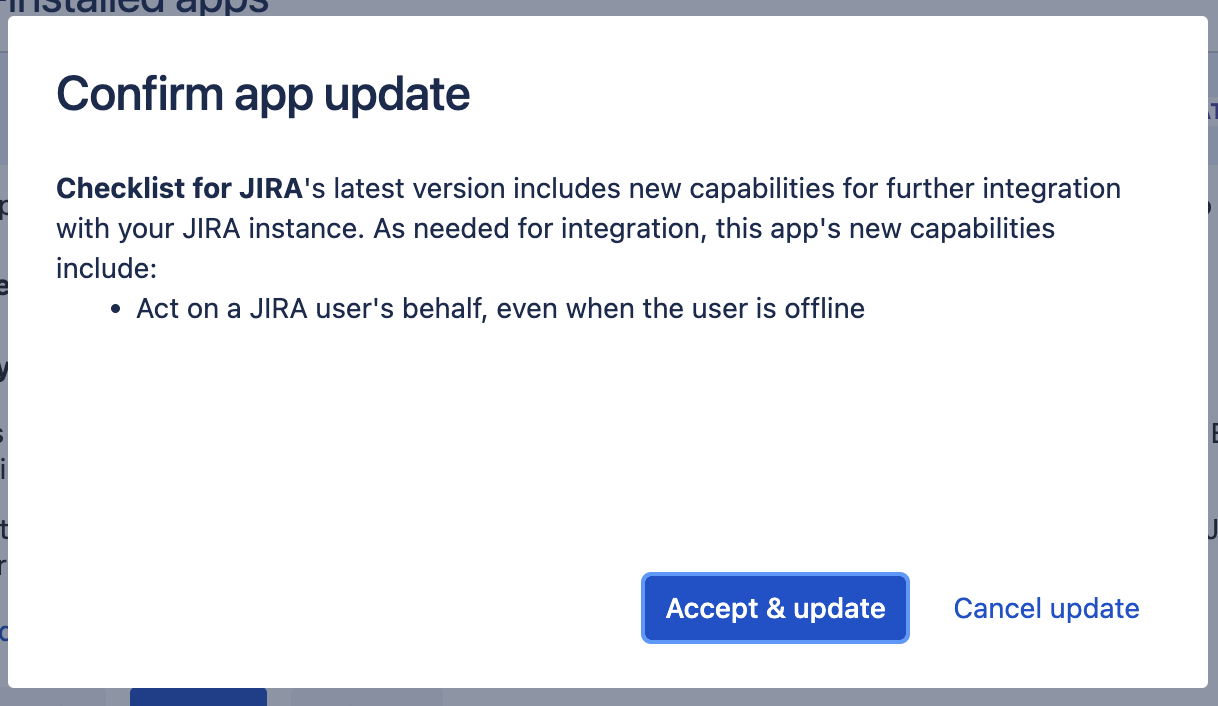
Click Update.
-
Click Accept & update to confirm the update. (The Act on a Jira user’s behalf permission is only used for to avoid automatic upgrading.)
-
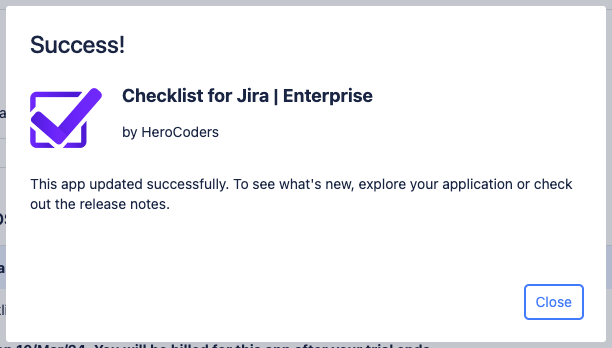
You will see a confirmation message.
-
Return to the Connected apps page and click on the …menu for Checklists for Jira (Enterprise). Select Get Started.

-
To migrate your checklist data to the new app, click Start import. If you are migrating for the first time, you can ignore the Clear previously imported data toggle.
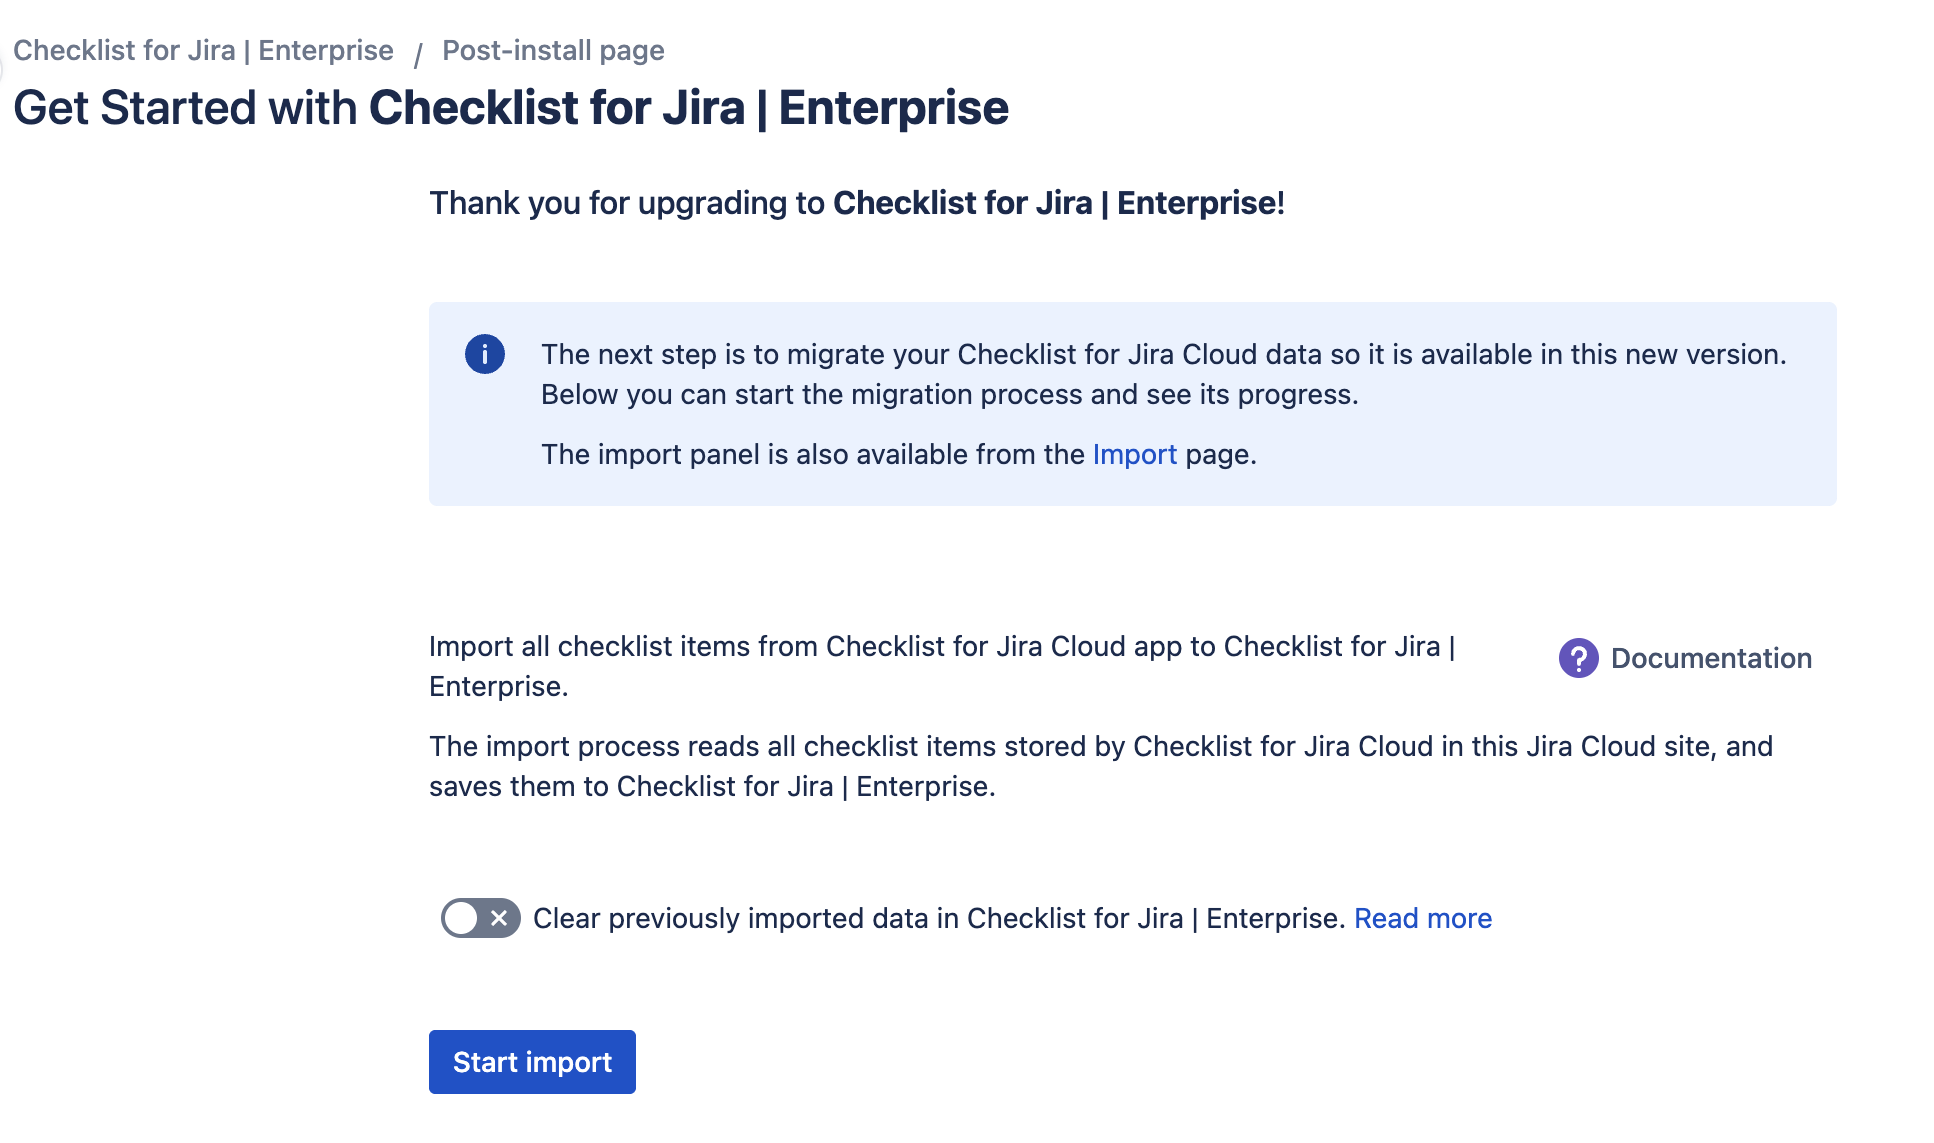
If you need to cancel, then restart the import at a later time, enable the Clear previously imported data in Checklist for Jira Enterprise toggle. This will delete in any previously imported data to prevent checklists/items.
-
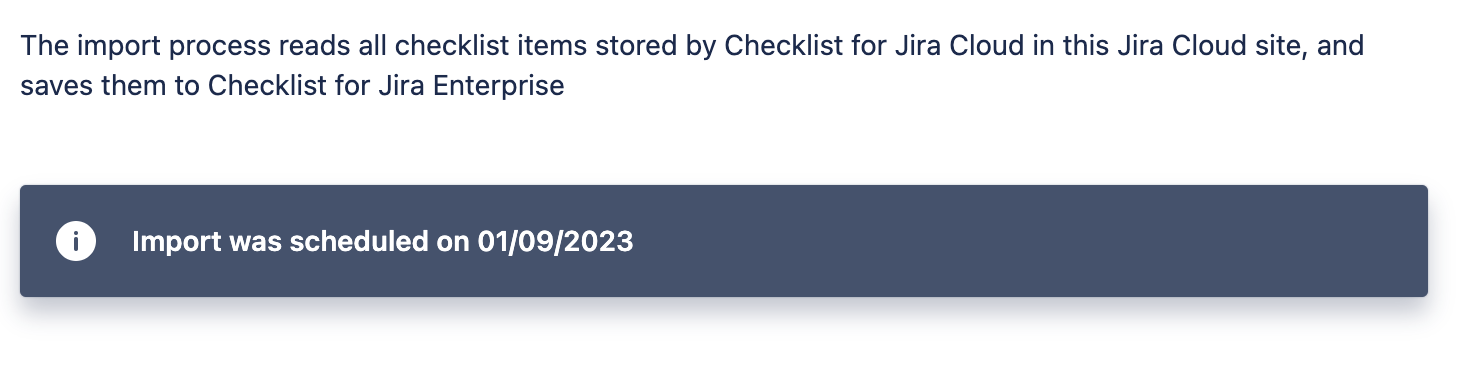
A message will indicate that the import is scheduled and allow you to cancel the import if needed.
-
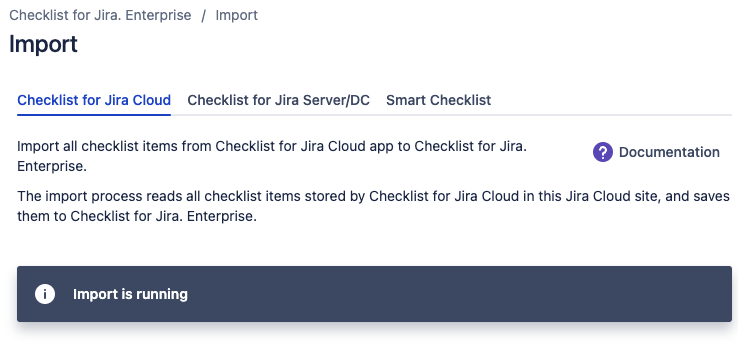
The import should start within a few minutes. You can check that the import is underway by clicking the Refresh button. Once the import is started, the Cancel import button becomes disabled.
The import is a gradual process. Checklist data will become available in the database and visible in the UI as it’s imported.
If you need to cancel and restart your import, be sure to enable the Clear previously imported data in Checklist for Jira Enterprise toggle.
-
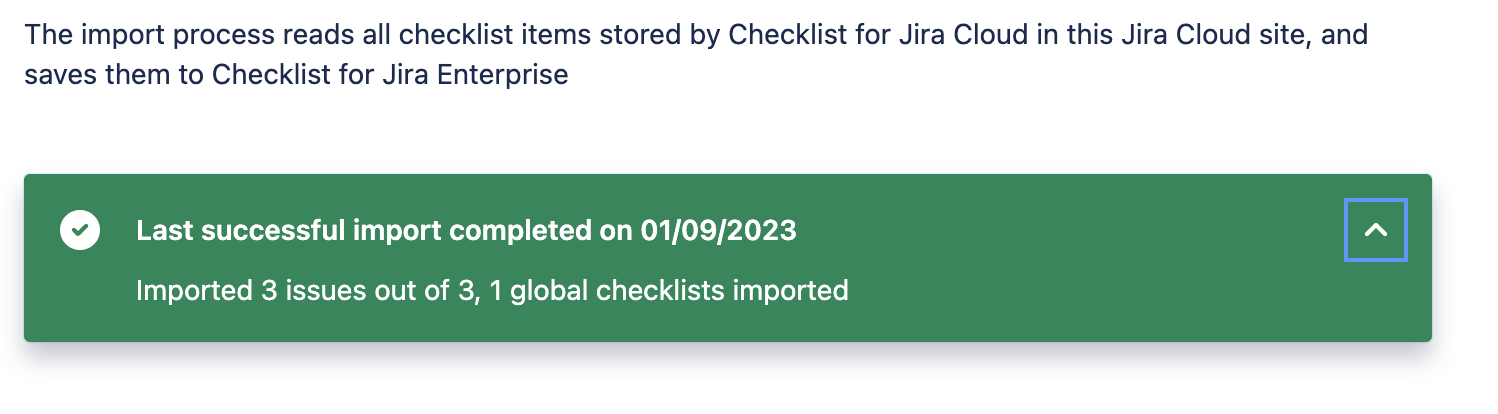
A message will confirm that the import is complete.
-
Once the import is complete, it is recommended that you review/reconfigure the following:
-
Checklist permissions
-
Workflow validators
-
Post-migration Configurations
Once the migration is complete:
-
Navigate to Jira Settings > Apps > Manage Apps and review the following:
-
Global Settings – Ensure your global settings are properly configured. (If checklists are not shown on the main work item panel, enable the Show Checklist Always setting.)
-
Global Checklists – Review your global checklists and their contexts. If the contexts did not import, please contact support.
-
Permissions – Review checklist permissions.
-
Statuses – Verify that any custom statuses migrated correctly.
-
-
Checklist for Jira Enterprise creates several custom fields. However, your instance may also still include checklist custom fields from the original Checklist for Jira Cloud app. These fields will no longer be associated with your checklists. (We recommend that you delay deleting these custom fields in case of an emergency rollback.)Therefore it is recommended that you review places other than the work item panel where you were using these fields, and replace them with the new custom fields created byChecklist for Jira Enterprise:
-
Automation rules
-
Board cards
-
Create and transitions screens
-
Workflow conditions, post functions, rules and validators
-
-
Default local checklist items are not supported in cloud. However, you can accomplish the same thing using a default template.
-
Checklist item assignees – After verifying that all of your users were successfully migrated to cloud, you may need to re-assign checklist items on local checklists. Mentions/assignees are not supported Global Checklists.