
Depending on whether your project is company-managed or team-managed, the way you add a field differs. Follow the appropriate steps below.
Company-Managed Projects
In company-managed projects you work with screens, which define which fields appear during different operations (create, edit, transition, etc.).
-
Go to Project Settings
Navigate to Project Settings > Screens.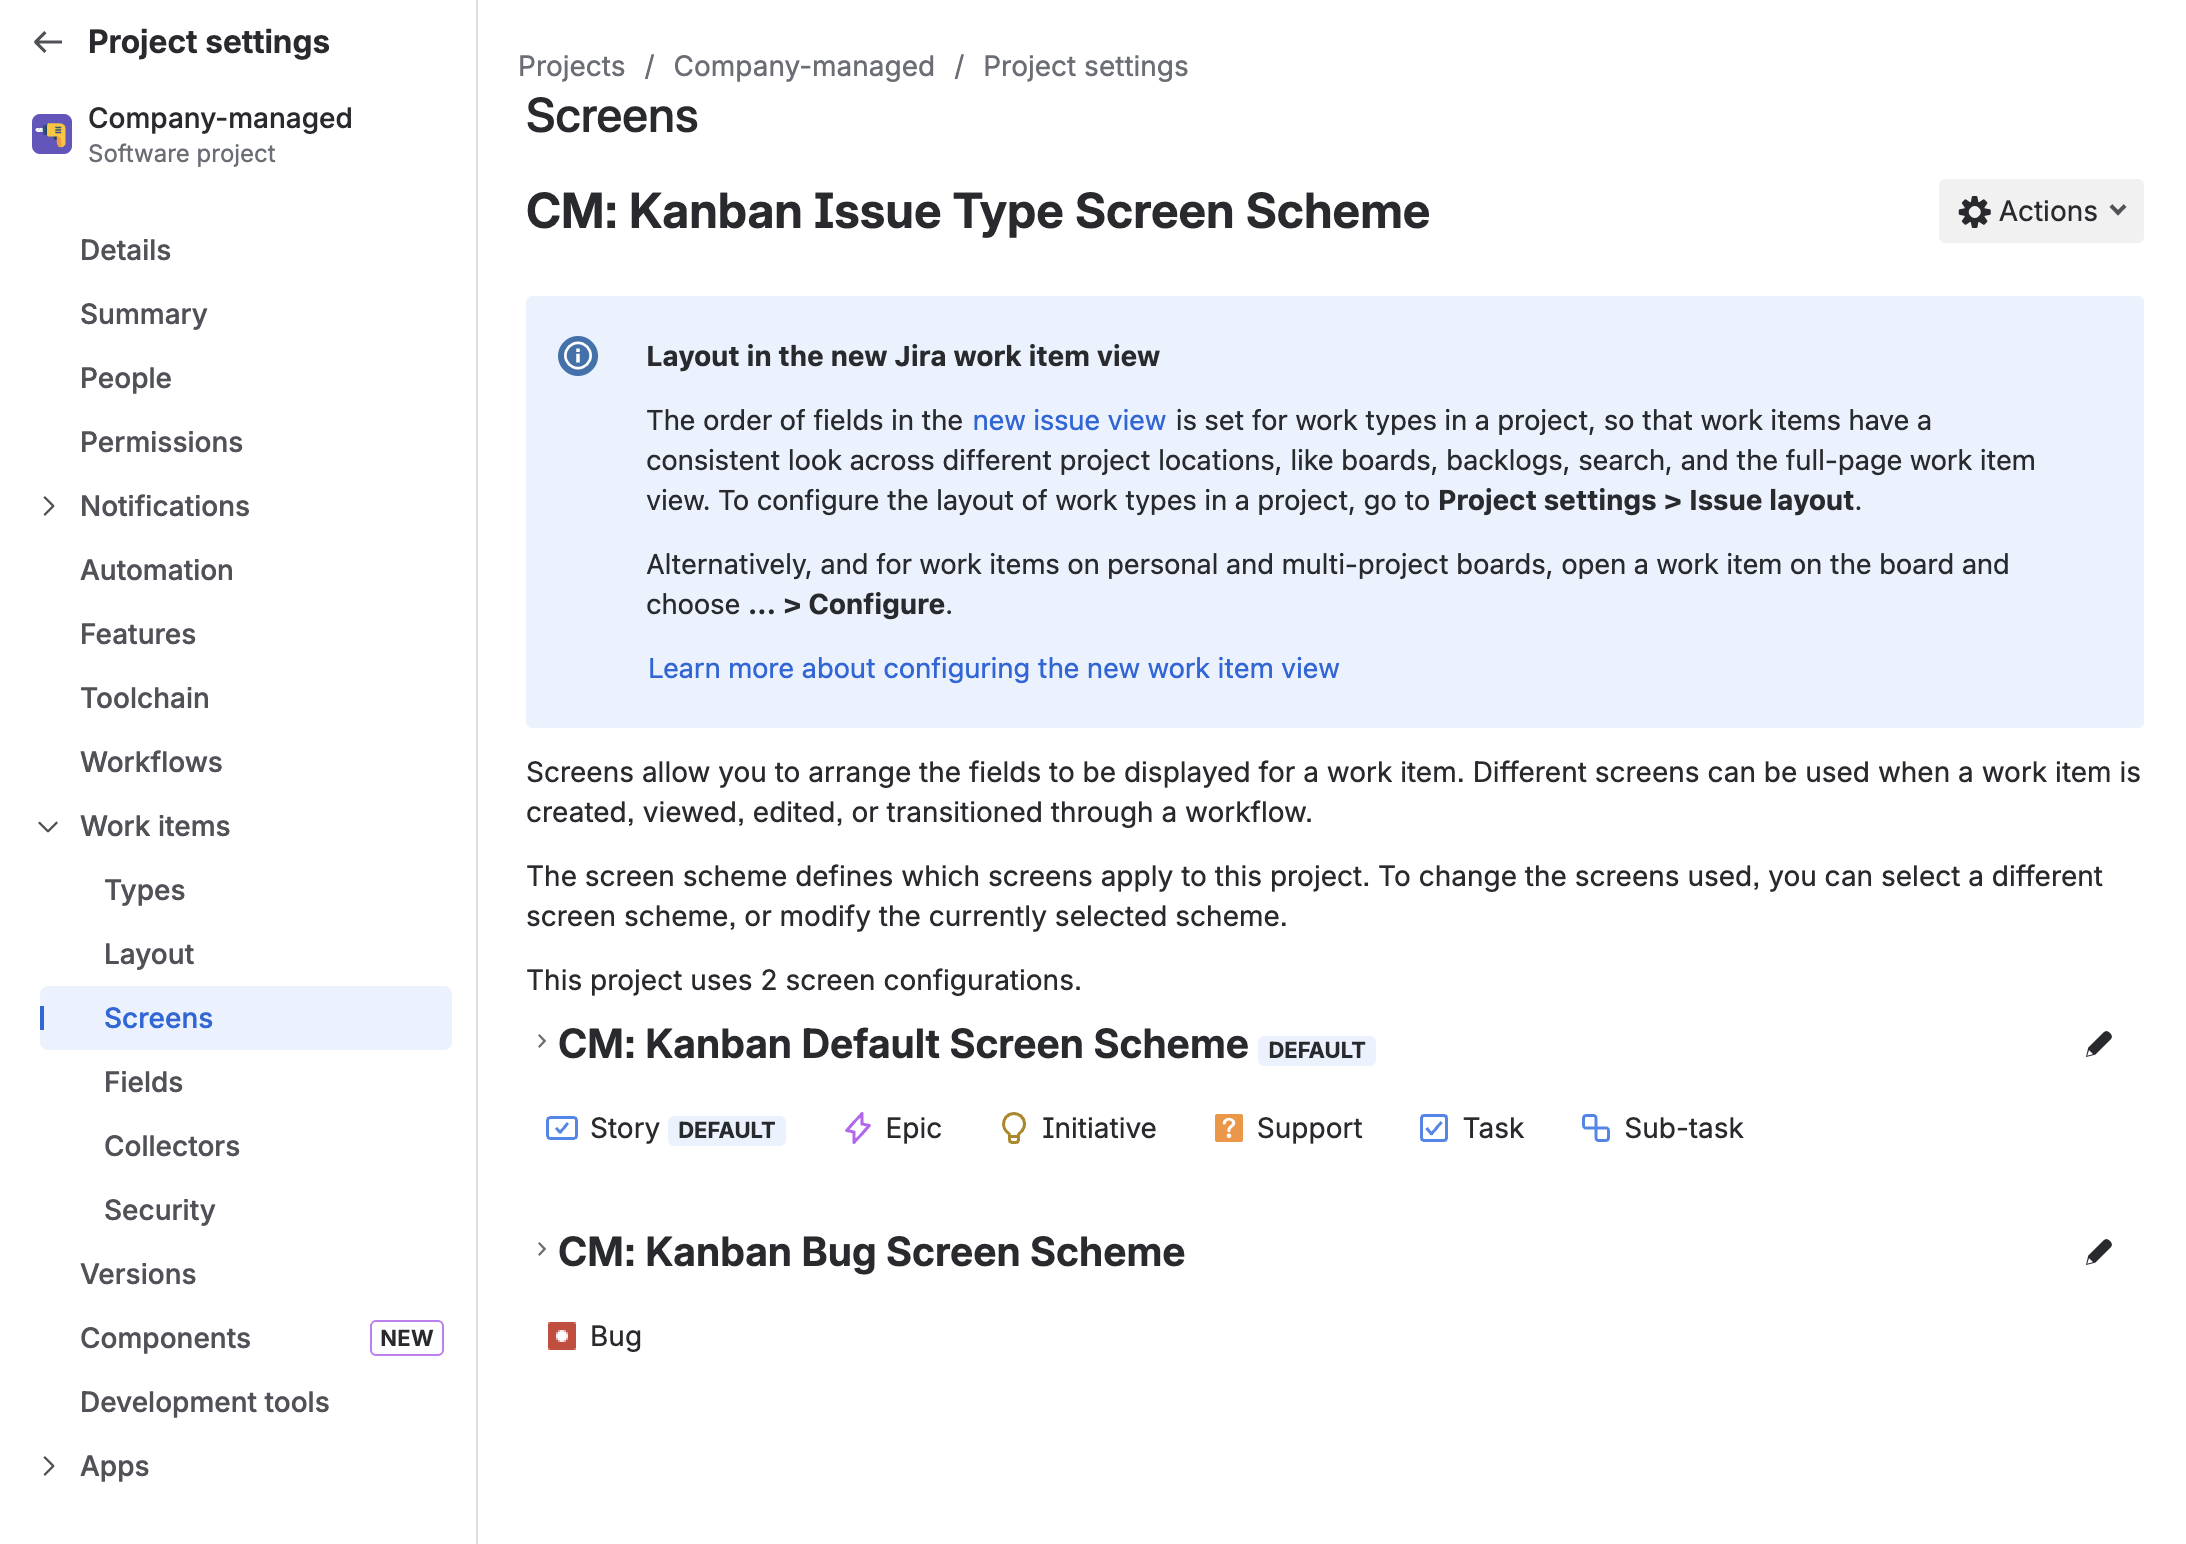
-
Edit the appropriate screen
Click the pencil icon next to the screen configuration associated with the issue type. -
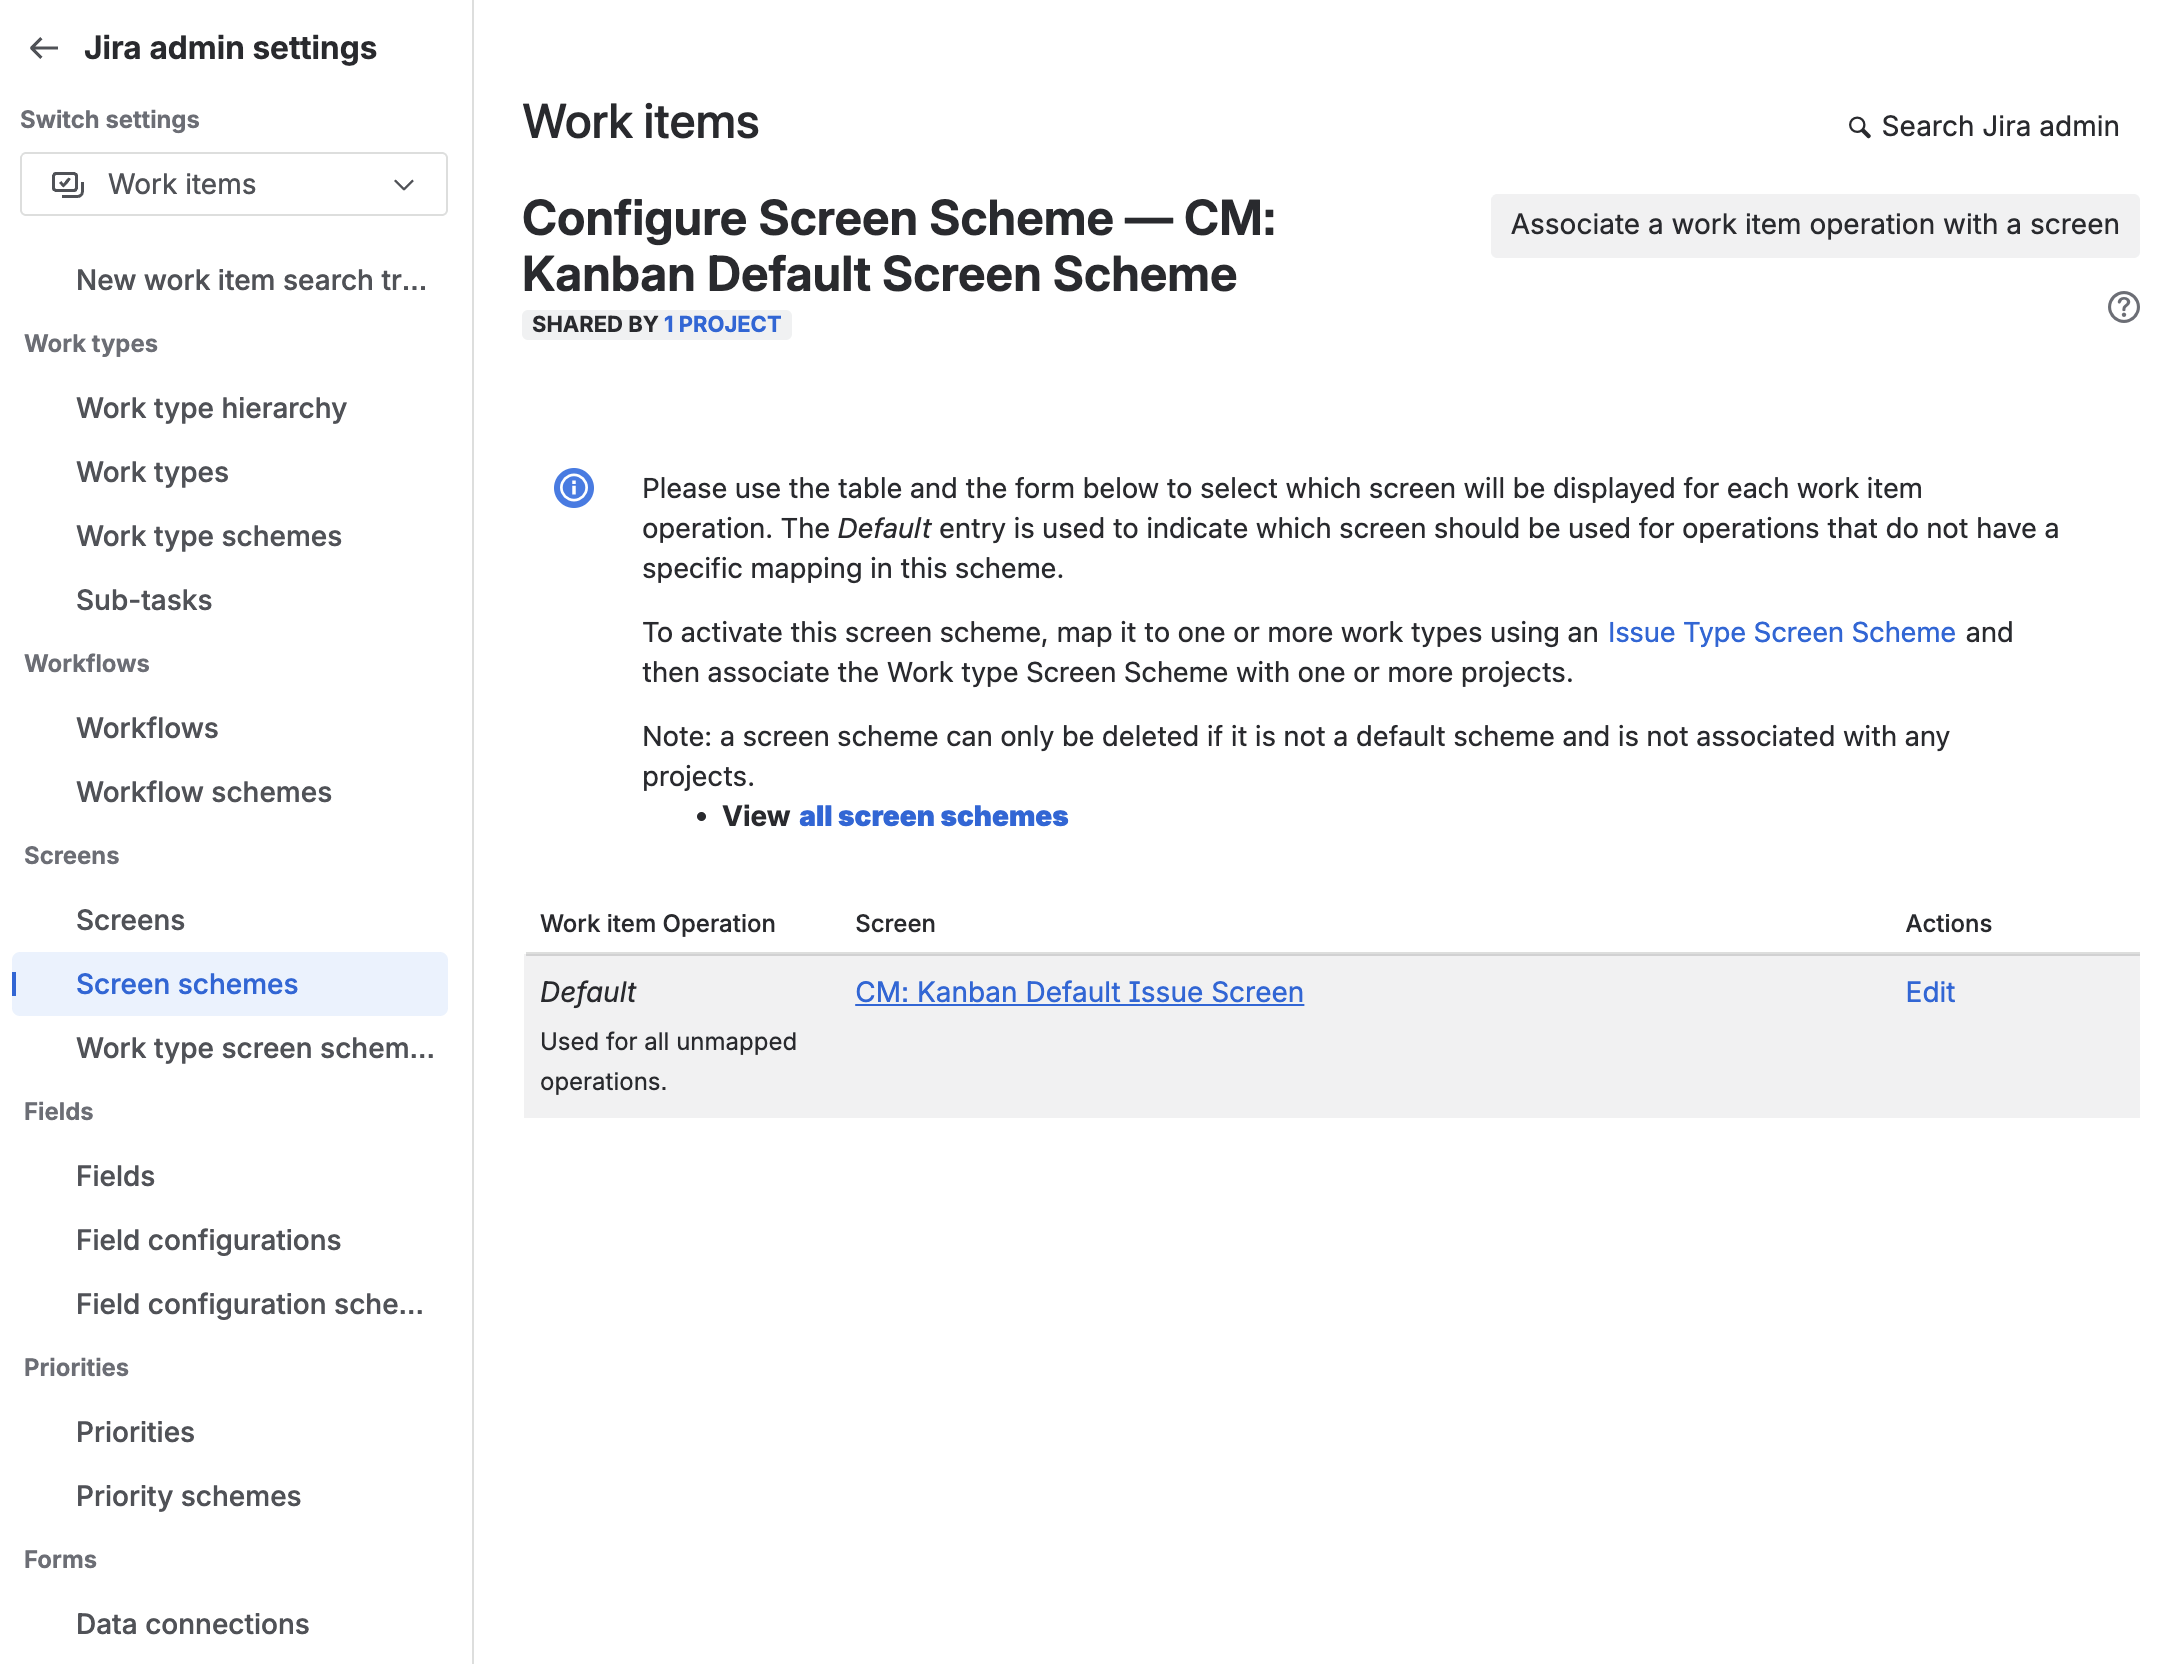
Select the screen to configure
Click the name of the screen you want to configure (for example, the Create, Edit, or View screen).You can also see a full list of available screens by going to Jira Settings > Issues > Screens.
-
Add a field
Use the dropdown at the bottom of the list of fields to select the field you want to add to the screen.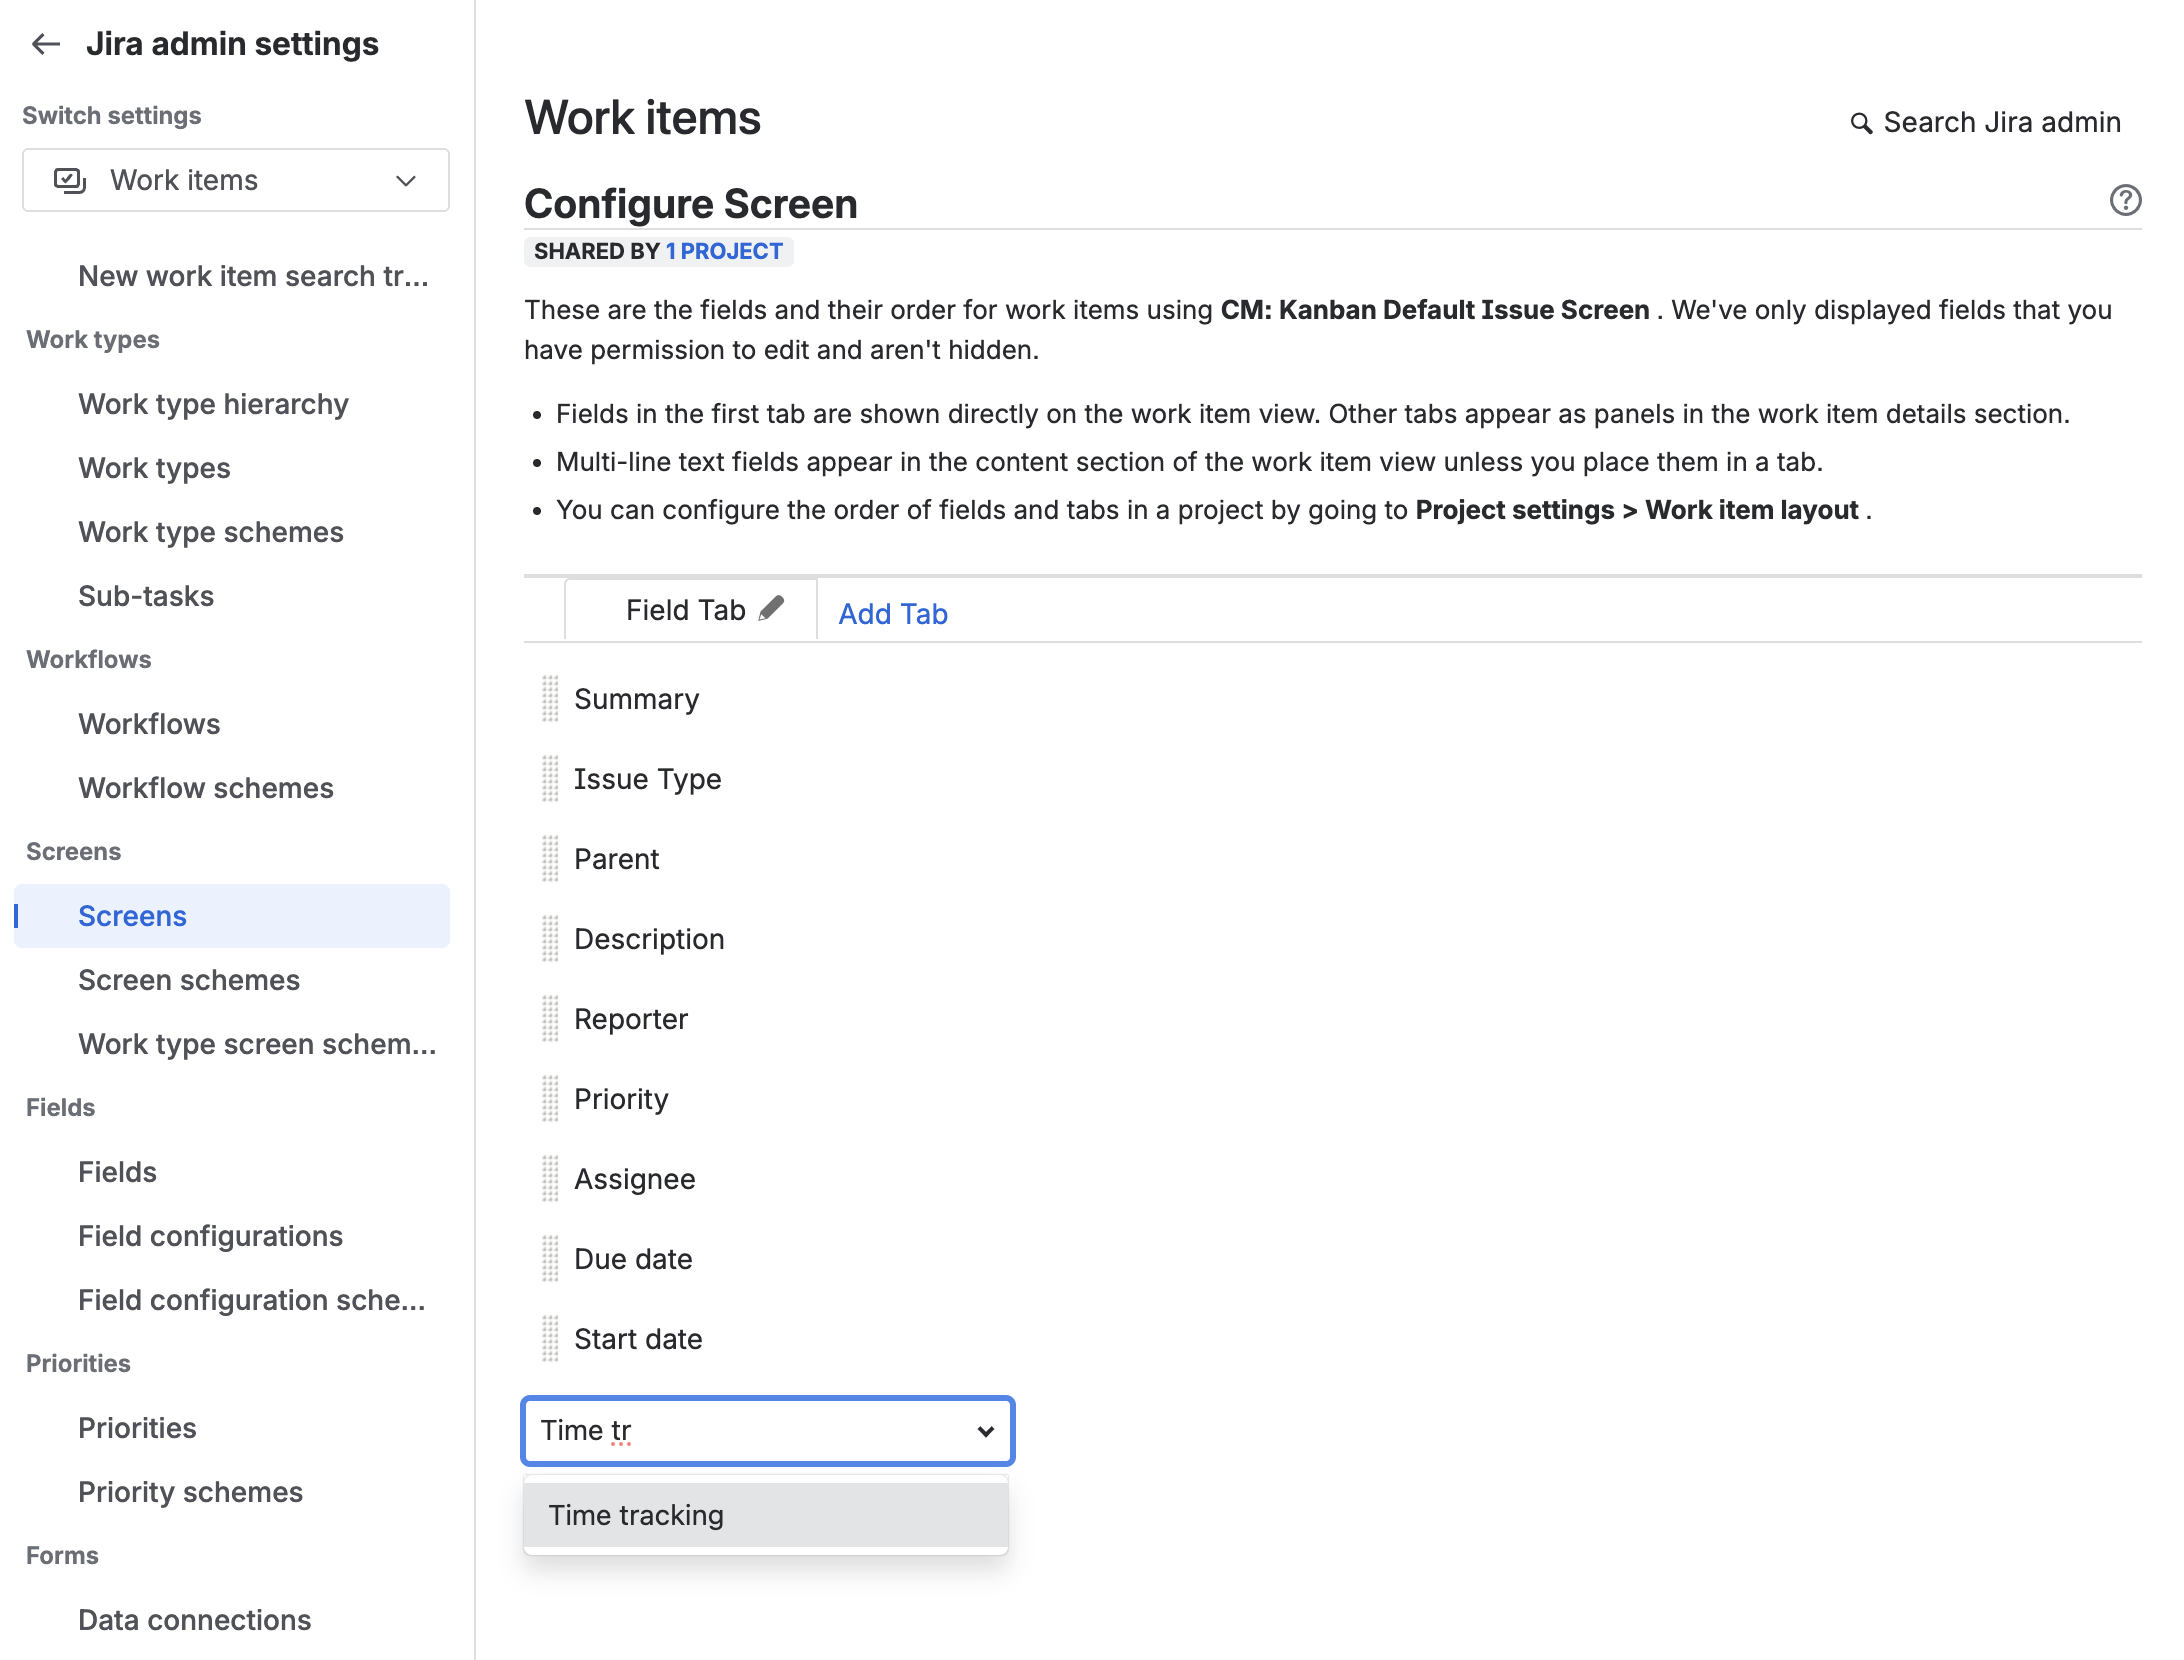
-
Reorder the field
Drag the field to the position in the list where you want it to appear on the issue.
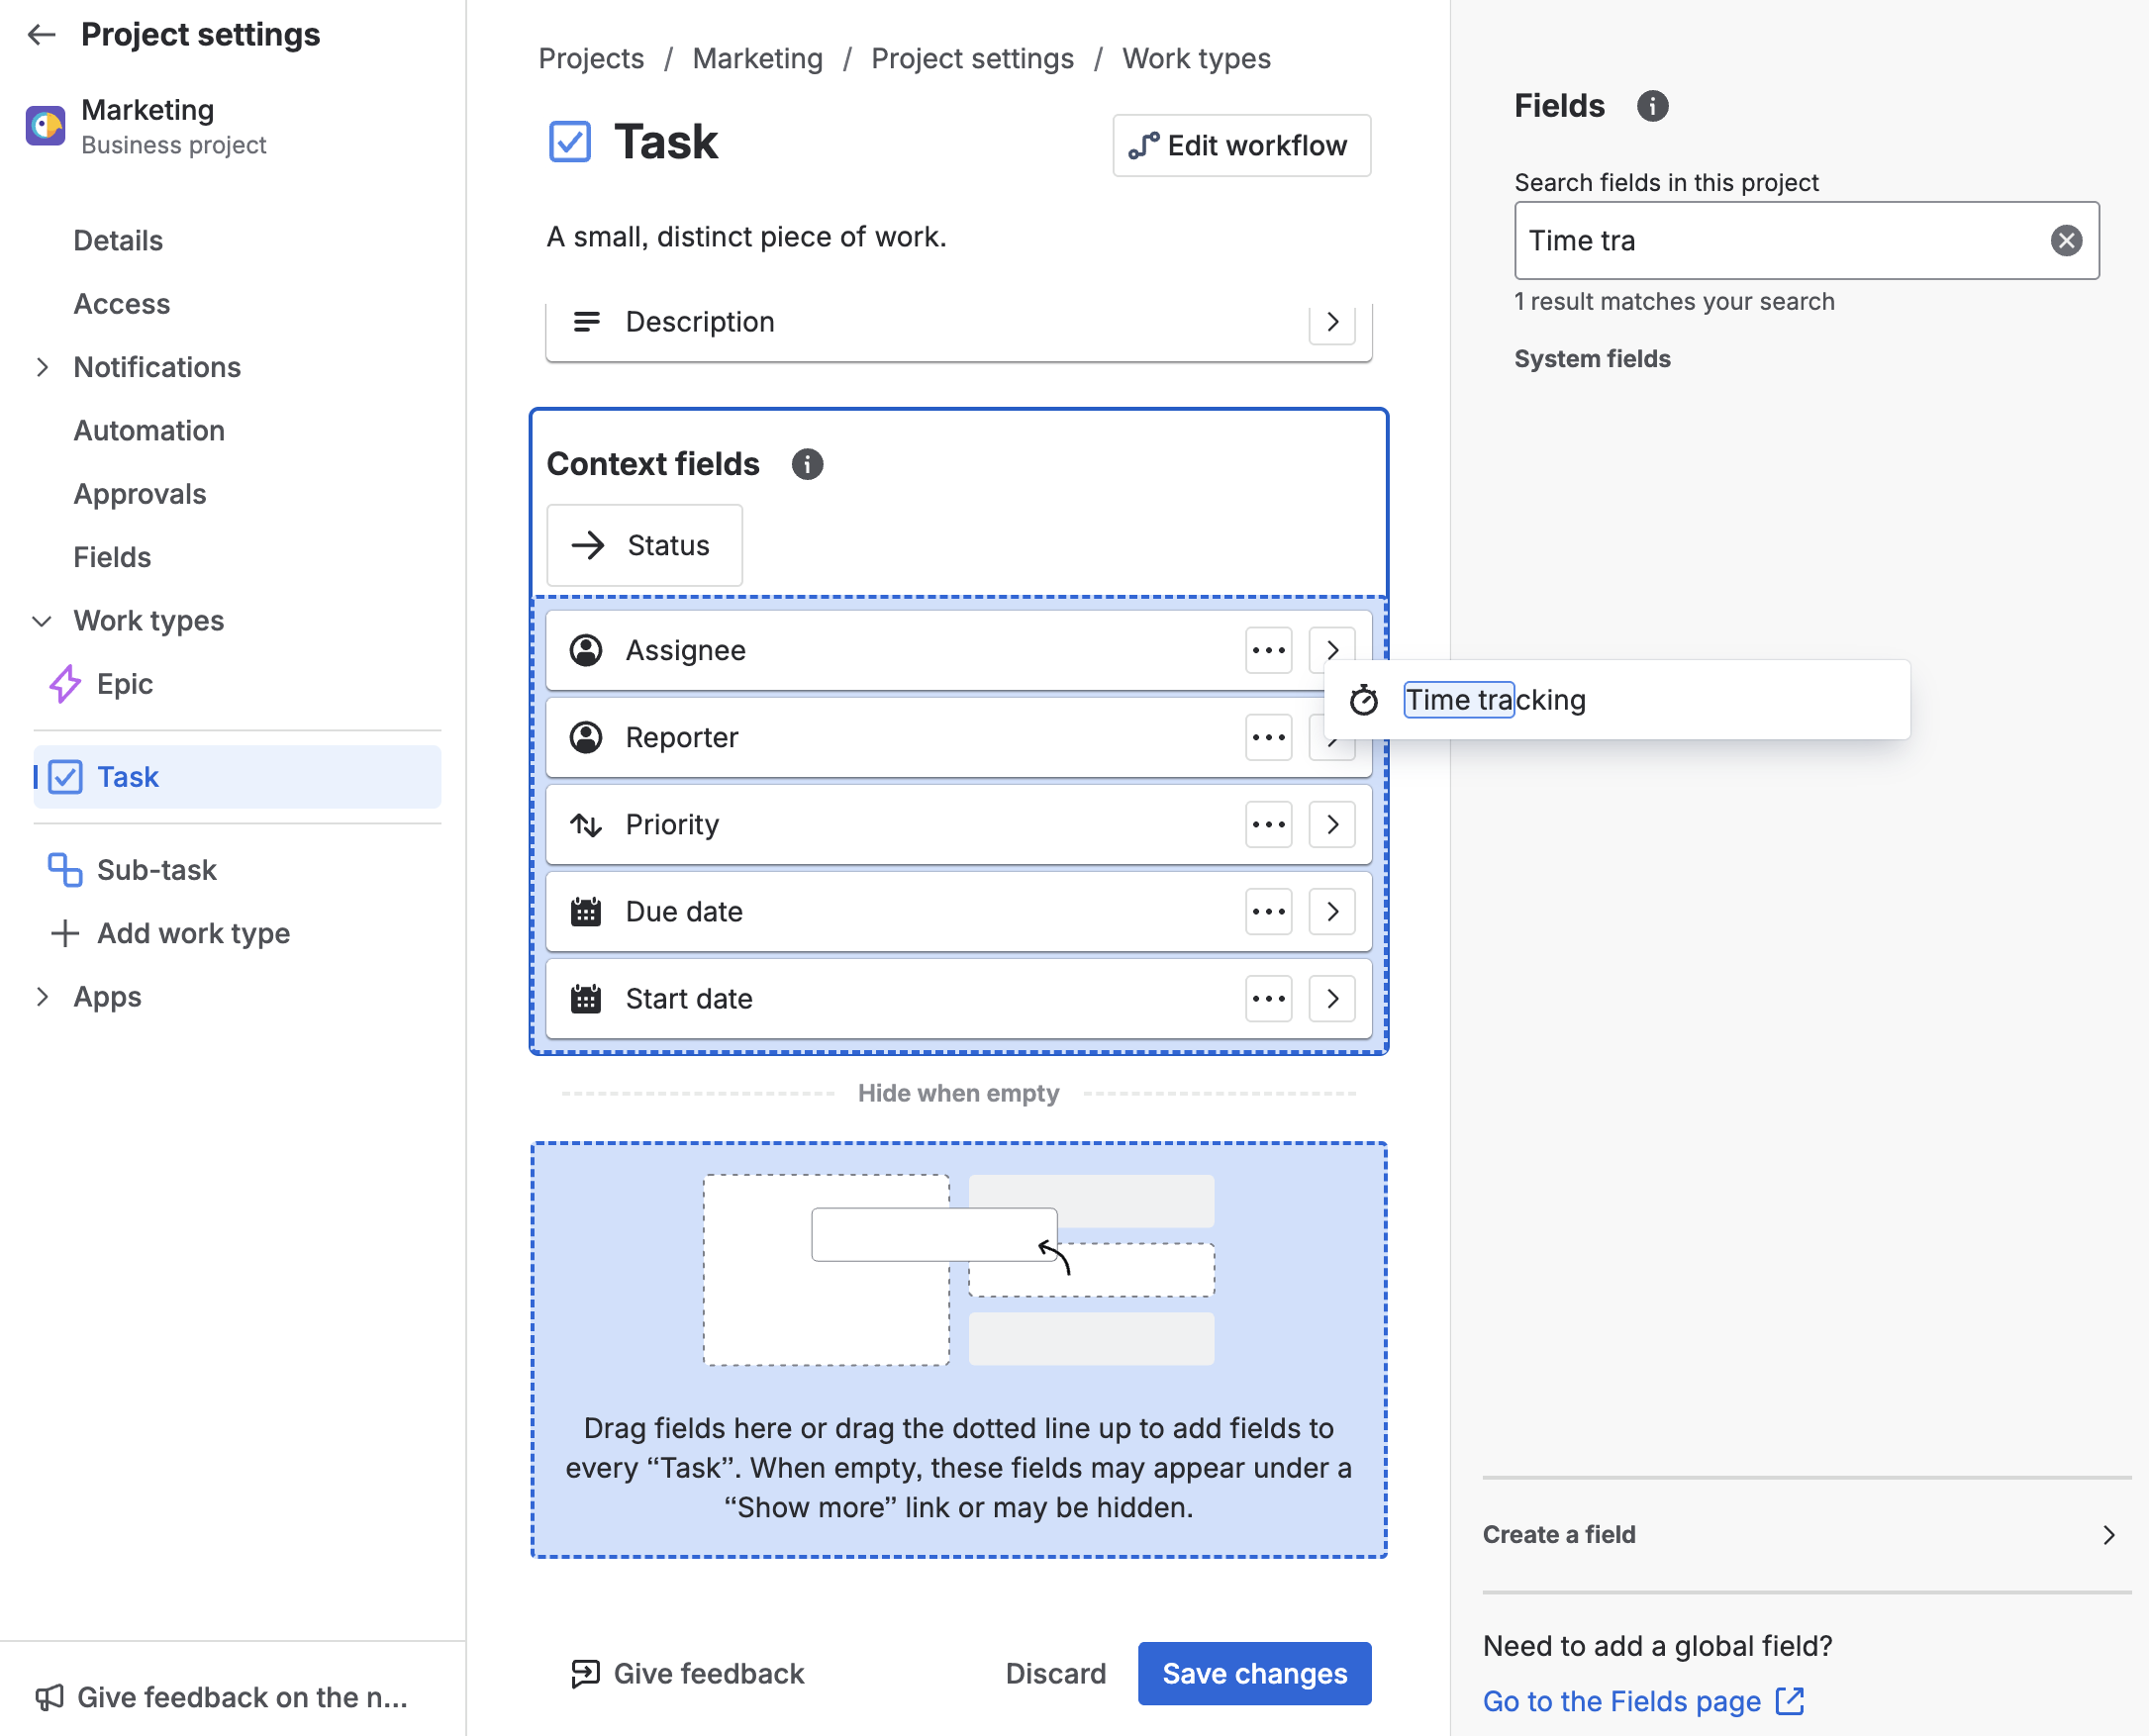
Team-Managed Projects
In team-managed projects, you don’t use screens — instead, you configure issue layouts to manage which fields are visible and where.
-
Go to Issue type settings
Navigate to Project Settings > Issue types. -
Select the issue type
Click the issue type (e.g., Task, Bug, Story) where you want to add the field.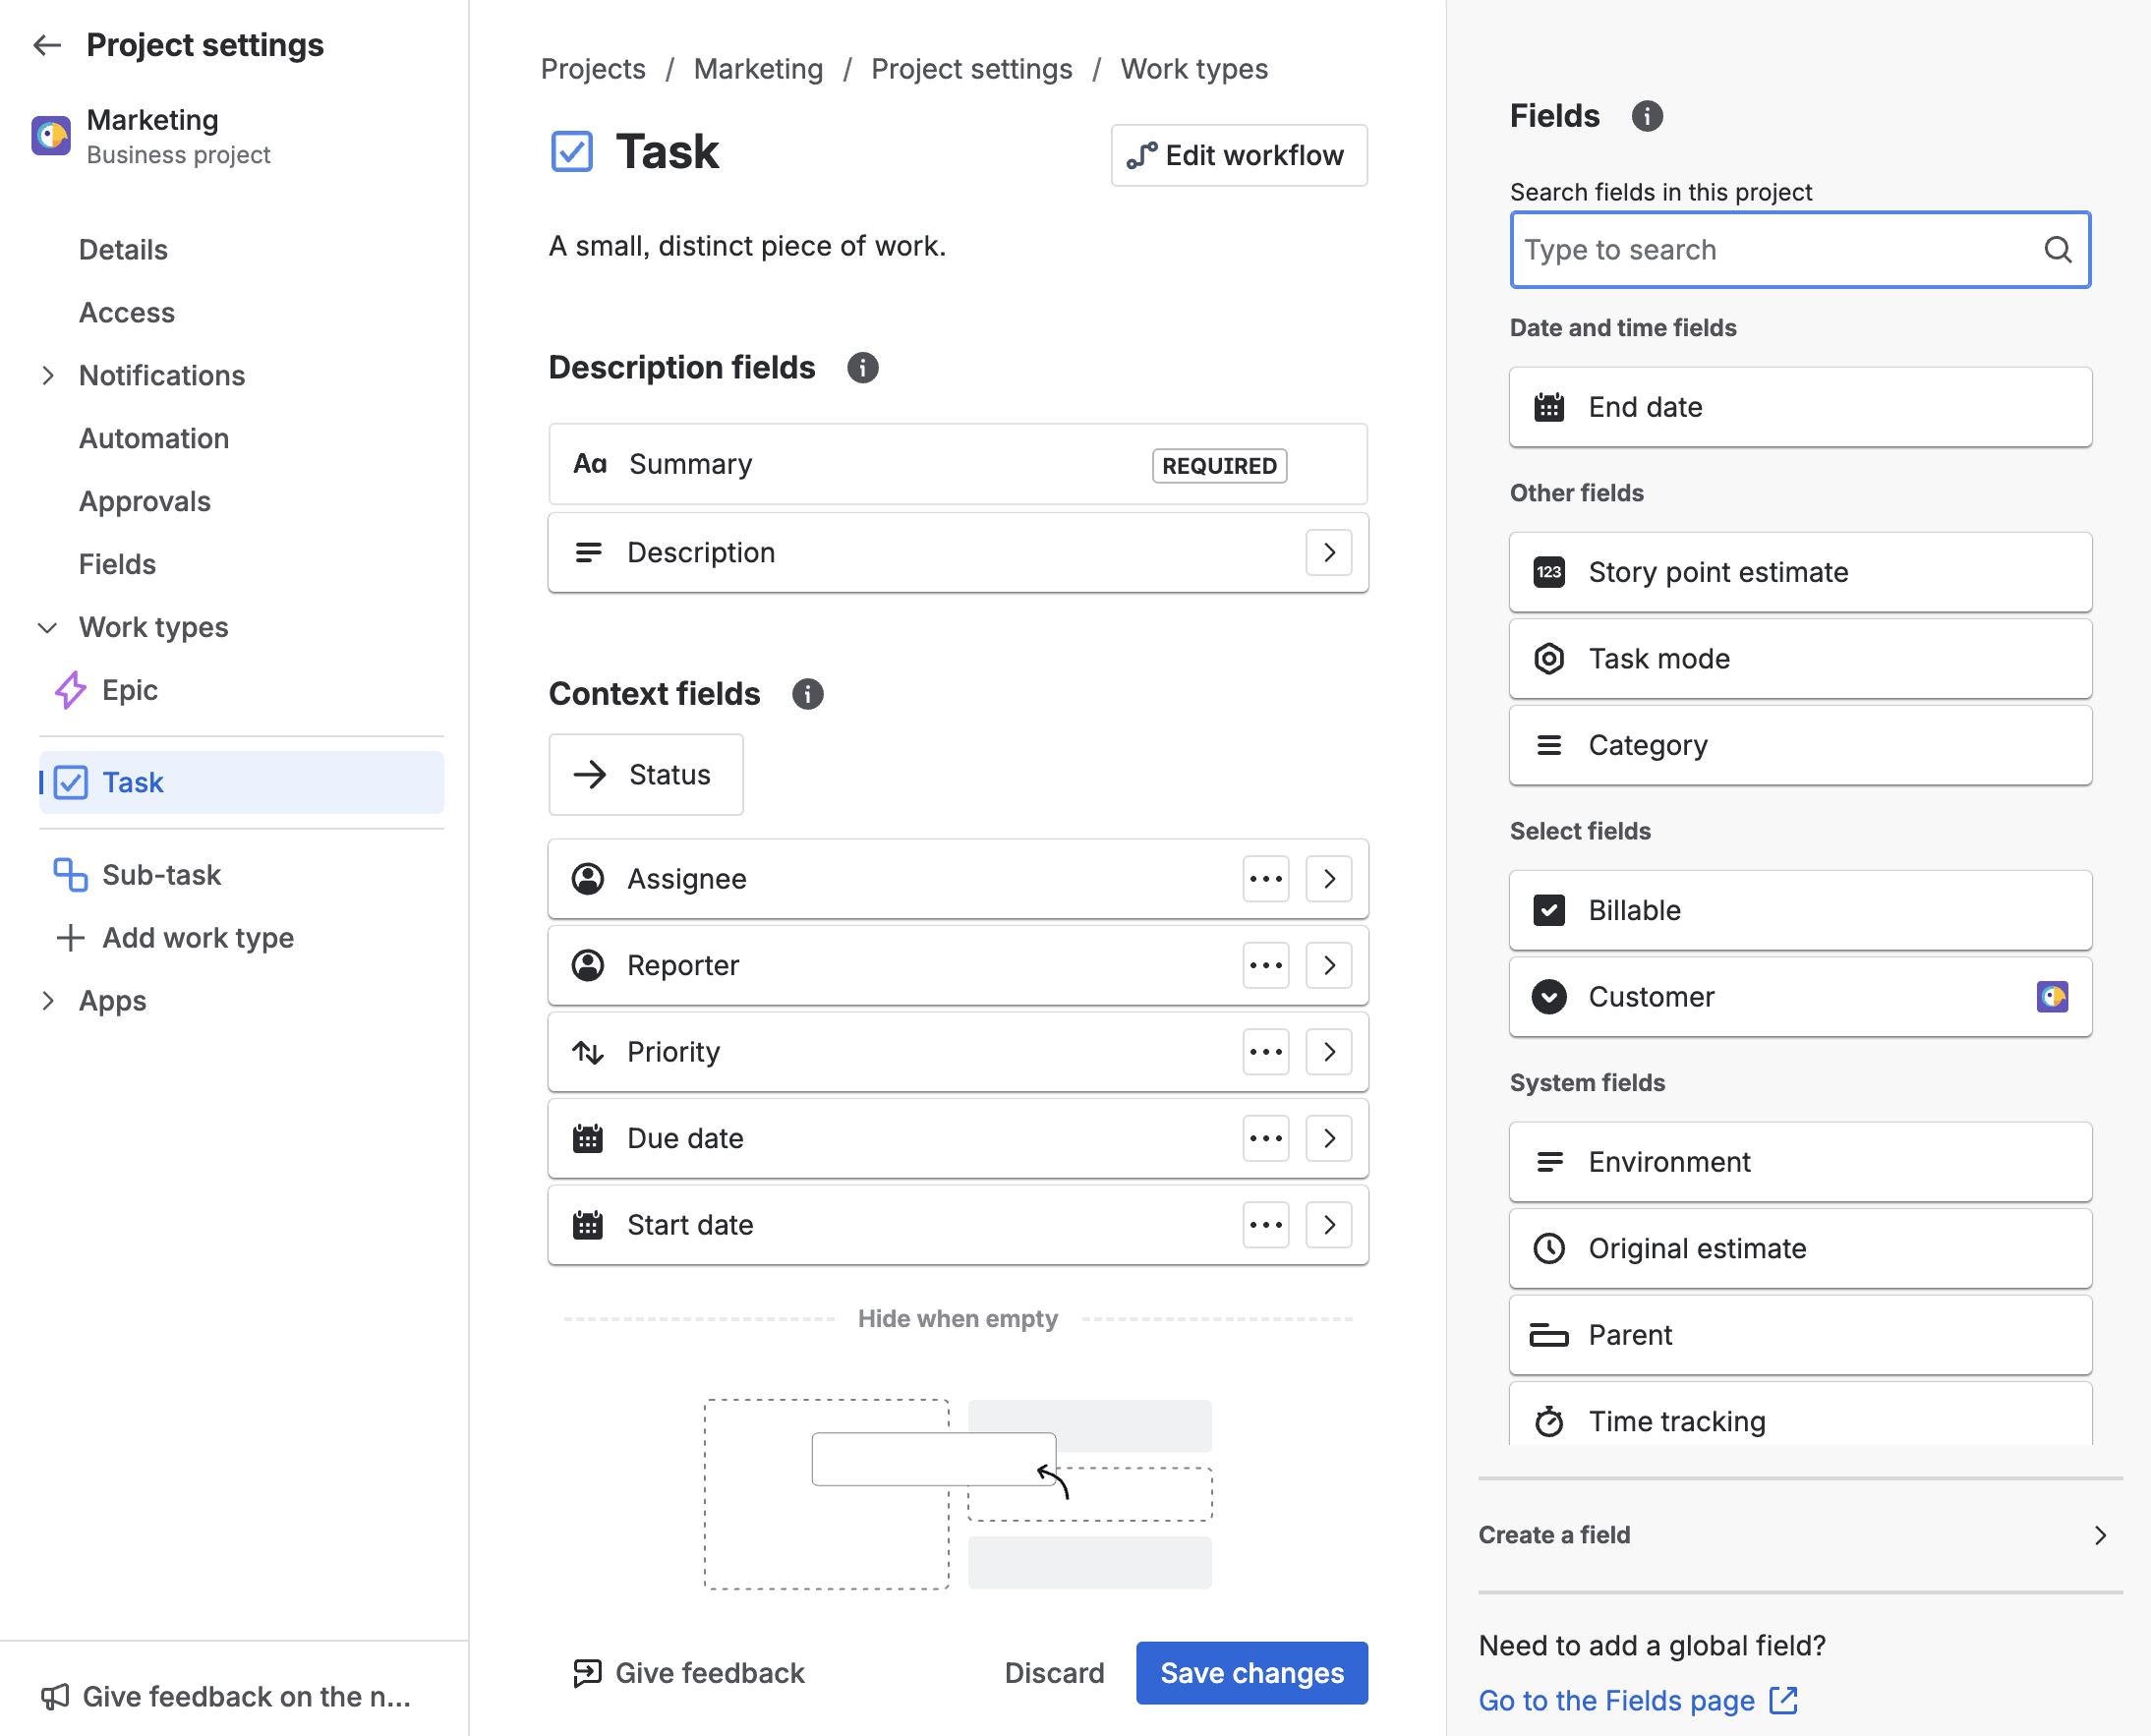
-
Add a field
Search your field on the right and drag it onto your issue layout.If the field does not exist yet, you can create it by clicking Create a field.
-
Arrange the field
Drag the field into the section where you want it to appear:-
Description fields – display prominently in most views
-
Context fields – always visible on the issue
-
Hide when empty – only shown if the field contains a value
-
-
Save your changes
Click Save changes to update the issue layout.
✅ Your new field is now available on issues — through screens in company-managed projects, and through layouts in team-managed projects.
Just like that, the field has been added to your issues. You can now use and edit it in your Portfolio or in the Capacity Planner.