Integrations
Checklists for Jira can be used in combination with other apps to perform advanced functions in Jira. Examples for the following apps are provided below:
Elements Copy & Sync
This example refers to Company-managed (Classic) Jira spaces only.
If you are using Checklists for Jira (Enterprise), note that this method will not work for Global Checklist. Global Checklists are not saved to the Checklist Text custom field and therefore will not be copied and/or synced.
Elements Copy & Sync is a Jira app used to clone and sync Jira work item. You can use Elements Copy & Sync to copy work items with their checklists and the checklist’s current statuses. Alternatively, you can copy the Jira work item and checklist without the checklist status, or you can synchronize to keep the checklists on both work items in sync.
To copy a work item with checklist item statuses:
Ensure that the Sync checklists to Custom Fields global setting is enabled.
Go to the Elements Copy & Sync Cloud administration and click on Recipes in the navigation bar.
In the Recipes listing page, select Escalate ticket in the Active Recipes list.
Click on the Content tab on the Recipe configuration page.
In the Fields section, activate the Set and synchronize fields option. The Fields mapping options subsection is displayed.
Click on the "..." button at the right of the Add target fields option, and select Checklists for Jira.
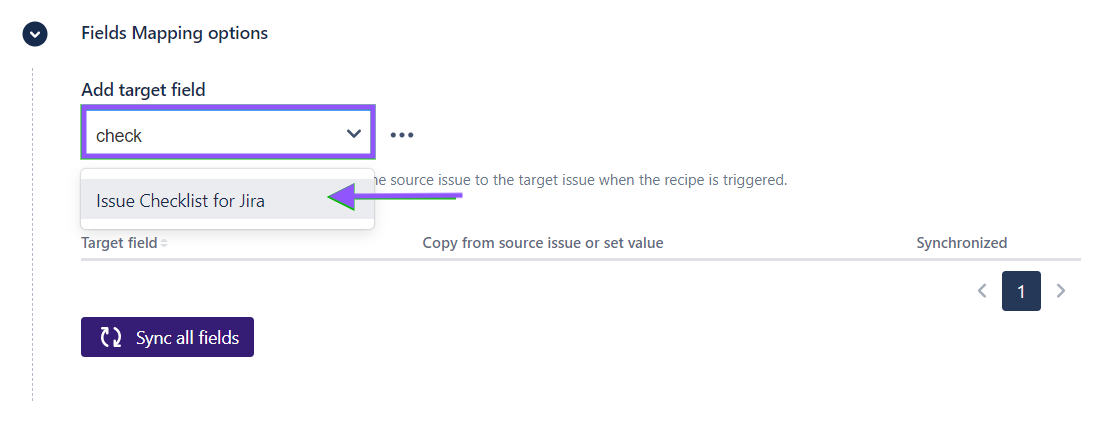
Save the recipe.
When the recipe is triggered from a work item, it will copy all the checklists in the source Jira work item to the target work item, including the status of the checklist items.
To copy a work item with checklist items cleared (all items open/incomplete):
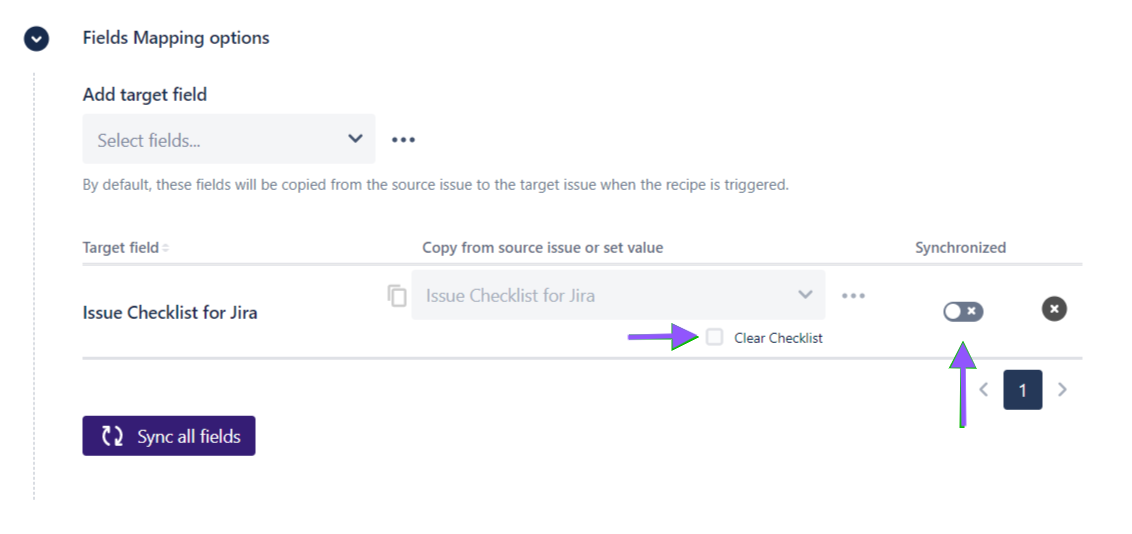
To copy the Jira work item with the all checklist items marked as open/incomplete (regardless of the item status on the source Jira work item), check the Clear Checklist checkbox.
To copy a work item with checklist items synced:
To copy the Jira work item with the all checklist items synced (each time an item is marked as done in the checklist of the source Jira work item, the same item will automatically be marked as done in the checklist of the copied Jira work item) enable the Synchronized toggle.
For more information, see Elements Copy & Sync documentation.
External Share for Jira
External Share for Jira allows you to safely share Jira content with anyone. You can integrate with Checklists for Jira (Free) and Checklists for Jira (Pro) so that your checklists are included on the shared rendering of the Jira work item. (Integration with Checklist for Jira (Enterprise) is pending.)
See the External Share for Jira documentation for more information.
To include Checklists in an external share:
Ensure that the Sync checklists to Custom Fields global setting is enabled.
Navigate to Apps and select External Share.
Select the Global Settings tab and then the Integrations tab.

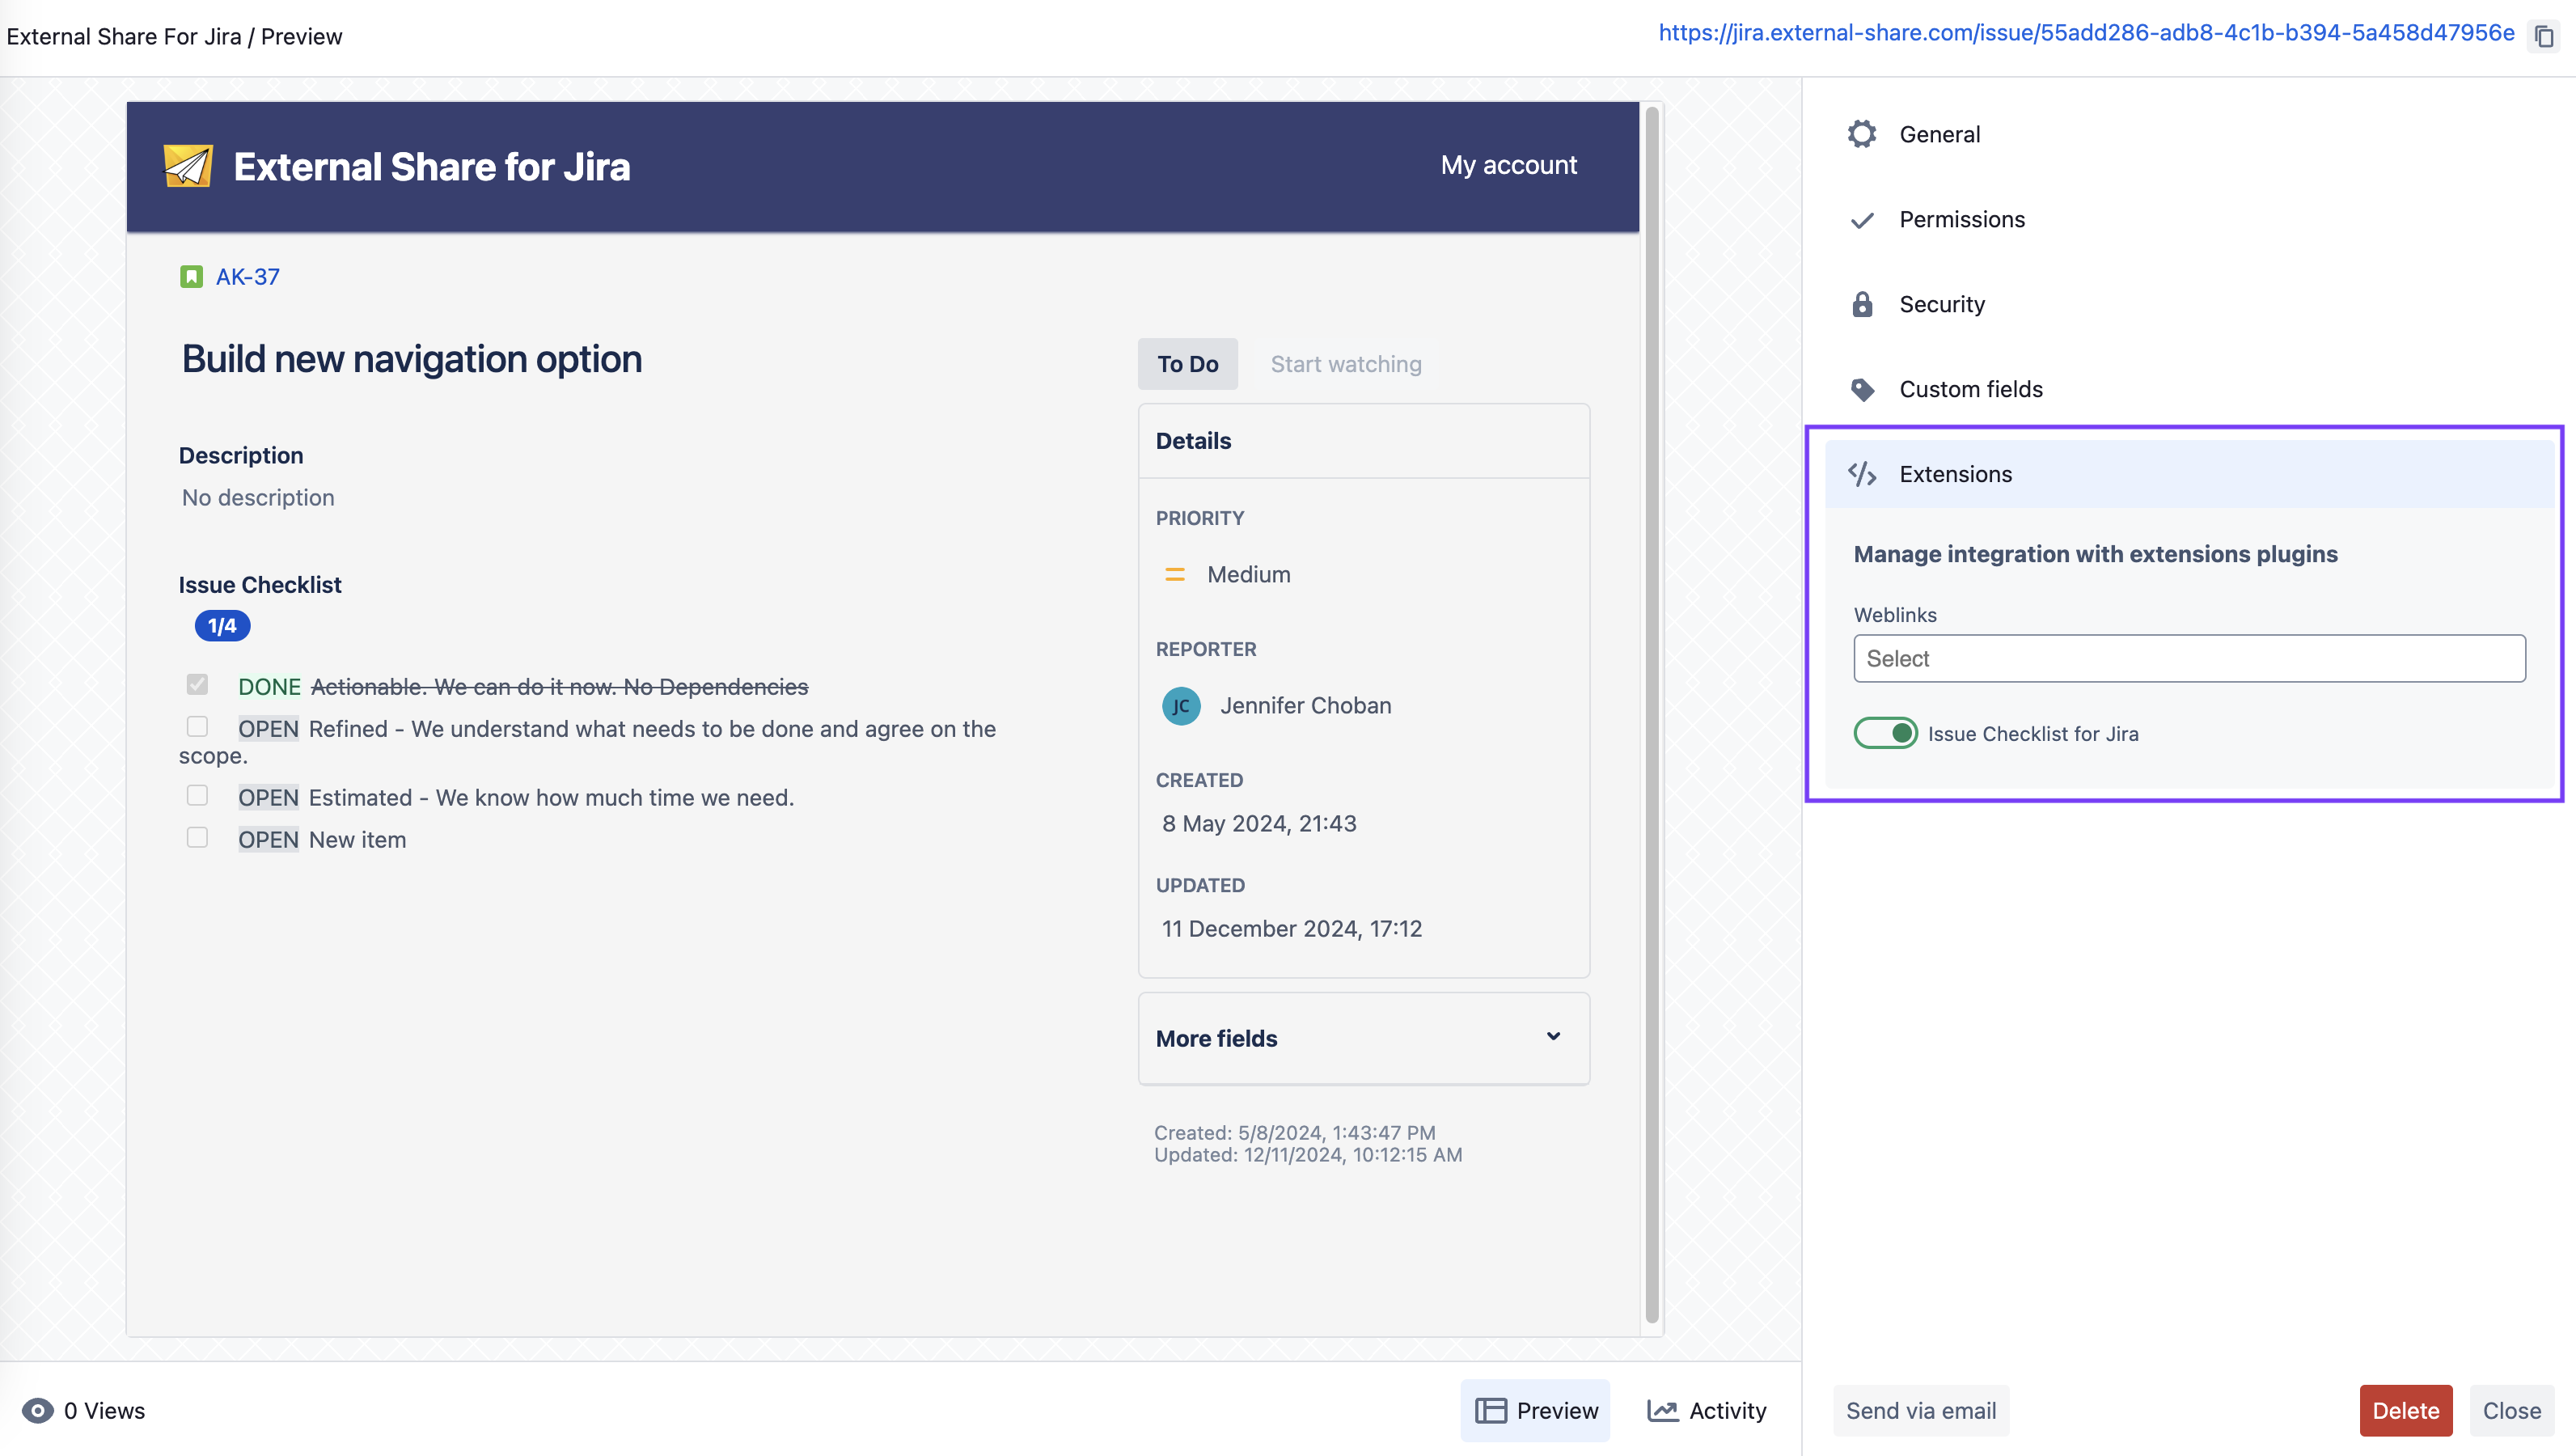
Check the box that says Enable Issue Checklist for Jira Integration and click Save.
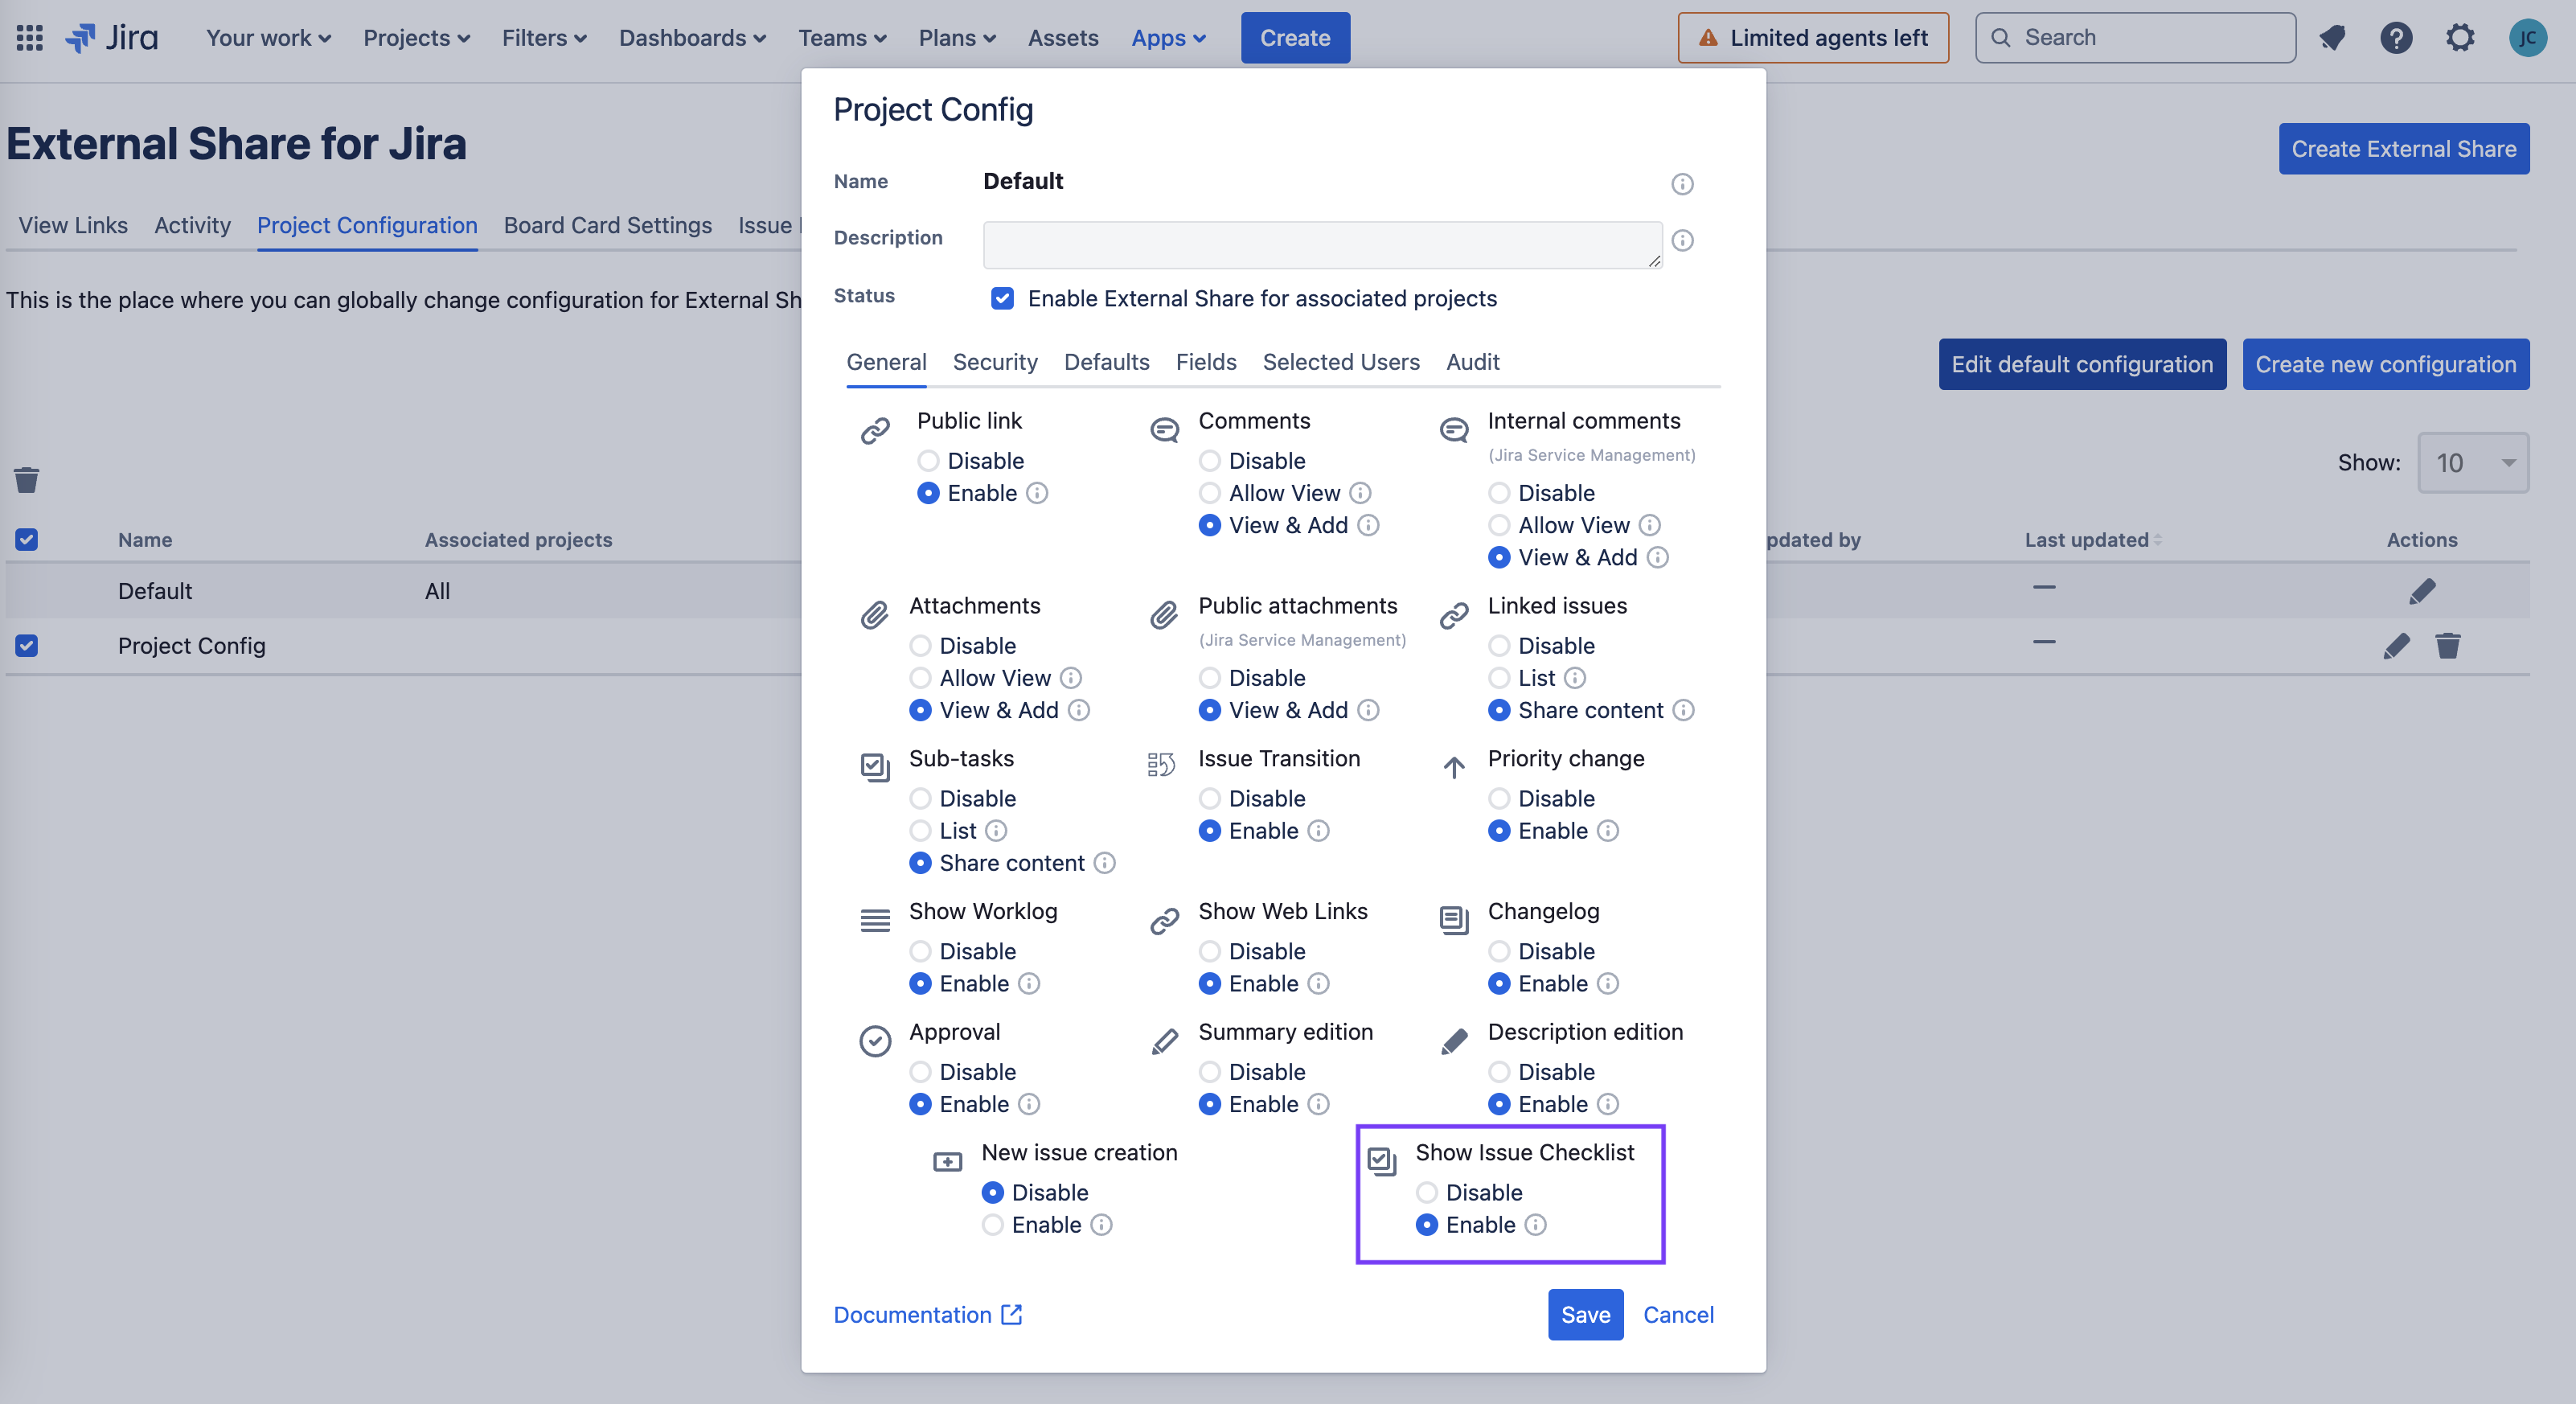
Click on the Project Configuration tab and ensure that Show Issue Checklist is enabled.
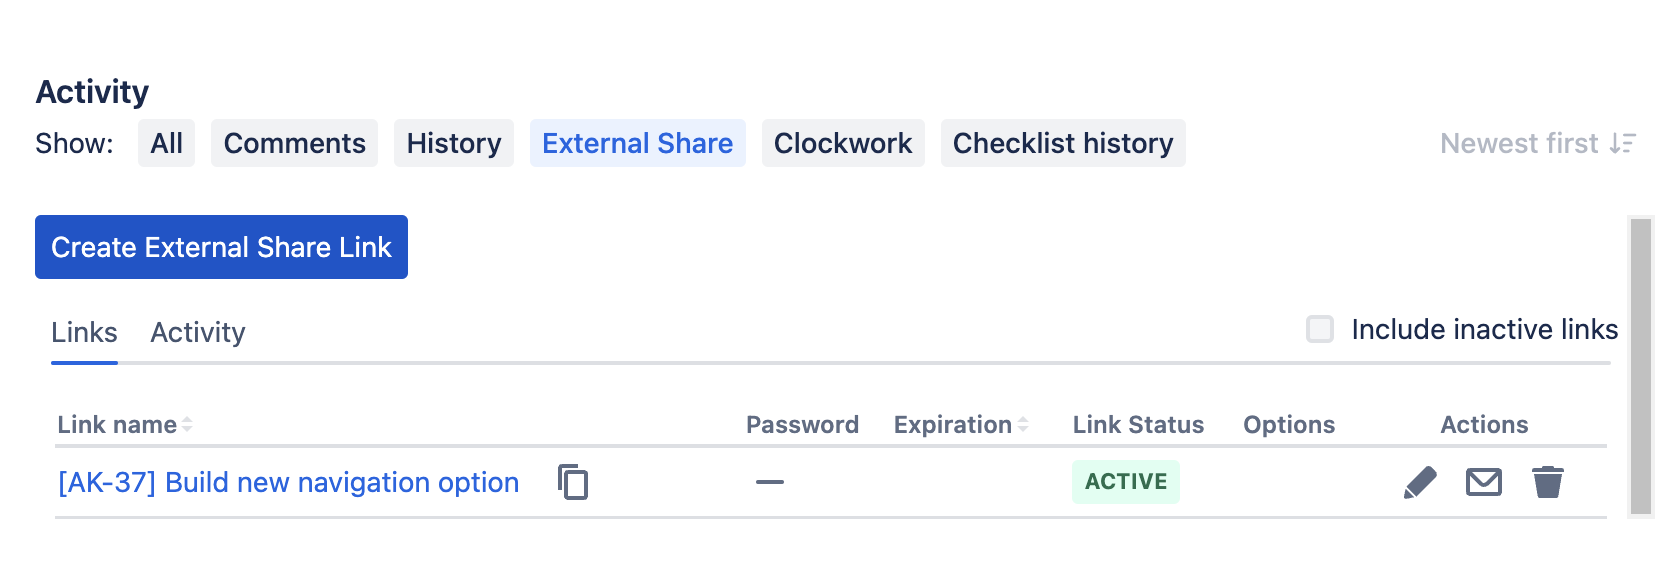
To share a work item with checklists, select External Share.

Click Create External Share Link, or click on the pencil icon if you want to edit an existing link.
A preview window will open. Click on Extensions in the navigation bar on the right, and enable the asdf toggle. The window will refresh and the will render the checklist.
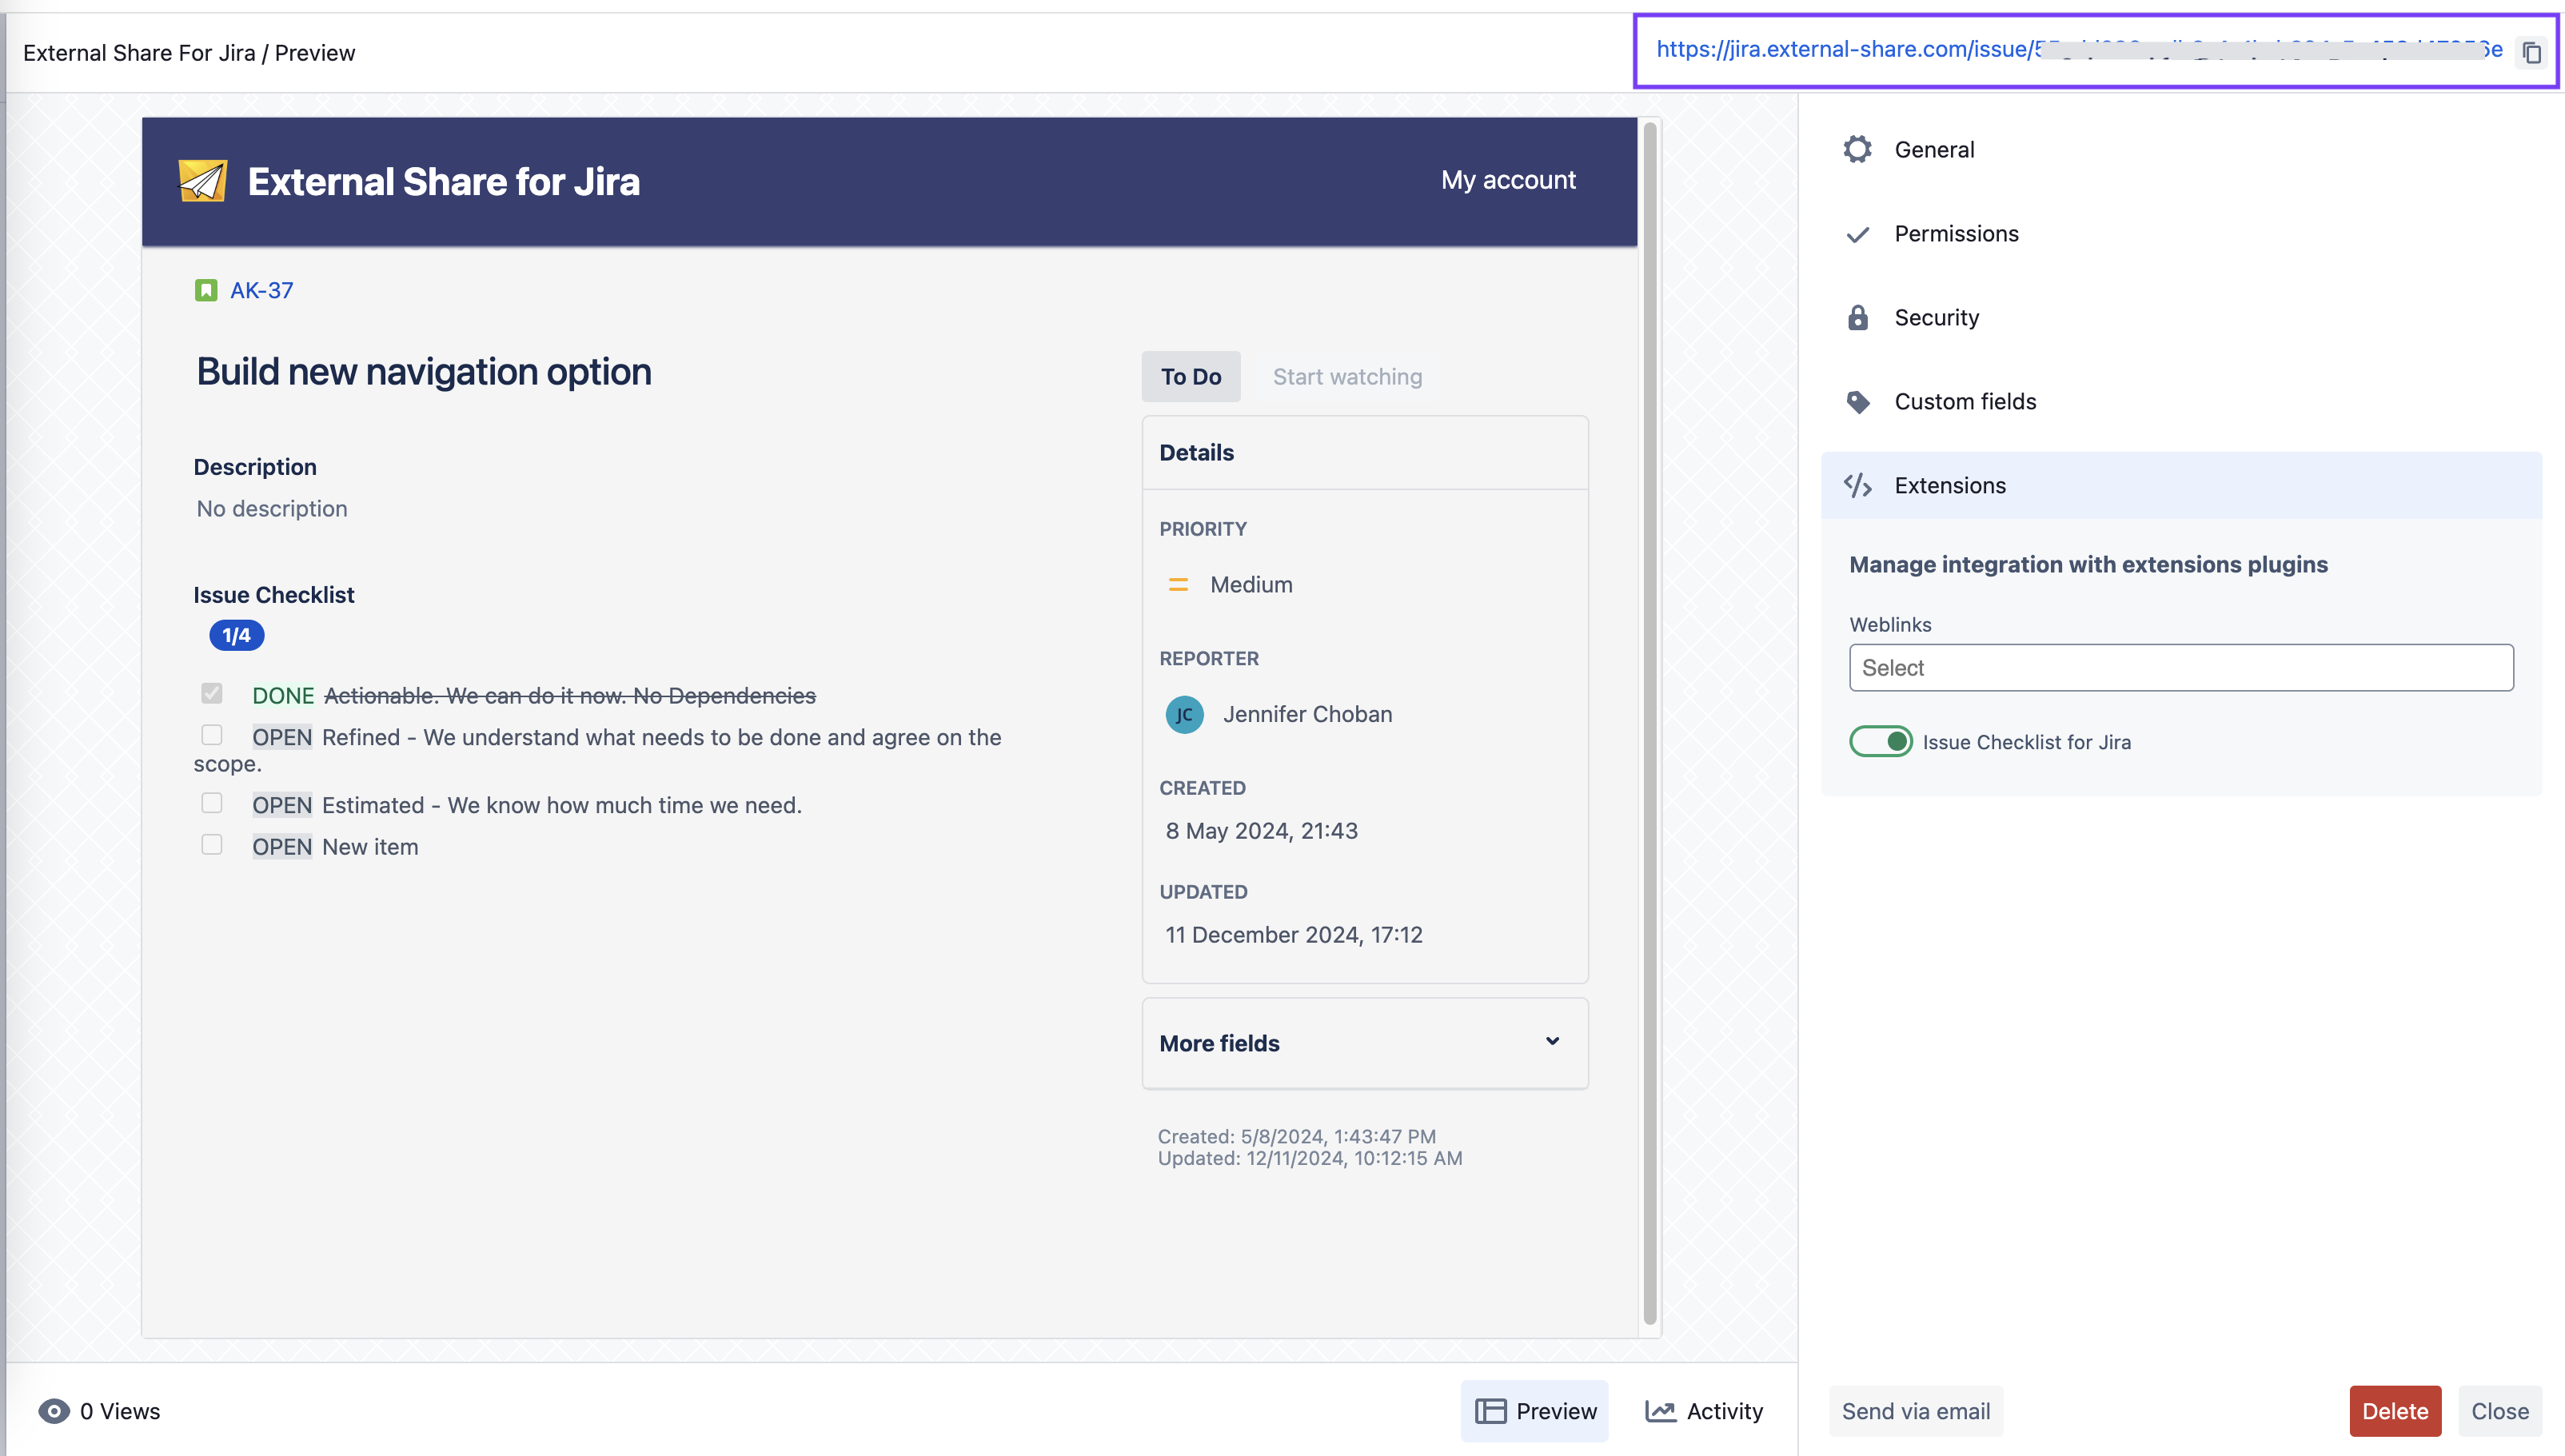
Copy and share the generated link at the top of the page.
JXL for Jira
This example refers to Company-managed (Classic) Jira spaces only.
If you are using Checklists for Jira (Enterprise), note that:
The Checklist Text field will only reflect local checklists. Global checklists will not be included.
The Checklist Completed field refers only to local checklists. The status of Global checklists in not reflected.
The Checklist Progress field reflects the cumulative progress on both local and Global checklists.
The Checklist Progress % field reflects the cumulative progress on both local and Global checklists.
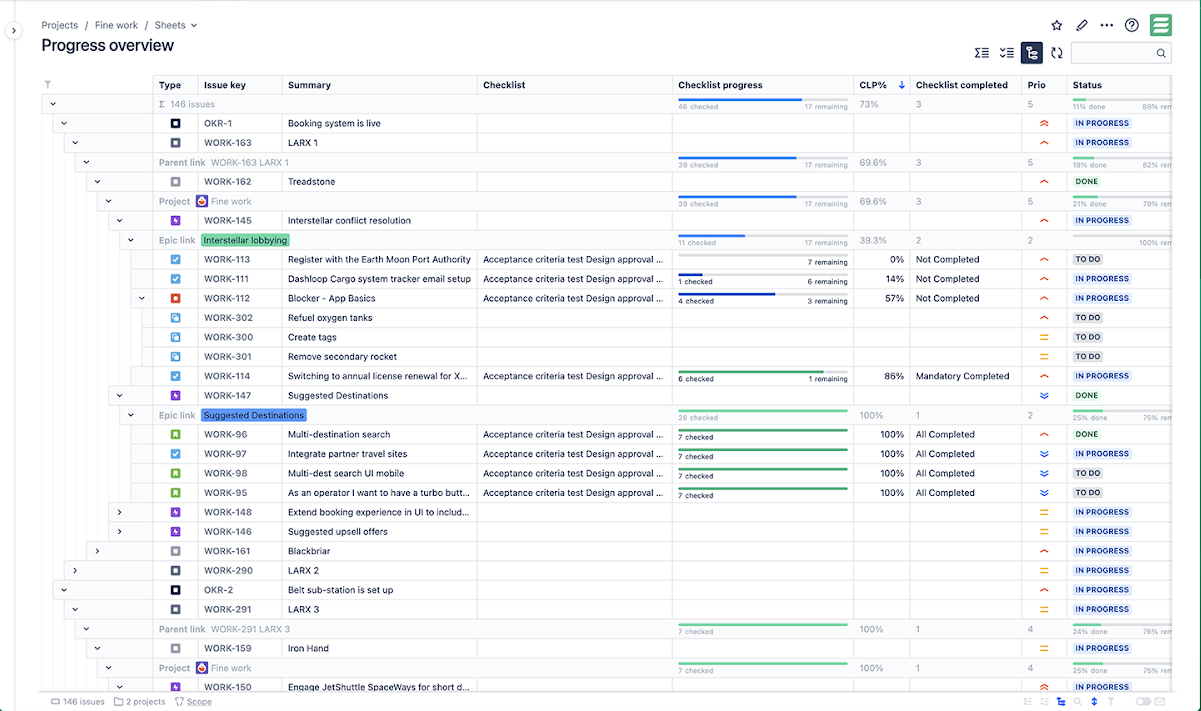
JXL for Jira is a work item editor/organizer that lets you view, sort, and edit work items in customizable spreadsheets within Jira. Users can create and inline edit work items, copy and paste fields in bulk, group and structure work items in custom hierarchies, and sum up field values across groupings and hierarchy levels.
JXL allows you to add the following Checklists fields as columns in the spreadsheet:
Checklist Text
Checklist Completed (can be used in work item groupings and hierarchy)
Checklist Progress (displayed as a progress bar, can be used in calculations)
Checklist Progress % (can be used in calculations)
See the JXL documentation for more information.
To add a column to the table of a Sheet:
Click the Edit icon at the top right of the sheet.
Hover the cursor over the position in the table where you want to create the column.
Click the Add icon that appears above the table.
Select the desired field(s).
Click Save.
Powerscripts
Power Scripts is an automation app offered by Anova Apps that allows you to automate tasks in Jira.
Checklists can be integrated with Power Scripts to add or modify the checklists in various situations such as when a work item is transition or a label is added. This example shows how to:
Add a checklist when the work item is transitioned depending on the value of a custom field
This example refers to Company-managed (Classic) Jira spaces only.
If you are using Checklists for Jira (Enterprise), note that this method will not allow you to add a Global Checklist. Global Checklists are not saved to the Checklist Text custom field and therefore cannot be accessed by the script.
To add a checklist if a Story is transitioned to In Progress and the value of a custom field is Development:
Ensure that the Sync checklists to Custom Fields global setting is enabled.
Ensure that the Checklist Text field is present on the Create work item screen. Note that you can hide the field from the work item view page.
Find the custom field IDs for the Checklist Text field and the other custom field used in the script.
Navigate to Jira Settings > Work items > Workflows and open the relevant workflow in Diagram view.
Click on the relevant transition and select Post Functions.
Click Add post function.
Select SIL Postfunction and click Add.
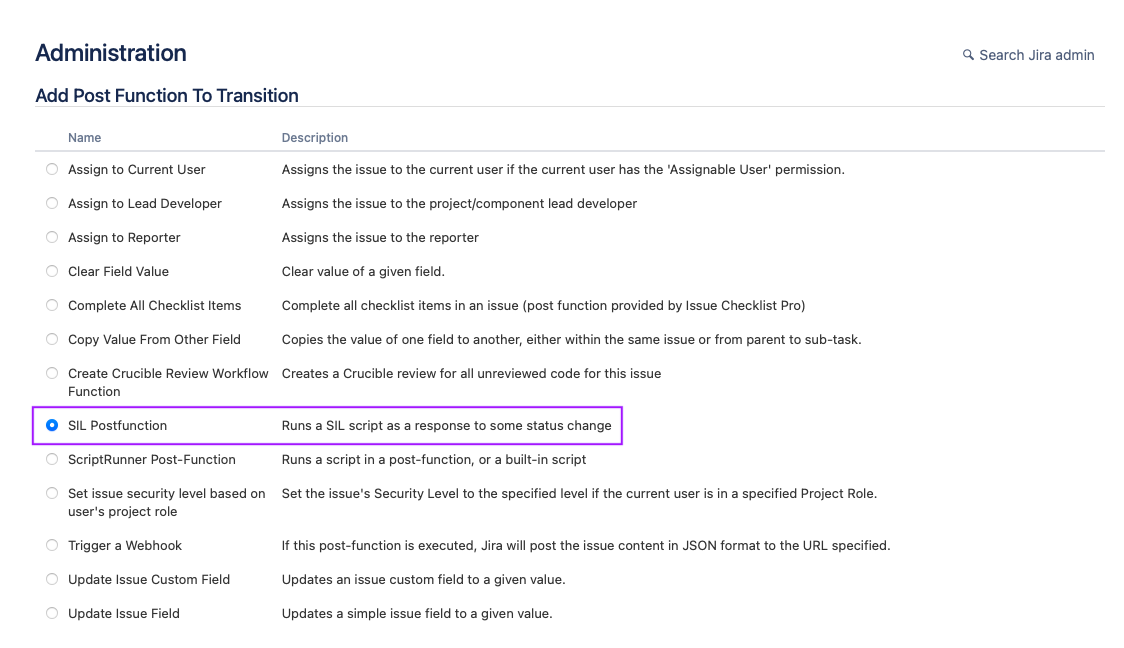
Select create a new script and click Next.

Name the new script, select its location (directory) and click Next.
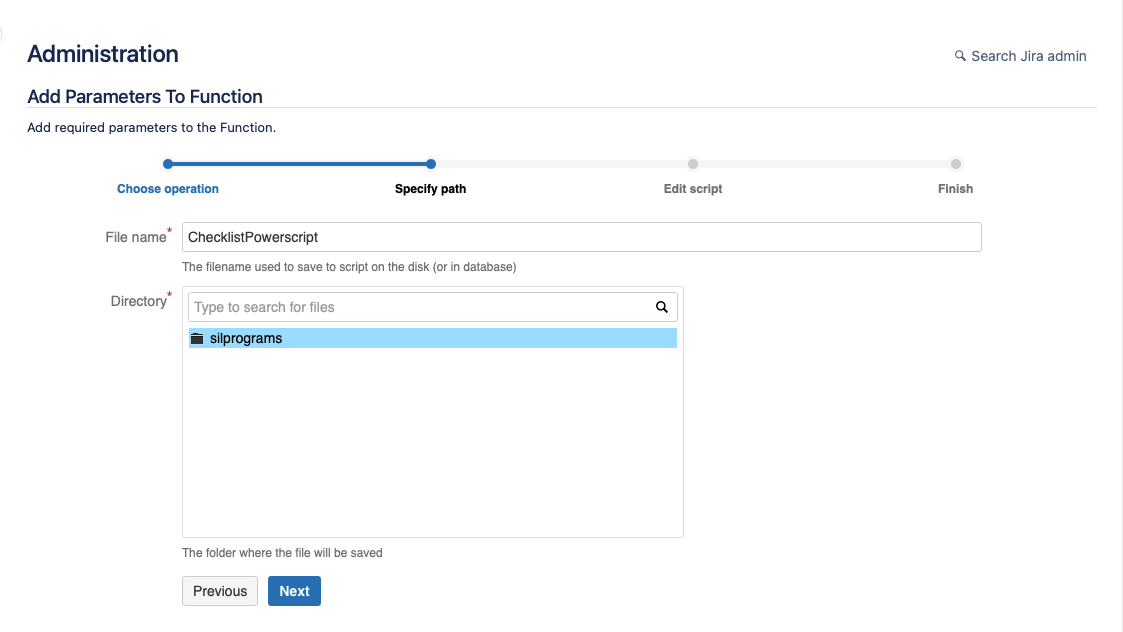
Write script that updates Checklist Text field as follows, where
customfield_10171 is the field who’s value will be checked to run the script
customfield_10039 is the Checklist Text field
Request sent to QA and QA Confirmed are items in the checklist.
Note that although the Checklist Text field accepts checklists in text form, Power Scripts requires all new lines to be proceeded by \n.
CODEif (project == "DEMO" and issueType == "Story" and customfield_10071 == "Development") { customfield_10039 = "[]Request sent to QA \n []QA Confirmed"; }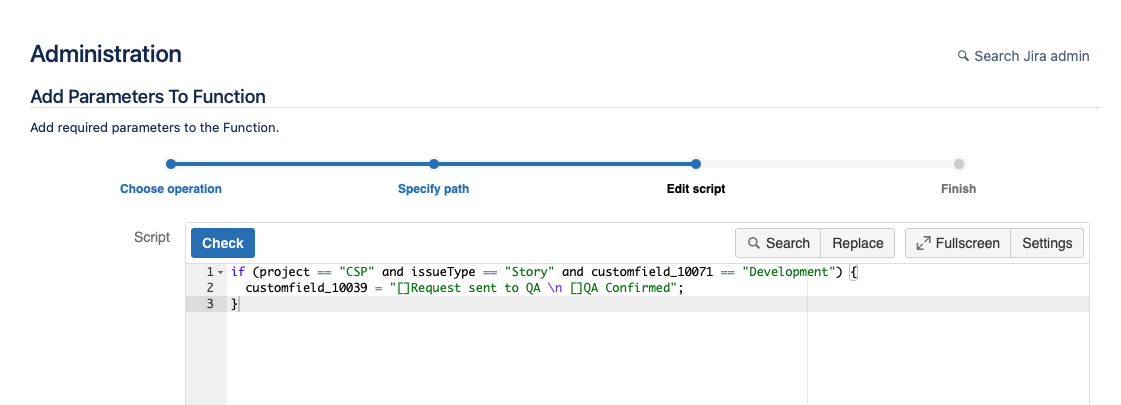
Click Check to validate the script.
Click Next.
Click Add on the final confirmation page.
Confirm that the new post function is on the list. (It will appear as the first item on the list.)
Click Publish Draft to publish the changed workflow.
Transition a Story that has the indicated custom field value to the In Progress status. The checklist items should appear on the work item.
Recurring Tasks
Recurring Tasks is an automation app offered by Gebsun Software. It allows users to schedule and automate creation of Jira work items and sub-tasks.
Checklists for Jira can be integrated with Recurring Tasks to create Jira work items that will contain a checklist.
Add checklist to recurring task
This example refers to Company-managed (Classic) Jira spaces only.
If you are using Checklist for Jira (Enterprise), note that this method will not allow you to create work items with Global Checklists. When new work items are created, Global Checklists will be according to the Checklist Context.
Ensure that the Sync checklists to Custom Fields global setting is enabled.
Ensure that the Checklist Text field is present on the Create Jira work item screen. Note that you can hide the field from the work item view page.
When creating a Recurring Task (or editing an existing one), find Checklist Text field in the dialog box and enter the checklist contents with each item proceeded by square brackets.
Click Save.
Test by waiting for the recurring work item to be created or by creating it from Recurring Tasks menu. The Checklist items should appear on the Jira work item.
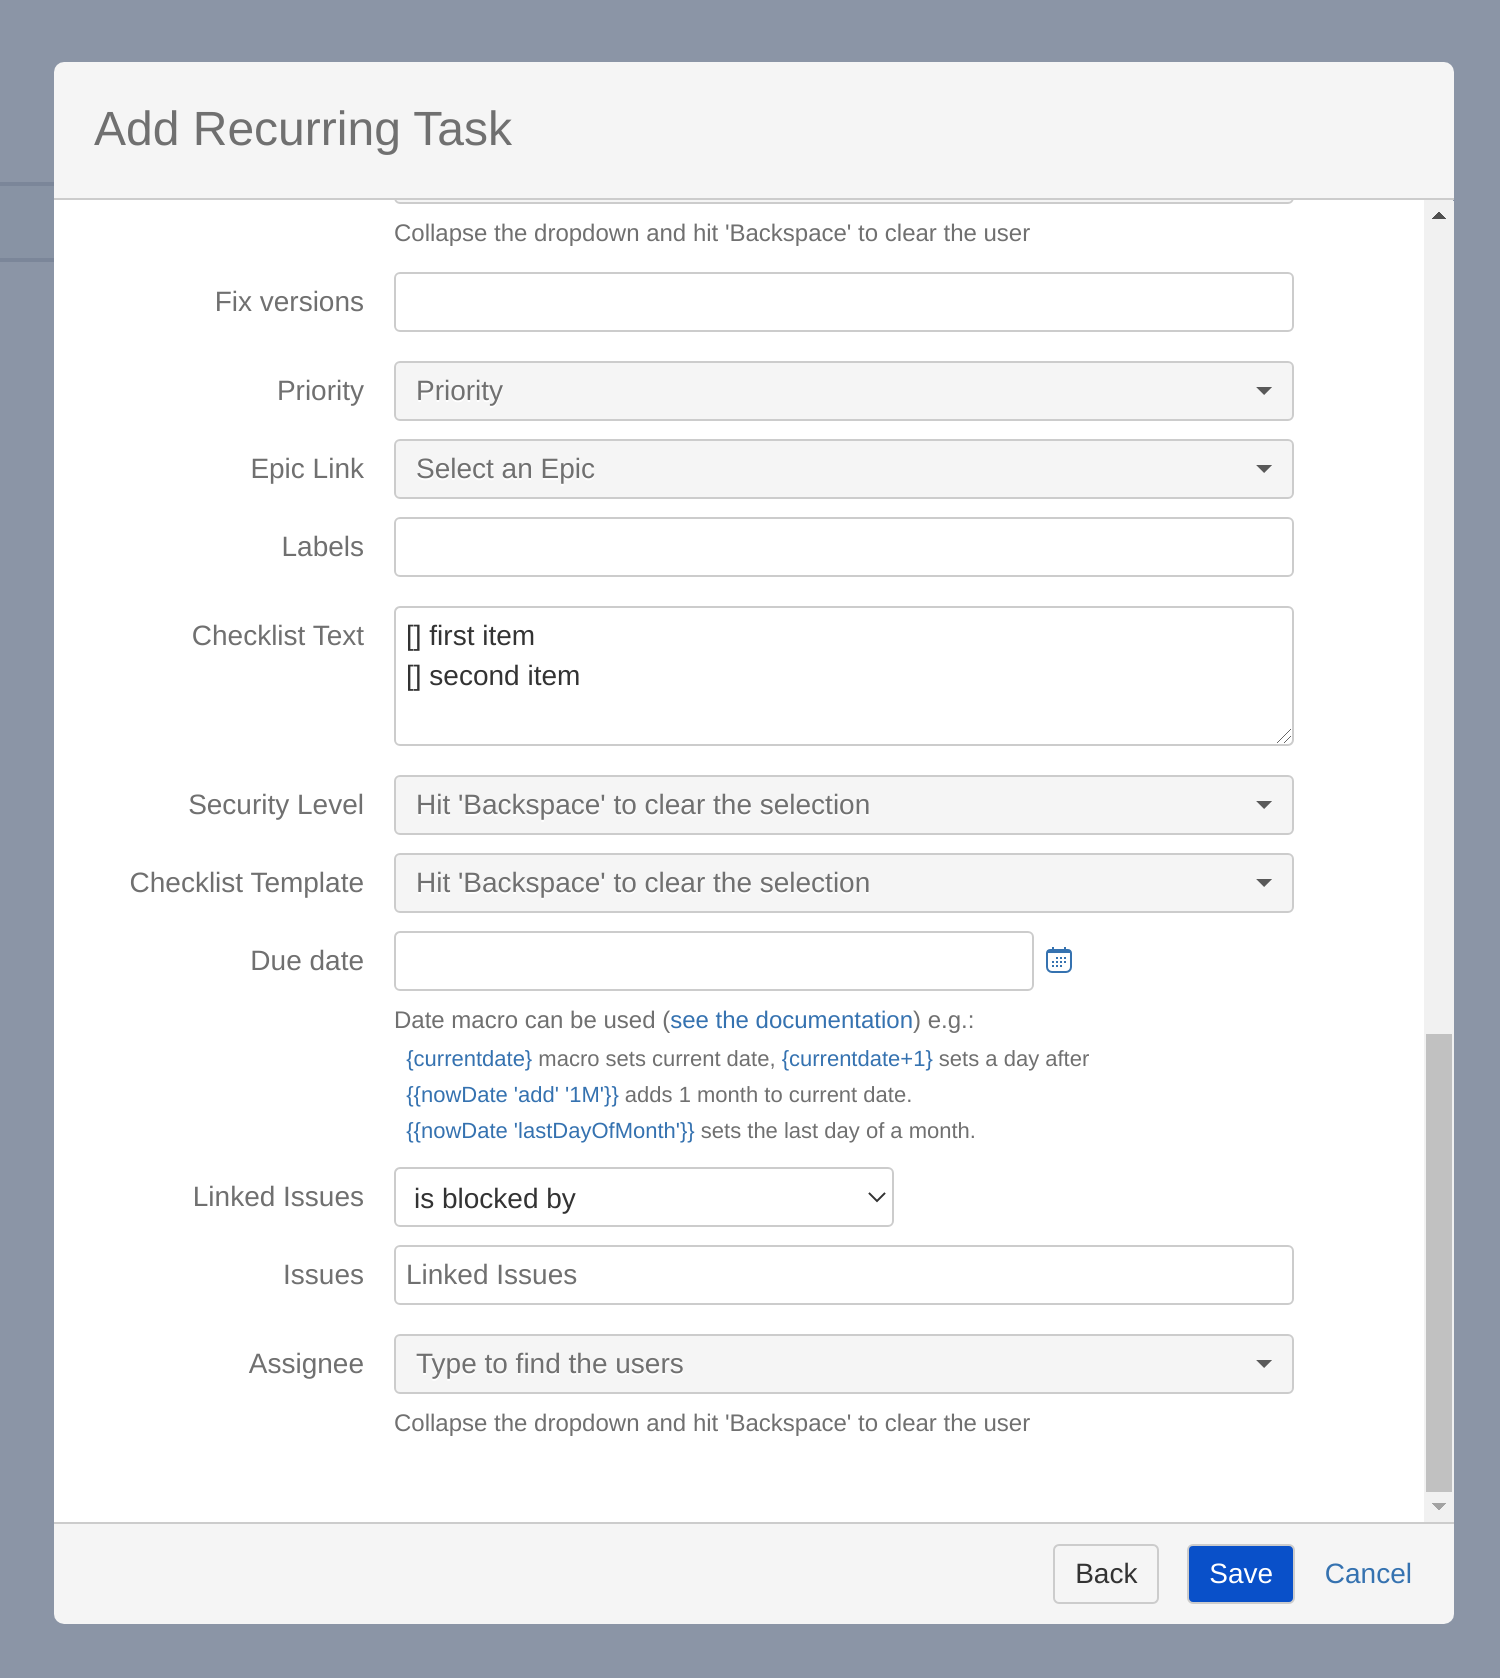
Alternatively, you can use the Default Checklist feature to automatically add a checklist to newly created Jira work items.
Scriptrunner for Jira
ScriptRunner for Jira is an app offered by Adaptavist that allows you to run custom scripts written in Groovy in response to various events in Jira. Scripts can also be scheduled to run at a specific time.
Checklists can be integrated with ScriptRunner for Jira which allows for a wide range of actions. Scripts have full access to Jira REST API. This example shows how to:
Create Jira Work Items from Checklist Items on Transition
This example refers to Company-managed (Classic) Jira spaces only.
If you are using Checklists for Jira (Enterprise), note that this method will not allow you to add a Global Checklist. Global Checklists are not saved to the Checklist Text custom field and therefore cannot be accessed by the script.
Ensure that the Sync checklists to Custom Fields global setting is enabled.
Navigate to Jira settings > Apps > ScriptRunner > Script Listeners.
Click Add Listener.
Enter a name of the Listener and select Issue Updated as the event on which the script will be run. Select the relevant space(s).
Select Current User to have reporter field of the newly created Jira work items to be set to the user who transitioned the original Jira work item.
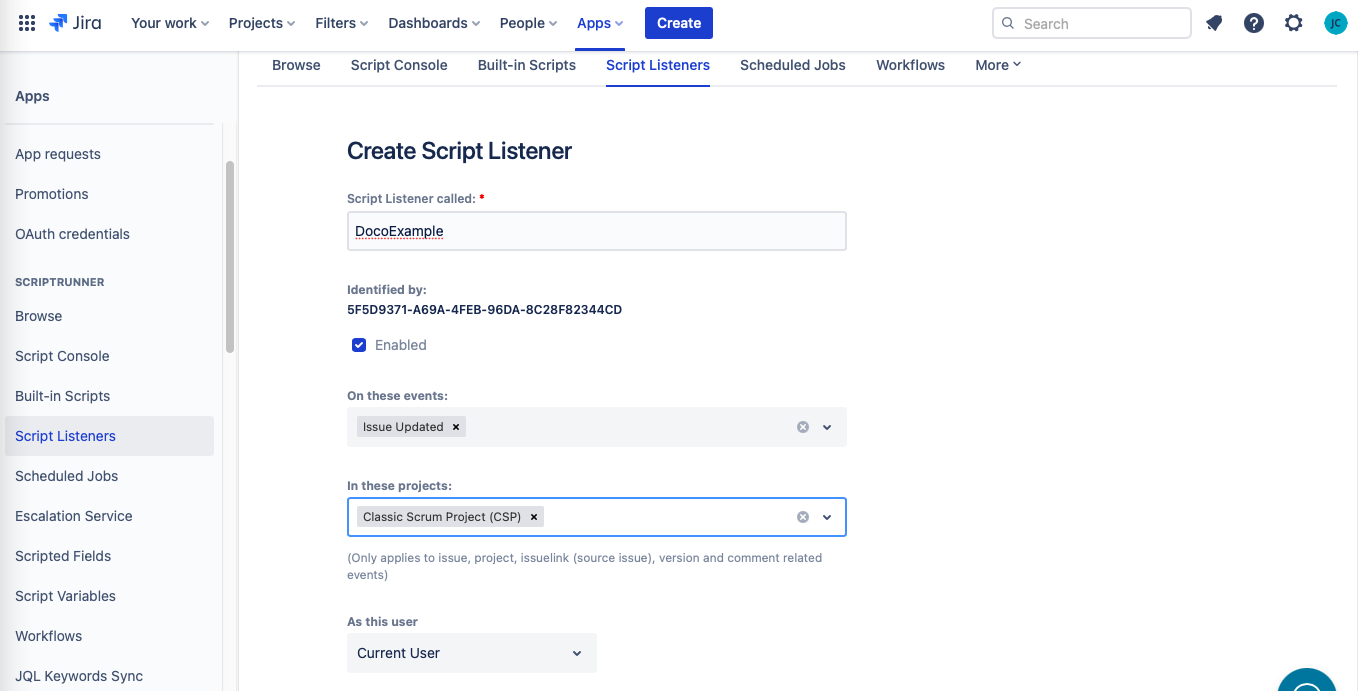
Click into the panel in the lower script panel and paste in the code below.
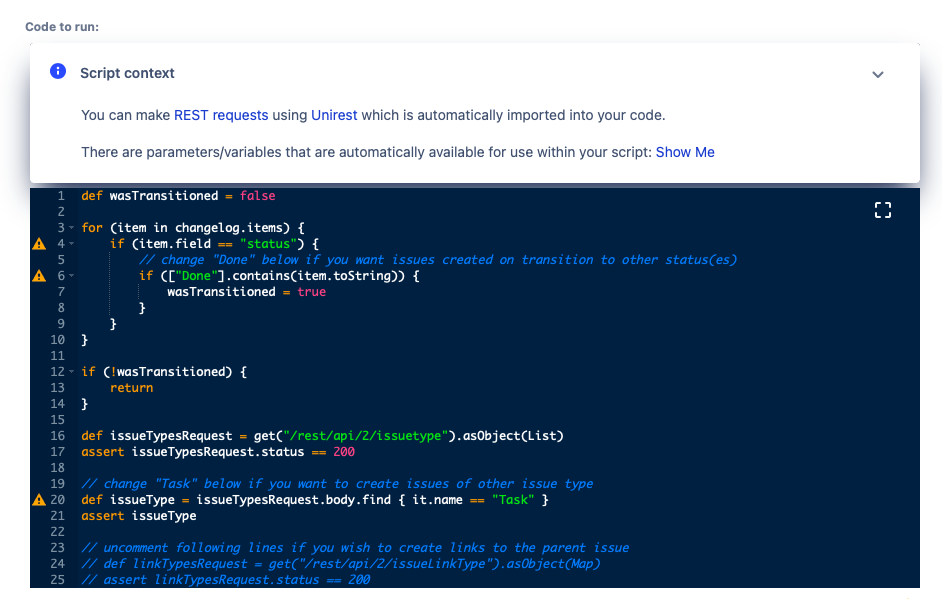
Test the script by transition a Task with a checklist to Done.
Please note:
Comments in the script describe optional adjustments.
The script ends execution if there was no work item transitioned or if the transition was to a status other than one expected. By default, the script is run when a Jira work item is transitioned to the Done status. You can adjust the script to run when a Jira work item is transitioned to any status in your workflow (line 6).
By default, the script creates Task type Jira work items from checklist items. You can adjust the script to create Jira work items of different work item types (line 20).
Uncomment lines 24-28 if you want to create Jira work item links between the newly created Jira work items and the parent work item. You may want to change the work item link type (line 27) and the inward / outward relation between Jira work items (line 78).
By default, no Jira work items are created for checklist separators. This can be changed by commenting out line 55 of the script.
After the Jira work items are created, the script can mark items as completed by updating Checklist Text custom field. If you wish to do so:
Uncomment the last lines in the script.
Ensure that the Checklist Text custom field is present on the work item screen, or that the script listener is run as ScriptRunner Add-On User (not as Current User).
7. Adjust the script to your needs and click Save.
If you need help with troubleshooting the script listener, please add entry logs with more information to the ScriptRunner log (e.g. content of items variable). After script execution, navigate to Jira settings > Apps > ScriptRunner > Logs to see the logs.
Xporter
If you are using Checklist for Jira (Enterprise), note that these methods cannot be used to export Global Checklists as Global Checklists are not saved to the Checklist Text custom field.
Xporter for Jira is an app offered by Xblend that allows you to export Jira work items to various formats and documents (PDF, MS Word, and MS Excel).
Checklists for Jira can be integrated with Xporter to allow you to include checklist data in exported work items and documents.
Built-in Xporter Integration
Please refer to the following page in Xporter documentation for detailed instructions.
Manual Integration
Alternatively, you can include checklist data in the Xporter template using the custom fields provided by Checklists for Jira:
Checklist Text – custom field that contains the checklist in text format
Checklist Progress – custom field that shows how many items have been completed vs the total number of items
Checklist Progress % – custom field that shows the checklist progress as a percentage
Checklist Completed – custom field that indicates whether or not the checklist is completed
