
Migrating between versions automatically preserves all checklist data (with the exception of Global Checklists available in only). Local checklists, templates, values in custom fields, etc. will be immediately available once the upgrade/downgrade is complete.
For a comparison of available features between FREE PRO and ENTERPRISE versions, see this page.
If you are using automations or workflows that rely on read-only checklist fields, such as Checklist Progress or Checklist Text (read-only), you will need to update the field used in them.
If your Jira site is pinned to an EU region, please contact our support team in advance to ensure that your data is migrated to the correct data residency location.
Upgrading to Enterprise for the First Time
-
Navigate to admin.atlassian.com. Select the appropriate Organization. Click on the … menu to the right of the appropriate Product and select View product. Click on Connected apps from the left nav bar.
-
Scroll to the Checklists for Jira (Pro or Free) and click View app details.
-
Click on the Uninstall button in the upper right. (Uninstalling the previously installed app first will avoid duplication of custom fields. Your checklist data will still be preserved and will be shown in Checklists for Jira Pro once it is installed.)
-
Return to the Connected apps page and click on the Explore apps button.
-
Search for Checklist for Jira Enterprise.
-
Install the app.
-
Install the app. If you block work item transitions using All checklist items are completed validator, you will need to update the workflow to use the validator from the newly installed version.
-
Reset any automation rules, JQL filters, etc., that use read-only checklist fields.
Upgrading to Enterprise If You Had Enterprise Installed in the Past
Upgrading or downgrading between versions can be performed an unlimited number of times.
If you used Checklist for Jira Enterprise and used Global Checklists in the past, then downgraded to Checklist for Jira Free or Pro, and are now re-installing Enterprise, then a sync will need to be performed to update the entity properties.
-
Navigate to admin.atlassian.com. Select the appropriate Organization. Click on the … menu to the right of the appropriate Product and select View product. Click on Connected apps from the left nav bar.
-
Scroll to the Checklists for Jira (Pro or Free) and click View app details.
-
Click on the Uninstall button in the upper right. (Uninstalling the previously installed app first will avoid duplication of custom fields. Your checklist data will still be preserved and will be shown in Checklists for Jira Pro once it is installed.)
-
Return to the Connected apps page and click on the Explore apps button.
-
Search for Checklist for Jira Enterprise.
-
Install the app.
-
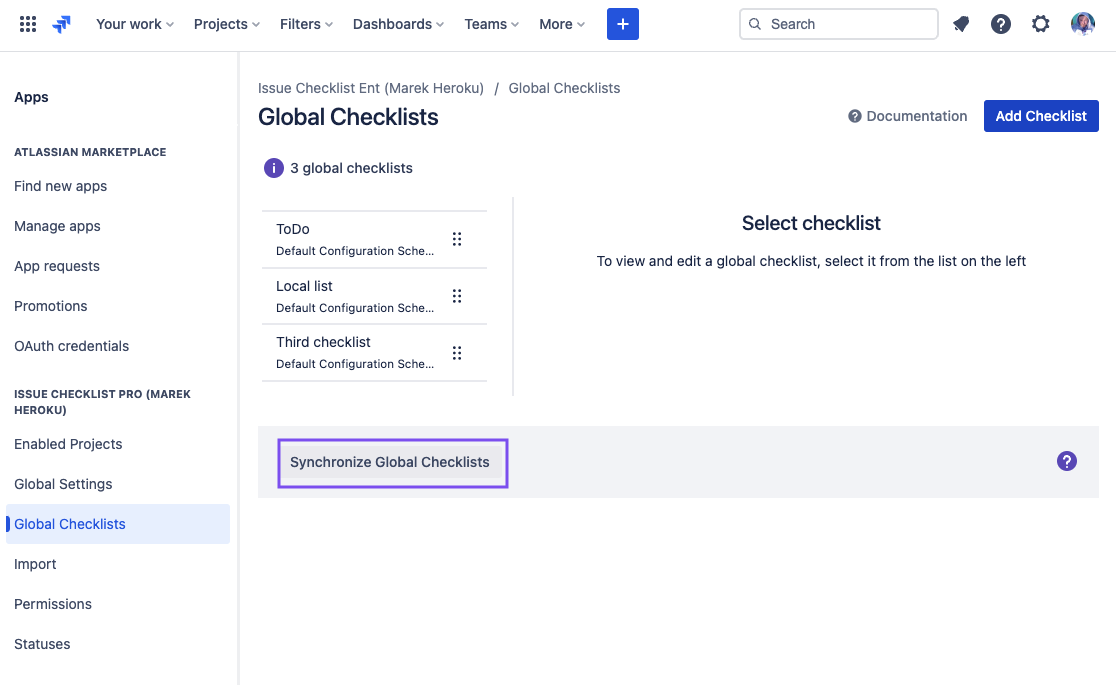
Navigate to Jira Settings > Apps > and select Global Checklists under Checklist for Jira Enterprise. Press the Synchronise Global Checklists button. Note that depending on the number of work items, the synchronization may take several hours.
-
If you block work item transitions using All checklist items are completed validator, you will need to update the workflow to use the validator from the newly installed version.
-
Reset any automation rules, JQL filters, etc that use read-only checklist fields.