Here you can find quick tips and sample stories on how you can enhance your Jira workflows with checklists.
Definition of Ready
Make sure that work items have all the necessary information attached before they are handed over to people executing them.
Problem: New work items are passed on to the team without the necessary context, requirements, or resources attached to start working on the task. This causes the team to waste time going back to the reporter asking clarifying questions and waiting for additional materials.
Solution: Block work items from transitioning into the ‘Ready’ status unless the Definition of Ready checklist is completed.
-
The Reporter creates the work item.
-
The Definition of Ready checklist automatically gets applied to it to help them collect all the necessary information.
-
If they try to transition the work item to Ready before the checklist is completed, the transition will be blocked.
How to set up...
-
Create a Definition of Ready checklist:
-
In your space, click the Checklist Templates tab (it may be hidden under More on the right).
-
Click Create template.
-
Add the checklist content and save.
-
-
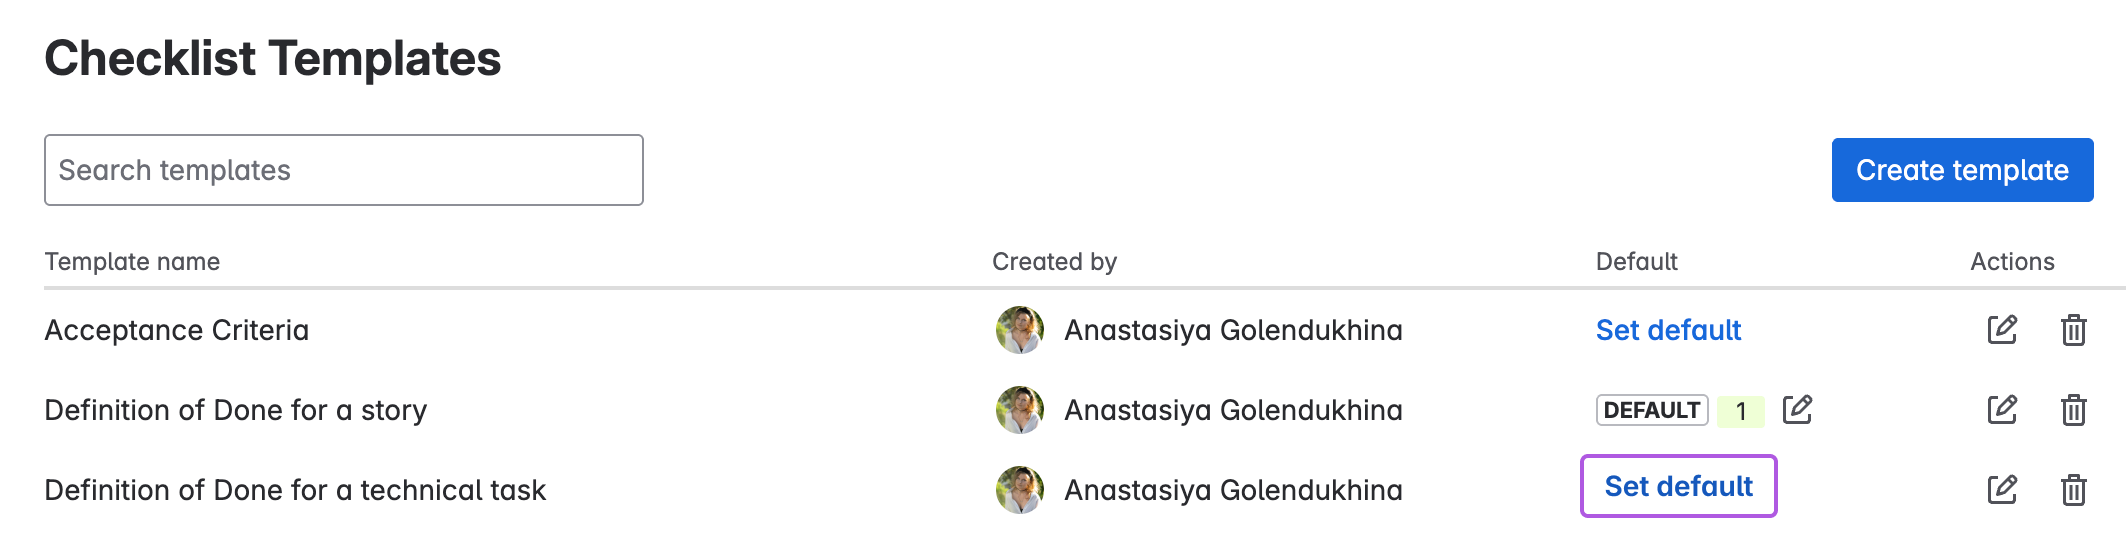
Set the checklist as default:
-
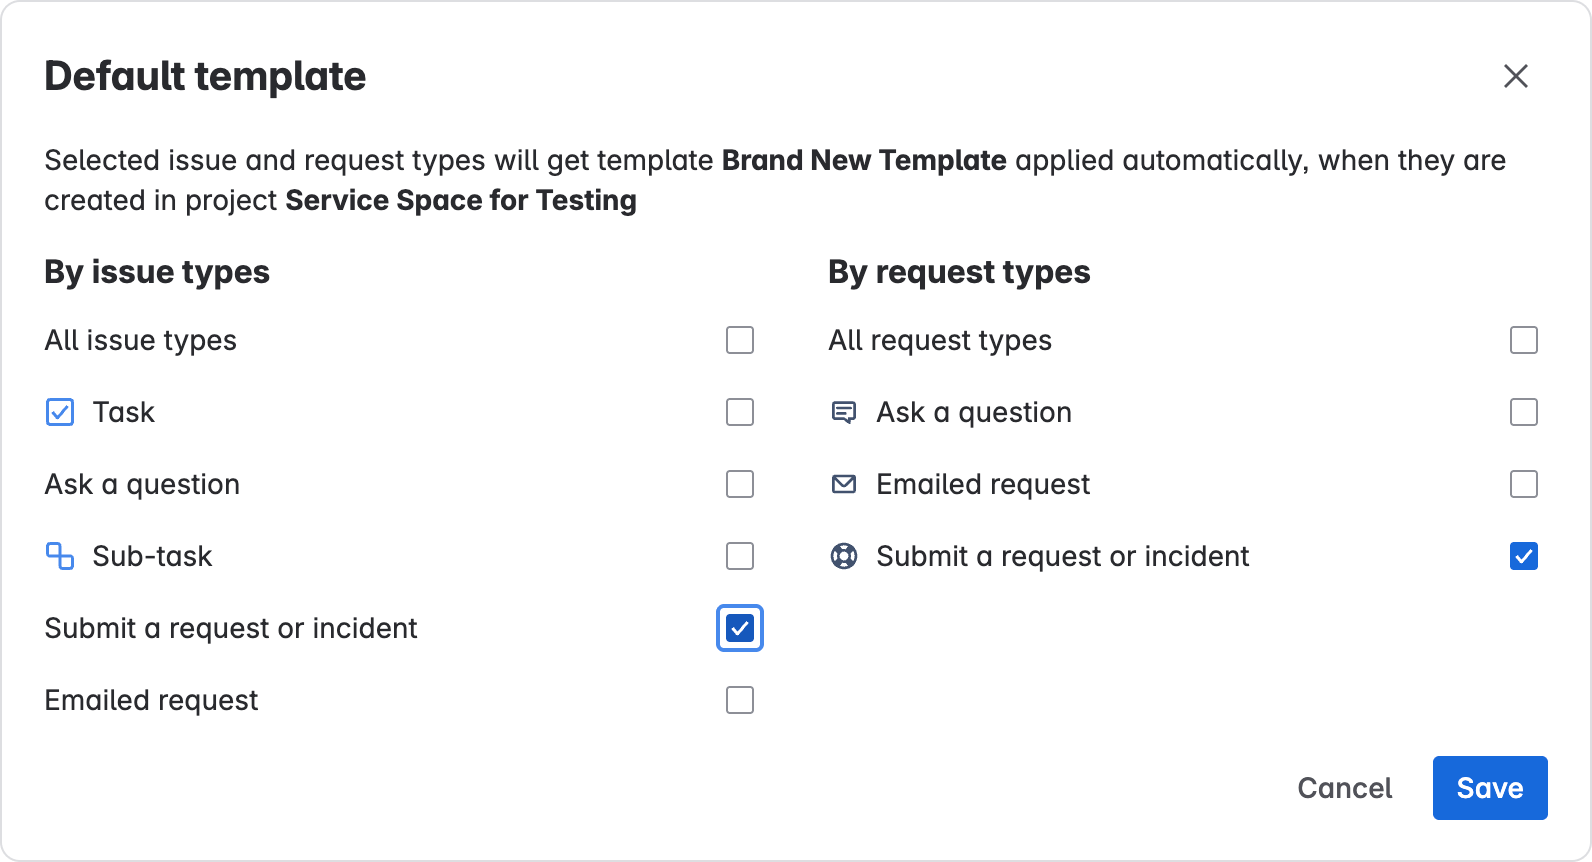
In the template list, click Set default.
-
Choose work types or request types that you want this template to be applied to and save.
-
-
Add Workflow Rule to block transitions:
-
Go to Space settings > Workflows. You may need to ask your site administrator for workflow editing permissions.
-
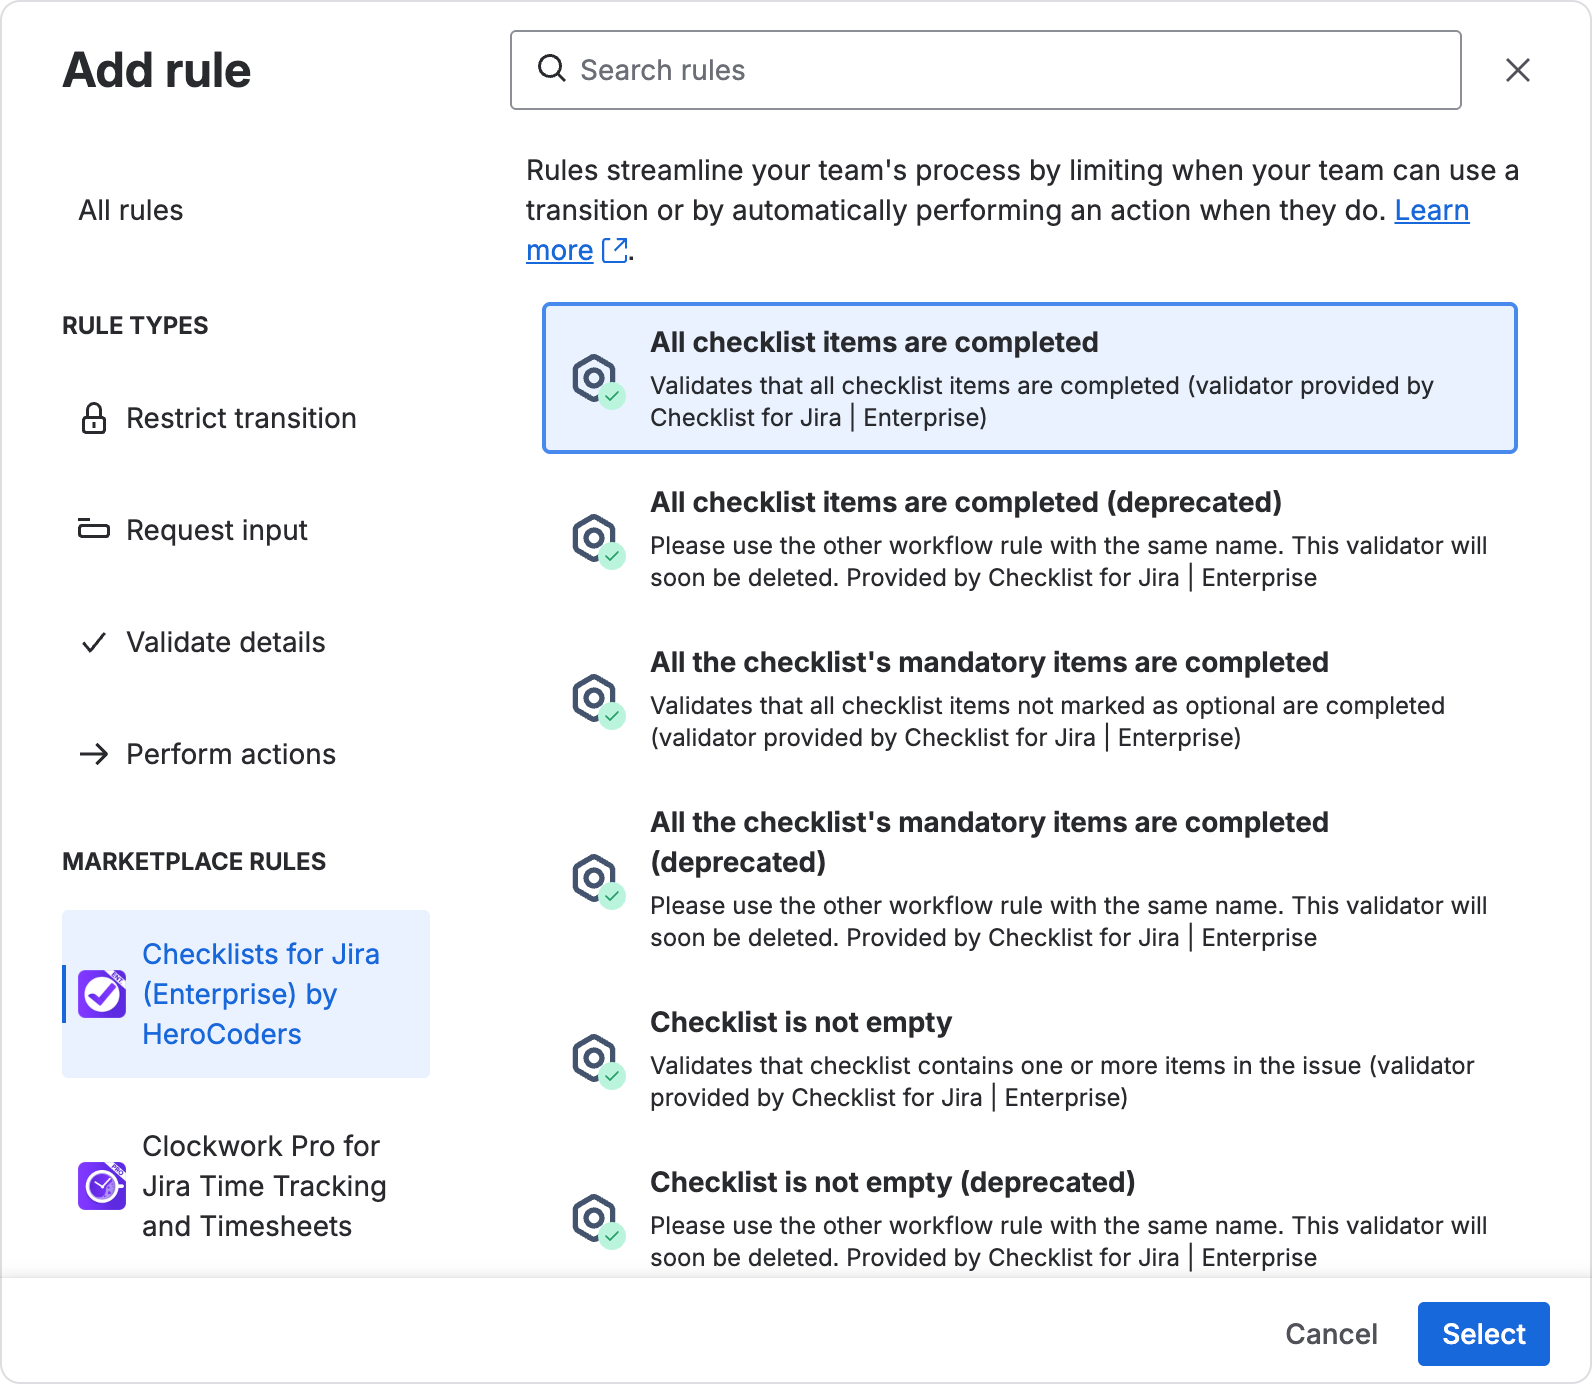
Choose the transition you want to edit and click the Plus button next to Validate details.
-
Click All checklist items are completed OR All the checklist’s mandatory items are completed and then Select.
-
Definition of Done
Problem: Because of conflicting ideas about what it means for a task to be completed or incomplete descriptions, work is sometimes considered done when crucial elements are missing. This can cause anything from extra time spent on testing and fixing bugs to important security issues and key user features missing in the final product.
Solution: Keep a checklist in each work item of what it would mean for this task to be done. This can be a list of requirements written down during team refinement, or a regular list of steps required to complete every task. For example:
-
Assignee completes a task
-
Before resolving the work item, they need to go through the checklist and complete the required items, such as passing a certain type of review, checking compliance requirements, verifying that it works on Staging, running a build, or deploying to a certain environment.
-
If they have not completed a specific step and attempt to transition the work item to the next stage, for example to testing by QA, the workflow will block the item until all checklist items are finished.
-
When all items are done and the task finally moves to the next workflow status, the downstream team doesn’t have to worry that the assignee missed key items.
How to set up...
-
Add a Definition of Done checklist to the work item. If you have repeated DoD’s, you can add them as a Default Template to be automatically applied to all new work items of a specific type.
-
Add a Workflow Rule to block transitions until checklists are completed:
-
Go to Space Settings → Workflows
-
Edit the workflow and select the transition you want to edit.
-
Click Validate Details.
-
Filter by the Checklists for Jira app and choose All checklist items are completed, or you can also only validate completion for mandatory items.
-
Acceptance Criteria Requirements
Problem: During task refinement sessions, a lot of information might fall through the cracks and forgotten, leading to arguing over what the finished task is supposed to be like. With checklists, you can write down Acceptance Criteria directly as a checklist on the work item and have the team agree on the terms. This checklist can then be used by the assignee to verify that they’ve done the task as it should be, and the downstream team members can then check the work against the acceptance criteria.
Solution: Write down acceptance criteria during refinements in the form of a checklist that can be used to verify results.
-
When you have a refinement session, immediately write down each agreed-upon point as a checklist item. You can add details and tag a relevant user. E.g. “Customer must be able to place an order without signing in”
-
As the assignees carry out the task, they can compare the results with the checklist items.
-
The checklist’s mandatory items will need to be completed before they can transition the work item.
-
If you have a testing or stakeholder acceptance stages, the team can also go over the checklist items to make sure all is carried out according to prior agreement.
How to set up...
To have transitions blocked until all items are completed:
-
Go to Space settings → Workflows
-
Edit the workflow
-
Select the transition you want to verify with checklists and click Validate details to add a rule.
-
Filter by Checklists for Jira and choose All checklist items are completed or All the checklist’s mandatory items are completed and save.
Simple Quality Assurance (QA) Testing
Problem: Your team needs to set up a basic testing process with a list of things to verify, but dedicated testing tools are too expensive and complicated.
Solution:
-
Create a testing checklist, depending on your team’s needs:
-
Have team members write an individual checklist for a work item with specific test cases. You can use automations to require a work item to contain a checklist with a specific name or items, like “Testing Notes” before it can be transitioned to “Ready for Testing” status.
-
For repeated work such as testing releases, APIs, or anything where the same testing checklist can apply, you can load a premade template manually or automate it by work type or label.
-
-
In the testing phase, QA engineers can mark failed items with a dedicated custom status and complete items that pass the criteria. To repeat a run, you can just use the “Toggle all” feature (available in Enterprise).
-
The work item can’t transition to Done unless all mandatory checklist items are completed, ensuring that no test scenarios have been skipped.
How to set up...
-
Create your testing templates:
-
Open the space page and find the Checklist Templates tab. It might be hidden under More.
-
Click Create Template
-
Add your template content. You can add details on how to reproduce testing scenarios in the description for each item, and also add headers to organize the process.
-
-
Add automation to require a test checklist before transitioning:
-
Create a new automation
-
Add work item transition as trigger
-
Add a separate condition step → Work item fields condition. For example, you can require for the field to contain a checklist called “Testing Scenarios”. To do that, simply add it with a hashtag symbol to denote a checklist title in the text field, like so:
#Testing Scenarios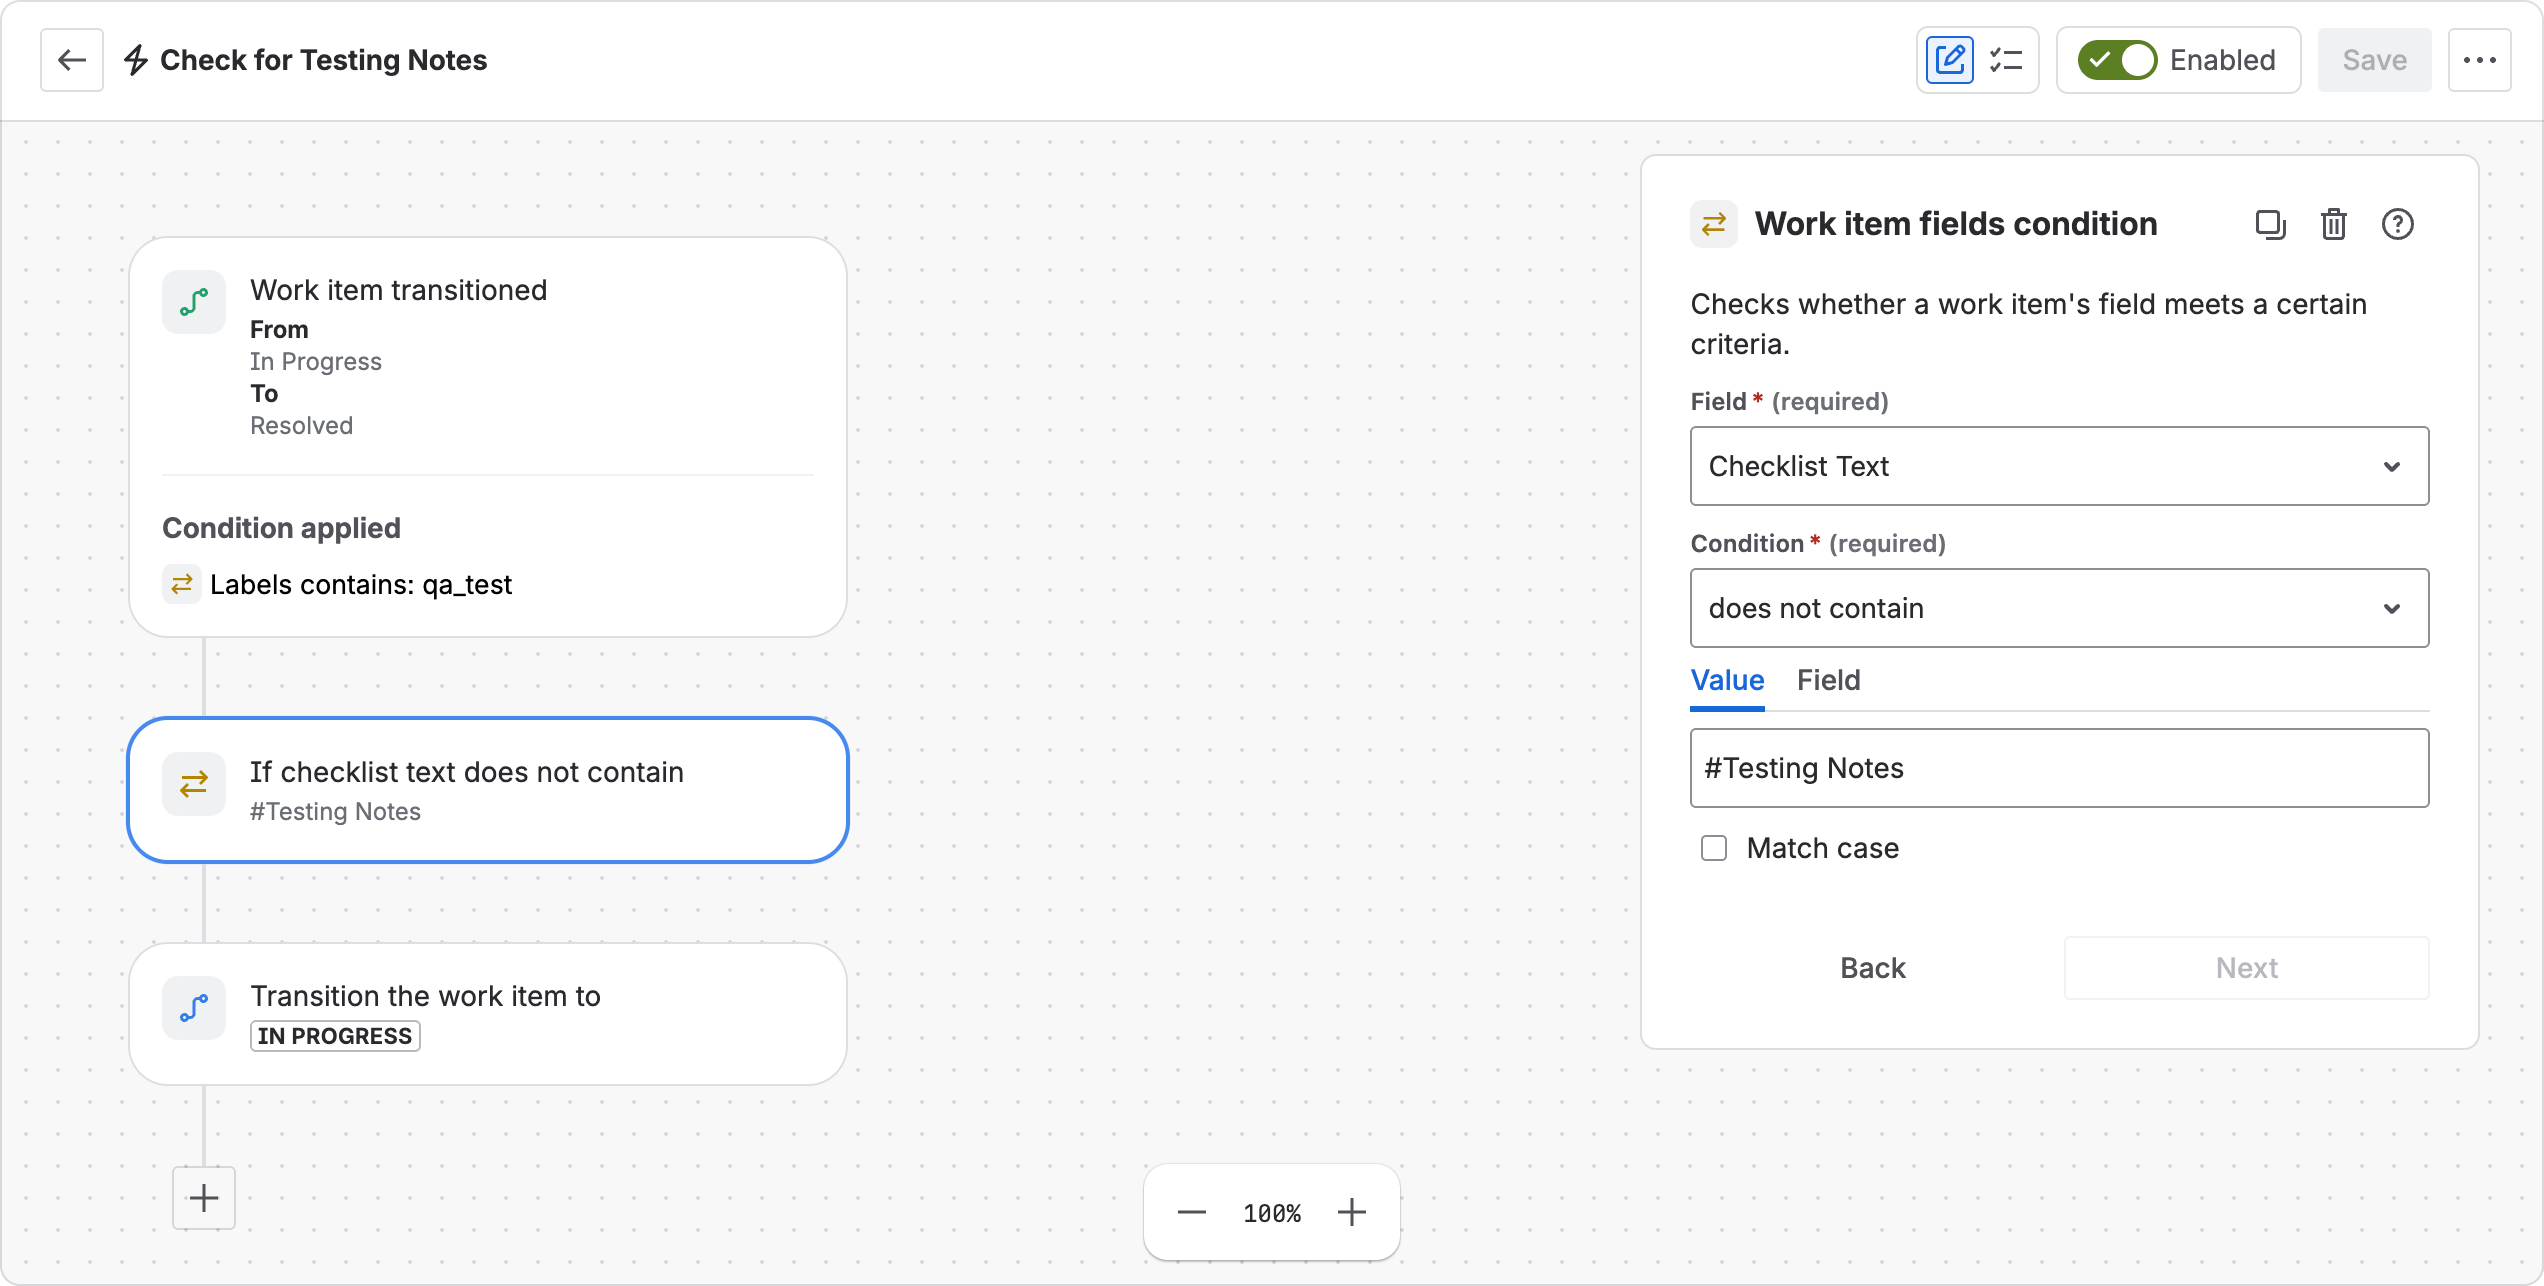
-
In the condition, select the Checklist Text field and set up the contents. You can use
-
-
Add checklists to work items. You can add it:
-
Manually using the checklist menu → Load Template
-
Using labels
-
By applying a default template to all new items of a work type
-
-
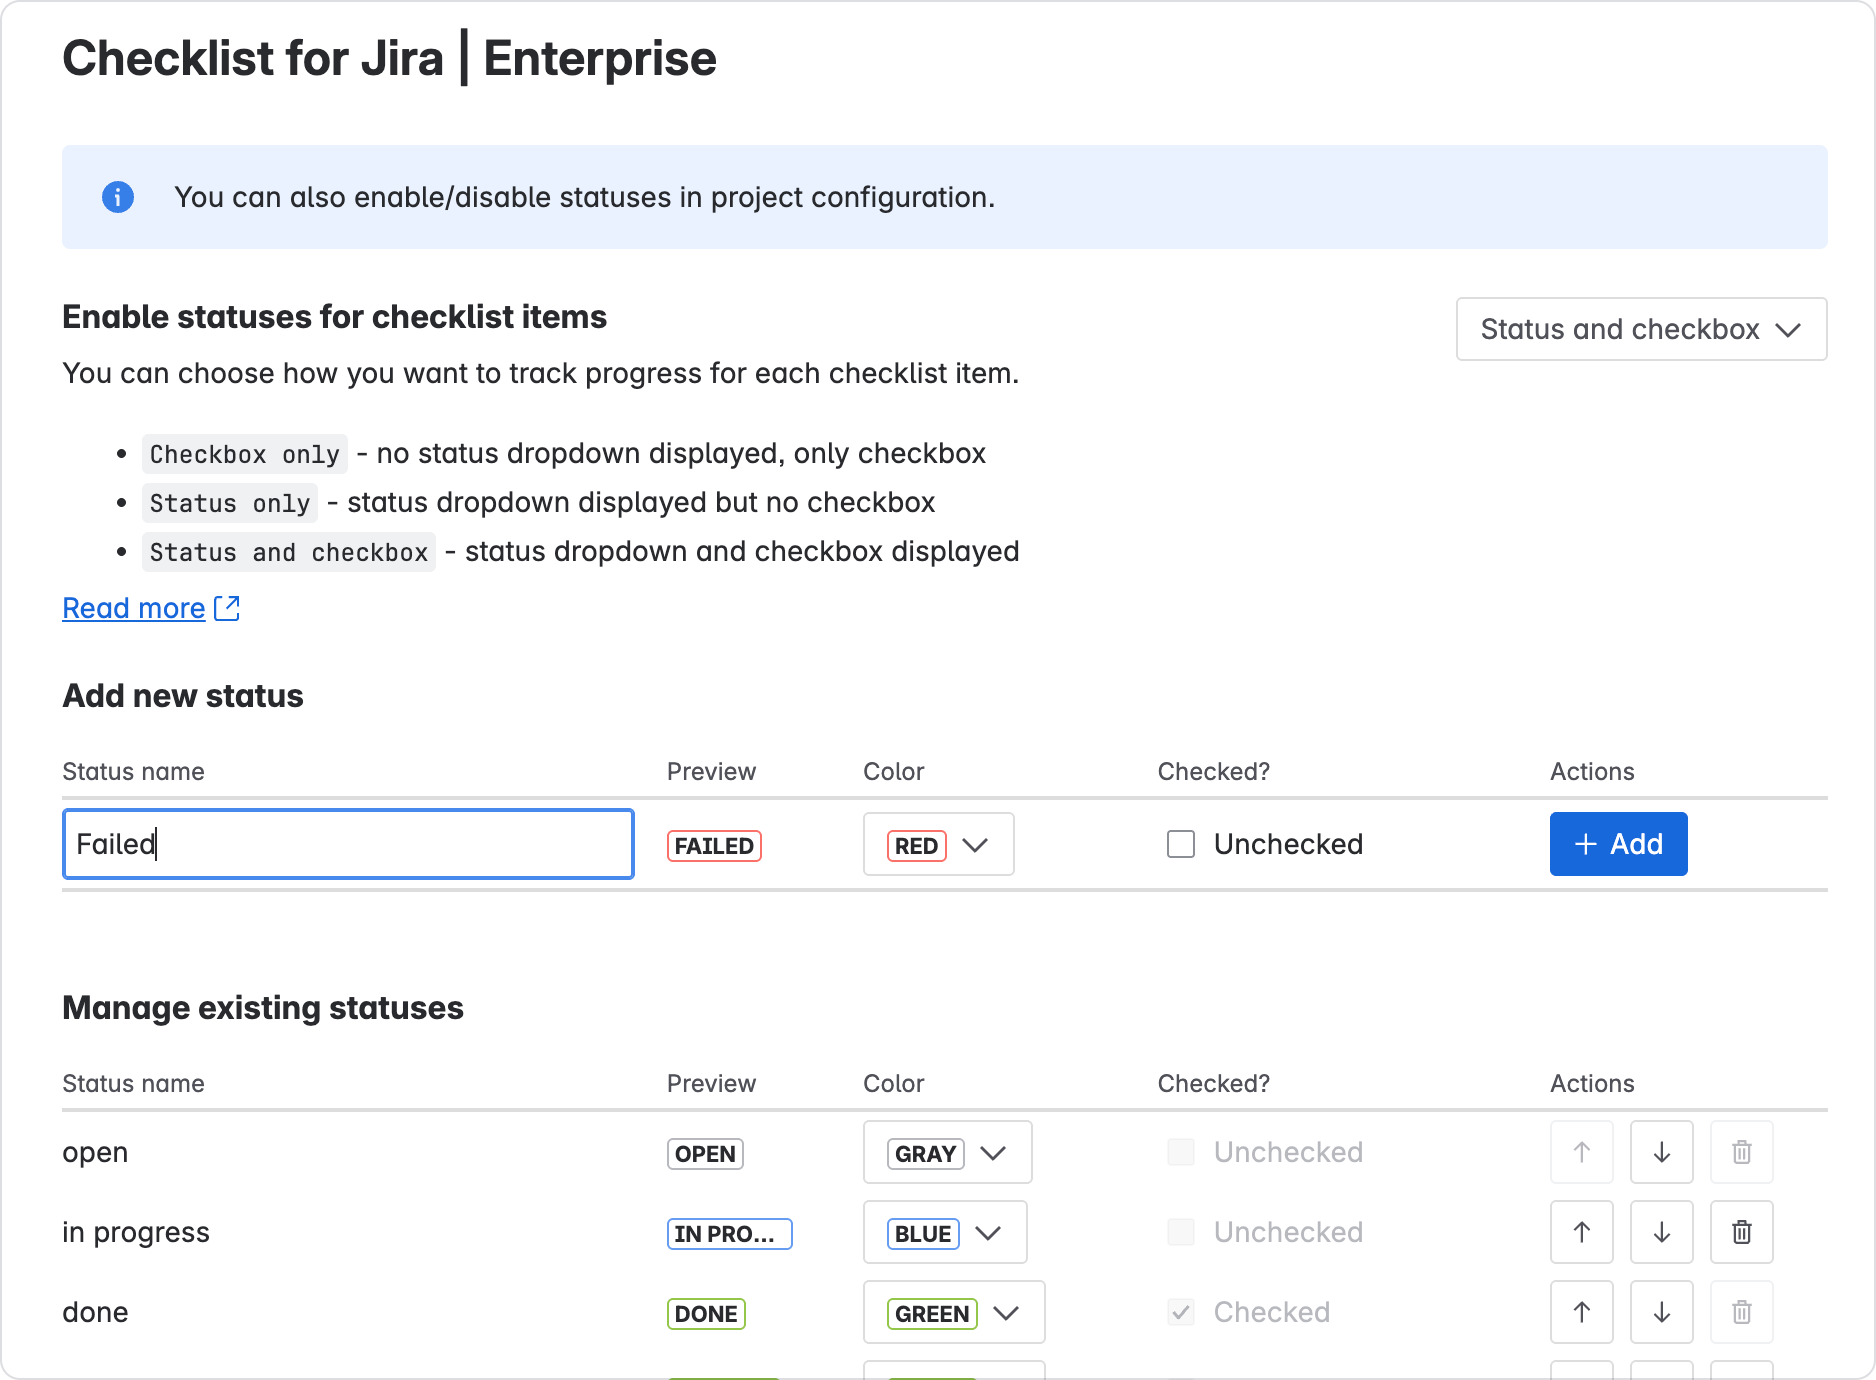
Add custom status for failed test cases:
-
You will need to have global admin permissions to set this up.
-
Open Marketplace Apps → Checklists for Jira → Statuses
-
Under “Add New Status”, enter the new status, pick a color and checkbox state and click Add.
-
-
Require completing checklists:
-
Open Space settings → Workflows and edit the workflow.
-
Choose a transition and click Validate Details to add a rule.
-
Filter by Checklists for Jira and choose “All mandatory items are completed”.
-
Deployment Checklists
Problem: When it’s time to release a new version or deploy changes, you want to make sure that everything goes smoothly and all the technical requirements for security and stability are taken into account. Sometimes this can be a stressful process, so you might want to remove any possibility to forget a step or make a mistake, especially if there are multiple people involved.
Solution: Add a checklist to any deployment or release work items and have the team follow it.
-
Team members can assign individual checklist items to split the work details.
-
For more complex steps, you can add detailed descriptions and notes.
-
As they complete each step, they can mark progress using statuses.
-
When crucial steps are completed, you can set up automations to notify stakeholders.
-
With the help of workflow rules, the work item cannot be considered done before the checklist is completed.
Onboarding and offboarding checklists
Problem: Whenever you hire a new employee or say goodbye to someone on the team, there is a certain amount of work involved, from managing account access to devices and handing over work.
Solution: Create a reusable onboarding and offboarding checklist for a specific type of task.
There are several easy ways to set it up depending on your site conventions:
-
Apply the onboarding or offboarding checklist using a simple label
-
If these tasks have a specific work type, you can just set the checklist as a default template for it
-
For more complicated conditions, such as if a lot depends on the role or custom fields, you can use automation with the Checklist Text custom field to put the checklist together from building blocks.
Creating transparency for external teams and stakeholders
Problem: For large tasks it can be hard to show progress to stakeholders and dependent teams. Without any breakdown, the work item remains in a single status for a long time, creating uncertainty, lack of trust, and perhaps even leading to micromanagement. If you break down work into subtasks, your Agile boards are littered with lots of similar items that distract from the larger goals.
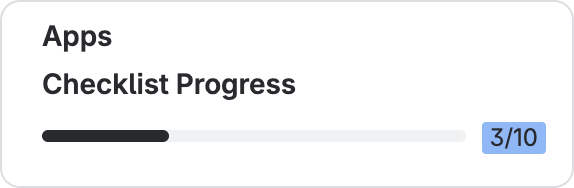
Solution: Break down work into checklist items and display checklist progress.
-
When needed, interested parties can look in on the detailed progress. Add due date and assignee labels to individual checklist items. Show detailed progress of each checklist item using statuses on top of just open or done checkboxes.

-
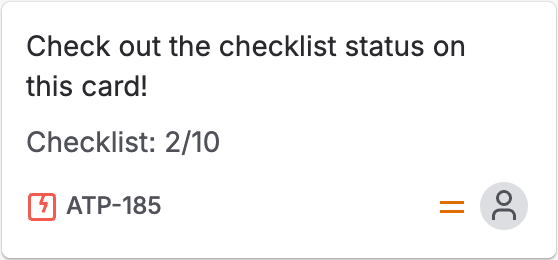
Display checklist progress on board cards (Company-managed spaces only)
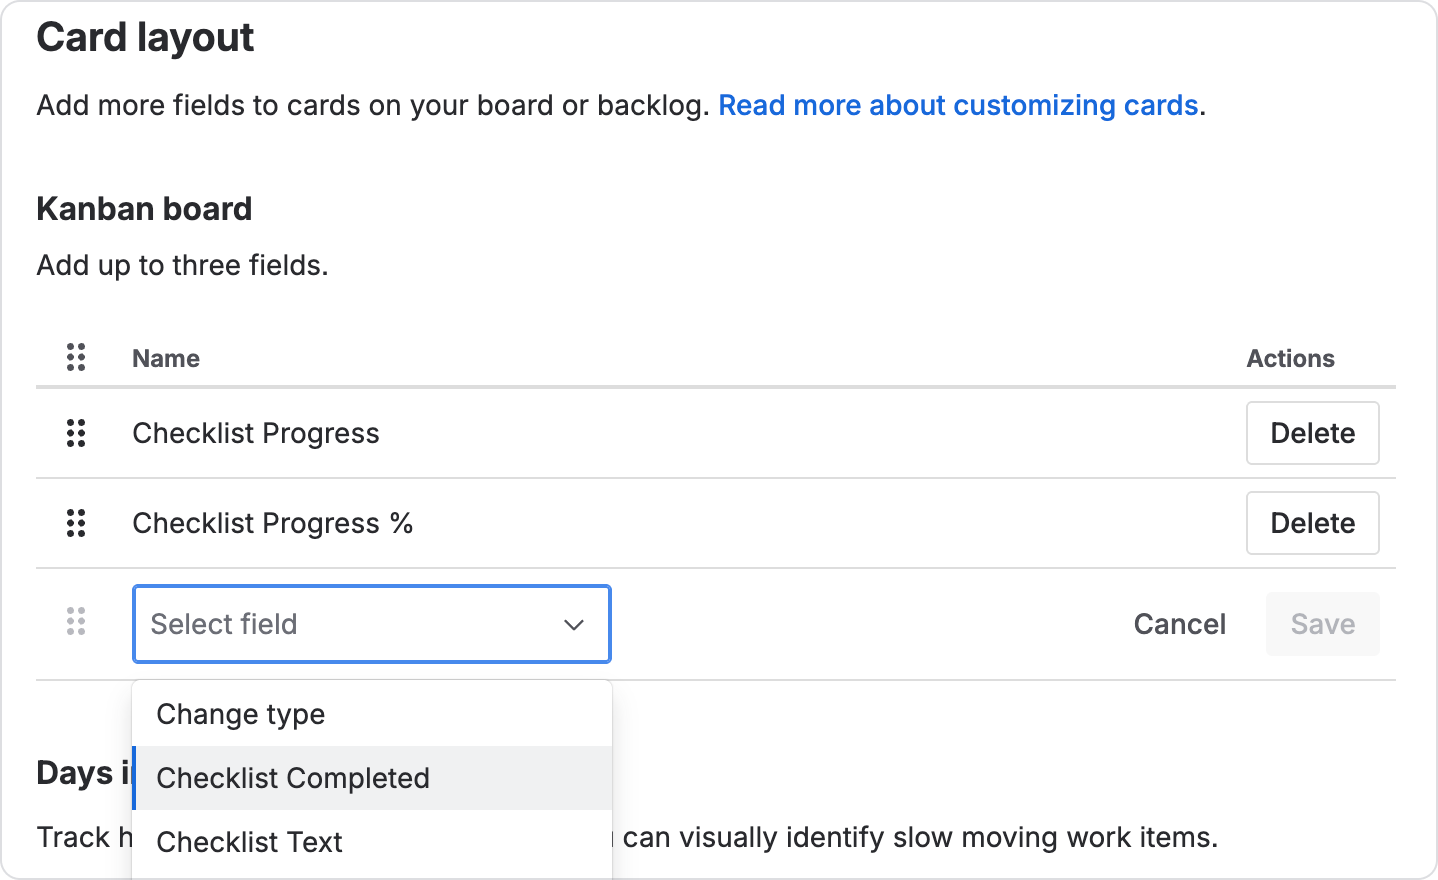
How to add progress to board cards
-
Go to Board Settings > Layout > Card layout
-
Click Add field
-
Choose any of the checklist fields: Checklist Progress, Checklist Progress %, Checklist Completed.
-
Export checklist progress and status for each work item to Confluence, spreadsheets, and BI tools.
-
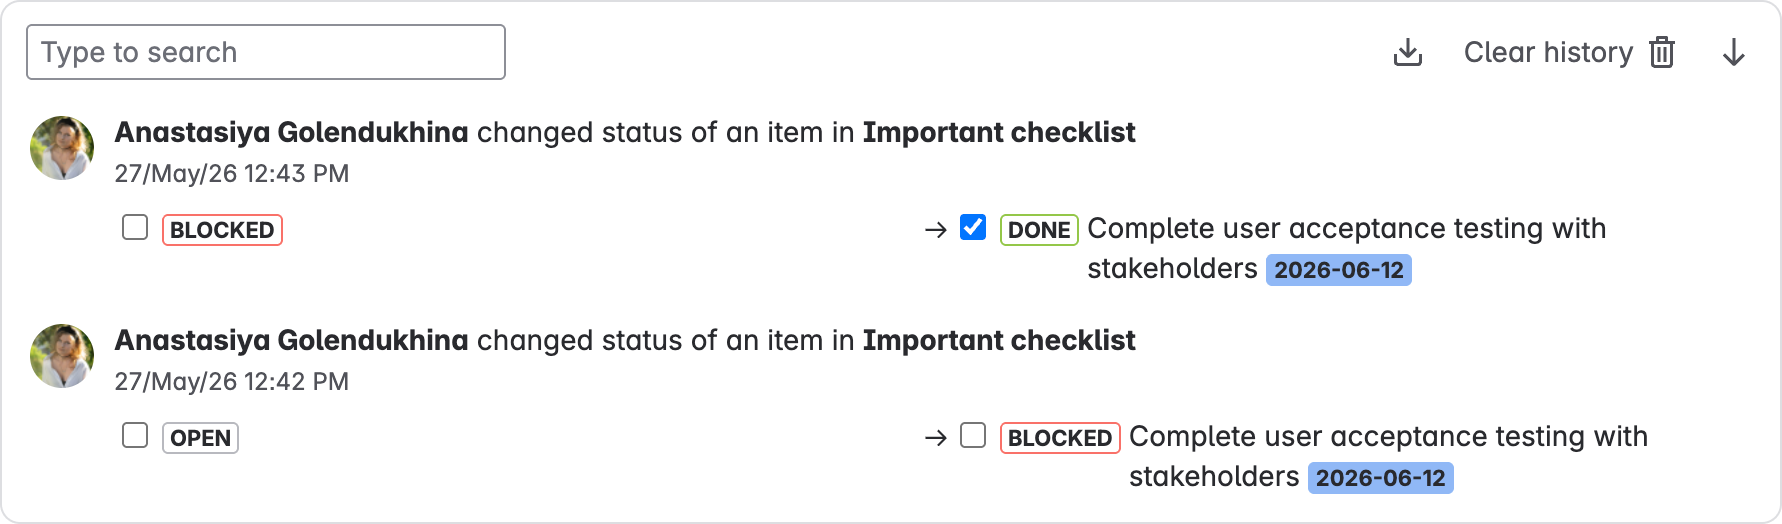
Keep track of history for specific checklist items if you need to verify the chain of events. You can even export the history as a separate document.
Maintaining compliance requirements
Problem: In regulated areas where requirements change fairly often, it can be hard to keep track of them across different teams and spaces, leading to some being missed or outdated.
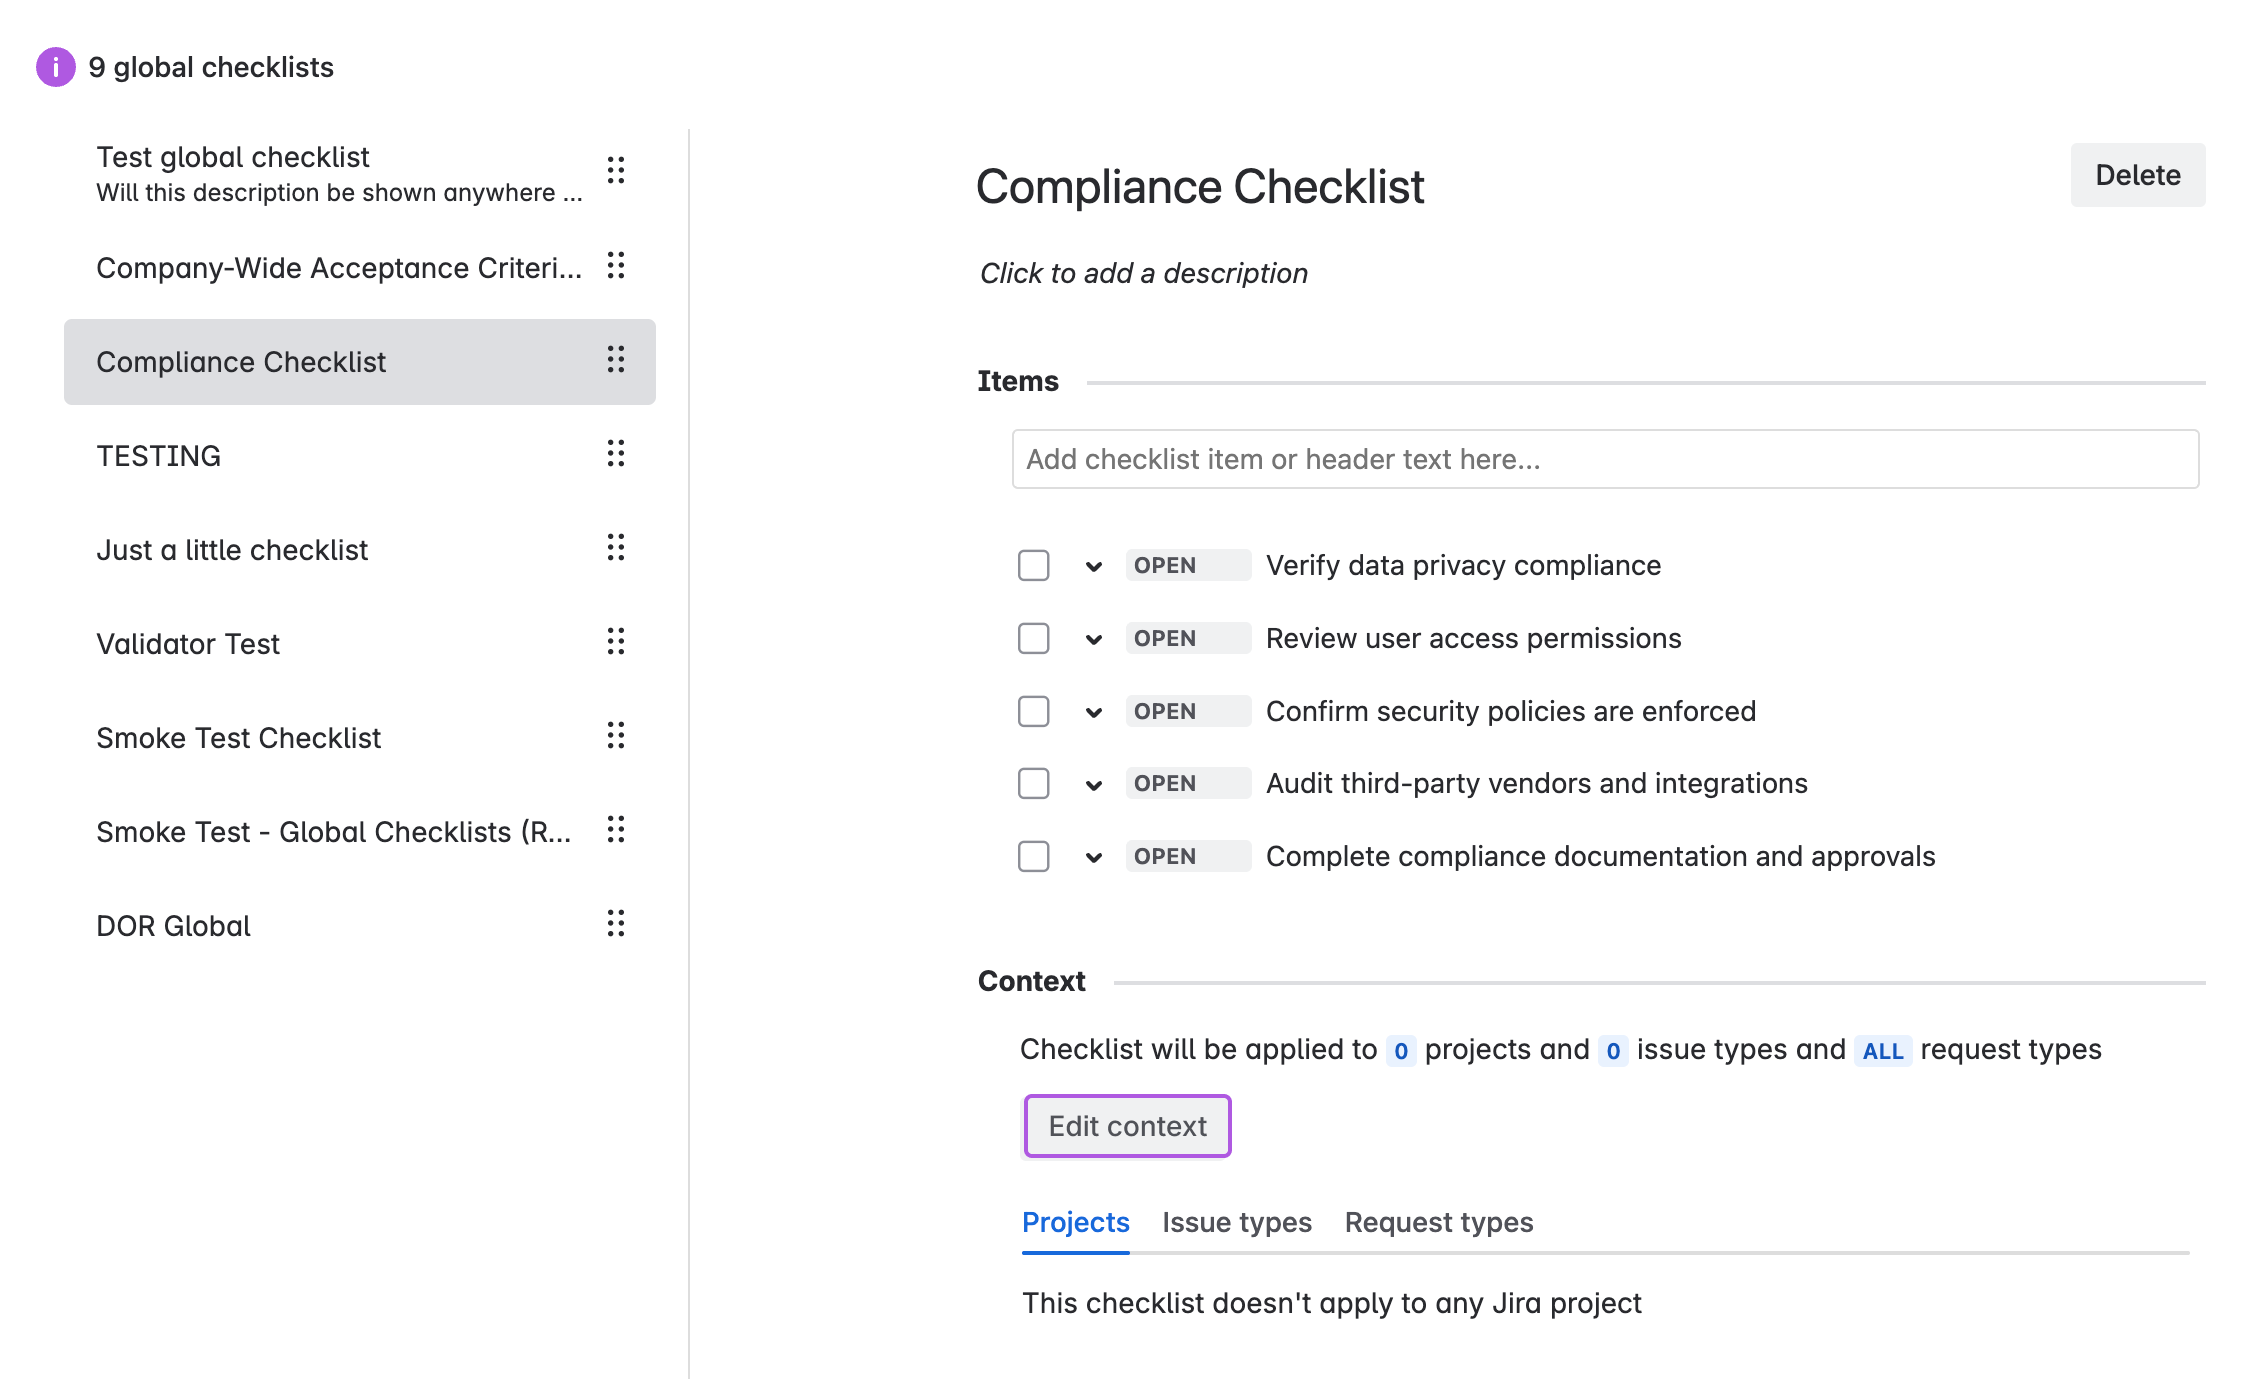
Solution: Use synchronized Global Checklists applied across multiple spaces and work types. Available in Checklists for Jira Enterprise, these checklists will always stay up to date in all open work items whenever you update the original checklist template. Also, they are protected from editing inside the work items, removing any possibility of circumventing the requirements.
How to set up Global Checklists for compliance
-
Create Global Checklist:
-
Click the Jira Settings button and click Marketplace apps.
-
In the sidebar (click the Expand

-
Click Add Checklist.
-
Add the necessary items like with any other checklist.
-
-
Select spaces and work types to apply:
-
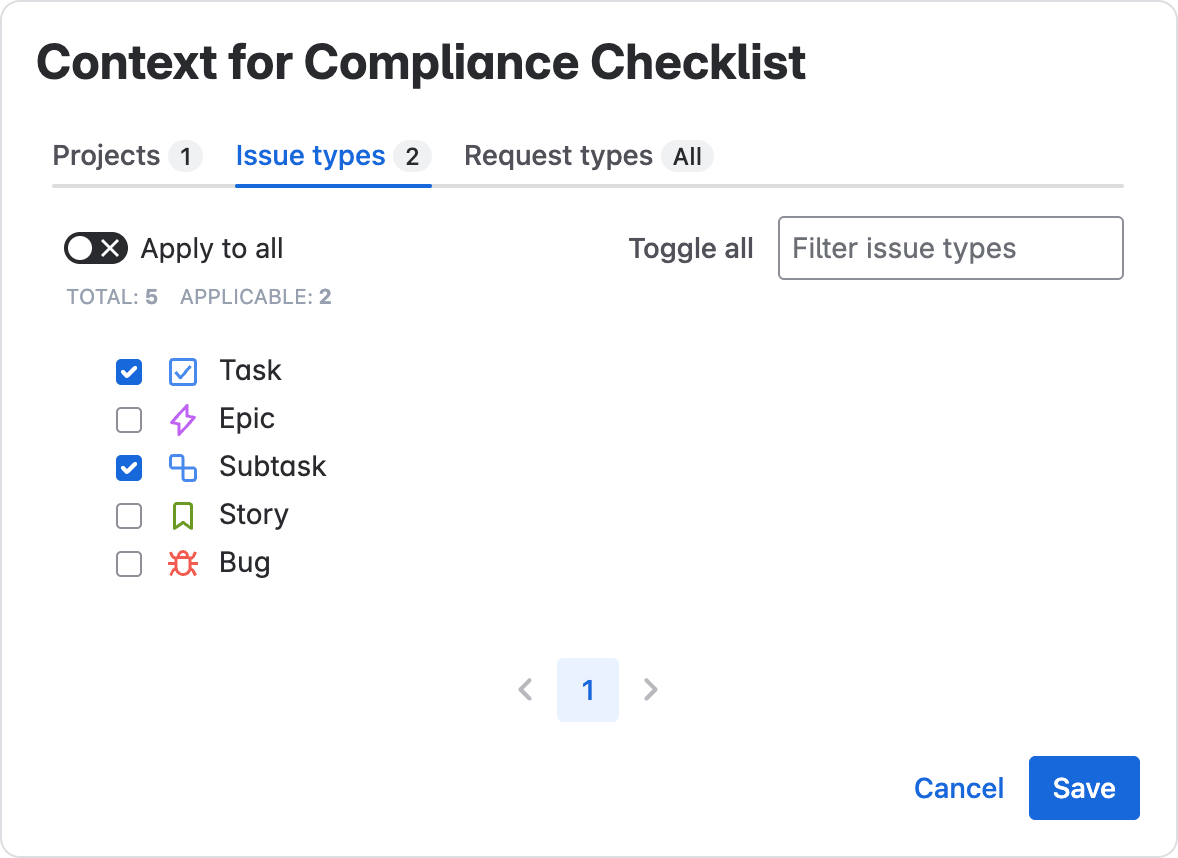
Under the Global Checklist you’ve created, click Edit Context.
-
In the respective tabs, choose the Projects (Spaces), Work types, and Request types you want to have this same checklist.
-
-
Update checklist as needed. When you update the checklist here, the app will synchronize the checklist contents across open work items and update the items. On Done work items, the checklist will be frozen in the state it was in when the work item was finished.
Publicly visible progress for customer tickets
Problem: Incoming customer requests may require several different steps to complete and take some time. Without visibility into what’s happening on your end, the customer only sees an “In Progress” status and may become dissatisfied with response time.
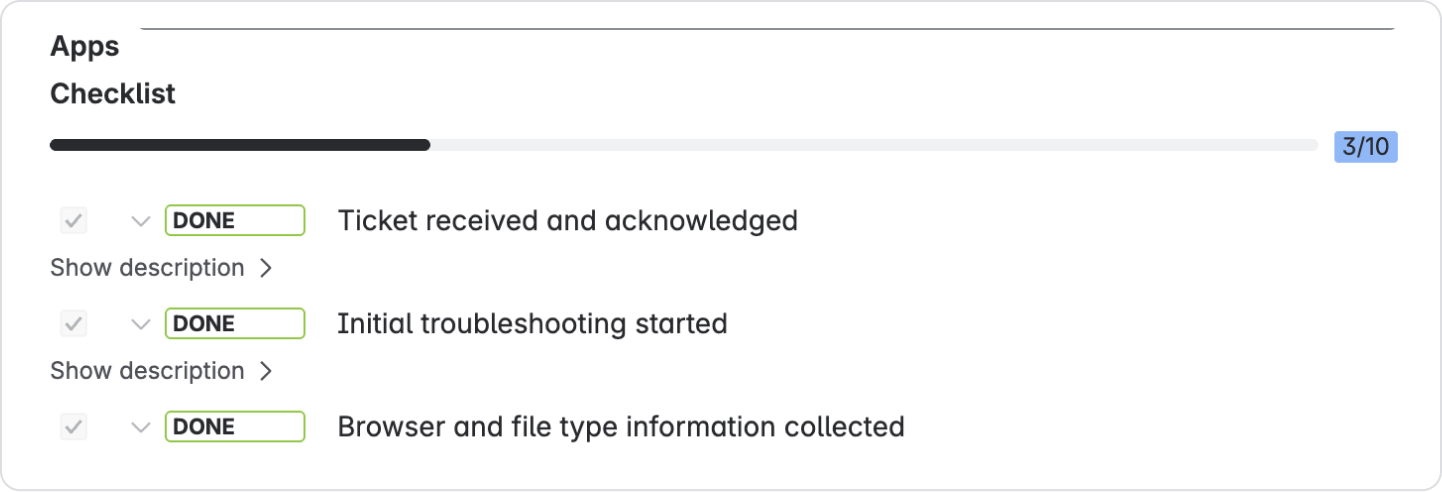
Solution: Display checklist progress or contents for customers so that they can see that work is ongoing and have realistic expectations.
-
When you get a request that has several work stages, you can add them as checklist items.
-
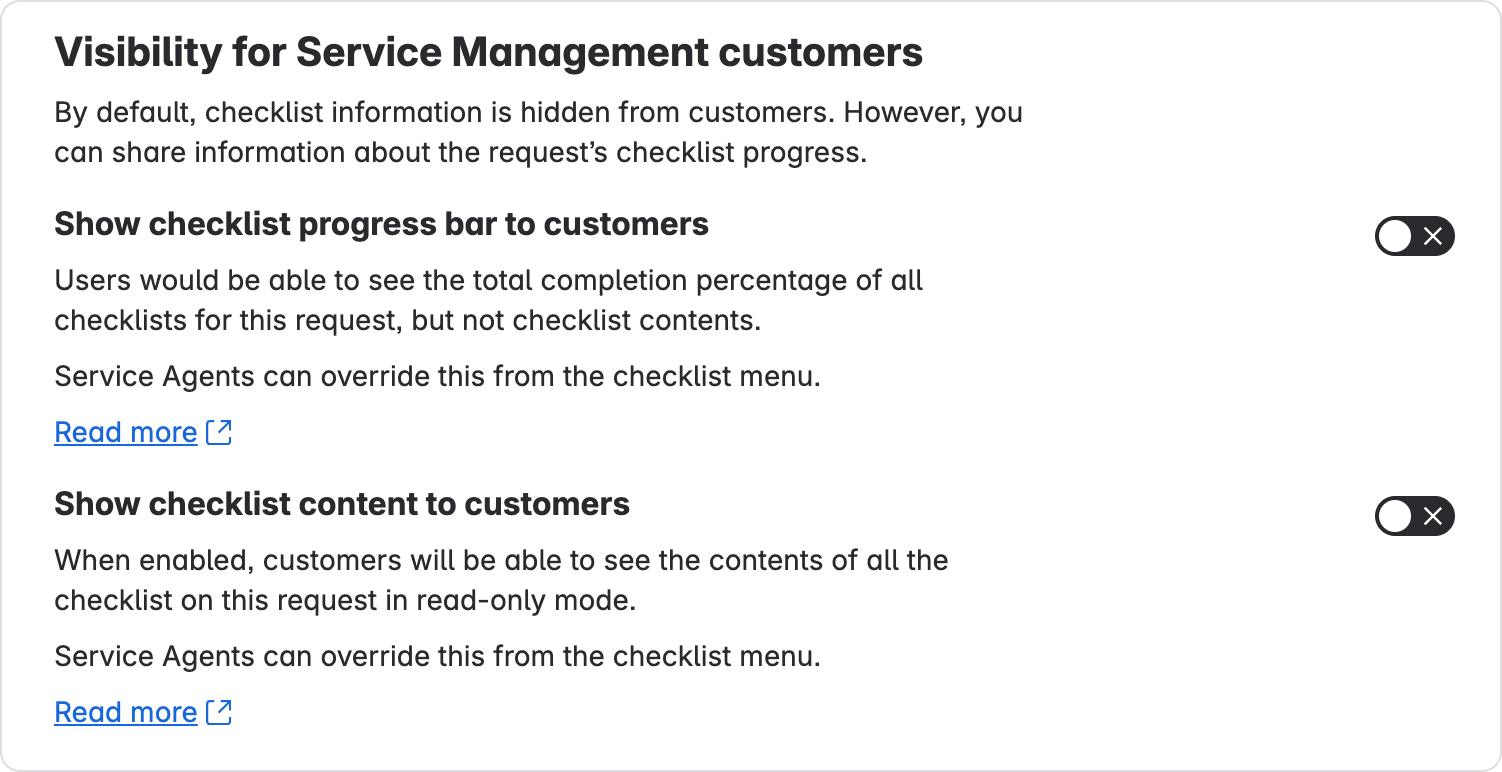
Enable visibility for checklist progress or checklist contents.
-
As service agents complete checklist items, the customers will be able to see that their request is being worked on.
How to add request templates and enable checklists for customers
Create a default checklist: if you have a repeating request type that always has the same checklist:
-
Choose Save as Template on an existing checklist.
-
In the Checklist Templates tab for your Service space, click Set default for that template.
-
Choose the request or work types and click Save. This checklist will now be automatically added to new requests or work items when they are created.
To enable checklist visibility for a specific request
Click the checklist menu on the work item panel and choose Show progress to customers or Show checklist to customers.

To enable checklist visibility for the whole Space
Go to Space Settings > Apps > Checklists for Jira and scroll to the bottom.