
Use cases
-
Applying a checklist template on transition to a specific status. After this, you can also set up a workflow rule to require completing that specific checklist.
-
Applying checklist templates depending on specific rules like Components or even based on Assignee.
Prerequisites
Available on Checklists for Jira Pro and Checklists for Jira Enterprise
Before you start, create the templates you want to use in the Checklist Templates tab of your space.
How to
-
Open Automations for the space you want it to be used in. This requires space management permissions.
-
Click Create flow → Create from scratch.
-
Add any triggers or conditions that you want.
-
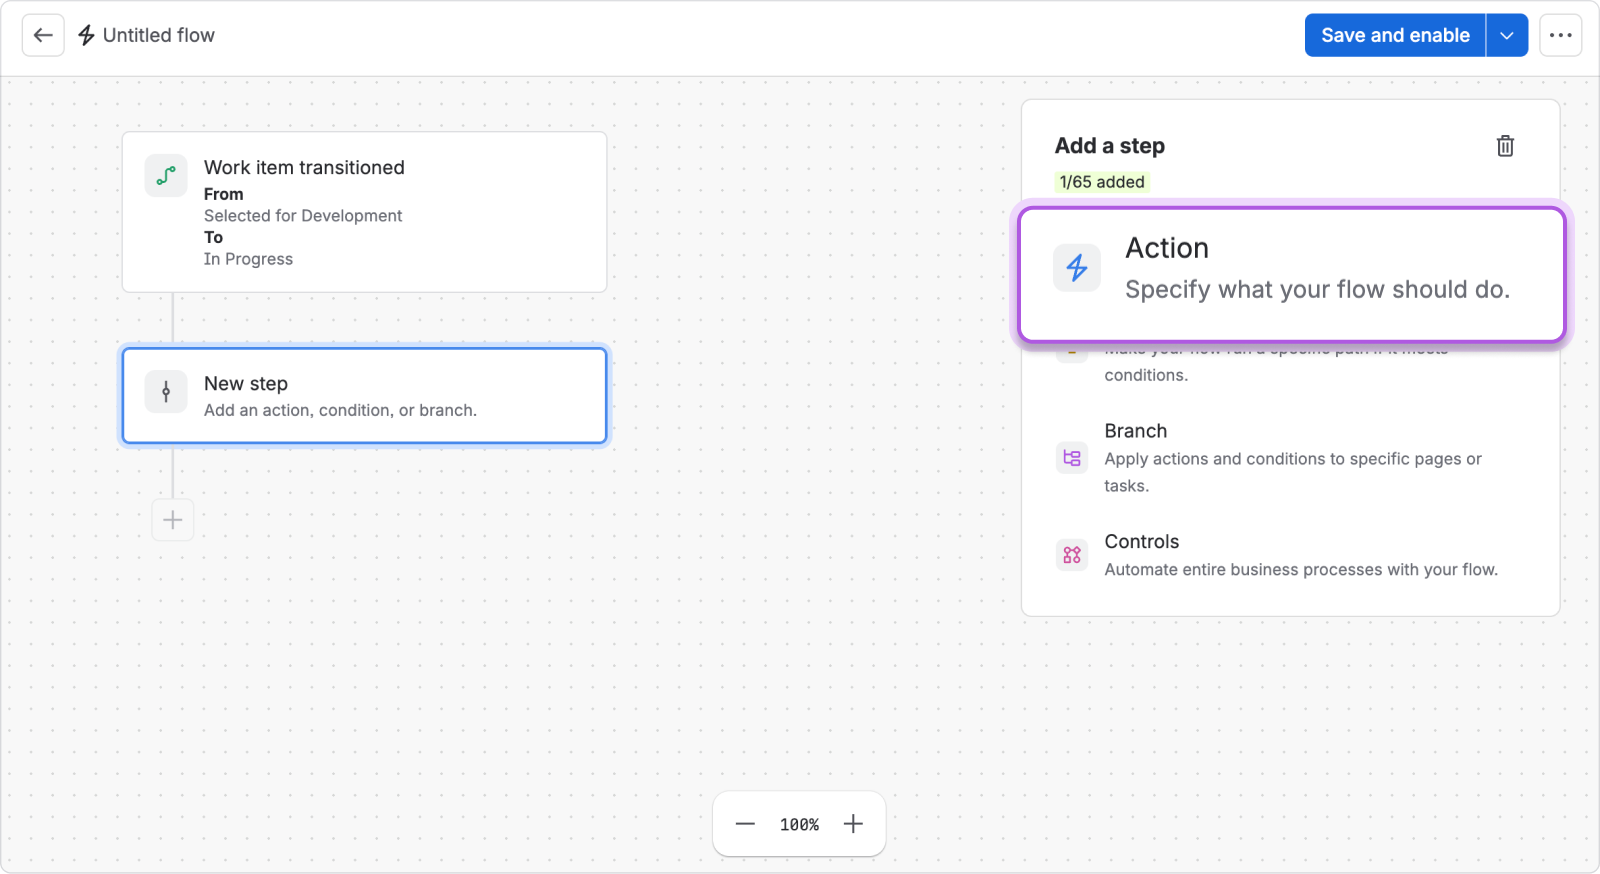
Click the plus button and select Add an action.
-
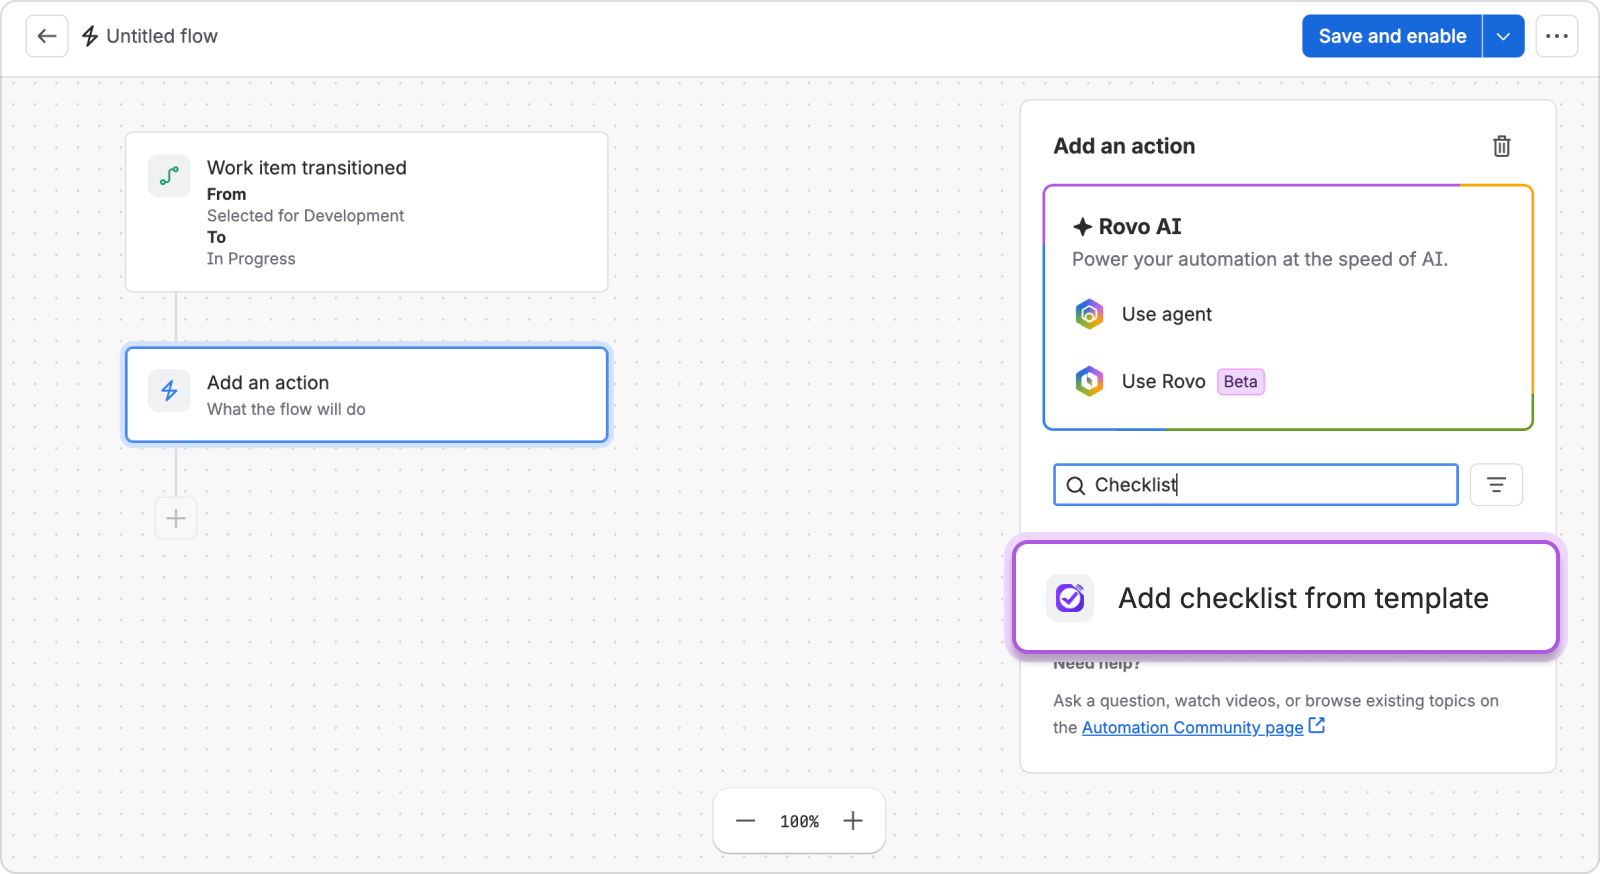
Choose Add checklist from template under Other apps.
Hint: you can search for “checklist” in the list of automation actions.
-
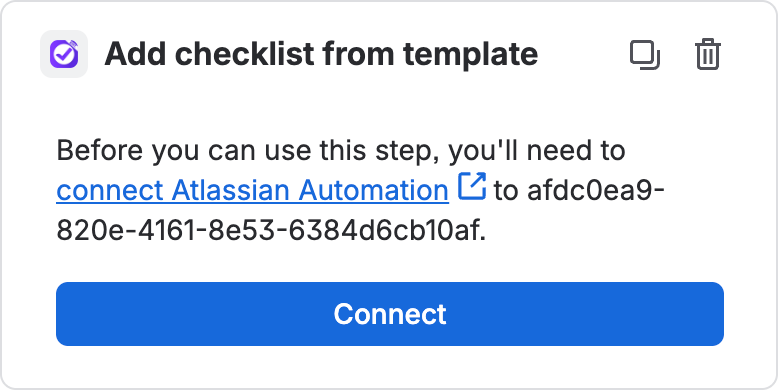
On the next step, simply click Connect and then on the following screen click Next.
This is a step that is required for all app automations, and it simply registers the automation connection to your Jira account.
-
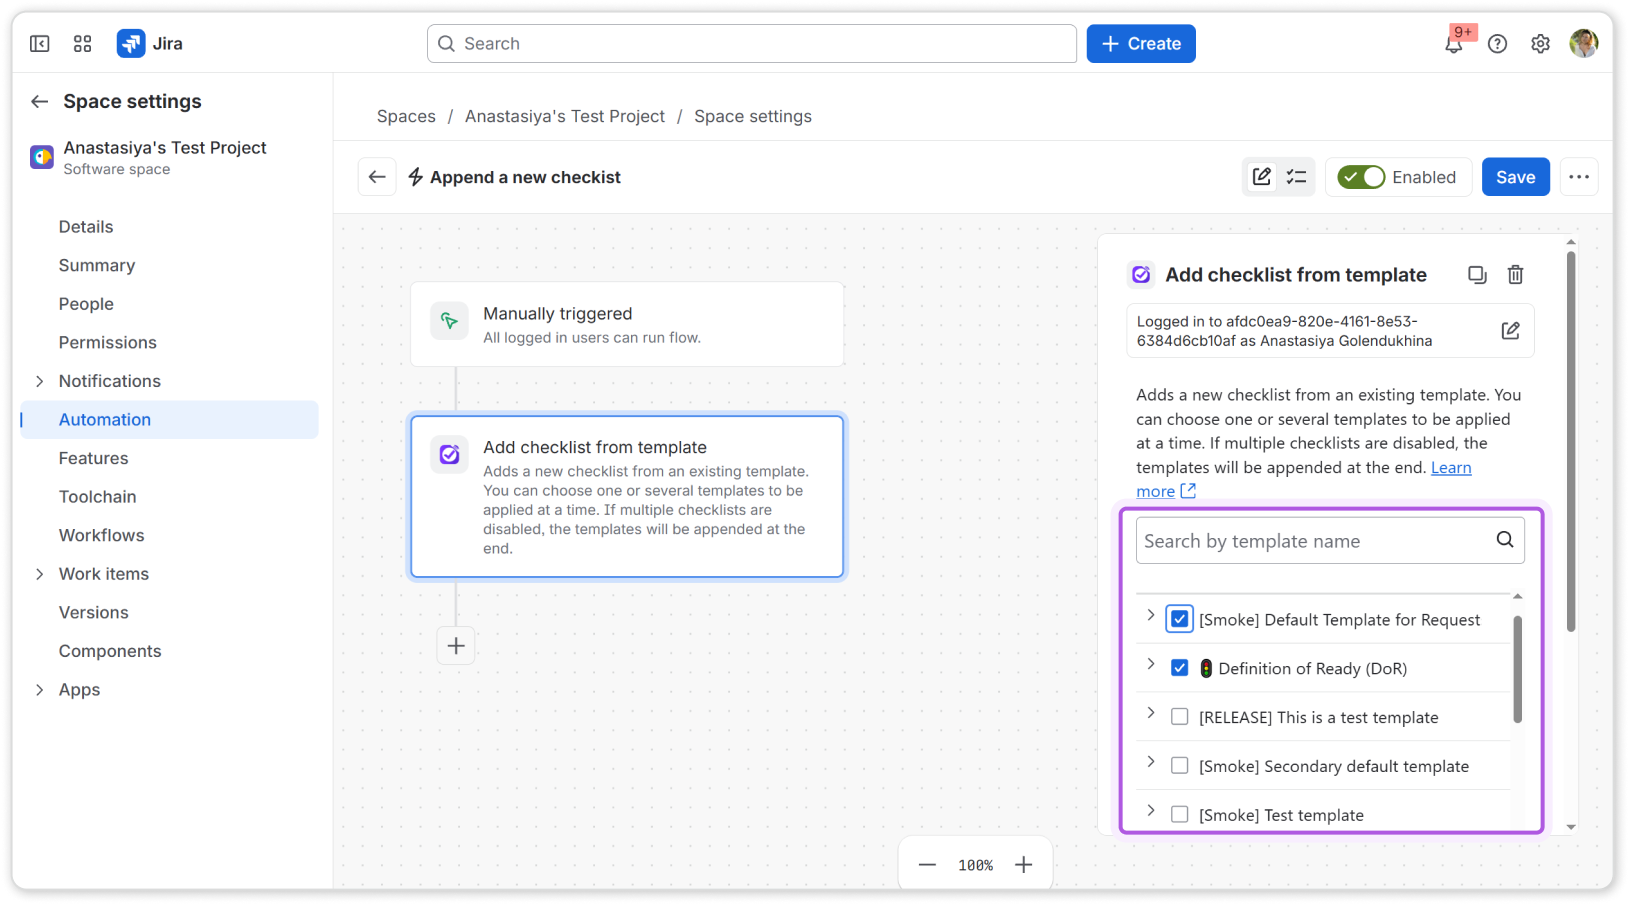
Then in the next step, choose the templates that you want to apply with the automation. You can select one or more templates. If you need to preview the template contents, click the expand button:

-
Now you can simply click Save, name your automation and enable it.
Limitations and FAQ